If you have a bass null at listening position, you know the sound, kick drums vanish, bass notes skip, and one step forward makes everything come back. In a small home office studio, that kind of hole can make good speakers seem broken.
The annoying part is that a null is usually caused by geometry, not by a lack of power or a cheap woofer. You can throw money at bigger monitors and still sit in the same cancellation zone.
The good part is that you can often fix it with tape on the floor, a patient hour of moving things, and a couple of smart acoustic upgrades. This article sticks to what works in real rooms, focusing on seat position, room modes, and speaker placement.
What a bass null is and how it differs from “not enough bass”
A bass null is a spot where certain low frequencies cancel, so the sound pressure at your ears drops hard at those notes. You can have plenty of bass in the room and still hear almost none at the listening position.
“Not enough bass” is a broad, consistent lack of low end that follows you around the room. A null is picky, you move your head six inches and the missing note suddenly shows up.
Most nulls come from boundary interference, where direct sound from the speaker meets a delayed reflection from a wall, floor, or desk and cancels. In small rooms, those reflections are strong and the timing is short, so the cancellations land right in the bass range.
Room modes also play a role, because standing waves create alternating peaks and dips between surfaces. If your seat position lands near a pressure minimum for a mode, that frequency disappears even if the speaker is producing it cleanly.
The key clue is that the room is not “eating bass” everywhere, it is rearranging bass in space. That is why you can hear a huge low end near a wall and almost nothing at your chair.
Nulls are usually narrow enough to feel like specific notes are cursed, but they can also be wide and make the entire low end feel thin. If the dip spans a big chunk of the 60 Hz to 150 Hz range, mixes get especially hard because punch and warmth both disappear.
In a desk setup, you can get a double hit where a room mode creates a dip and SBIR deepens it at nearly the same frequency. That is when you see a dramatic “cliff” in a measurement and your ears tell you the kick drum is missing its chest.
Another tell is that turning the volume up does not fix it, it just makes everything else louder. A true null makes you chase bass with the volume knob and you still feel unsatisfied.
It also helps to remember that bass wavelengths are long, so you are dealing with feet, not inches, when it comes to the physics. The frustrating part is that small moves can still matter because you are shifting your ears relative to a standing wave pattern.
When people say “my speakers have no bass,” a null is one of the first things to rule out. The speaker might be fine, but your seat might be parked in the worst place in the room for that frequency.
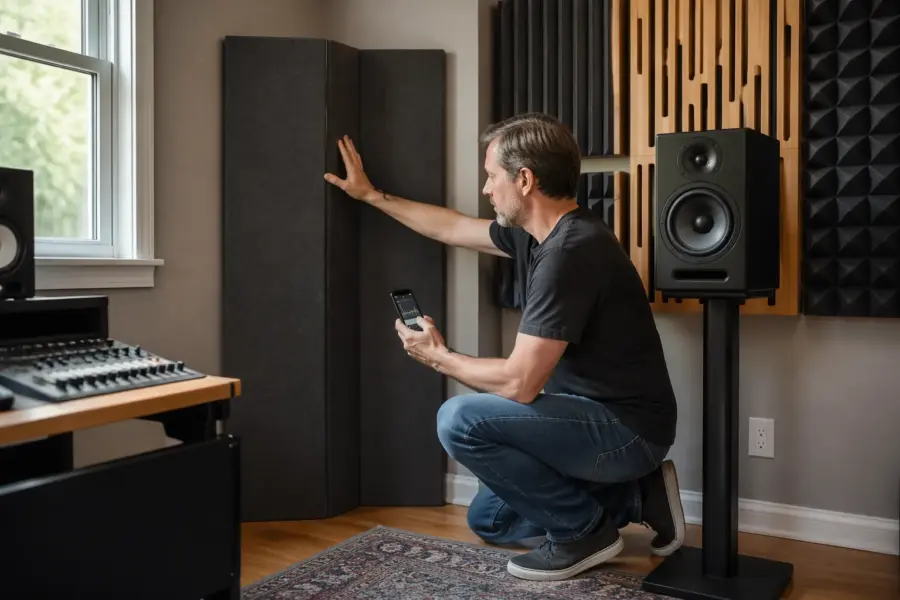
Confirming the null: simple tests you can do today
Start with a slow sine sweep from about 20 Hz to 200 Hz, played at a moderate level through your normal setup. When you hit the problem frequency, you will hear the bass drop out sharply instead of tapering gradually.
Use a free measurement app if you can, like Room EQ Wizard with a USB mic such as the MiniDSP UMIK-1. A measured dip of 10 dB to 30 dB at the listening position is common when the bass null at listening position is real.
Do the “walk test” next, keep the sweep running and move forward and back along the centerline of your desk area. If the bass returns in front of you or behind you, you are sitting in a cancellation zone tied to seat position and front to back room modes.
Finally, mute one speaker at a time and repeat the sweep. If the dip changes a lot between left and right, speaker placement relative to nearby boundaries is a major driver, not just the room’s overall modal pattern.
If you do not want to use a sweep, you can use a bass-heavy song with steady notes and loop a section that walks through different pitches. The risk is that the mix itself might have uneven bass, so a pure tone sweep is still the cleanest check.
Keep the test level sensible, because low-frequency sweeps can tempt you to crank volume and that can stress small monitors. You are listening for relative changes, not trying to rattle the room.
Head movement matters, so try leaning forward and back while staying seated to see if the null is tight around one spot. If the bass comes back when you lean forward, you have a strong hint that seat distance to the front or rear wall is involved.
Do a quick check at different heights by sitting up tall, then slouching a little, because floor-to-ceiling effects can be real. If the bass changes with posture, floor bounce or the vertical mode is part of the story.
When you measure, look at the frequency response and also the decay, because long ringing can make bass feel lumpy even when the average level looks fine. A null can exist right next to a peak that rings, which makes the room feel both thin and boomy depending on the note.
If you can, take measurements at a few points around your head area, like a small cluster the size of a basketball. A null that only exists at one pinpoint is easier to escape than a broad dip that covers the whole listening zone.
Do not panic if the graph looks ugly, because most small rooms have some drama below 200 Hz. The goal is not perfection, it is getting rid of the deep holes that make you misjudge kick and bass levels.
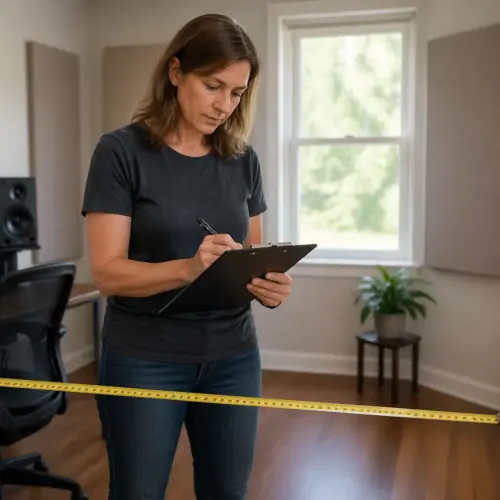
Move the seat first: small changes that matter
Before you touch speakers or buy panels, move the chair and your head position, because it is the cheapest fix and often the biggest. In small rooms, a 6 inch to 12 inch change can shift you off a modal null and into a usable zone.
A good starting point is the 38 percent rule, place your ears about 38 percent of the room length from the front wall, measured wall to wall. It is not magic, but it often avoids the deepest lengthwise room modes that create a bass null at listening position.
If your desk is against a wall, you may be forced to sit too close to the front wall, which can create its own issues. Even then, you can usually move the chair a bit and adjust the desk depth so your ears are not exactly at a pressure minimum.
Avoid sitting exactly halfway between the front and rear wall, because that is a common spot for a length mode null. The same logic applies to sitting exactly centered between side walls, which can exaggerate symmetry-related dips.
Use painter’s tape to mark your current chair leg positions before you move anything. That way you can always return to baseline if a move makes things worse.
When you move, do it in a controlled way, like 6 inches at a time, and test after each step. Random big moves can make you miss the best spot and leave you guessing about what changed.
In a tiny room, you may find that the best bass spot is not the most comfortable desk position. If you can, prioritize the listening position and then adapt the desk layout around it.
Seat height is not just about ergonomics, because your ears are part of a three-dimensional pattern of peaks and dips. A small height change can shift the floor-to-ceiling cancellation enough to bring back upper bass punch.
Do not forget that the chair itself can change things, especially if it has a big padded back that sits right behind you. A tall chair back can act like a small absorber or reflector depending on frequency, so test with and without it if you can.
If you are in a narrow room, shifting left or right a few inches can break a stubborn symmetry that locks you into a dip. You can keep the monitors symmetrical while letting your head be slightly off-center if it improves the low end.
Once you find a better seat position, live with it for a day and play familiar tracks at low volume. If the bass stays consistent across songs, you are likely out of the worst cancellation zone.
| Seat move | What it tends to change | What to listen for |
|---|---|---|
| Move forward 6 to 12 inches | Length mode pressure minimum shifts | Kick drum weight returns |
| Move backward 6 to 12 inches | SBIR from front wall changes timing | One-note bass becomes smoother |
| Raise seat height 1 to 3 inches | Floor bounce cancellation shifts | Bass guitar notes stop disappearing |
| Shift left or right 2 to 6 inches | Side wall mode symmetry breaks | Low end evens between speakers |
| Rotate desk slightly | Reflection angles change at the desk | Upper bass tightens, less “hollow” |
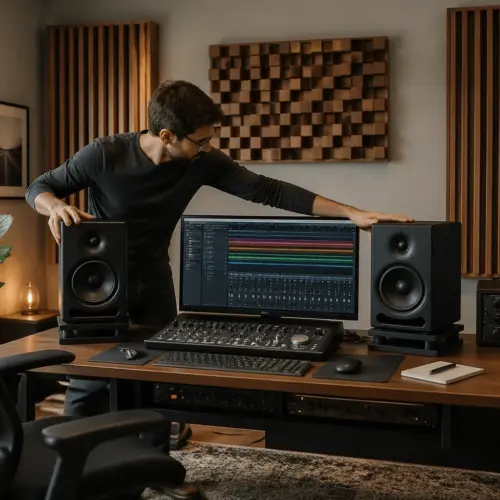
Adjust speaker distance and height to reduce cancellations
After seat position, the next lever is speaker placement, especially distance to the front wall behind the speakers. That distance sets the timing of the front wall reflection, which can cancel bass at a predictable frequency.
If your monitors are 2 feet from the front wall, the reflection path difference can land a cancellation in the 100 Hz neighborhood, right where punch lives. Moving the speakers closer to the wall often pushes that cancellation higher, where it is easier to treat and less damaging.
Try two extremes before you settle, either very close to the front wall, like 2 to 6 inches, or farther out, like 3 to 4 feet if the room allows. The middle distances are where SBIR often lines up with common room modes and makes the bass null at listening position feel brutal.
Height matters too, because floor bounce creates its own cancellation, especially if your speakers sit low on a desk. Get the tweeters at ear height on stands, and if the desk is big, consider pulling the speakers forward so the front edge is near the desk edge.
If your speakers are on a desk, the desk surface can add a strong reflection that messes with upper bass and lower mids. Stands that decouple and lift the speakers often clean up the 80 Hz to 200 Hz region more than people expect.
Angle and toe-in can change how much energy hits nearby boundaries, even in the bass where things feel less directional. Small toe-in adjustments can slightly change the balance of direct sound versus reflections and sometimes reduce how severe a dip feels.
Check that both speakers are the same distance to your ears, because unequal distances can create comb filtering that confuses your diagnosis. You want to fix the room and boundary issues, not accidentally introduce timing errors between left and right.
Distance to side walls matters as well, because side wall reflections can reinforce or cancel certain bass notes depending on spacing. If one speaker is closer to a side wall than the other, you can get uneven bass that pulls the image and makes the null feel worse.
Do not ignore the front wall itself, because a rigid wall reflects bass strongly while a window or bookshelf can behave differently. Two rooms with the same dimensions can still have different null behavior because the boundaries are not equally reflective.
If you have rear-ported monitors, being close to the wall can change their low-end tuning and output level. That is not automatically bad, but it means you should re-check the response after each move instead of assuming the change is purely SBIR.
When you test positions, keep the speakers on the same line and move them together first, then fine-tune individually if needed. Moving one at a time too early can create a mess of variables that is hard to interpret.
Once you find a placement that reduces the worst dip, lock it in with tape and resist the urge to keep chasing perfection. A small room rarely gives you a flawless curve, but it can give you a workable one.
Use symmetry, but do not worship it
People repeat “make it symmetrical” because it helps imaging, but symmetry can also lock you into the deepest modal dips. If you have a severe bass null at listening position, perfect symmetry can keep both speakers feeding the same cancellation pattern.
Keep left and right distances close enough for a stable phantom center, then allow small asymmetry if it smooths the low end. A one inch difference in speaker distance to the front wall can shift SBIR enough to reduce a narrow dip.
Do not change everything at once, because you will not know what fixed what. Move speakers in small steps, measure or sweep, then mark the best spots with painter’s tape.
If the room forces you into a compromise, pick bass smoothness over a pretty layout. A mix that translates beats a setup that looks like a studio photo.
Symmetry is still useful for stereo balance, so the goal is not to make the room lopsided for no reason. Think of it as “symmetry until it hurts,” then tiny deviations to dodge the worst cancellations.
Sometimes the best move is asymmetry in the room, not in the speaker positions, like adding a bookshelf or a thick curtain on one side. Breaking up identical boundary conditions can reduce the severity of a mode without destroying imaging.
In practice, you can keep the speakers symmetrical and slightly offset the listening position, especially in a tight office where the desk must stay centered. A small head offset often has less impact on imaging than people fear, but it can improve bass a lot.
If you do introduce asymmetry, do it in a reversible way and document it. A strip of tape and a note like “left speaker 1 inch closer to wall” makes it easy to back out if you do not like the trade-off.
Also watch for asymmetry created by furniture, like a cabinet next to one speaker and open space next to the other. That kind of real-world imbalance can be more important than a perfectly centered desk.
When you listen, use mono material sometimes, because it makes tonal differences easier to spot. If mono bass feels centered and stable, you are in a better place than if it feels like it leans left or right.
The end goal is repeatability, where you can sit down and trust what you hear every time. A slightly imperfect-looking setup that behaves consistently is a win.
Add bass trapping where it helps the null most
Bass traps do not “fill” a null directly, but they reduce the strength and decay of the reflections that create deep cancellations. When you lower the reflected energy, the dip often becomes shallower and the room stops exaggerating nearby peaks.
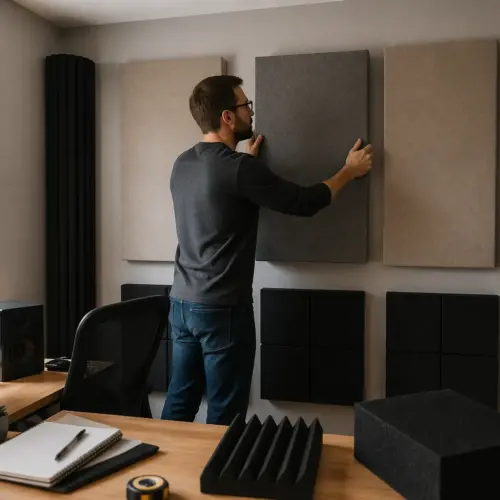
Start with thick traps in corners, because corners collect pressure for many room modes at once. In a home office, that usually means floor to ceiling traps in the front vertical corners behind the speakers if you can manage it.
If the null seems tied to the front wall, add a thick absorber on that wall between and behind the monitors, and do not bother with thin foam. Think 4 inches of rigid fiberglass or mineral wool with a 2 inch to 4 inch air gap, or a purpose-built membrane trap if you know the target frequency.
Rear wall trapping often helps more than people expect, because the back wall reflection hits you late and loud in a short room. A deep absorber or a thick couch plus traps behind it can tame the room modes that stack up along the length.
Thickness is the name of the game, because bass does not care about thin panels. A 2-inch panel can help mids and highs, but it will not do much for a 70 Hz problem that is ruining your kick drum.
Air gaps behind absorbers are not a gimmick, because they effectively increase low-frequency performance without adding weight. If you can float a 4-inch trap off the wall by a few inches, it usually works noticeably better.
Do not expect one trap to solve a deep null, because the null is often a combination of several reflections and modes. The goal is to reduce the room’s extremes so that placement changes and small EQ moves become effective.
If you are building DIY traps, use safe materials and cover them properly, because loose fibers are not something you want in a small office. A simple wood frame and breathable fabric can make DIY traps look clean and behave predictably.
Membrane or panel traps can be powerful when you have a known problem frequency, but they are easier to get wrong than broadband traps. If you are not measuring, broadband thickness is the safer bet.
Placement matters as much as quantity, so do not scatter small panels randomly and hope for magic. Put the biggest, thickest traps where the room builds pressure and where reflections are strongest.
After adding traps, re-run the sweep and listen for changes in both level and decay. Even if the dip is still there, a shorter decay can make bass lines easier to follow and less smeared.
Target the usual suspects: corners, front wall, rear wall
If you can only treat a few spots, prioritize where bass energy builds and where reflections come back strong. That usually means corners first, then the front wall behind the speakers, then the rear wall behind your seat.
Do not ignore the ceiling if you have a low room, because the ceiling and floor form a mode that can create a stubborn upper-bass dip. A thick ceiling cloud above the listening position can reduce that bounce and make bass notes more consistent.
- Front vertical corners, floor to ceiling traps
- Rear vertical corners, thick broadband traps
- Front wall absorber behind and between monitors
- Rear wall thick absorber at ear height
- Ceiling cloud above the listening position
- Air gaps behind traps where possible
Front corners are popular because they help both the speakers and the listening position at once. When the front of the room is controlled, the whole system feels more stable and less “hyped” on certain notes.
The rear wall is the place that surprises people, because it can make the difference between tight bass and a weird hollow low end. In a short room, the rear wall reflection is close enough in time to interfere strongly with what you hear.
If your chair is close to the rear wall, even a thick absorber can be more about damage control than perfection. In that case, moving the seat forward a bit and then treating the rear wall is often more effective than treatment alone.
Side wall corners matter too, but they are often blocked by furniture in an office. If you cannot trap the rear corners, even partial traps or thick freestanding panels can help reduce ringing.
A ceiling cloud does not have to cover the whole room to be useful. A panel above the desk and chair can reduce floor-ceiling interaction and also improve clarity in the low mids.
If you have a closet or an open doorway behind you, that can change how the rear wall behaves. Sometimes an open closet full of clothes acts like a big absorber and can actually help the low end.
Windows can complicate things because they reflect some bass while leaking other frequencies, and they can add rattles that confuse listening. Heavy curtains can reduce high-frequency reflections, but for bass you still need thickness and mass in the right places.
Try to keep treatment decisions tied to a symptom you can hear or measure. If you add something and nothing changes, it might be in the wrong spot or too thin to matter.
When the usual suspects are handled, the room becomes easier to work in even if it is not perfect. You will spend less time second-guessing bass levels and more time making decisions that translate.
When EQ helps, and when it can’t fix the problem
EQ is good at cutting peaks, because peaks are excess energy that your speaker and amp can stop producing. A null is missing energy at your ears, so boosting that frequency often just makes the speaker work harder while the cancellation stays.
If you try to boost a 20 dB dip, you can run out of headroom fast and still not hear the note. That is how people blow woofers while chasing a bass null at listening position with software.
EQ can help after you fix geometry, because it can smooth the remaining bumps and correct gentle slopes. Tools like Sonarworks SoundID Reference, Dirac Live, or a MiniDSP can be great, but only when seat position and speaker placement are already reasonable.
Use measurement to set expectations, if the dip is narrow and shallow, EQ might help a little, and if it is wide and deep, it is a placement and treatment issue. Treat EQ like polish, not like drywall.
A practical way to use EQ is to identify peaks that make certain notes jump out and cut them gently. A few dB of reduction with a reasonable Q can make bass feel more even without stressing your system.
Be careful with very narrow filters, because they can make the response look good on a graph while sounding unnatural. If you are not sure, use broader, smaller moves and listen to real music.
If you are using a subwoofer, EQ can be more effective because you can place the sub to reduce the null and then use EQ to smooth the remaining response. That combination is often more powerful than EQ on mains alone.
Also remember that EQ does nothing for decay time, so a room can still sound boomy even if the frequency response is flatter. Bass trapping is what shortens ringing, and that is a big part of “tight” bass.
Automatic correction systems can over-correct if the measurement position is too narrow or if the mic placement is sloppy. Take multiple measurements around the listening area so the correction targets what you actually hear, not a single lucky or unlucky spot.
It is also easy to confuse a null with a speaker boundary issue that changes with small moves, so do not lock in EQ until placement is stable. If you EQ first and then move things, you can end up chasing your tail.
When EQ is used correctly, it should feel like the room got less opinionated, not like the bass got louder. If the correction makes you want to turn the volume down because it sounds aggressive, something is off.
Subwoofers and multiple sources: the cleanest way to fill a null
A single subwoofer can help because it gives you another placement option that is independent from your main speakers. If the null comes from speaker to wall geometry, moving the sub changes the path lengths and can reduce cancellations.
Two subs are often better than one in a small room, because multiple sources can average out room modes. You are not “making more bass,” you are changing how the room modes get excited so the seat position stops landing in a deep dip.
Try the sub crawl if you want results without math, put the sub at your chair, play a bass-heavy loop, then crawl around the room edges to find where bass sounds smooth. Put the sub there, then re-check your listening position with a sweep.
Cross over low enough that the sub handles the problem region, often 70 Hz to 90 Hz for small nearfields, and time-align if you can. Bad integration can create a new null right at the crossover, which is its own kind of misery.
Placement flexibility is the real advantage, because your mains are usually stuck near the desk while a sub can go along a wall, in a corner, or even behind you. That freedom lets you pick a spot that excites the room differently and reduces the worst dip at the chair.
Do not assume a corner is always best for a sub, even though it increases output. Sometimes a corner placement makes one mode too strong and creates a new problem while you are trying to fix the old one.
Two subs do not have to be expensive monsters to work well, because the goal is smoothness, not maximum SPL. Even modest subs can outperform larger single-sub setups if they are placed and aligned properly.
If you use two subs, common starting placements are midpoints of opposing walls or front corners, but your room will decide. Measure and listen, because the “best” layout depends on dimensions and where you sit.
Time alignment and phase matter, because two sources can also cancel each other if they are not working together. If your sub has a variable phase control or delay, use it with measurements to maximize the crossover region at the listening position.
Level matching matters too, because a sub that is too loud can trick you into thinking the null is fixed when you are really just overcompensating. The goal is that bass notes are consistent, not that everything is bass-heavy.
If you cannot add a sub, sometimes moving the mains and using a high-pass filter can still help by reducing how hard the room gets excited in the worst region. It is not the same as multiple sources, but it can make the low end easier to manage.
When subs are integrated well, you stop noticing the sub as a separate thing. You just notice that the kick drum exists again at the listening position and bass lines stop playing hide and seek.
A practical workflow for fixing a bass null in one afternoon
If you want a plan that does not spiral, start with measurement or at least a repeatable sweep file and a fixed volume. Consistency matters more than fancy gear when you are comparing small moves.
Move the seat position first in 6 inch steps, then lock it when the biggest dip improves. After that, adjust speaker placement in small increments, focusing on distance to the front wall and height relative to your ears.
Once placement is better, add bass trapping where you can, starting with corners and the rear wall if the room is short. Then re-measure and use gentle EQ cuts for remaining peaks, because peaks are what EQ does best.
Write down what you changed, because your ears will adapt and you will forget the baseline. A few notes like “speakers 4 inches from wall” and “seat moved forward 10 inches” saves you from looping back to the worst spot.
Start by identifying the problem frequency range, because it helps you stay focused when you test changes. If the null is around 80 Hz, you know to pay attention to kick fundamentals and bass guitar low notes during listening checks.
Use a short playlist of reference tracks you know well, because it keeps your ears honest. Pick tracks with steady bass notes, clear kick drums, and mixes that you trust across systems.
When you move the seat, do not forget to move the mic or your head to the exact same spot each time. A few inches of inconsistency can make you think a change helped when you really just measured a different point in the standing wave.
When you move the speakers, move them together first and keep the listening triangle intact. You can fine-tune toe-in and spacing later, but the early goal is reducing the biggest low-frequency cancellation.
Once you find a better placement, listen at low volume for a few minutes, because nulls can hide when you listen loud. If bass stays present at low volume, you are usually in a better geometric situation.
If you add treatment, add it in stages so you can tell what each piece did. Even one pair of corner traps can change decay and smoothness enough to make the next steps easier.
After each stage, do one more sweep and one more music check, because graphs and ears catch different problems. A response curve might improve while the room still rings, or decay might improve while a dip remains, and both are useful information.
Stop when you reach a point where the bass is consistent enough to mix without second-guessing every low-end move. You can always refine later, but getting out of the deep null is the big quality-of-life upgrade.
Conclusion
A bass null at listening position is usually a geometry problem, so the fix starts with seat position and speaker placement, not with shopping carts. When you get the basics right, room modes stop bullying you and bass becomes predictable.
After placement, bass trapping makes the whole room behave better, and EQ can clean up what is left. If you want the most reliable low end in a small room, a well-placed sub or two can be the final move that turns a frustrating setup into something you can trust.
The main mindset shift is that you are not trying to force bass into a bad spot, you are trying to stop sitting in the bad spot. Once you hear the difference a small move can make, you will never look at a desk setup the same way again.
Fixing a null is also about removing extremes, because extreme dips and peaks make you mix in self-defense. When the room is calmer, you can make smaller decisions and your work translates better to cars, headphones, and living rooms.
If you do nothing else, do the sweep, move the chair, and move the speakers closer to or farther from the front wall in a controlled way. Those three steps solve more “my speakers have no bass” complaints than any plugin ever will.
Once the low end is stable, everything else gets easier, from compression choices to reverb levels, because you are not fighting a disappearing foundation. That is the real payoff of dealing with a bass null instead of living with it.