Monitor boundary switches are one of the few “free” bass fixes you can try in a home office, but they only work when you understand what problem they are meant to solve. If you treat them like a magic bass knob, you can end up with mixes that sound thin everywhere else.
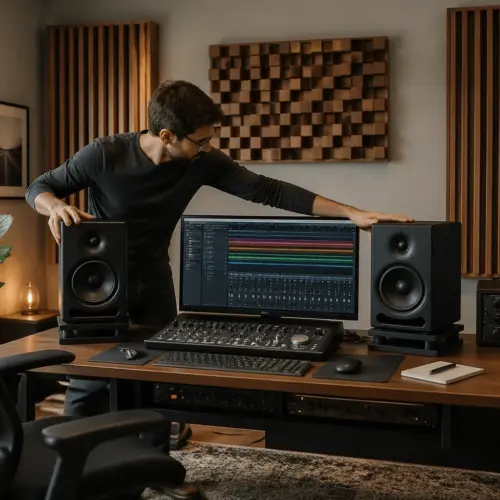
Most home offices force you into awkward speaker placement, like a desk against a wall, a bookshelf on one side, or a corner you cannot avoid. Those boundaries change low frequency output in predictable ways, and boundary compensation exists because manufacturers know you will put monitors there anyway.
This article shows how to tune bass with monitor boundary switches using a practical method that works without turning your room into a lab. You will use low shelf settings and roll off controls on purpose, while keeping placement tradeoffs and symmetry in view.
What boundary switches and EQ controls really do
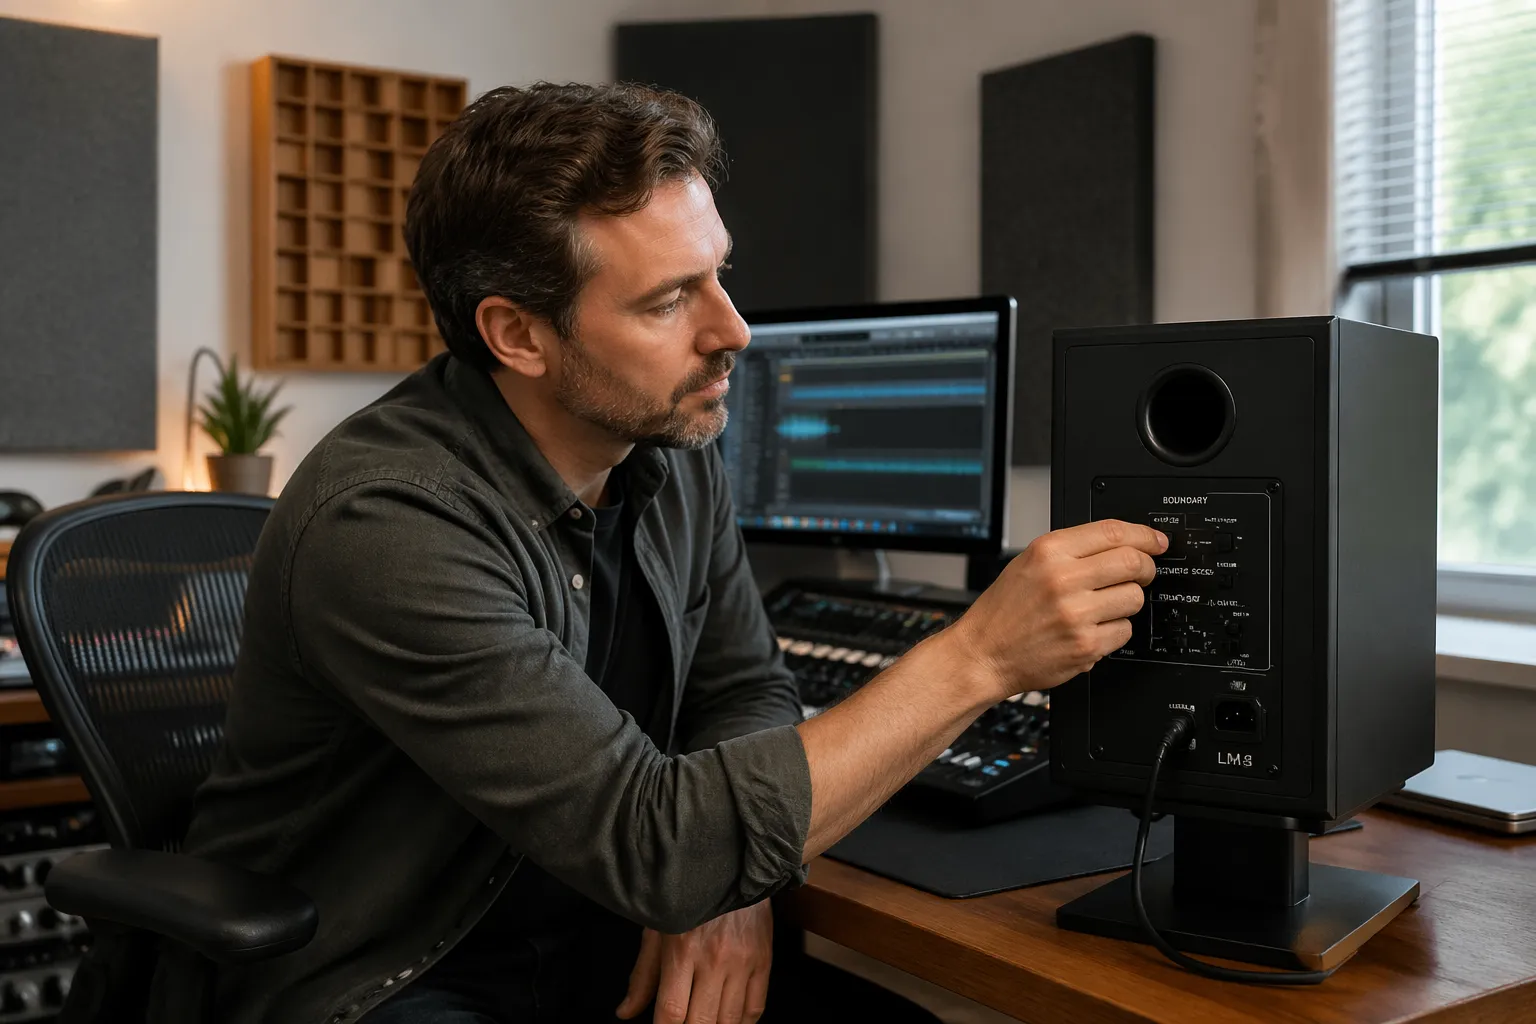
Boundary switches are usually a small set of presets that change the monitor’s low end to compensate for nearby surfaces. The goal is to counteract boundary gain, which is the bass boost you get when a speaker sits close to a wall, corner, or desk.
A common layout is “free space,” “wall,” and “corner,” and each step typically reduces bass more aggressively. Some brands label it as boundary compensation, while others call it “acoustic space” or “room control,” but the intent is the same.
Low shelf settings are broader than a narrow EQ notch, because they tilt a whole region of the spectrum, often starting somewhere between 80 Hz and 200 Hz. That means they can fix a general “too much bass” condition, but they cannot erase a single boomy room mode at 55 Hz.
Roll off controls usually target the very bottom, like 40 Hz to 60 Hz, and they act more like a high pass filter or a gentle bass cut. They help when your room exaggerates sub bass that you cannot even hear clearly at the desk, but you feel it as pressure or mud.
It helps to separate what the speaker is doing from what the room is doing, because boundary switches only change the speaker. Your room still has resonances, cancellations, and reflections that remain even if you cut 2 dB at 100 Hz.
Boundary gain is usually a wide, smooth lift, so it tends to make everything in the low end feel uniformly bigger. Room modes tend to make specific notes jump out or vanish, which is why you can have both “too much bass” and “missing bass” at the same time.
Most boundary presets are designed around typical nearfield use, where the speaker is close to you and close to a wall by necessity. They are not precision tools, so you should expect them to get you into the right ballpark, not solve the room perfectly.
Some monitors combine a boundary switch with separate low shelf and roll off controls, which can tempt you to stack too many moves. When you stack cuts, you can end up with a monitor that measures “controlled” but feels anemic and hard to balance against references.
Another detail people miss is that boundary compensation is often calibrated for a specific distance range, not for “anywhere near a wall.” A speaker that is 2 inches from the wall behaves differently than one that is 10 inches away, even if both are technically “near a wall.”
Desk reflections also live in a similar region as boundary gain, but they show up more as smearing and comb filtering than as a simple bass boost. That is why a boundary switch can make the low end smaller while the low mids still feel messy and unclear.
Think of the low shelf as a tonal tilt that affects warmth and thickness, not just “bass.” If you cut it too much, vocals can lose chest and snare drums can lose body, even though the kick drum seems cleaner.
Think of roll off as a way to keep sub bass from dominating your perception in a small room, especially when your monitors extend lower than the room can support. It is often safer to use a gentle roll off than to overcut the low shelf, because it targets a smaller range.
If your monitors have a “desktop” or “table” setting, it is usually aimed at the low midrange and upper bass where desk bounce causes dips and peaks. That control can matter as much as boundary compensation when your speakers sit close to a large flat surface.
Finally, remember that these switches are designed to help average placement scenarios, not extreme ones. If your speakers are inside a bookshelf cubby or pressed against a side wall, the presets can only do so much before placement becomes the real fix.
When to adjust settings vs when to move your speakers
Use boundary switches after you pick a sensible starting placement, because you cannot EQ your way out of a truly bad geometry. If your monitors are jammed into a corner behind a dual monitor stand, the reflections and cancellations will still wreck the low mids.
Moving speakers changes the timing of reflections, and timing problems show up as peaks and nulls that EQ cannot fill. A deep null at the listening position is often a cancellation, so cutting or boosting with a low shelf just changes the flavor of wrong.
That said, real home offices come with placement tradeoffs, and sometimes you accept a wall behind the desk because the rest of the room has to function. In that case, boundary compensation becomes a way to keep the bass balance reasonable while you focus on the bigger wins, like speaker height and toe in.
I usually move speakers first when the bass sounds uneven note to note, like one kick drum hit is huge and the next disappears. I reach for low shelf settings first when everything is consistently thick, like the whole mix leans warm even at moderate volume.
Start with the simplest movement that changes the boundary relationship, which is usually distance from the front wall. Even a few inches can shift where cancellations happen, and sometimes that is enough to make the low end feel less confusing.
Side wall distance matters too, but it often shows up more as stereo balance issues and low mid coloration than as pure bass level. If one speaker is closer to a side wall, you can get a lopsided low end that no global EQ setting can truly fix.
Height and stand choice count as “moving speakers” even if the speakers stay in the same spot on the desk. Getting the speakers off the desktop and onto stable stands can reduce desk coupling and clean up the punch region without touching any switches.
If you are forced to keep speakers on the desk, small changes like raising them on isolation pads or angling them down can still change what you hear in the upper bass. That is why you should treat physical adjustments as part of the bass workflow, not as a separate topic.
Use the boundary switch when the placement is basically fixed and the bass is broadly too loud or too thick. It is a fast correction for a predictable acoustic boost, and it is often the right move when the desk must remain against the wall.
Use roll off when you feel sub bass energy but cannot judge it clearly, which often happens in small rooms at moderate listening levels. If you keep second guessing 40 Hz decisions, a gentle roll off can make your monitoring more honest.
If the problem is a narrow boom that only happens on certain notes, treat that as a placement or room issue first. Boundary compensation can reduce the overall bass, but it rarely removes the one-note “whoom” that makes you mistrust your kick and bass balance.
If the bass is fine but the low mids are smeared, the desk and the front wall reflection are often the real culprits. In that case, speaker distance, height, and tilt can do more than any low shelf cut.
Also consider the listening position as something you can move, even if it is only a few inches. Sliding your chair forward or back changes where your ears land in the standing wave pattern, and that can turn a “no bass” spot into a usable one.
When you do move speakers, move them in matched increments and keep notes, because random experimenting is hard to evaluate. A simple log like “front wall distance: 8 inches” helps you return to a known baseline if you get lost.
Once placement is stable, then the switches become meaningful, because you are not chasing a moving target. The best boundary setting is the one that stays correct after you listen for a full work session, not the one that impresses you in the first minute.
A step-by-step method to dial in low shelf and roll-off
To learn how to tune bass with monitor boundary switches, you need a repeatable process that starts from neutral and changes one variable at a time. The point is to land on a setting you can defend, not the one that sounds biggest for ten seconds.
Start with both speakers set to the manufacturer’s default, often “flat” or “free space,” and set your listening level to something you can tolerate for ten minutes. Bass perception changes with volume, so keep the level steady while you make decisions.
Before you touch any switches, confirm that both speakers are wired in correct polarity and that your interface is not doing any hidden EQ. A polarity mistake can make the low end feel hollow, and you can waste a lot of time “fixing” it with boundary controls.
Pick a short loop of material that exposes bass balance, like a kick and bass groove with consistent hits. Avoid intros that change instrumentation every bar, because you want your ears to focus on the low end behavior, not on arrangement changes.
Listen first at the exact position where you actually work, not standing up or leaning back. Nearfields are sensitive to small head movements, and you want your settings to be right where your ears usually are.
When you switch a boundary preset, give your ears a few seconds to settle, because louder often feels better at first. If one setting is clearly louder in the bass, match overall listening level before you decide which is more accurate.
Use the boundary switch for the big correction based on placement, then use low shelf for the last bit of tonal balance. If you do it the other way around, you can end up overcutting and losing the ability to judge kick weight properly.
Roll off should be the final step, because it changes the foundation you are judging everything against. If you roll off first, you might compensate by adding too much 80 Hz to 120 Hz later, which can make mixes sound punchy at home but boomy elsewhere.
As you adjust, keep your changes small and reversible, especially if your monitor has multiple frequency points for the shelf. A 1 or 2 dB step is usually enough to reveal direction without overcommitting.
Pay attention to bass pitch definition, not just bass amount, because definition is what translates. If the bass guitar turns into a single blob of energy, you are hearing too much boundary gain or too much low shelf boost.
Also pay attention to the kick drum decay, because boundary gain can make the tail hang around longer than it should. A kick that sounds like it has extra reverb is often just the room and boundaries exaggerating the low end decay.
Once you think you have a good setting, take a short break and come back, because your ears adapt quickly to bass changes. The “right” setting often feels slightly less exciting at first, but it stays believable over time.
Finally, check your result at a slightly lower volume, because a good bass balance holds up when you turn down. If the bass disappears completely when you lower the level, you probably cut too much somewhere in the low shelf region.
| Placement situation | What you usually hear | First control to try |
|---|---|---|
| Speakers 18 to 36 inches from the front wall | Lean or uneven low end, bass notes change a lot | Move speakers or seat before touching EQ |
| Speakers 6 to 12 inches from the wall | Overall bass lift, low mids get thick | Boundary compensation or low shelf cut |
| Speakers within 3 inches of the wall | Big bass plus smeared lower midrange | Boundary switch plus small desk cleanup |
| Speaker near a corner, other speaker not | Left and right bass do not match | Asymmetric boundary settings, then placement |
| Desk causes strong reflection | Upper bass punch but muddy low mids | Speaker height and tilt, then low shelf |
Use the table as a decision shortcut, but do not treat it like a rulebook, because rooms vary wildly. The point is to pick the most likely first move, then confirm with listening rather than guessing.
If you are stuck in a very tight space, you may find that the “wall” setting is the real neutral, not “free space.” Many people in home offices end up closer to a wall than the monitor designer would prefer, so the compensation becomes your practical baseline.
When you are close to the wall, a small low shelf cut can sometimes sound more natural than a more aggressive boundary preset. That is especially true when the boundary preset also affects the low mids and makes the speaker feel less forward.
If your monitor offers a choice of shelf corner frequencies, start higher when the problem is thickness and start lower when the problem is sub pressure. A higher shelf point can clean up warmth, while a lower roll off can keep deep lows from dominating without thinning the whole mix.
Try to keep your changes symmetrical at first, because it is easier to hear overall tonal balance when both speakers behave the same. Once you have a good global balance, then you can address left-right differences with asymmetric settings if needed.
Matching left and right speakers in imperfect rooms
Most home offices are asymmetrical, like a window on one side and a bookcase on the other, and bass symmetry suffers first. If one speaker is closer to a side wall or corner, it can sound louder in the lows even when your monitor controller says both channels match.
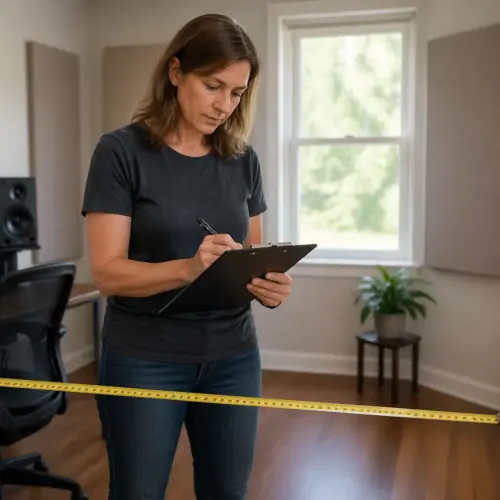
Start by measuring physical distances, because your eyes lie when a desk is crowded. Match left and right distance to the front wall as closely as you can, then match distance to side boundaries if the room allows it.
If you cannot match boundaries, you can still use boundary compensation differently on each speaker, and that is not “cheating.” A corner loaded speaker often needs a stronger low shelf cut than the other side, or it will pull your phantom center to one side on bass heavy material.
After you set asymmetric switches, verify with mono playback, because mono makes level and tonal mismatches obvious. If the bass image leans left or right in mono, you still have imbalance, and the fix is often smaller than you think.
Do not assume that matching SPL with a meter guarantees matching bass, because boundaries change frequency balance, not just loudness. Two speakers can measure the same level at 1 kHz and still be very different below 150 Hz at the listening position.
Start by matching the triangle geometry, because unequal distances to your ears can create phase differences that mimic tonal imbalance. If one speaker is even a few inches farther, the low end can feel less solid on that side.
Check that both speakers have the same coupling to their supports, because a wobbly stand can soften bass and change perceived punch. If one speaker is on a pad and the other is on the desk, you are not comparing like with like.
Listen for the center image on bass-heavy mono material, like a simple kick pattern, because it reveals boundary differences quickly. If the kick feels like it lives under one speaker, that side is probably getting more boundary reinforcement.
When you use asymmetric compensation, make one change at a time and keep it small, because big differences can create a strange stereo field. You want the bass to feel centered and stable, not like the room is tilting.
Be careful with asymmetric roll off, because it can make the very bottom feel like it shifts left and right depending on the note. If you need different roll off settings per side, it is a sign that placement or boundaries are extremely uneven.
Sometimes the best compromise is to bring the more “open” speaker closer to a boundary so both sides behave more similarly. It sounds backwards, but matching the problems on both sides can be easier to correct than having two totally different acoustic situations.
Window glass can reflect differently than drywall, and a bookcase can act like a partial absorber and diffuser, so do not expect perfect symmetry in a home office. The goal is not perfection, but a stable center and a bass balance that does not drift with small head movements.
Once you think you have matched the speakers, listen to a few mixes you have done in the past and notice what you would change. If you suddenly want to pull bass out of everything, you may have overcorrected and made your monitoring too lean.
Common mistakes that make bass less accurate
The biggest mistake is treating boundary switches like a bass enhancer instead of a correction tool. If you boost low shelf settings to “get more bass,” you are stacking boundary gain on top of EQ, and the low end gets slow and lumpy.
Another mistake is changing settings while you listen to one song that you love, especially if it is mastered loud with heavy low end. Use a small set of references you know well, and pick at least one track with tight acoustic bass or kick drum that reveals overhang.
People also forget the desk, which is a boundary too, and a nasty one because it creates early reflections that smear punch. If your monitors sit flat on the desktop, you can flip boundary compensation all day and still have a cloudy lower midrange.
A final mistake is chasing a ruler flat response at the chair with aggressive cuts, because it often sounds dead and misleading. A small amount of warmth is normal in small rooms, and you want translation more than you want a pretty graph.
Another common mistake is making changes while you are tired, because bass judgment is one of the first things to go. If you have been listening for hours, your decisions will drift toward whatever sounds less annoying in the moment.
People also change two or three controls at once, then cannot tell which move helped. If you cannot describe what a single switch did, you should undo it and try again more slowly.
It is easy to confuse “more detail” with “less bass,” because cutting bass can reveal midrange information. The danger is that you end up with a monitoring setup that flatters clarity but makes you overmix low end later.
Another mistake is ignoring the fact that many monitors are designed to be used with some boundary reinforcement in small rooms. If you cut too much, you can end up fighting the speaker’s intended voicing and losing the sense of weight that helps you balance a mix.
Some people try to fix a harsh top end by cutting bass, because the balance feels less aggressive when the low end is smaller. That is a trap, because you end up with thin mixes and the harshness still exists when you listen on other systems.
Another subtle mistake is placing objects between the speakers and the front wall, like a laptop stand or a large microphone, and then blaming the bass. Those objects can create reflections and diffraction that change the low midrange in ways that feel like “bad bass.”
Finally, people often forget to recheck settings after they add a rug, move a couch, or fill a bookcase. Small rooms change quickly, and a boundary setting that was perfect in an empty room can be slightly wrong once the room is lived in.
A step-by-step method to dial in low shelf and roll-off
Step one is to lock in speaker height and angle, because bass perception changes when the tweeter axis is wrong and the midrange shifts. Get the tweeters at ear height, then toe in so the speakers aim just behind your head.
Step two is to pick a baseline distance from the front wall that your room can handle, usually 6 to 12 inches in a tight office. That placement tradeoff is common, and it is exactly why boundary compensation exists on nearfields.
Step three is to apply the boundary switch that matches your placement, then stop and listen for two specific things, kick drum weight and bass guitar pitch clarity. If the kick gets bigger but the bass line becomes harder to follow, you probably need less bass, not more.
Step four is to fine tune with low shelf settings in small steps, because a 2 dB change in the 100 Hz region can feel dramatic at a desk. If your monitor has both a boundary switch and a low shelf, use the switch for coarse correction and the shelf for the last bit.
Step five is to decide whether you need roll off, and you decide that by listening for sub bass behavior rather than guessing. If your references feel like they have a constant low pressure that masks everything else, a gentle roll off can help.
Step six is to verify your settings at two listening levels, one moderate and one slightly quieter. If the bass balance only works when it is loud, you are probably compensating for the Fletcher-Munson effect instead of fixing the room interaction.
Step seven is to check with a track that has sparse low end, because it reveals whether you cut too much warmth. A mix with just vocal and guitar should still feel natural, not like it is missing the lower body of the performance.
Step eight is to check with a track that has sustained low notes, because sustain reveals room buildup and decay. If the note seems to swell after it starts, the room is storing energy, and you may want a little more cut or a small placement change.
Step nine is to do a quick “walk around” check, where you stand up and move a foot or two left and right while music plays. You are not mixing while walking, but it shows you how sensitive your room is and how narrow your good listening zone really is.
Step ten is to commit and stop tweaking, because constant tweaking teaches you to mistrust your monitors. A stable reference you learn over time beats a theoretically better setting you change every week.
If you want a simple sanity check, compare your bass decisions on good headphones after you set the switches. If your mixes suddenly have way too much sub on headphones, you probably rolled off too aggressively on the monitors.
Another sanity check is to listen from just outside the room with the door open, because it reduces the influence of the nearfield sweet spot. If the bass outside the room sounds far bigger than at the desk, you are likely sitting in a null and should try moving the seat.
Do not forget to label your final settings, even if it is just a note on your phone. If you bump a switch later, you want to recover quickly without redoing the whole process.
Matching left and right speakers in imperfect rooms
When one side of the room is more open, the bass can sound tighter on that side and boomier on the side with a wall or cabinet. Your brain tries to average it, but your mixes end up with bass decisions that do not hold up in headphones or a car.
Use pink noise or a slow sine sweep in mono to compare left and right, and do it at a moderate level so the room does not rattle. You are listening for relative balance, not for the smoothest possible sweep.
If one speaker has clear extra bass, try a stronger boundary compensation setting on that speaker only, then recheck mono music. This is one of the rare times where unequal settings can produce a more equal result at the listening position.
After you get bass balance, check that the midrange still matches, because some boundary presets shift the low mids more than you expect. If voices pull to one side, you cut too much on one speaker, or your placement is still uneven.
Try a vocal-heavy reference in mono, because vocals reveal small low mid shifts that bass-only tests can miss. If the vocal suddenly feels thinner on one side, your compensation is affecting more than just the bottom octave.
Check your crossover region indirectly by listening to bass instruments that have harmonics, like electric bass with finger noise or pick attack. If the fundamental feels centered but the growl leans, you may be hearing a boundary-related low mid imbalance.
If you use a subwoofer, matching left and right becomes a different game, because the sub is often mono and interacts with the room strongly. In that case, boundary switches on the mains can still help, but sub placement and crossover settings dominate the result.
Even without a sub, you should check that both speakers are the same model and revision and that both rear panels are set identically except for intentional asymmetry. It sounds obvious, but mismatched input sensitivity or HF trim can make the bass feel strange because the balance of harmonics changes.
If you have to choose between perfect symmetry and practical workflow, prioritize a stable center image at the listening position. A stable center makes panning and bass placement decisions easier, even if the room is not acoustically beautiful.
Once you have a workable match, take a photo of your setup from above and from the listening position. That makes it easier to restore the geometry if you move things for a meeting or a different project.
Common mistakes that make bass less accurate
A common trap is setting roll off too high because the room booms, then compensating by turning up the volume. That makes the bass seem controlled, but it also makes you under mix sub bass because you removed it at the source.
Another trap is ignoring what happens around 120 Hz to 250 Hz, where “chest” and “box” live in a mix. Many low shelf settings start affecting that area, so a heavy cut can make drums lose body and guitars sound smaller than they should.
People also confuse boundary gain with room modes, and they are different problems that stack together. Boundary gain is a broad lift from nearby surfaces, while modes are narrow peaks and deep nulls tied to room dimensions.
If you hear one note that explodes, do not assume boundary compensation will fix it, because it probably will not. That is when bass traps, a different seat position, or a different speaker distance from the wall does more than any switch.
Another mistake is using extreme EQ to “fix” a null, because nulls are often cancellations that do not respond well to boosting. You can burn headroom and stress the speakers without actually filling the hole at your ears.
Some people judge bass while sitting too far back from the desk, which changes the nearfield relationship and increases room influence. If your chair position changes day to day, your boundary settings will feel inconsistent even if the speakers never move.
It is also easy to forget that open-back headphones can recalibrate your expectations of bass, especially if your room is boomy. If you tune your monitors right after a long headphone session, you may cut too much because the room feels exaggerated by comparison.
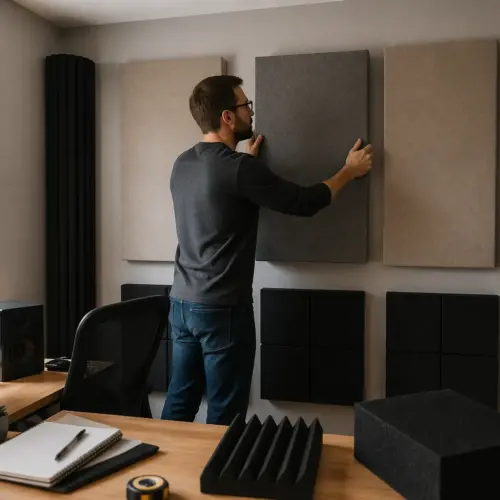
Another mistake is assuming that more treatment always means you should change the boundary switch. Treatment can reduce decay and smooth reflections, but it does not always change the broad boundary gain that the switch is designed to address.
People sometimes set boundary compensation correctly, then ruin it by placing large reflective objects right next to one speaker, like a PC tower or a stack of hard drives. That creates a new boundary and can make one side sound thicker again.
Finally, people forget that translation is the goal, so they keep tweaking until the room sounds “impressive.” An impressive bass in a small office is often a sign that you have too much energy building up, not that you have accuracy.
Locking in your settings with a quick repeatable test
Once you think you are done, you need a test that you can repeat every time you move the desk, add a rug, or change monitor stands. The best test is short, boring, and consistent, because consistency beats cleverness here.
Use two reference tracks you know well, one with a tight kick and one with sustained bass notes, and keep them in a dedicated playlist. Then use a simple mono check and a quick sweep to catch obvious boundary problems before you start working.
The goal of the test is not to prove your room is perfect, but to confirm nothing has drifted. If the test sounds different than last week, something changed, and it is better to catch it in two minutes than halfway through a mix.
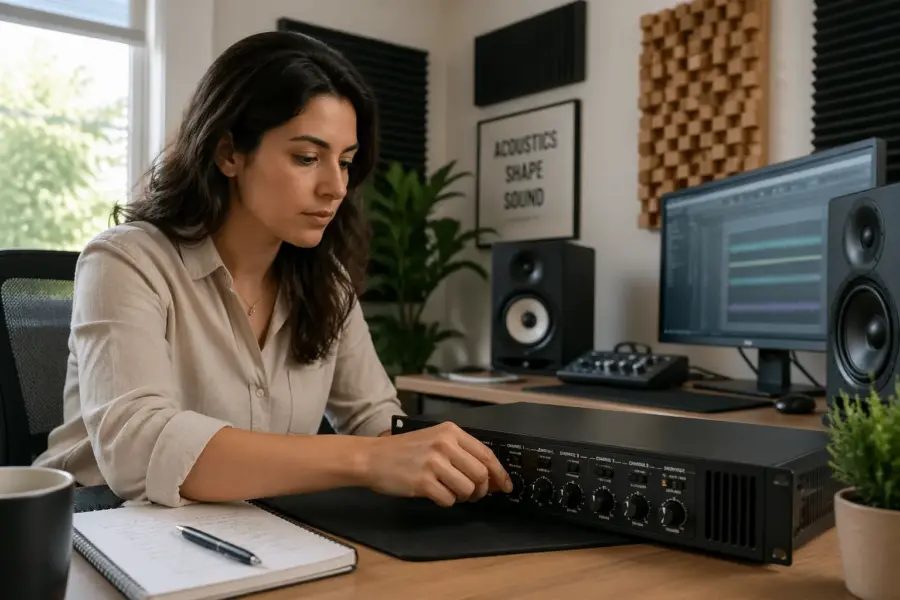
Mark your monitor knob position with tape or a paint marker, because repeatability depends on level. If you always run the test at the same loudness, you will notice changes in bass balance faster and with less second guessing.
Keep the test files local and uncompressed if you can, because streaming normalization and codec changes can distract you. You want the same input every time so the only variable is your room and your settings.
When you do the sine sweep, do not chase every bump, because every room has bumps. You are listening for big changes like a new rattle, a new hole, or a new side-to-side imbalance that suggests something moved.
If you want an even quicker check, use a familiar kick loop and flip mono on and off. If mono suddenly makes the low end collapse or shift, you may have a wiring issue or a left-right mismatch that needs attention.
- Set monitor level to a marked knob position
- Play mono pink noise for 10 seconds
- Switch left then right solo, compare bass loudness
- Play a 40 Hz to 200 Hz slow sine sweep
- Play two reference tracks, focus on kick weight
- Recheck boundary switches, then low shelf settings
After the checklist, do one real-world check by playing a mix you trust that you have heard on many systems. If that mix suddenly sounds wrong in the bass, your settings may have drifted, or your room changed in a way the quick test did not fully reveal.
If you share the room with other work, like video calls or gaming, run the test after you rearrange anything around the desk. A new monitor arm, a new lamp, or a moved bookshelf can change reflections enough to affect low mid clarity.
Do not be afraid to revert to your last known good settings if you get inconsistent results. A stable baseline is valuable, and you can always experiment later when you have time to evaluate changes properly.
If you use measurement software, you can include one quick measurement as part of the routine, but keep it consistent and simple. The measurement should confirm what you hear, not replace listening, because boundary switches are ultimately about practical translation.
Conclusion
Boundary switches work best when you treat them as a correction for predictable boundary gain, not as a tone control for taste. If you want to know how to tune bass with monitor boundary switches, start with placement, then use boundary compensation and low shelf settings to finish the job.
Accept the placement tradeoffs your home office forces on you, but do not accept guesswork, because a simple routine gets you to a stable result fast. When your left and right speakers match and your bass decisions translate, the room stops arguing with you and you can get work done.
The main win is not a dramatic change, but a reliable reference that lets you make decisions without fear. When boundary gain is under control, you stop overcorrecting in your mixes, and your low end starts to travel better to cars, earbuds, and small speakers.
Keep your process repeatable, keep your changes small, and treat the switches as part of a bigger system that includes placement and symmetry. If you do that, boundary compensation becomes a practical tool you can trust instead of a mystery switch you keep second guessing.