Acoustic panels can make a home office sound tighter and less fatiguing, but renters and cautious homeowners usually stop at the same question, how do you hang them without wrecking the walls. Acoustic panel mounting without drilling is completely doable if you match the method to the panel weight, the wall paint, and how often you plan to move things around.
I have seen people spend good money on panels and then panic when they realize drywall anchors are a one way decision. The good news is that modern adhesives, smart panel mounting hardware, and no wall setups cover almost every real world room.
The bad news is that the wrong adhesive can peel paint, and the wrong clip can drop a panel onto your monitor. A little planning up front beats patching and repainting later.
Decide if your panels need to be removable
Before you buy anything, decide whether you want panels to come down cleanly in five minutes or whether you are fine with a semi permanent install. That choice narrows the options more than panel thickness or fabric color.
If you rent, plan for true removability, meaning no holes, no glue residue, and no paint pull off. If you own, you can still avoid drilling while accepting that you might do minor touch ups later.
Removable setups also make sense if you switch between video calls and recording, because you may want different coverage on different days. I like movable treatment for multipurpose rooms, because home offices rarely stay the same for long.
Measure your panels and weigh one on a bathroom scale if the listing does not state the weight. Weight is the number that drives every safe decision in acoustic panel mounting without drilling.
Lightweight panels: adhesive strips and hook systems
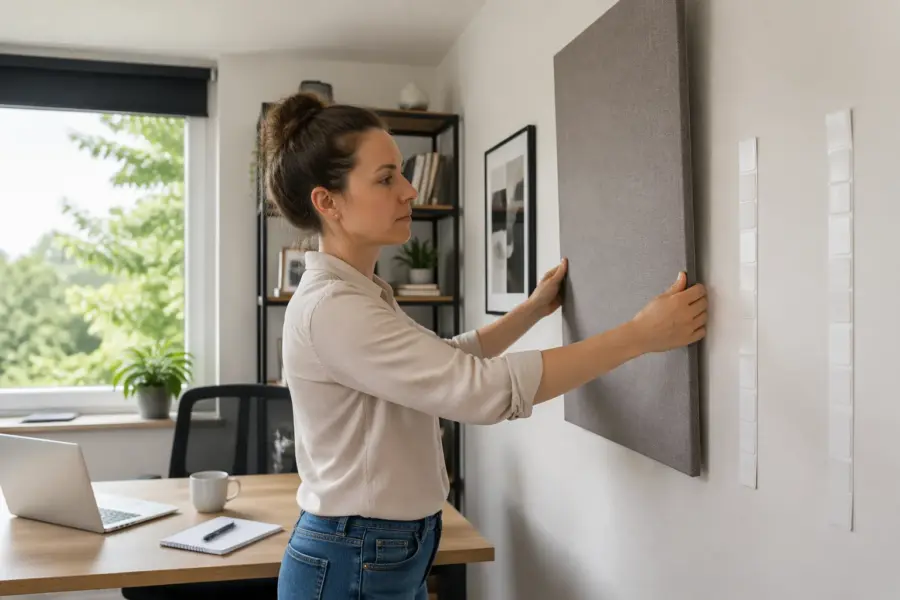
For light fiberglass or foam panels in the two to four pound range, adhesive systems are usually the cleanest approach. Command strips for panels work well when you use enough of them and you prep the wall like you actually care about the paint.
Use the picture hanging style strips that interlock, not the generic foam tape that becomes permanent in a month. If the panel frame is rough wood, stick the strip to a smooth backer like a small square of painted hardboard or a thin plastic plate first.
Hook systems are another option, especially if the panel already has D rings or a wire, because you can use adhesive hooks rated for the load. I prefer hooks when I want a tiny air gap behind the panel, since that can help absorption in the upper bass.
Do not trust the package rating unless you account for real conditions like warm rooms, textured walls, and paint that is not fully cured. When in doubt, add more strips, spread them out, and avoid putting all the weight on a single top edge.
Heavier panels: French cleats, Z-clips, and rail systems
Once panels get heavier, adhesive alone becomes a gamble, especially in a home office where HVAC cycles and sunlight change the wall temperature. This is where panel mounting hardware like French cleats and Z clips earns its keep, because the panel load transfers into a mechanical interlock.
You can mount a cleat or a rail without drilling by attaching the wall side to a removable adhesive backer board, then using multiple high strength strips on that board. It sounds fussy, but it spreads the load and gives you a clean surface for the hardware to bite into.
| Mount type | Best for | Notes for no-drill installs |
|---|---|---|
| Mini French cleat | Wood framed panels, 6 to 20 lb | Attach cleat to a backer board, then use many strips on the board |
| Z-clips (aluminum) | Flat backed panels, 8 to 30 lb | Needs accurate alignment, works best with a rigid backer board |
| Rail system with sliding hooks | Multiple panels in a row | Great for spacing, but the rail must be well supported across its length |
| Keyhole plates | Medium panels, quick lift-off | Adhesive hook points must be rated high, and wall texture can cause wobble |
No-wall options: stands, leaning panels, and desk-mounted frames
If your walls are fragile, textured, or freshly painted, skip them entirely and use freestanding acoustic panels. This approach also solves the problem of bad mounting surfaces like brick veneer, thin plaster, or weird office partitions.
Panel stands can be simple, like a T base with a vertical slot, or more serious, like rolling gobos used in small studios. For video calls, a pair of freestanding acoustic panels behind the monitor can cut slap echo without touching the wall once.
Leaning panels are the cheapest no wall trick, and they work better than people expect if the panel has a rigid frame. Put a non slip pad under the bottom edge, and add a small bumper at the top so the frame does not scuff the paint.
Desk mounted frames clamp to the rear edge of the desk and hold a panel like a small privacy screen. I like this for voice work, because it gets absorption close to the mic without turning the whole room into a padded box.
Preventing wall damage and paint pull-off
Paint pull off happens when the adhesive bond to the paint is stronger than the paint bond to the drywall paper. If you have builder grade flat paint, expect it to fail first, even if the adhesive is marketed as removable.
Start by cleaning the wall with isopropyl alcohol on a lint free cloth, then let it dry fully. Skip household cleaners, because many leave residue that reduces adhesive strength and encourages sudden failure later.
If you can, test one strip in a low visibility spot for a full week, then remove it using the proper pull tab method. If the paint lifts on the test, stop and switch to freestanding acoustic panels or use a sacrificial backer like a thin sheet of PVC that you can remove later.
Avoid sticking anything to paint that is less than a month old, because curing takes longer than people think. If you must mount sooner, use a no wall setup for a few weeks and come back to adhesives later.
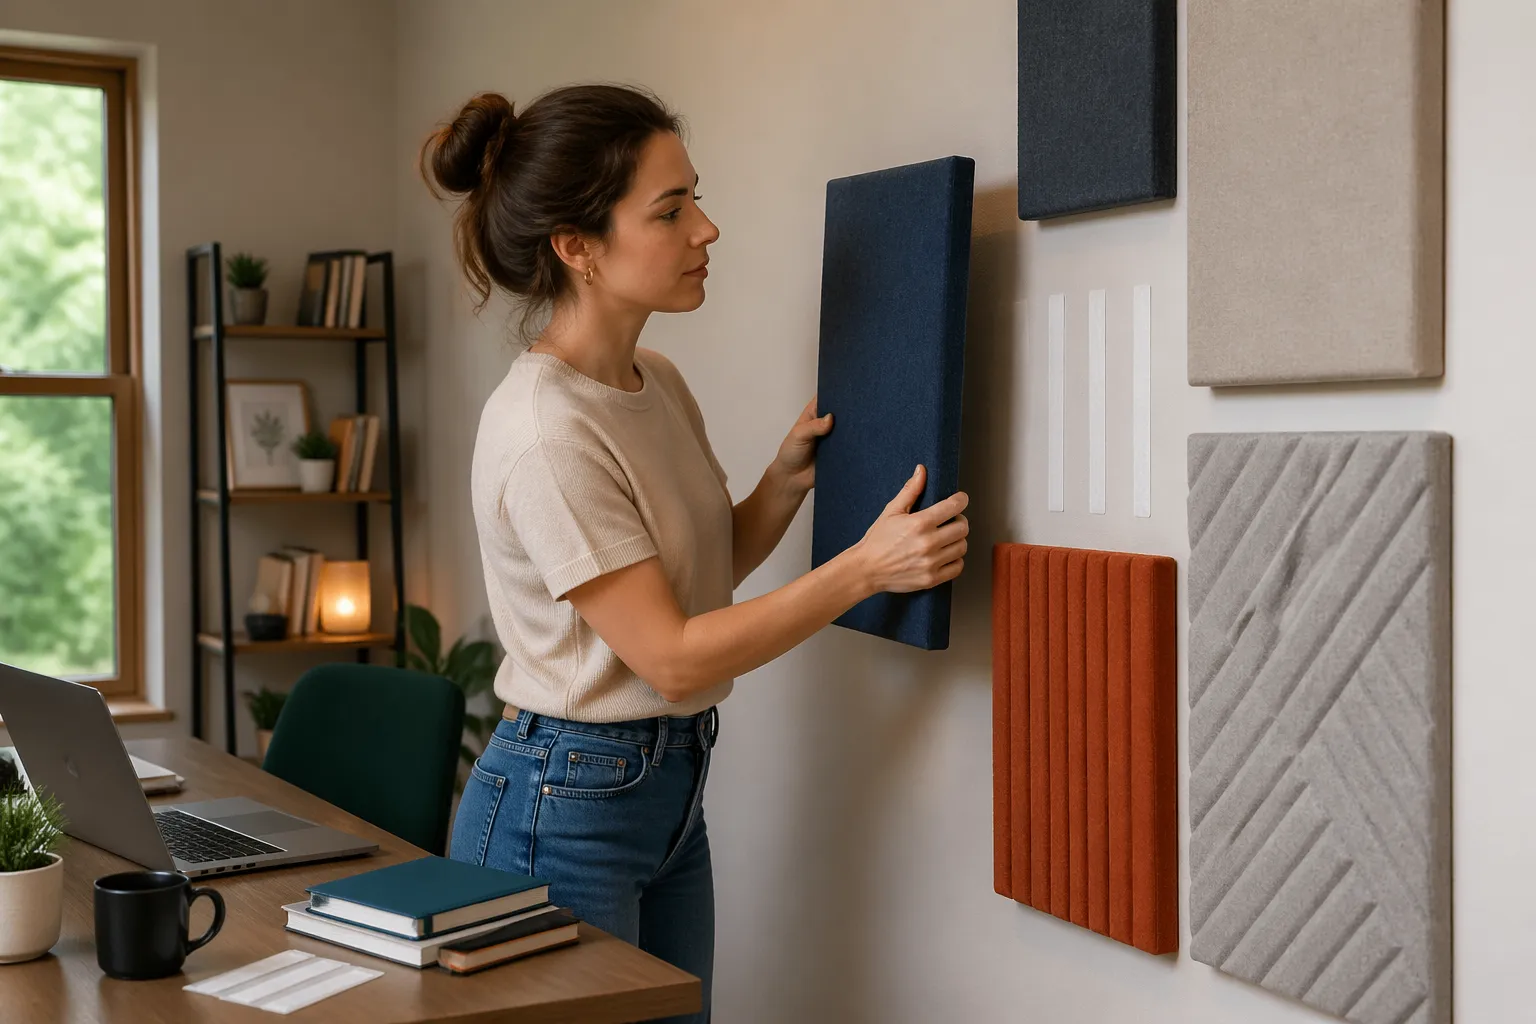
Aligning panels cleanly (spacing, leveling, templates)
Panels that are slightly crooked look amateur fast, especially on camera, so plan the layout like you would plan shelves. I use painter tape to outline panel edges first, because it lets you step back and judge spacing before you commit.
Make a simple template from cardboard that matches the panel size, then mark the top corners and the strip locations. This saves time when you are installing a grid and keeps your acoustic panel mounting without drilling from turning into a measuring marathon.
Use a level, but also trust your eyes, because many rooms have floors and ceilings that are not perfectly square. If you align to a crooked ceiling line, your panels can look wrong even when the bubble says they are right.
Keep gaps consistent, like two inches between panels, and repeat that spacing across the wall for a calmer look. If you want a tighter pattern, leave a small reveal and add dark fabric edges, because shadow lines hide tiny alignment errors.
Safety checks so panels don’t fall
Every mounting method needs a basic safety check, because gravity never takes a day off and adhesives weaken in heat. Treat every panel like it could land on a laptop, a kid, or your face during a late night call.
Do a pull test after the recommended cure time, and do it in the direction the panel would actually fall. If you can peel a corner with two fingers, you need more strips, a better backer surface, or a different plan.
- Confirm panel weight with a scale
- Match adhesive rating to real surface type
- Use enough strips to spread the load
- Press and hold each strip for the full time
- Wait the full cure time before hanging
- Recheck after 24 hours and after a hot day
- Keep panels away from doors that slam
Choosing the right command strips for panels
Command strips for panels are not all the same, and the differences matter more than the branding. The interlocking picture hanging strips usually outperform poster strips because they resist shear forces, which is what a panel creates as it tries to slide down the wall.
Buy the larger size than you think you need, because using six big strips is safer than using ten small ones that concentrate load in tiny spots. If the panel has a frame, place strips near the corners and add one or two across the middle to reduce flex.
For fabric wrapped panels, avoid sticking adhesives directly to fabric, because the fabric can separate from the frame and the panel drops while the strip stays on the wall. Attach the strip to the wood frame, or attach it to a rigid plate that is glued or screwed to the frame before you ever touch the wall.
If you want an air gap, use adhesive hooks and a short loop of picture wire or strong cord, then hang the panel like a small frame. This creates a more forgiving setup, because the hook takes the load and the panel can shift a little without popping strips loose.
Backer boards and sacrificial layers for no-drill mounting
A backer board is the trick that makes heavier no drill installs realistic, because you can build a strong interface without touching the wall with screws. Think of it as a removable mounting plate that gets the adhesives, and then your panel mounting hardware attaches to the plate.
Use thin plywood, MDF, or PVC sheet, and paint it if you want it to blend in when panels move around. Keep the board slightly smaller than the panel so it hides behind the frame and does not look like a random rectangle on the wall.
Spread strips across the whole board, not just the corners, because the board can bow and peel if the center floats. I like to add a few strips in a vertical line down the middle for tall panels, since gravity loads the top edge harder than you expect.
Once the board is secure, mount Z clips or a cleat to the board with short screws that do not punch through the front. This keeps the wall untouched while still giving you a mechanical hang that is far more predictable than raw adhesive alone.
Handling corners, doors, and tricky studio geometry in home offices
Home offices have awkward geometry, like doors that swing into the only usable wall, or closets that steal corner space where bass builds up. Plan around the room you have, not the room you wish you had.
For first reflection points beside a desk, a thin panel on command strips for panels usually works because the panel is light and the area is not disturbed. If a door swing puts the panel at risk, move the panel to the ceiling side of the reflection point or use a freestanding acoustic panel that you can slide out of the way.
Corners are where people want thick traps, and that is also where no drill mounting gets harder because the panels are heavier. A solid option is a corner gobo style stand, where two panels hinge together and sit across the corner without any wall contact.
If you record voice at the desk, put absorption behind and slightly above the mic, not only behind your head. That placement reduces early reflections that make speech sound papery, and it often takes fewer panels than random wall coverage.
Troubleshooting common failures with no-drill mounts
If a panel slowly slides down, you have a shear problem, which usually means you used the wrong strip type or too few contact points. Switch to interlocking strips, increase the number, and make sure you pressed each strip hard for the full time.
If a panel falls off suddenly, the wall surface is usually contaminated or the paint is weak. Clean with alcohol, wait longer for cure, or stop fighting the wall and go with freestanding acoustic panels.
If the panel rocks or rattles, the back is not flat or the hooks are spaced too far apart. Add felt pads at the bottom corners, or add a second hook point so the panel cannot pivot when bass hits.
If removal tears paint even when you pull the tab correctly, you need a sacrificial layer next time. A backer board, a removable vinyl wall protector sheet, or a stand based setup keeps you from repeating the same mistake on the next wall.
Conclusion
Acoustic panel mounting without drilling works best when you treat it like a load problem first and a decor problem second. Light panels do fine with command strips for panels or adhesive hooks, while heavier panels usually need smarter panel mounting hardware or a backer board.
If your paint is questionable or you move often, freestanding acoustic panels and desk mounted frames are the least stressful path. Pick a method you trust, take time to align everything cleanly, and you end up with a home office that sounds controlled without turning the walls into a repair project.


