If your home office doubles as a studio, low end problems show up fast once you add decent speakers or a subwoofer. The hard part is deciding whether the fix is bass traps, acoustic panels, or both.
The phrase bass traps vs acoustic panels gets tossed around like it is a simple either-or choice. In real rooms, the answer depends on what frequency range you are fighting and how the room itself stores energy.
Flutter echo and harsh reflections are easy to hear, so people buy thin panels first and assume the bass will follow. Then the kick drum still feels lumpy, the voice sounds boomy on calls, and mixes do not translate.
Low frequency control is mostly about physics you cannot talk your way around, like wavelength and boundary buildup. You can still make smart, budget-friendly choices if you understand what each product is built to do.
A well-treated room is not about making everything silent or “dead” in the way people imagine. It is about reducing the specific kinds of reflections and resonances that trick your ears into making bad decisions.
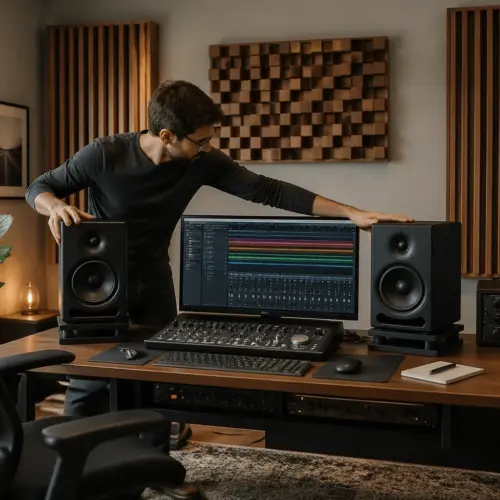
That is why two rooms with the same speakers can sound completely different, even at the same volume. The room is effectively part of the monitoring chain, and it can be the weakest link.
It also helps to separate comfort from accuracy, because a room can feel pleasant while still being misleading. A little less splash in the highs can feel like progress even if the bass is still doing backflips.
If you are mixing, producing, gaming, or doing voice work, the goal is repeatability. You want the room to stop changing the sound every time you move your head a few inches.
The core difference: what each product is designed to absorb
Acoustic panels are usually designed for mid and high frequencies, where reflections create comb filtering and a “spitty” top end. They can help with broadband absorption when they are thick enough and placed with intent, but many off-the-shelf panels are really reflection control products.
Bass traps are built for low frequency absorption, which means they need more depth, more air volume, or a tuned design to interact with long wavelengths. The goal is to reduce modal ringing and boundary buildup that makes one note loud and the next note disappear.
Here is the blunt truth, thin foam squares do almost nothing below the low mids in a typical home office. They make the room sound less “slappy,” yet the bass remains uneven because the energy is still bouncing between walls and piling up in corners.
When people argue bass traps vs acoustic panels, they are often comparing products that are not competing in the same frequency band. A panel aimed at 1 kHz and a trap aimed at 80 Hz solve different problems, even if they use similar materials.
Mid and high frequency issues are mostly about reflections arriving at your ears a few milliseconds after the direct sound. Those reflections smear the stereo image, blur transients, and make EQ choices feel inconsistent.
Low frequency issues are more about the room acting like a storage tank for energy. Instead of a quick reflection, you get a resonance that builds up, rings, and changes the balance over time.
This is why you can clap your hands and hear flutter echo instantly, yet you cannot “clap” your way into hearing a 60 Hz mode. The bass problem is still there, but it is easier to notice with music, sweeps, or measurements.
Panels are often used to control early reflections at the side walls, ceiling, and sometimes the wall behind the speakers. Traps are usually used where low frequencies accumulate, like corners and wall-to-ceiling junctions.
Another difference is how forgiving the placement is, because reflection control is fairly predictable once you know the reflection points. Bass trapping is more about covering the places where multiple modes pile up, which is why corners are such a reliable target.
It is also worth noting that the same material can behave differently depending on thickness and placement. A rigid fiberglass panel can be a reflection panel at 2 inches, and a credible bass absorber at 6 inches with an air gap.
So the label on the box is less important than the design goal and the absorption curve. If you do not know what a product absorbs and where, you are basically guessing with your budget.
How thickness and mounting affect bass performance
Panel thickness is the first lever you can pull, because thicker porous absorbers reach lower in frequency. A 2-inch panel can clean up early reflections, while a 4-inch panel starts to behave more like broadband absorption when you mount it correctly.
Mounting matters as much as thickness, since an air gap behind the panel increases low frequency absorption without adding material. A 4-inch mineral wool panel spaced 4 inches off the wall often beats the same panel glued flat, especially in the upper bass and low mids.
Porous absorbers work best where particle velocity is higher, and that is not right at the wall for bass. When you stick a thin panel directly to drywall, you mostly treat the stuff you were already hearing, not the stuff that ruins translation.
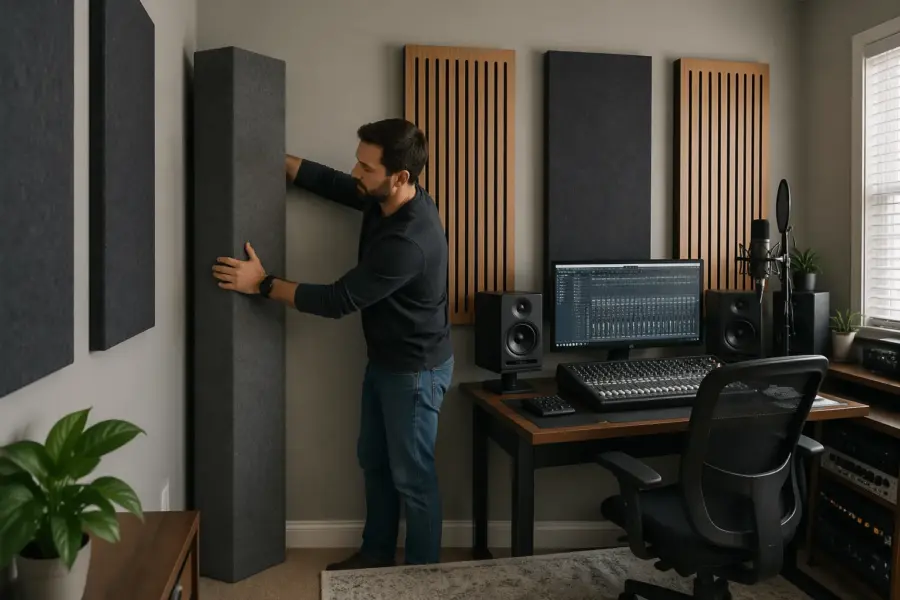
Corner placement changes the game because corners concentrate pressure for many room modes. That is why a thick “panel” straddling a corner starts behaving like a bass trap, even if the manufacturer calls it a panel.
Think of thickness as buying reach, because low frequencies need more distance to be meaningfully affected. The deeper the absorber and the larger the air volume behind it, the more it can interact with bass energy.
Density matters too, but not in the way people assume, because denser is not automatically better for bass. Many DIY builds use mineral wool or fiberglass in a density range that balances airflow resistance and depth.
If you are trying to treat the low mids, like 150 to 300 Hz, a 4-inch panel with an air gap can be a sweet spot. That range is where desks, small rooms, and speaker-boundary interactions often create that “boxy” or “thick” sound.
If you are trying to treat true bass, like 60 to 120 Hz, you usually need corner traps with real depth. That might mean 6-inch or thicker porous traps, or large corner units that effectively create a deep air cavity.
Mounting also affects how much coverage you can get without turning the room into a padded cell. A few well-placed thick units can outperform a lot of thin units scattered randomly.
Ceiling clouds follow the same rules, because the air gap above the cloud is part of the absorber system. A cloud that hangs a few inches down tends to work lower than one that is flush-mounted.
There is also a practical point about safety and stability, because heavy panels need proper anchors and hardware. If you are renting, free-standing frames and corner straddles can get you most of the benefit without drilling as much.
Finally, remember that bass performance is not only about absorption, but also about reducing the strength of reflections that cause cancellations at the listening position. A small change in placement and mounting can change the whole feel of the low end at the desk.
When standard panels are “good enough” for your room
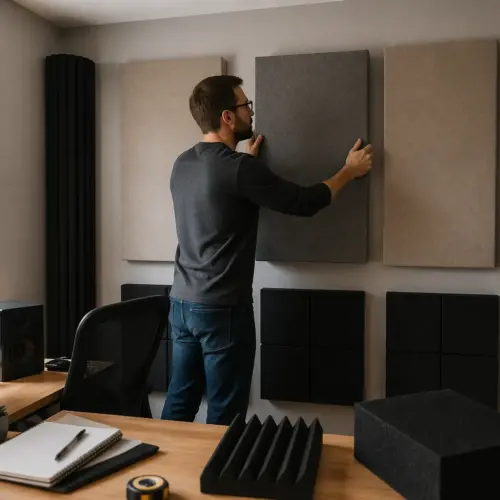
Standard panels can be enough when your main complaints are flutter echo, harshness, and a hollow sound on Zoom or voiceover. In that case, you want controlled early reflections and shorter decay in the mids, not heroic low frequency absorption.
They can also be enough if you work quietly on nearfields at low volume and do not rely on sub bass decisions. Many home offices never see sustained energy under 80 Hz, so you get more mileage from reflection control than from deep trapping.
If your room is already fairly large relative to what you do, the bass modes may be less severe in the critical range. A bigger space still has modes, but they can be spaced differently and feel less like a single-note problem.
Panels are also a reasonable first move if your desk is against a wall and you are hearing obvious slap from the opposite wall. Cleaning up that back-and-forth reflection can make speech clearer and reduce listening fatigue.
For voice recording, the priority is often controlling the immediate acoustic around the mic. A few thick panels placed behind and to the sides of the talent can make the voice sound closer and more controlled.
For editing and content work, you may care more about intelligibility than about perfectly flat bass. In that workflow, a room that is calm in the mids can be more productive than a room that is technically flatter but still reflective.
Standard panels can also be “good enough” if you are willing to use headphones for low end checks. That is not a perfect solution, but it can reduce how much you need the room to behave below 100 Hz.
If you are hearing a clear improvement in imaging after treating first reflections, that is a sign you were reflection-limited. Better imaging makes pan decisions easier and makes reverb and delay levels easier to judge.
There is also a comfort factor, because harsh reflections can make you turn the volume down and second-guess everything. A few panels can make the room feel more controlled, which helps you work longer without fatigue.
| Room symptom | What you hear at the desk | Standard panel approach |
|---|---|---|
| Flutter echo between bare walls | Fast “ping” or “zing” on claps and speech | 2-inch to 4-inch panels at first reflection points |
| Overly live room tone on calls | Roomy voice and long midrange decay | 4-inch panels behind and to the sides of the mic |
| Bright, fatiguing top end | Sibilance feels sharp and cymbals splash | Panels on side walls plus a ceiling cloud |
| Mild low mid boxiness | Guitars and speech sound “cuppy” | Thicker panels with a 2-inch to 4-inch air gap |
Even in the “panels are enough” scenario, placement still matters more than quantity. Treating the right surfaces can beat treating more surfaces in the wrong spots.
If you only have budget for a few pieces, start with the first reflection points and a ceiling cloud. Those locations tend to deliver the most obvious improvement per panel in a typical desk setup.
Also consider the wall behind you, because a strong rear-wall reflection can blur depth and make the room feel bigger than it is. A couple of thicker panels behind the listening position can reduce that smear without needing full-room coverage.
Standard panels are not a cure-all, but they can make a room usable quickly. If you are not hearing big bass swings and your work is mostly midrange-focused, that may be the right trade.
When you specifically need bass traps
You need bass traps when the room has obvious modal problems, like one bass note that swells and hangs on while nearby notes vanish. If you sweep a sine wave and the level jumps in chunks, that is room modes, not your monitors.
Small rooms make this worse because the lowest modes land right in the range you care about for kick, bass guitar, and male voice fundamentals. A spare bedroom office with an 8-foot ceiling almost always benefits from serious corner trapping.
If you use a subwoofer, bass trapping stops being optional because you are feeding the room more low frequency energy. Even if the sub is well integrated, the room still rings at its favorite frequencies unless you add low frequency absorption.
Another sign is time, not level, because bass problems often show up as long decay rather than just “too loud.” If your room sounds tight at first and then the low end blooms after the transient, traps are the tool that shortens that tail.
You also need traps when you can move your head forward and back and the bass changes dramatically. That is a classic symptom of standing waves creating peaks and nulls along the room length.
If your mixes sound fine in your room but fall apart in the car, the low end is often the culprit. The room is pushing you to overcorrect, so you end up with bass-light or bass-heavy mixes elsewhere.
Another clue is when you keep changing the bass EQ and never feel confident. When the room is lying, you can spend an hour chasing a problem that is not actually in the track.
Desk setups can make this worse because the speakers are close to boundaries and the listening position is often not ideal. Speaker-boundary interference can create deep nulls that feel like missing bass even when the room is actually booming elsewhere.
Traps will not fix every null, but they can reduce the severity of the peaks and shorten decay so the bass is easier to judge. That usually translates into faster decisions and fewer surprises on other systems.
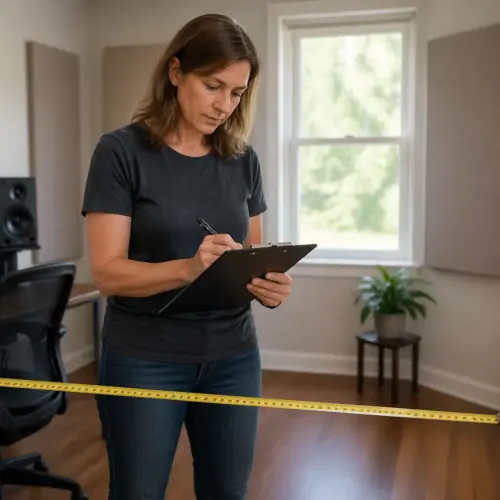
If you measure your room, bass problems show up clearly as big peaks and dips and long waterfalls in the low end. You do not need lab-grade data, but even basic measurements can confirm what you are hearing.
In many rooms, the first two vertical corners behind the speakers are the highest value locations. Treating those corners can tighten the low end and improve the clarity of the low mids at the same time.
What “bass trap” really means in real products
Some companies call any thick panel a bass trap, and sometimes they are not totally wrong. A 6-inch porous absorber straddling a corner can deliver useful low frequency absorption, even if it is not a tuned resonator.
True bass traps are either very thick porous absorbers, corner units with lots of depth, or tuned devices like membrane or Helmholtz traps. Tuned traps can hit a narrow problem frequency hard, but they are easy to misapply if you do not measure.
For most home offices, thick porous corner traps are the safest buy because they act like broadband absorption down into the bass. They also improve the low mids, which is where many “boomy desk” problems actually live.
If you see a product that is 2 inches thick and marketed for bass, treat that claim with suspicion. You might get a small change around 200 Hz, but you will not get meaningful control at 60 to 120 Hz where rooms usually misbehave.
Porous bass traps usually use fiberglass or mineral wool, and the performance is mostly about depth and placement. The corner straddle design works because it creates an air cavity behind the absorber, which effectively increases depth.
Superchunk-style traps, where the corner is filled with a triangular stack of insulation, can be very effective if you have the space. They are bulky, but the extra volume is exactly what low frequencies respond to.
Membrane traps work differently, because they use a flexible face that moves and dissipates energy at specific frequencies. They can be powerful tools, but they are not a beginner-friendly first purchase unless you have measurements and a specific target.
Helmholtz traps are even more specialized, because they are essentially acoustic bottles tuned to a narrow band. They can solve a stubborn resonance, yet they can also do almost nothing if the tuning is off or the placement is wrong.
Marketing language can blur these categories, so it helps to look for real absorption coefficients by frequency. If a product does not show performance data below 125 Hz, you should assume it is not doing much down there.
Also watch for products that are heavy on aesthetics and light on depth, because fabric and frames do not absorb bass. The core absorber thickness and the air volume behind it are what matter for low frequency work.
In practical terms, many “bass traps” in home studios are just thick broadband absorbers used in corners. That is not a compromise, it is often the most reliable approach when you cannot design a tuned system.
If you are building DIY traps, the same principles apply, and the build quality mostly affects safety and durability. A well-built frame, breathable fabric, and correct mounting can make a DIY trap perform like a commercial one using similar materials.
Combining panels and traps for balanced treatment
The best setups stop treating bass traps vs acoustic panels as a debate and start treating it as a sequence. You usually get the biggest improvement by fixing low frequency decay and peaks first, then cleaning up reflections so imaging snaps into place.
A practical plan is corner traps in as many vertical corners as you can manage, plus a ceiling cloud and side-wall panels at the first reflection points. That mix gives you low frequency absorption where the room stores bass and broadband absorption where your ears pick up smearing.
When the bass is under control, the rest of the treatment starts to make more sense. You can hear what the panels are doing because the low end is not masking everything.
It also helps to treat the front of the room as a system, because the speakers, front wall, and corners all interact. Front-corner traps and a bit of absorption on the front wall can reduce boundary effects and tighten imaging.
The ceiling is often overlooked, but it is a major reflection surface in a desk setup. A cloud can reduce that vertical bounce and make the phantom center feel more stable.
Side-wall panels are about clarity and stereo accuracy, not just making the room quieter. When those early reflections are controlled, panning decisions become less guessy and reverbs sit more predictably.
The rear wall is a common trouble spot because it can create strong reflections back to the listening position. If you cannot put traps back there, thicker panels with an air gap can still reduce the slap and the low-mid buildup.
There is a balance point where too much mid-high absorption can make the room feel unnaturally dull. Keeping some liveliness while controlling the worst reflections often feels better for long sessions.
Symmetry matters because uneven treatment can pull the stereo image to one side. If you treat one side wall, treat the other side wall in a similar way so the left and right reflections match.
If you have to prioritize, start with the corners you can treat cleanly and safely. After that, target the first reflection points and the ceiling, because those are the next biggest wins.
- Trap the front vertical corners behind the monitors
- Add a ceiling cloud above the listening position
- Treat side-wall first reflection points with 4-inch panels
- Trap rear vertical corners if the room allows
- Use an air gap behind wall-mounted panels
- Keep the desk and monitor placement symmetrical
After the basics, you can refine with measurement and small changes in placement. Moving a panel a foot can matter, especially when you are trying to tame a specific reflection path.
Do not forget that furniture and layout are part of the acoustic plan. A thick couch, a bookcase, and even curtains can change the decay and reflection pattern, though they are not substitutes for proper trapping.
The goal is not to cover every inch of wall, but to control the key energy paths. A balanced room usually has a mix of absorption and some remaining natural ambience.
Common buying mistakes and how to avoid them
The most common mistake is buying too thin because thin looks tidy and costs less. Panel thickness controls how low the absorber can work, so a room with bass issues needs depth, not decoration.
Another mistake is treating only the side walls and calling it done, which can make the room feel “dead” while bass remains wild. You end up with dull highs and the same low end peaks, which is a frustrating place to work.
People also mount panels flat to the wall because it seems logical, then wonder why low frequency absorption barely changes. If you cannot afford thicker panels, use an air gap and focus on corners where the geometry gives you free performance.
Finally, many buyers chase a single number like NRC and assume it covers everything. Look for absorption data by frequency band, because broadband absorption claims can hide the fact that the product drops off fast in the bass.
Another common mistake is ignoring placement and buying based on how many pieces come in a pack. Ten small foam tiles in random spots rarely beat two thick panels in the right locations.
People also underestimate how much corners matter and try to solve bass problems with wall panels alone. If your corners are bare, the room still has an easy place to store low end energy.
It is also easy to over-treat the top end while chasing clarity, especially if you use a lot of thin foam. The room gets dull, but the bass is still uneven, so you feel stuck.
Buying without a plan is another budget killer, because you end up with mismatched sizes and thicknesses that do not work together. A simple layout sketch can prevent impulse purchases that do not fit your room.
Some buyers assume a single “vocal booth” panel behind the microphone will fix a whole room. It can help the mic, but it does not address the reflections and resonances that reach your ears while you mix.
Another trap is assuming that heavier automatically means better, because weight can come from frames or decorative elements. What matters is the absorber material, the depth, and the way it is mounted.
Skipping measurement entirely can also lead to wasted money, even if you only do basic checks. A simple before-and-after sweep can confirm whether your purchases are actually reducing peaks and decay.
Finally, some people treat acoustics as a one-time purchase and never revisit speaker placement. Moving the speakers and listening position can reduce problems for free, and treatment works best when the geometry is already reasonable.
Conclusion
Low frequency control is where home offices fall apart, so the bass traps vs acoustic panels decision should start with what range you need to fix. Panels handle reflections and clarity, while bass traps address the modal mess that makes mixes and voices sound inconsistent.
If you can only buy one thing, buy depth and put it in corners, because that is where low frequency absorption pays off fastest. After that, add panels with smart mounting and enough panel thickness to keep broadband absorption honest.
Most rooms end up needing both, just in different proportions depending on size, layout, and how loud you work. The good news is that a few correct choices usually beat a lot of random ones.
Once the room stops exaggerating certain notes and smearing the stereo picture, your speakers start to sound more expensive. That is the real win, because you can trust what you hear and work faster with fewer surprises.