Most small home offices sound worse than they need to, and the problem usually starts with the desk. If your speakers are jammed against a wall, squeezed around monitors, or pushed to the corners, your mix decisions will drift all day.
Good speaker placement in small home office rooms is less about magic foam and more about geometry you can measure. When the left and right speakers see the room the same way, your brain stops fighting the setup and starts trusting what it hears.
I like simple rules you can repeat, because most of us move things around for calls, laptops, and coffee. The goal is a stable stereo image at your chair, even when the room is cramped and the desk is doing its best to ruin everything.
You do not need a perfect room to get a clean center image and reliable panning. You do need to stop guessing and start placing speakers with a few hard constraints.
The geometry behind good stereo imaging
Stereo imaging is mostly timing and level, which means distance matters more than brand names. If one speaker is even an inch or two closer, the phantom center slides and vocals stop sitting still.
In a small room, early reflections arrive fast, and your ears blend them with the direct sound. That blend can make the center image fuzzy, so you want symmetry and short, predictable reflection paths.
Think of your head and the two speaker tweeters as three points that should form a clean triangle. When the triangle is skewed by a monitor arm, a shelf, or a side wall, the stereo field tilts with it.
Room geometry also decides where bass piles up and where it disappears. You can’t EQ your way out of a null that comes from placement, because the dip is caused by cancellation, not lack of power.

The reason symmetry matters so much is that your brain is a pattern-matching machine. When left and right arrive with the same timing and similar reflections, you stop “hearing the room” and start hearing the mix.
When symmetry is off, you compensate without realizing it by turning your head, leaning in, or mixing too bright on one side. That is why a sloppy setup can feel tiring even at low volume.
Distance differences do not just move the center, they change how reverb and depth cues read. A vocal that should sit forward can suddenly feel like it is glued to one speaker because the room is giving you conflicting timing information.
It also helps to remember that the tweeter is your imaging driver, not the woofer. If the tweeters are not matched in distance and angle, the upper-mid details that define placement will not line up.
Small rooms exaggerate these issues because you are always sitting close to boundaries. The same placement mistake that is “fine” in a bigger room can become a daily problem when the walls are only a few feet away.
Even your chair can matter if it has a tall reflective back that sits between you and one speaker. If you notice the image shifting when you lean back, you may be hearing the chair as a boundary too.
Building an equilateral triangle that fits your desk
The equilateral triangle rule works because it keeps left and right timing matched and keeps the stereo field predictable. In practice, you set the distance between the speakers, then sit the same distance away from each one.
On a typical 48 to 60 inch desk, I usually start with 36 to 44 inches between tweeters. That often lands your listening distance in the same range, which feels close but gives strong direct sound in a noisy home.
If your desk is shallow, do not push the speakers forward just to hit a perfect triangle, because you will crowd the keyboard and end up moving them back later. Instead, shrink the triangle slightly and keep the speakers stable, because consistency beats theoretical perfection.
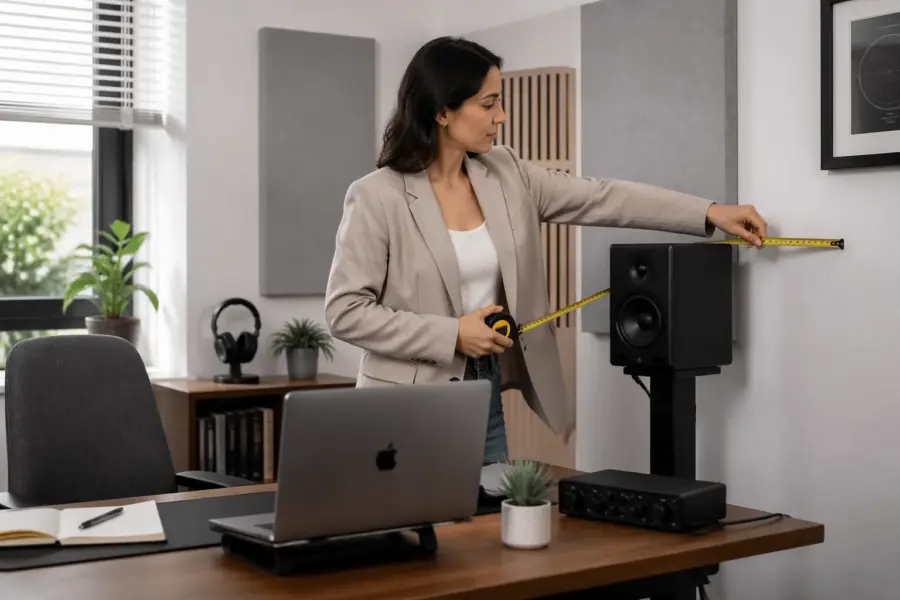
Measure from tweeter to tweeter, not from cabinet edges, because different speakers have different baffle widths. Then measure from each tweeter to the spot between your eyes, since that is where you judge imaging during work.
If you use a laptop sometimes and a larger monitor other times, pick a triangle that works with the largest setup. A triangle that only works when the desk is “perfectly clean” will not survive a normal week.
When the desk forces the speakers too close together, you can still get a stable image by moving your chair closer. A smaller triangle is not automatically worse, it just narrows the sweet spot and makes toe-in more critical.
Try to keep the speakers the same distance from the front edge of the desk, even if you cannot center them perfectly. That keeps the desk reflection timing similar on both sides, which helps the phantom center stay locked.
Mark your ideal speaker footprint with small pieces of tape so you can reset after cleaning or rearranging. In a home office, repeatability is a feature, not an obsession.
If you have a wide desk and you are tempted to spread the speakers far apart, stop when the center starts to sag. A good test is a mono vocal or a podcast voice, because it should sound like a single point in front of you, not two speakers talking at once.
Also pay attention to the angle of your shoulders and head relative to the desk. If you always sit slightly rotated toward a second monitor, the triangle can be “correct” but your listening position is not.
When you find a triangle that works, keep the chair position consistent too. A chair that rolls back six inches changes the entire geometry, and that is enough to make bass and imaging shift in a small room.
Distance from walls: avoiding boundary-related dips
Boundary interference happens when sound from the speaker meets a delayed copy bouncing off a wall, then cancels at certain frequencies. In a small home office, the front wall behind the speakers is usually the first offender.
If you slide speakers forward and back by a few inches and the low end changes a lot, you are hearing those cancellations move around. You want a position that keeps the biggest dip out of the most important bass region for your work, usually 70 to 150 Hz for music and voice weight.
The tricky part is that “more bass” is not always “better bass.” A position that sounds impressive for five minutes can be the same position that makes you under-mix low end because the room is hyping it.
Front-ported speakers can sometimes tolerate being closer to the wall, but the boundary effect still happens because it is about the whole speaker radiating sound. Rear-ported speakers add another variable, because the port output interacts with the wall too.
If you have no choice but to place speakers close to the wall, focus on making both sides equally close. Matched problems are easier to work with than mismatched problems, because at least your stereo balance stays honest.
Side walls matter as well, especially if one speaker is tucked near a corner and the other is not. Corners add multiple boundaries at once, which can make one speaker sound louder and thicker even when the volume knob is identical.
Your listening position has boundary issues too, because the wall behind your head can cause cancellations in the low mids. If your chair is right against the back wall, you are almost guaranteed to hear weird dips that change when you lean forward.
A simple way to sanity-check the low end is to play a slow bass sweep or a track with steady bass notes and move your head a few inches. If the bass changes dramatically with tiny movements, you are in a sensitive spot and placement adjustments will pay off.
Do not forget the ceiling if you are in a small room with hard surfaces. A low ceiling can create strong vertical reflections that make the upper bass and low mids feel boxy, even when the front wall distance seems fine.
Once you find a decent front-wall distance, try not to “fix” bass by changing toe-in or speaker spacing first. Boundary dips are mostly a distance problem, so solve the distance problem before you chase other knobs.
| Speaker distance to front wall | Common result in small rooms | What to try next |
|---|---|---|
| 2 to 6 inches | More bass level, more uneven bass | Add thick absorption behind speakers, re-check toe-in |
| 8 to 14 inches | Noticeable dip shifts upward, kick can hollow out | Move in 1 inch steps, pick the least annoying dip |
| 16 to 24 inches | Smoother low mids, desk reflections get louder | Raise speakers, add desk pad, adjust listening distance |
| 30 inches or more | Cleaner boundary behavior, eats desk space fast | Use stands behind desk, or rotate desk away from wall |
Those numbers are not laws, they are starting points that help you predict what you will hear. The real win is finding a position where kick and bass notes stay consistent across a few songs you know well.
When you test positions, keep the listening level moderate and consistent. Loud playback can trick you into thinking the low end is smoother than it is, because your ears compress and your room rattles fill in gaps.
If you have to choose between losing desk space and getting a cleaner response, consider moving the desk instead of the speakers. Rotating the desk so the speakers fire down the longer dimension of the room often improves bass without buying anything.
Also check what is behind the speakers, because a bare drywall surface behaves differently than a thick curtain or a packed bookshelf. Sometimes the best “distance” is the one that lets you put something soft and deep behind the speakers without blocking vents or outlets.
Height, angle, and toe-in for a stable center image
Start with tweeters at ear height, because most nearfields are designed to be flat on-axis. If you sit high in a task chair, you may need short stands or isolation risers to get the tweeter up where it belongs.
Desk reflections can smear the upper mids, especially around 1 to 3 kHz where clarity lives. I prefer lifting speakers so the tweeter has a clean line over the desktop, even if that means the woofer ends up slightly above the desk surface.
Toe-in is the easiest knob to turn, and you should actually turn it. Aim each speaker so its axis crosses just behind your head for a focused center, then back it off if the top end gets too sharp.
If the center image is wide and vague, increase toe-in a little and re-check that the distances match. If the center image is razor thin but fatiguing, reduce toe-in and consider a small absorber at the first side-wall reflection point.
Height is also about matching left and right, not just hitting a target number. If one speaker is on a stand and the other is on a stack of books, you may be at the right height but still get a tilted image.
Many speakers have a vertical sweet spot that is narrower than people expect. If you are far above or below the tweeter axis, the crossover region can get weird and vocals can lose focus.
A small downward tilt can help when speakers must sit higher than your ears, like on tall stands behind a desk. A small upward tilt can help when the speakers are low but you cannot raise them because of screens or shelves.
Toe-in also changes how much side-wall reflection energy you get. More toe-in usually reduces side-wall splash and increases direct detail, which is great until it makes the top end feel too forward for long sessions.
Use a simple vocal test to dial this in, like a dry voice recording with minimal reverb. When toe-in is right, the voice should feel like it is coming from a stable point between the speakers even when you blink, breathe, and shift in your chair.
Then play something with wide panning and check that the edges do not feel detached from the center. If hard-panned guitars sound like separate boxes instead of part of a stage, your angle and spacing combo probably needs a small adjustment.
Do not ignore the speaker’s own design, because some waveguides like being aimed directly at you and others sound smoother slightly off-axis. If you feel stuck, try tiny toe-in changes of a few degrees and give your ears a minute to adapt.
Finally, check that both speakers are the same height relative to your ears when you are actually working. If you slump when typing and sit tall when listening, you may be hearing two different tonal balances and blaming the speakers.
Handling desk and monitor reflections without wrecking placement
A big monitor between speakers is basically a reflection panel, and it can pull the image upward and forward. You do not have to remove it, but you should stop it from sitting in the direct path between tweeters and ears.
Try lowering the monitor, pushing it back, or using an arm so the screen sits behind the speaker baffles. Even a couple inches of setback can reduce the strongest reflection and make panning easier to judge.
The desktop is the other big reflector, and it is why stands behind the desk often beat speakers sitting on the desk. If you must place speakers on the desk, use isolation pads and tilt them so the tweeter points at your ears without blasting the desk surface.
A thick desk mat helps more than people expect, because it breaks up the hard, smooth surface right where the reflection is strongest. I like a dense felt mat or a large mouse pad style mat, not a thin decorative one.
Monitor placement is not just about reflections, it is about blocking the direct sound too. If the screen edge is in line with the tweeter, you can get diffraction that makes the upper mids feel gritty or phasey.
One simple trick is to keep the speakers slightly forward of the monitor plane, so the sound reaches you before it hits the screen. That is not always pretty on a desk, but it is often audible immediately.
If you run dual monitors, the center seam can be worse than a single screen because it creates two angled reflection surfaces. In that case, consider moving the speakers a little wider and bringing the monitors slightly inward so the tweeters have a cleaner path.
Try to avoid placing small hard objects between you and the speakers, like a metal laptop stand or a desk lamp with a wide shade. Those items create little reflections that add up and make cymbals and consonants feel spitty.
Isolation pads are not just about stopping vibrations, they help you set angle and height quickly. If you can tilt the speaker without stacking random objects under it, you will actually keep the setup consistent.
If your desk is hollow or lightweight, it can resonate and amplify certain notes. You will hear this as a one-note “bloom” that seems to come from the desk rather than the speakers.
Stands behind the desk are ideal when you can manage them, because they decouple the speakers and reduce the desk reflection path. Even small stands that lift the speakers a few inches off the surface can make the midrange cleaner.
Do not overdo the mat idea by covering the entire desk with fluffy material that makes your mouse unusable. You just need something dense in the reflection zone, which is usually the area between the speakers and your keyboard.
If you want a fast check, clap once at your listening position and listen for a sharp “ping” off the desk or monitor. When you reduce that ping, the stereo image usually gets calmer and more stable.
Handling asymmetry from furniture and room features
Most home offices are asymmetrical, with a door on one side, a closet on the other, and a bookshelf doing whatever it wants. The trick is deciding what must be symmetrical and what you can treat or ignore.
Keep the listening triangle symmetrical first, because your brain locks onto direct sound before it judges the room. That means equal distances, matched toe-in, and similar clearance around each speaker, even if the rest of the room is uneven.
If one side wall is close and the other side opens into a hallway, your left and right early reflections will not match. In that case, I would rather sit slightly off-center in the room if it lets both speakers see more similar side boundaries near the front half of the room.
Furniture can help if you use it on purpose, because a stuffed chair or a curtain can tame a harsh reflection. A glass cabinet next to one speaker is a problem, so move it, cover it, or rotate the whole setup until both sides behave closer to the same.
Asymmetry is most damaging when it is close to the speakers or close to your ears. A weird shaped room can be workable if the first few feet around the speakers are reasonably similar left to right.
Doors are sneaky because an open door and a closed door are two different acoustic rooms. If your door position changes during the day, your reference changes too, so pick a default and stick with it when you care about decisions.
Closets can act like bass traps when open and reflective panels when closed, depending on what is inside. If one side of the room has a closet and the other does not, you may need to compensate with a curtain, a shelf, or a panel on the opposite side.
Bookshelves are usually helpful because they add irregular surfaces that break up reflections. The catch is that a half-empty shelf can reflect more than you think, so filling it with uneven items can actually improve things.
Windows are another asymmetry trap, especially if one speaker fires toward glass and the other fires toward drywall. A thick curtain can make the window side behave more like the solid wall side without changing the whole room.
If you cannot fix the room, at least make the speaker environment consistent by matching stands, matching height, and matching distance to nearby objects. Two speakers in two different “micro rooms” will never image as well as two speakers in the same one.
Sometimes the best compromise is rotating the desk so you are not centered between a close wall and an open space. Even a small rotation can move the first reflection points to more similar distances, which helps the stereo field feel balanced.
When you test changes, use mono material and listen for image drift as you move your head slightly left and right. If the image collapses toward one speaker immediately, you likely have a strong reflection or boundary difference on that side.
Do not underestimate soft, reversible fixes like a freestanding clothes rack with a blanket on it. In a home office, flexible solutions beat permanent construction, especially if the room has to serve more than one purpose.
A simple placement workflow you can repeat
When you change one thing at a time, you learn fast, and you can get back to work without spending a weekend chasing perfection. This workflow is built for speaker placement in small home office setups where the desk still has to function as a desk.
Use a tape measure, painter’s tape for marks, and two or three reference tracks you know well. If you can, use a basic measurement app with a calibrated mic later, but your ears can get you most of the way there.
Before you touch the speakers, clear the immediate area so you are not judging changes through clutter. A stack of notebooks beside one speaker and not the other is enough to confuse the results.
Start at a moderate volume and keep it there for the whole process. If you keep turning it up when something sounds better, you will end up choosing the loudest option, not the most accurate one.
Pick reference tracks that cover what you actually do, like a spoken word clip for voice, a bass-heavy track for low end, and a dense mix for imaging. Avoid tracks you only like because they sound good on everything, because they hide problems instead of revealing them.
When you move speakers forward and back, move them together so the triangle stays intact. If you change multiple variables at once, you will not know what fixed the issue or what made it worse.
After you find a good spot, take a quick photo of the setup from above and from your chair. That photo is a reset button for the next time you bump a stand or re-route cables.
If you do use measurement tools, use them to confirm decisions rather than to make decisions for you. A smoother graph is nice, but what matters is whether you can judge level, panning, and tone without second-guessing.
Finally, live with the new placement for a day before you declare victory. Your ears adapt quickly, and a setup that seems “different” at first can reveal itself as more reliable after a few normal work sessions.
- Pick a listening spot centered on the desk
- Set tweeters at ear height
- Match tweeter-to-head distances
- Set speaker spacing for a near equilateral triangle
- Start toe-in crossing just behind your head
- Move speakers forward or back in 1 inch steps to reduce boundary interference
- Mark the best positions with tape on the desk or stands
Once you mark the positions, commit to them and stop nudging speakers casually. If you need to move them for a meeting, move them back to the tape marks when you are done.
Re-check your triangle every few months, because chairs change, desks shift, and stands get bumped. A two-minute measurement check can save you from weeks of mixing around a problem you accidentally created.
If you share the room with someone else, make the marks obvious and explain why they matter. It is easier to keep a good setup than to rebuild one after it slowly drifts out of alignment.
When you add new gear like a bigger monitor or a mic boom arm, treat it like a change to the room. Place it, listen, and adjust, because small objects in the wrong spot can undo the work you just did.
Conclusion
Good placement is a chain, and the weak link is usually geometry, not gear. If you build a workable equilateral triangle, manage boundary interference with sane wall distances, and dial toe-in carefully, the room stops arguing with you.
Small rooms will always have quirks, but repeatable setup habits beat endless tweaking. Once you find positions that lock the center image and smooth the low end, mark them and treat everything else as secondary.
The payoff is not just better mixes, it is faster decisions and less fatigue during long days. When the speakers behave predictably, you stop chasing problems that are really just placement mistakes.
If you only do one thing after reading this, measure and match distances, then set toe-in with intention. Those two habits alone fix most small home office speaker setups more than any plug-in or foam kit ever will.


