If your home office studio with glass door sounds weird in the high end, you are not imagining it. Glass is a mirror for sound, and nearfield monitoring puts that mirror uncomfortably close to your speakers and ears.
I have worked in plenty of spare rooms where everything measured fine in the bass, yet the stereo image still snapped left and right depending on the day. The common thread was a shiny door or window sitting right at the first reflection point.
The good news is you can fix most of the problem with geometry, not expensive gear. A few inches of movement, smarter reflection control, and a realistic plan for treating a door can make mixes translate again.
Why glass surfaces are tricky in nearfield setups
Glass reflects mid and high frequencies with very little loss, so it acts like a bright secondary speaker. In a nearfield setup, that reflection arrives fast enough to smear transients and mess with imaging.
You can hear it as a papery top end on vocals, splashy cymbals, or a phantom center that refuses to lock. It is the same reason clapping in a room with a sliding door sounds sharp and short.
The nearfield advantage is that the direct sound is strong, but the disadvantage is that early reflections are proportionally louder. A home office studio with glass door often has the door close to one speaker, so the problem is uneven from the start.
That unevenness is where asymmetry fixes matter, because your brain expects both channels to behave similarly. If the left side has a hard reflective panel and the right side has a bookcase, the stereo field tilts even when your monitors are matched.
Another reason glass is tricky is that it stays reflective across a wide range of angles, so you do not get the gentle rolloff you might get from a couch or a curtain. Even when the reflection is not perfectly aimed at you, it can still add a bright haze that makes the room feel smaller than it is.
Nearfield listening also makes timing differences more audible, because your ears are comparing small arrival-time changes between channels. A few milliseconds of extra path length off the door can create comb filtering that feels like a moving EQ when you shift in your chair.
Glass doors are often framed by hard trim, handles, and nearby drywall, so the reflective area is bigger than it looks. That cluster of hard surfaces can behave like one large boundary, especially for short wavelengths like upper mids and highs.
People sometimes assume the problem is only “brightness,” but the bigger issue is coherence. When the reflection is strong, the direct sound and reflected sound fight over localization cues, and the image becomes unstable even if the tonal balance seems acceptable.
If you do any editing, the glass effect can be obvious on clicks, consonants, and snare transients, because those sounds are rich in upper mids. You might find yourself de-essing harder or softening attacks, when the real culprit is the room adding a second version of the same transient.
It also affects reverb decisions, because early reflections in the room mask the early reflections in your reverb plugins. You can end up picking longer, darker reverbs to hide the room glare, and then the mix feels washed out everywhere else.
Identify the glass door’s reflection paths from your speakers
Start with the simplest tool, a handheld mirror, because it shows you what the speaker “sees” from the listening position. Sit where you mix, have a friend slide the mirror along the glass, and mark the spots where you can see each tweeter.
Those marks are your first reflection points, and they are usually the loudest offenders for harshness and image wobble. If you work alone, you can tape a mirror to the door at ear height and move your head instead, but it is slower.
Next, check the path from the speaker to the door to your ears, because angles matter more than distance at this stage. A reflection that bounces straight to your head is worse than one that skims away toward the back wall.
Do not forget the desk, because the desk can bounce sound into the glass and back again as a two hop reflection. That combo can create a narrow, annoying peak that makes you turn down 3 kHz on everything.
While you are doing the mirror test, also note how much of the glass is actually “visible” to each speaker. If one monitor can see almost the entire door and the other can only see a sliver, you already know why the image keeps pulling.
It helps to do the test at tweeter height and again a little lower, because the desk and chair can change the effective angle. A reflection that misses your ears when you sit upright might hit you when you lean forward to type.
Pay attention to the door handle area, because metal hardware can create a tiny but intense reflection. It is not usually the main problem, but it can add a sharp “tick” that makes the whole door feel worse than it measures.
If you have measurement software, use it as a confirmation tool instead of the first step. A simple impulse response or ETC view can show you how strong the early reflection is, but the mirror tells you exactly where to fix it.
Also check whether the door is slightly angled in its frame or if it flexes when it is not fully latched. Small changes in angle can change where the reflection lands, which is why the room can feel different when the door is cracked versus fully closed.
Once you have the reflection points marked, take a photo so you can recreate the plan later. It is surprisingly easy to forget the exact spots after you move furniture around or clean the room.
Desk and speaker placement strategies to reduce glare
Before you buy treatments, move the setup so the glass door is not at a perfect specular angle to one tweeter. A small rotation of the desk, even 5 to 10 degrees, can redirect the strongest reflection away from the listening position.
Speaker toe-in is your friend here, but only if you use it deliberately instead of copying a random photo online. Aim the tweeters so their axes cross just behind your head, then adjust until the center image is solid without making the top end razor sharp.
Try to keep the listening position and the two speakers in a consistent triangle, because random spacing changes can create new problems while you chase the door reflection. If you change distance, do it in small steps and listen for image stability before you change anything else.
In a door-heavy room, it often helps to move the whole setup a few inches away from the glass side, even if it feels slightly off-center visually. You are not trying to center the desk in the room, you are trying to center the sound at your head.
If the door is behind one speaker, pulling that speaker forward can reduce how much energy hits the glass at a direct angle. Even a small offset can change the reflection path enough that the worst bounce no longer points at your ears.
Do not ignore vertical placement, because a door reflection can be stronger when the tweeter is aimed at the middle of the glass. Sometimes raising or lowering the speaker changes the reflection point to a less harmful area, like the door frame where you can treat a smaller section.
Keep the monitors off the desk if you can, because desk coupling adds its own set of reflections and resonances. Small stands or isolation pads can reduce vibration and also give you more freedom to adjust height and angle.
If you have a wide desk, consider pushing the monitors slightly narrower than you think you want, then re-check panning. A narrower spacing can reduce sidewall and door excitation, and you can regain width with careful toe-in rather than raw distance.
It can also help to keep the speakers a little closer to you, within reason, because the direct-to-reflected ratio improves as you reduce distance. The goal is not to sit uncomfortably close, but to make the direct sound clearly dominate the early reflections.
| Move | What it changes | When it helps most |
|---|---|---|
| Rotate desk 5 to 15 degrees | Redirects first reflections off the glass | Door sits near one speaker |
| Increase speaker toe-in slightly | Reduces side splash, tightens phantom center | Image pulls toward the glass side |
| Pull speakers 4 to 10 inches forward | Changes timing of desk and door reflections | Top end sounds phasey on vocals |
| Lower monitor height 1 to 2 inches | Reduces desk bounce into the door | Desk surface is wide and reflective |
| Narrow the speaker spacing a bit | Less energy hits side boundaries | Room is small and bright |
After each placement change, listen for the point where the center image “clicks” into place rather than hovering. That click is a sign you reduced a dominant early reflection or at least made both sides behave more similarly.
If you are tempted to fix the glare by turning down the tweeter or using a darker EQ curve, pause and make sure you are not just compensating for the door. A good placement change usually makes the sound smoother without sacrificing detail.
When the door is on one side, it can be useful to slightly increase toe-in on the door-side speaker only, as a controlled asymmetry. The idea is to aim its strongest energy more toward you and less toward the glass, while keeping overall tonal balance consistent.
Keep notes as you move things, because it is easy to lose track of what actually improved the sound. A simple “before and after” note about vocals, snare, and center image can save you from undoing the best change by accident.
Balance the opposite side so stereo imaging stays stable
Once the glass side is calmer, the other side can become the new problem if it is too dead or too cluttered. Stable imaging needs similar reflection behavior on both sides, even if the room cannot be perfectly symmetrical.
A common home office studio with glass door has a wall on one side and open space or a closet on the other. That mismatch makes panning decisions unreliable, because the early reflections carry different tonal color in each ear.
Good asymmetry fixes often mean adding absorption or diffusion to the non glass side so both sides “sound” equally hard or equally soft. You do not need identical furniture, but you do want comparable reflection control within the first few feet from each speaker.
If the opposite side is an open doorway, a thick curtain on a tension rod can act like a temporary wall for high frequencies. If the opposite side is a bare wall, a 2 to 4 inch panel at the first reflection point can keep it from outshining the treated glass door.
Think of it as matching the “early reflection signature,” not matching the décor. If one side gives you a bright slap and the other side gives you a dull thud, your brain keeps re-centering the image and you feel that as instability.
Sometimes the opposite side is too absorptive because it is packed with clothes, soft chairs, or thick curtains, and that can be just as confusing. In that case, adding a bit of diffusion or a reflective element away from the first reflection point can restore balance without making the room harsh.
Be careful with placing a big absorber on only one side, because it can make the stereo field feel wider on one side and narrower on the other. If you add a panel to the glass side, plan a comparable panel or comparable effect on the other side.
If your room forces you into a lopsided layout, use the listening position as the anchor and build outward. You can often get 80% of the benefit by controlling reflections in the first few feet, even if the rest of the room stays imperfect.
Also consider what happens when the door opens, because an open glass door changes the boundary into an angled reflective flap. If your opposite side stays constant but the glass side changes daily, the imbalance becomes a routine problem instead of a one-time setup issue.
A quick way to test side balance is to play pink noise in mono and slowly pan it left and right. If one side gets brighter faster or feels closer, you have a reflection mismatch that will show up in real mixes.
When you get the sides closer in behavior, you will notice you can set vocal level and reverb level faster. That speed is a good sign, because it means the room is no longer arguing with your decisions.
Choose window-like treatments that fit a door layout
A door needs to open, so the best treatment is one you will actually use every day. The goal is to tame the first reflection point on the glass without turning the door into a permanent construction project.
For most rooms, a heavy curtain on a ceiling track is the easiest win, because you can park it to the side when you need the door. Look for dense fabric and real fullness, because a flat sheet does almost nothing above the low mids.
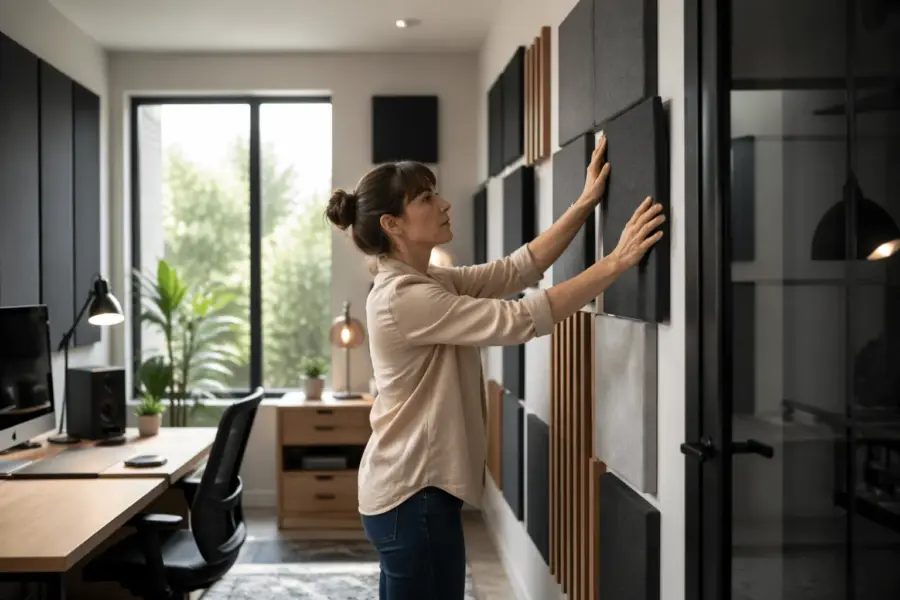
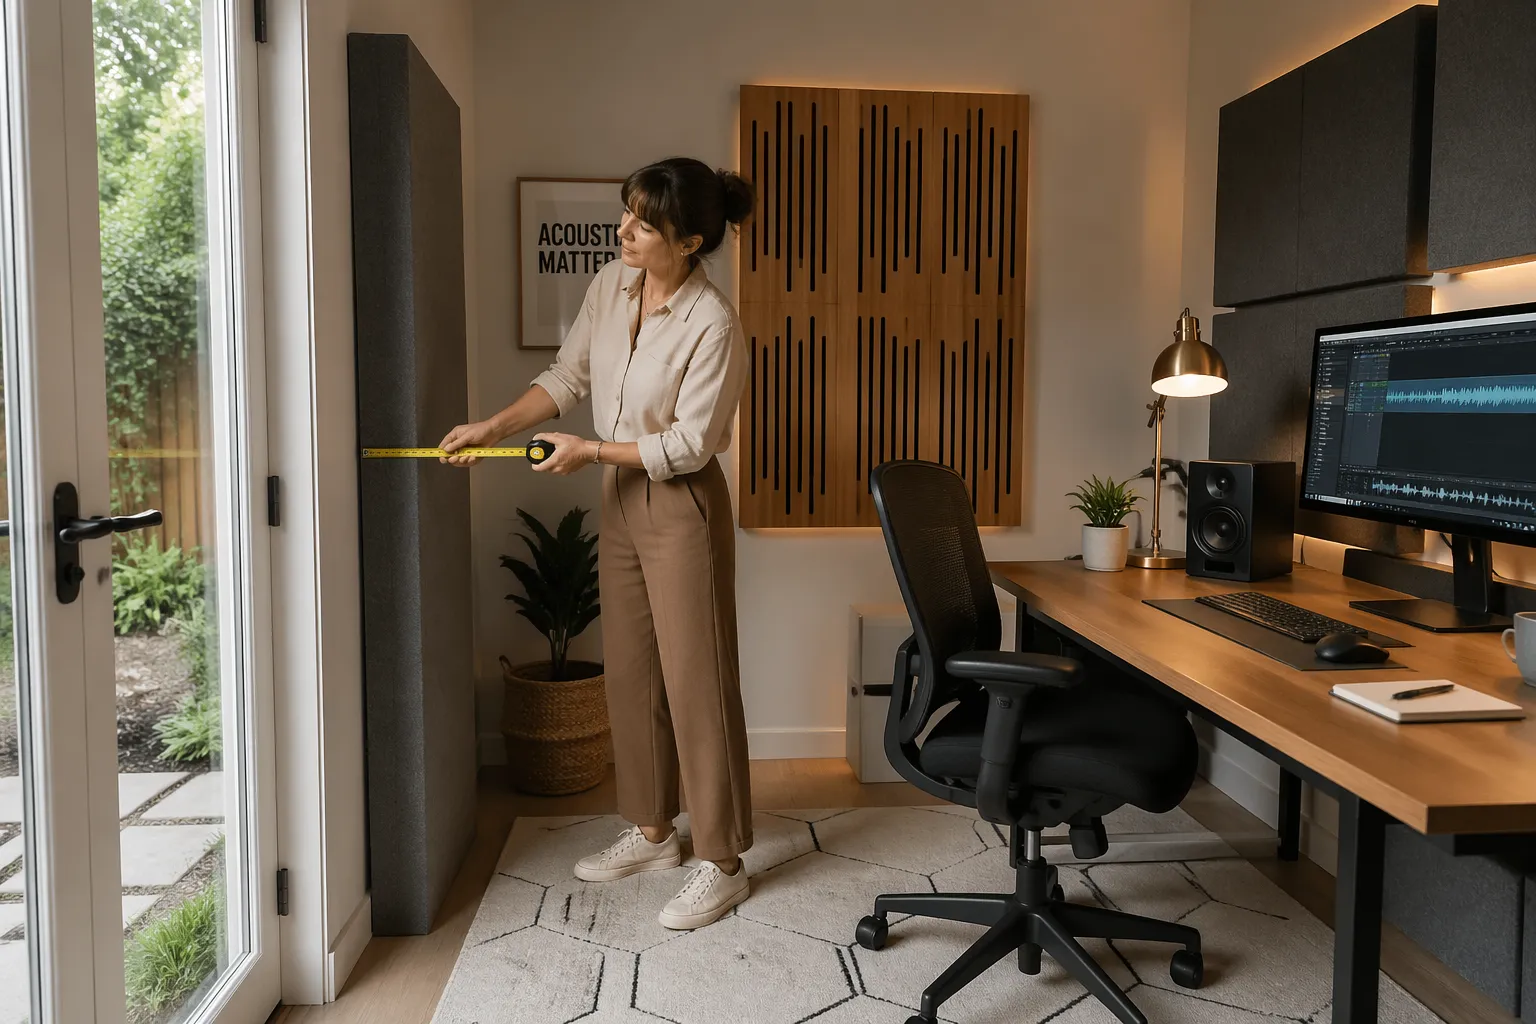
If curtains are not practical, consider a removable absorber panel that hangs from over door hooks, similar to a hotel blackout setup. A 2 inch fiberglass or mineral wool panel with a fabric wrap can work well, and you can lift it off when you need the door clear.
A third option is a clear acrylic secondary layer spaced a couple inches off the glass, which changes the reflection timing and can reduce the “ping” you hear on claps. It is less effective than absorption, but it can be a compromise when you need light and a clean look.
If you go the curtain route, prioritize coverage of the marked reflection points rather than trying to cover every inch of glass. You can often get most of the benefit by treating the section that the tweeter “sees,” especially in a compact desk setup.
Fullness matters because folds create multiple small angles, which reduces a single strong reflection. A curtain that is two to three times the width of the door opening usually behaves more like an acoustic treatment than a decorative drape.
Pay attention to how the curtain hangs at the bottom, because a curtain that floats far off the floor can leak a strong reflection under it. A little extra length or a weighted hem can keep it from acting like a reflective slot.
For removable panels, make sure the mounting method does not rattle, because rattles can show up as buzzing on bass notes. Simple felt pads between hooks and door surfaces can keep the setup quiet and also protect the door finish.
If you need the door to stay usable for traffic, consider treating only the upper half where the tweeter line of sight usually hits. That approach keeps the handle area accessible and makes the panel lighter and easier to remove.
Another practical option is a freestanding gobo you can roll in front of the door during mix time. It is not as sleek, but it avoids modifying the door and it can double as a vocal reflection filter when you record.
Whatever you choose, aim for repeatability, because the room should sound the same every time you sit down to work. If the treatment is annoying to deploy, you will skip it on busy days and your mixes will drift.
Quick checks to confirm you improved the sound
After each move, run a short reality check so you do not chase your tail for an afternoon. Use one mono vocal track and one percussive track you know well, and keep the monitoring level consistent.
The first thing I listen for is whether the phantom center stays put when I lean a few inches left and right. If the image collapses toward the glass side, you still have an early reflection or a side level mismatch.
Next, listen to sibilance and consonants, because those are the first things glass makes annoying. If “S” sounds change character when you turn your head, the door reflection is still too strong or too uneven.
Then check a dry snare or rimshot, because it reveals comb filtering quickly. A clean transient should sound like one event, not a tiny double-hit with a bright aftertaste.
I also like to listen quietly for a minute, because harsh reflections often show up more at low levels. If the mix stays clear and centered when you turn down, you are usually moving in the right direction.
If you have a mono button, use it and do not be gentle about it. A room with a strong early reflection often makes mono feel smaller and more nasal than it should, even on well-produced reference tracks.
Finally, do a quick “door state” check by listening with the door open and closed if that is part of your normal day. If the difference is dramatic, you may need a treatment that works regardless of door position.
- Mono vocal stays centered when you shift in the chair
- Snare attack sounds crisp without a glassy “shh” tail
- Panned hi-hats keep the same brightness left vs right
- Reverb tails sound smooth, not comb filtered
- Pink noise image feels even across the front
- Clap test loses the sharp “tick” near the door
If you want one extra sanity check, play a reference mix you trust and focus on where the lead vocal sits. In a good setup it feels anchored, not like it is floating closer to the door side.
Do not over-test with too many tracks, because you will start hearing differences that are just arrangement choices. Two or three consistent references are enough to tell you whether the room is improving.
Why small geometry changes beat “more foam” in a door-heavy room
People love buying foam because it feels like progress, but foam rarely targets the real issue with a glass door reflection. The strongest problem is the early specular bounce, and geometry decides whether that bounce hits your ears at all.
If you rotate the desk so the first reflection shoots behind you, you remove the nastiest part of the artifact before you treat anything. Then your treatment can be smaller, thinner, and easier to live with.
Geometry also protects your mixes from day to day changes, like the door being open during a call and closed during a mix session. When the setup is less dependent on that one surface, you stop mixing around a moving target.
I also like geometry first because it keeps the room from getting too dead, which happens fast in small offices. A room that is controlled but still has some life is easier to work in for long hours.
Foam is usually thin, so it mostly affects the very top end, and that can create a false sense of improvement. You might reduce hissy brightness while the real comb filtering in the upper mids stays, which is the part that makes vocals feel “phasey.”
Geometry changes, on the other hand, reduce the strength of the reflection across a broader range because you are reducing how much energy reaches the glass in the first place. That is why a five-degree rotation can sound like a bigger upgrade than a pack of panels.
Another issue with “more foam” is that it often gets placed where it is easy, not where it is needed. If the first reflection point is on the door and you put foam on the wall behind the monitors, you are treating the wrong problem and wondering why nothing changes.
In a door-heavy room, you also need solutions that are reversible and practical, because doors are functional objects. Geometry lets you improve the sound without turning the room into a permanent studio build that the rest of the household hates.
Once geometry is solid, targeted absorption becomes more effective because it is dealing with smaller leftover issues. That is the point where a curtain, a panel, or a gobo feels like a finishing move instead of a desperate fix.
It is also easier to troubleshoot when you change one variable at a time, and geometry changes are easy to undo. If you add foam everywhere at once, you cannot tell which surface was actually causing the image shift.
Use speaker height and desk surface to control the bounce into glass
Desk reflections are sneaky because they arrive almost as quickly as side reflections, and they often carry a bright edge. When that desk bounce then hits the glass door, it can come back as a narrow band glare that makes you second guess EQ moves.
Raise the speakers so the tweeters are at ear height, then check if the desk surface sits in the line between tweeter and ears. If it does, you can often reduce the bounce by lifting the monitors a couple inches, angling them down slightly, or using smaller stands behind the desk.
A big glossy desk is basically a reflector, so a desk mat can help more than people expect. I like dense felt or a thin rubber topped mat, because it knocks down the highest frequencies without turning the desk into a sponge.
If your door is close to the desk edge, keep the speaker fronts slightly ahead of the desk front edge. That move reduces the amount of sound that skims the desk and heads straight into the glass.
Monitor angle matters because tweeters are directional, especially above a few kHz. A small downward tilt can reduce how much high-frequency energy hits the desk, which reduces the amount that can ricochet into the door.
If you use monitor stands, check that they are not creating a shelf that reflects upward. A flat stand plate can behave like a mini desk, so a little absorption on the stand surface can sometimes clean up the top end.
Keyboard trays can help because they reduce the reflective area directly under the monitors. If you can lower the main desk surface in the acoustic line of sight, you often reduce the “zing” without changing anything else.
Try removing reflective objects from the desk during mixing, like tablets, glossy notebooks, or a second monitor angled like a mirror. Those items can bounce sound into the glass door in ways that make the door seem guilty when it is really a chain of reflections.
If you have two computer screens, angle them so they do not create a V-shaped reflector pointing at your face. A small change in screen angle can reduce a bright hotspot that you might have blamed on the door.
Once the desk bounce is under control, the door treatment can be lighter and still effective. You are essentially reducing the number of ways that high-frequency energy can find its way to that glass surface.
When to treat the door versus when to treat the wall behind you
The door is the obvious shiny object, but the back wall can be the real offender if you sit close to it. A strong rear wall reflection can combine with the door reflection and create a weird “halo” around the mix.
If your chair is within about 3 feet of the back wall, put some absorption behind you even if the door is untreated for the moment. That back wall treatment makes it easier to hear what the door is doing, because you remove one competing reflection path.
If you have to pick one treatment first, pick the surface that has the cleanest line of sight between speaker and ear. In many home office studio with glass door layouts, that is the door at the side, but in tight rooms it can be the wall behind your head.
A practical approach is to treat the door for early reflections and treat the back wall for comfort, because long sessions in a slapback room are exhausting. Your ears fatigue faster when early reflections stack up, and you start mixing too bright to compensate.
A useful way to decide is to think in terms of what you are hearing: image shift usually points to side reflections, while a “slap” or “flutter” feeling often points to front-to-back reflections. If your room feels like it talks back after every snare hit, the back wall probably needs attention.
If the door is exactly at the first reflection point and the back wall is far away, treat the door first because it is the earliest and strongest. Early reflections do more damage to imaging than later reflections that arrive after your brain has locked onto the direct sound.
If you cannot treat the door immediately, treating the back wall can still improve decision-making by reducing overall clutter in the time domain. It will not fix the door glare, but it can make the room less fatiguing and make the remaining problem easier to identify.
Sometimes the best move is to treat both lightly rather than one heavily, especially in a small office. A moderate panel behind you plus a curtain on the door can outperform an extreme solution on only one surface.
Also consider what you do in the room besides mixing, because recording in the same space changes priorities. If you record vocals with the door behind the mic, a door treatment can help both monitoring and recording with one change.
If you use headphones part of the time, you might be tempted to ignore the back wall, but it still affects how you judge speakers when you switch back. Consistency matters, because your ears adapt quickly and then punish you when the room changes again.
Common asymmetry fixes that do not ruin the room’s look
Most home offices are shared spaces, so you need fixes that pass the “normal room” test. You can get a lot of reflection control with items that already belong in an office.
A tall bookshelf with uneven depths works as light diffusion, especially if you mix books and storage boxes. Place it on the side opposite the glass if that side is too bare, and you will often hear the stereo image stop leaning.
A floor lamp with a fabric shade can soften a hot spot if the glass door is close to your right speaker and you cannot move the desk. It is not a substitute for a panel, but it can take the edge off while you plan a better door treatment.
If you already have a whiteboard or framed art, move it away from the first reflection point because it is a reflector too. People treat the glass and forget the shiny frame on the opposite side, then wonder why the imaging still drifts.
A thick area rug can help if you have hard floors, because floor reflections can interact with side reflections and make the room feel brighter than it should. It will not fix the door by itself, but it can reduce the overall “sparkle” that makes the glass stand out.
Plants are surprisingly useful when placed thoughtfully, because leaves and irregular shapes break up high-frequency energy. A large plant near the door side can slightly reduce the intensity of a reflection path without looking like studio gear.
Soft seating on the non-glass side can help you match the door side after you treat it with a curtain or panel. The goal is not to absorb everything, but to avoid one side being a hard mirror while the other side is a soft pillow.
If you need something more “studio-like” but still subtle, fabric-wrapped panels in neutral colors can look like minimalist art. Placing one at the first reflection point on the opposite wall is often enough to stabilize the image.
Try not to stack too many small fixes in random places, because it can create a patchy acoustic response. A few deliberate moves at the correct reflection points usually look cleaner and sound more predictable.
Lighting and screens also matter, because glossy surfaces behave like little glass doors. If you can, angle computer monitors slightly so they do not reflect sound straight back at you, and keep shiny accessories away from the speaker lines.
The best-looking rooms usually hide the acoustic intent inside normal choices, like heavier curtains, a bigger rug, and a bookshelf that is actually useful. When the room looks normal, you are more likely to keep it set up correctly and not “temporarily” move things that break the sound.
Conclusion
A home office studio with glass door can sound clean and trustworthy, but you have to respect how fast glass reflections arrive in nearfield monitoring. Start with geometry, confirm the reflection paths, and use speaker toe-in as a controlled tool instead of a guess.
Then match both sides with sensible asymmetry fixes, because stereo imaging depends on balance more than perfection. With basic reflection control on the door and a few quick listening checks, your mixes stop fighting the room and start sounding like your monitors again.
The main mindset shift is to treat the door like a predictable acoustic boundary, not a mysterious flaw in your speakers. When you control the first reflections and keep the setup repeatable, you can trust your decisions and work faster.
Once the room is stable, you will notice that small mix moves translate better outside the office. That is the real win, because it means your home office studio with glass door is no longer the hidden collaborator on every track.


