
Voice recording in a home office is usually ruined by the same two things, flutter echo and boxy midrange buildup. Both problems get worse when you pick the wrong acoustic panel thickness for voice recording and then place the panels where they look nice instead of where they work.
I care less about perfect graphs and more about what you hear in a real Zoom call or a podcast intro. If your voice sounds papery, nasal, or like it is bouncing off a closet door, panel thickness and placement are the fastest fixes.
Most people buy 1-inch foam, stick it behind the monitor, and wonder why the room still sounds harsh. Speech lives in the midrange, but the room problems that make speech ugly often sit lower than you think.
This guide focuses on practical choices, 1-inch, 2-inch, and 4-inch panels, plus when an air gap behind panels can outperform a thicker slab. The goal is a clean, controlled voice that stays natural, not dead and muffled.
You do not need a studio build-out to get there, but you do need to think like a microphone. The mic is brutally honest about the first reflections and the low-mid smear that your ears often ignore in the moment.
Panel thickness is not a vibe choice, it is a tool choice, and the tool has to match the room. A small, hard room demands different treatment than a carpeted bedroom with a big open closet.
If you are recording voice, you are also recording the room’s timing, because reflections arrive right after the direct sound. That is why the same mic can sound broadcast-ready in one space and cheap in another.
Good treatment does not have to make the room silent, it just has to stop the room from arguing with your voice. Once the early reflections are under control, your mic technique and processing suddenly start working the way tutorials promise.
Why thickness matters for voice and speech
Thickness changes how low a panel can absorb, and that matters because voices are not just “high frequencies.” Even a normal speaking voice has energy down into the 100 to 200 Hz range, and those lows shape warmth and boom.
If the room rings in the low mids, your mic hears it as chesty mud and a weird honk on certain syllables. You can EQ some of it later, but you cannot EQ out a room reflection that is arriving a few milliseconds late.
Midrange absorption is the workhorse for speech clarity, because that is where consonants and intelligibility live. The catch is that thin panels often absorb the upper mids and highs first, leaving the lower mids to smear around the room.
That uneven absorption is why a room can sound less bright but still sound cheap. A thicker panel shifts the absorption curve downward, so the room stops “talking back” in the range that makes voices sound boxy.
Think of thickness as how far down the panel can reach before it gives up. If your panels only grab the top end, you end up with a room that feels quieter but still sounds like a cardboard box on recordings.
Speech is full of fast transients, especially on T, K, P, and S sounds, and reflections blur them into a fuzzy edge. When the midrange reflections are controlled, those consonants snap into place without needing harsh EQ boosts.
The other reason thickness matters is that your room is not one problem, it is a stack of problems. Flutter echo is obvious, but the low-mid buildup is the part that makes you keep re-recording takes because the voice never feels settled.
If you are using a cardioid mic, it still hears the room, just less of it. The reflections that bounce off the wall behind the mic and return into the front of the capsule are often the ones that create that hollow, phasey tone.
Distance also changes what the mic captures, because a close mic makes the direct voice louder relative to the room. Even then, a bad room can still leak into the recording as a midrange haze that makes compression sound ugly.
When you compress voice, you raise the quiet parts, and the quiet parts are where the room lives. Thicker panels reduce that room tail, so your compressor works on your voice instead of pumping the space.
For most home offices, the “voice range” that needs help is not just 2 kHz sparkle, it is the 200 to 800 Hz mess. That is exactly the range where thin foam tends to underperform, even if it looks like it should be doing something.
Thickness is also about consistency, because a room that absorbs evenly sounds natural. A room that only absorbs highs sounds like you threw a blanket over the mic, while the boxiness stays untouched.
Once you hear the difference, it is hard to unhear it, especially on spoken word. A thicker or better-spaced panel makes the voice sound like it is coming from a person in front of you, not from inside the room.
1-inch, 2-inch, and 4-inch panels compared
One-inch panels are basically a treble tamer, and they work best for killing slap echo on bare drywall. They can help if your room is painfully bright, but they rarely solve the core acoustic panel thickness for voice recording problem.
Two-inch panels are the default for a reason, because they hit the speech band well without eating half the room. In most home offices, 2 inch vs 4 inch panels is the real decision, because 1-inch is usually too thin to be satisfying.
Four-inch panels start to control lower mids in a way you can hear immediately on spoken word. If you have a deeper voice, a dynamic mic close to your mouth, or a small room, 4-inch often sounds more expensive and less “roomy.”
The downside of 4-inch is simple, they are bulkier, cost more, and you can overdo it in the wrong spots. If you cover every wall with thick panels, you can end up with a dull top end while the true low bass still bounces around.
With 1-inch panels, you usually get the immediate “less zing” effect, which can trick you into thinking the job is done. Then you record and realize the voice still has that hollow center, because the room’s low mids are still fully alive.
One-inch can still be useful as a finishing layer, especially on small, reflective surfaces like closet doors or a big bare cabinet. It is also fine for taming a nasty flutter between two parallel walls when you already have thicker treatment elsewhere.
Two-inch panels tend to be the best value because they start to behave like real broadband absorbers in the speech range. They are thick enough to matter, but thin enough that you can place them where they need to go without turning the room into a maze.
If you are doing video calls, 2-inch panels also look more like intentional decor than a recording booth. That matters because panels you are willing to keep installed permanently are the panels that actually improve your daily audio.
Four-inch panels are where you stop fighting the room and start controlling it. The first time you put a 4-inch panel on the back wall and the “box” disappears, it feels like switching microphones even though you changed nothing else.
Four-inch is also more forgiving when placement is not perfect, because it covers a wider band and reduces more of the energy that causes that midrange bloom. That does not mean you can throw it anywhere, but it gives you a bigger margin for error.
If your room already has soft stuff, like a couch, a bed, and thick curtains, you might not need 4-inch everywhere. In that case, a few strategic 4-inch panels can do the heavy lifting while 2-inch fills in the reflection points.
If your room is mostly hard surfaces, 4-inch can prevent the “treated but still harsh” feeling that happens when only the highs get absorbed. You want the room to sound controlled, not just darker.
Foam deserves a quick reality check here, because a lot of 1-inch products are foam while 2-inch and 4-inch are often fiberglass or mineral wool. Material matters, but thickness is the lever you can feel immediately on voice, especially in small rooms.
If you are trying to decide between buying more 2-inch panels or fewer 4-inch panels, think about your worst wall. The wall closest to your mic position usually benefits more from thickness than the wall across the room.
Also consider what you do with the room when you are not recording. A couple of 4-inch panels on stands can be moved, while a full room of 2-inch panels might be easier to mount and forget.
When an air gap beats a thicker panel
An air gap behind panels increases low frequency absorption by moving the absorber away from the wall boundary. For voice work, even a 2-inch panel with a smart air gap behind panels can behave closer to a thicker build in the low mids.
I prefer an air gap when the wall is the reflection culprit but you cannot spare the depth of a full 4-inch panel everywhere. A 2-inch panel spaced 2 inches off the wall is often a better use of space than a flush-mounted 4-inch panel in a cramped office.
The reason the gap works is that sound pressure and particle velocity behave differently near a boundary. You are basically placing the absorber where the air movement is stronger, which makes the same material do more work.
In practice, an air gap is also a way to “tune” without buying new panels. If you already own 2-inch panels and the room still feels boxy, spacing them off the wall is often the cheapest audible upgrade.
Air gaps shine behind the mic and behind the monitor wall, because those are usually the closest hard surfaces in a desk setup. Those surfaces create fast reflections that land right in the intelligibility range, and the gap helps the panel catch more of that energy.
They also help on the back wall when you sit close to it, because the reflection path is short and strong. A spaced panel can reduce that “room in a shoebox” effect without making the room feel claustrophobic.
You do not need a fancy mounting system to create a gap, but you do need stability and safety. Simple spacers, French cleats, or a sturdy picture-hanging method can keep the panel off the wall while still looking clean.
Do not overthink the exact gap size, because even a small gap is better than none. A one-inch gap is still a meaningful change, and a two-inch gap is a common sweet spot for voice rooms.
A big gap can be great, but it can also start to intrude into your usable space, especially in a narrow office. If you are constantly bumping into panels with your chair, you will eventually take them down, and then the room goes back to sounding bad.
Another benefit is that spaced panels can reduce the “over-absorbed highs” feeling, because you can use fewer panels to get the same low-mid improvement. That keeps the room from turning into a dull, lifeless space where your voice loses air.
If you are mixing voice with background music, a balanced room is easier to work in. You want the voice to be dry enough for clarity, but not so dead that your editing decisions feel unnatural.
An air gap is not a bass trap replacement, but it is a strong step toward broadband control. For many speech-only setups, that step is enough to make the recording sound “finished” before you touch any plugins.
| Panel setup | What it does best for voice | Where it usually fits |
|---|---|---|
| 2-inch flush on wall | Controls midrange absorption and flutter echo | Side walls, door wall, behind camera |
| 2-inch with 2-inch air gap | Improves lower mid control without huge thickness | Behind mic, behind monitors, tight rooms |
| 4-inch flush on wall | Stronger low mid absorption, less boxiness | Front wall, back wall, first reflection zones |
| 4-inch with 2-inch air gap | Best broadband control short of bass traps | Back wall in small rooms, corners near desk |
If you want a quick rule, treat the air gap like “free thickness” as long as you can afford the depth. It is one of the few acoustic tricks that feels like cheating because it is so effective for the cost.
Also remember that a gap works best when the panel material is actually absorptive to begin with. Spacing cheap, thin foam off the wall helps a little, but it will not suddenly turn it into a low-mid absorber.
If you are trying to keep the room looking minimal, air gaps can let you use fewer panels overall. Fewer, better-performing panels usually look cleaner than many small panels plastered flat across the wall.
Matching thickness to your room size and desk distance
Room size changes what “too thin” means, because small rooms push problems into the low mids faster. A 9×10 spare bedroom often needs thicker treatment than a big open office, even if you record at the same volume.
Desk distance matters because your mic hears the closest boundaries first, usually the wall behind the monitor and the wall behind your head. If your chair is 12 inches from a wall, you will hear that wall, and 1-inch panels will barely dent the problem.
For a typical desk setup with the mic 18 to 30 inches from your face, 2-inch panels at the reflection points are the baseline that rarely disappoints. If you sit close to the back wall, stepping up to 4-inch on that wall is one of the cleanest upgrades you can buy.
If your room is larger but has hard surfaces, like a glass window and a wood floor, thickness is only half the story. You can keep 2-inch panels, add a rug and thick curtains, and still get a tighter sound than randomly adding more 4-inch slabs.
Small rooms create short reflection paths, which means the reflections arrive quickly and blend with your direct voice. That is why a tiny office can sound “phasey” even when it does not sound very echoey to your ears.
In a bigger room, you often hear more obvious reverb, but it can be easier to tame with a few well-placed panels. In a small room, you are fighting density of reflections, so thickness and placement become more critical.
Desk distance also includes the ceiling, because many home offices have low ceilings. If your mic is below a hard ceiling and you have no cloud, you can get a sharp reflection that makes S sounds spit and makes the voice feel “close but harsh.”
The wall behind your monitor is a common offender because it is usually bare and close to the mic. If you can only treat one surface, treating that front wall often gives you a bigger improvement than treating a random side wall.
The back wall behind your chair is the next big one, because it sends reflections straight into the mic’s pickup pattern. This is where 4-inch panels or a 2-inch panel with a generous air gap tend to pay off fast.
Side walls matter most when they are close and parallel, because they create flutter and a “shouty” quality. Two-inch panels at ear height on the side reflection points are a simple fix that makes monitoring and recording feel calmer.
If you record with the mic very close, like 4 to 6 inches away, you can sometimes get away with slightly less treatment. The tradeoff is that close miking increases plosives and proximity effect, which can make low-mid issues feel worse if the room is untreated.
If you record farther away, like 12 to 18 inches for a more natural sound, you need more room control. That is where thicker panels and a ceiling cloud stop being optional and start being the difference between “roomy” and “professional.”
Furniture can help, but it is not a substitute for proper absorption in the right places. A bookshelf can break up reflections a bit, but it will not stop the low-mid buildup that makes voice sound like it is trapped in the room.
If you are in a rental and cannot mount heavy panels everywhere, prioritize the closest boundaries first. A few well-placed panels on stands, plus a cloud if possible, will outperform a full wall of thin foam every time.
Also consider how you sit during recording, because posture changes your head position relative to boundaries. If you lean forward to read a script, your distance to the monitor wall changes, and so does the reflection timing.
When you match thickness to geometry, you stop chasing your tail with plugins. The room becomes stable, and your voice sounds consistent from take to take and from day to day.
Panel density basics (without overcomplicating it)
People get obsessed with density numbers, but the simple rule is that the material must let air move through it. If you blow through the panel and air passes, it can absorb, and if it feels like a brick, it tends to reflect.
For common fiberglass or mineral wool panels, mid densities usually work well for broadband absorption. Ultra dense boards can work, but they are easier to misuse, especially if you mount them flat and expect bass control.
For speech, I would rather have a correctly placed 2-inch panel of decent material than a fancy high density panel stuck in the wrong spot. The mic does not care about marketing, it cares about what happens in the first 20 milliseconds after you talk.
If you are building DIY panels, pick a commonly used insulation that has published absorption data and stick to consistent thickness. You will get more predictable midrange absorption, and you can tune the room with placement instead of guessing.
Density matters because absorption is basically friction, and friction needs airflow through the fibers. If the material is too open, it does not slow the air enough, and if it is too closed, the sound does not get in far enough to be absorbed.
For voice recording, you are not trying to solve sub-bass like a nightclub, you are trying to smooth the low mids and kill early reflections. That is why “good enough” broadband material is usually the right call.
Foam is often marketed with big claims, but most thin foam is only reliable in the high frequencies. If you like foam for aesthetics, treat it like a supplement, not like the foundation of your room.
Fabric choice matters too, because the covering has to be breathable. If you wrap a panel in a thick, airtight material, you can reduce the absorption and end up with a panel that looks great and performs worse.
If you are buying pre-made panels, look for real specs or at least a reputable manufacturer that publishes data. You do not need to read charts all day, but you want to avoid products that are basically decorative tiles.
For DIY, consistency is your friend because it keeps the room predictable. When every panel is a different thickness and density, you can accidentally create a room that is uneven, where some frequencies die and others hang around.
Also be realistic about safety and comfort, because voice work is usually long sessions. Properly wrapped fiberglass or mineral wool panels are safe when built correctly, but sloppy builds can shed fibers and make the room unpleasant.
If you want to keep it simple, pick a standard broadband material, use 2-inch or 4-inch thickness, and focus on placement. Most “density debates” are really “placement problems” wearing a lab coat.
Once the room is under control, you will notice you can back off aggressive noise reduction and harsh de-essing. That is a good sign that the panels are doing the right kind of work, not just darkening the sound.
Density is also why some panels feel like they do nothing even when they are thick. If the material is wrong, thickness alone will not save it, so it is worth buying or building panels that are known to perform.
Simple layouts that work with each thickness
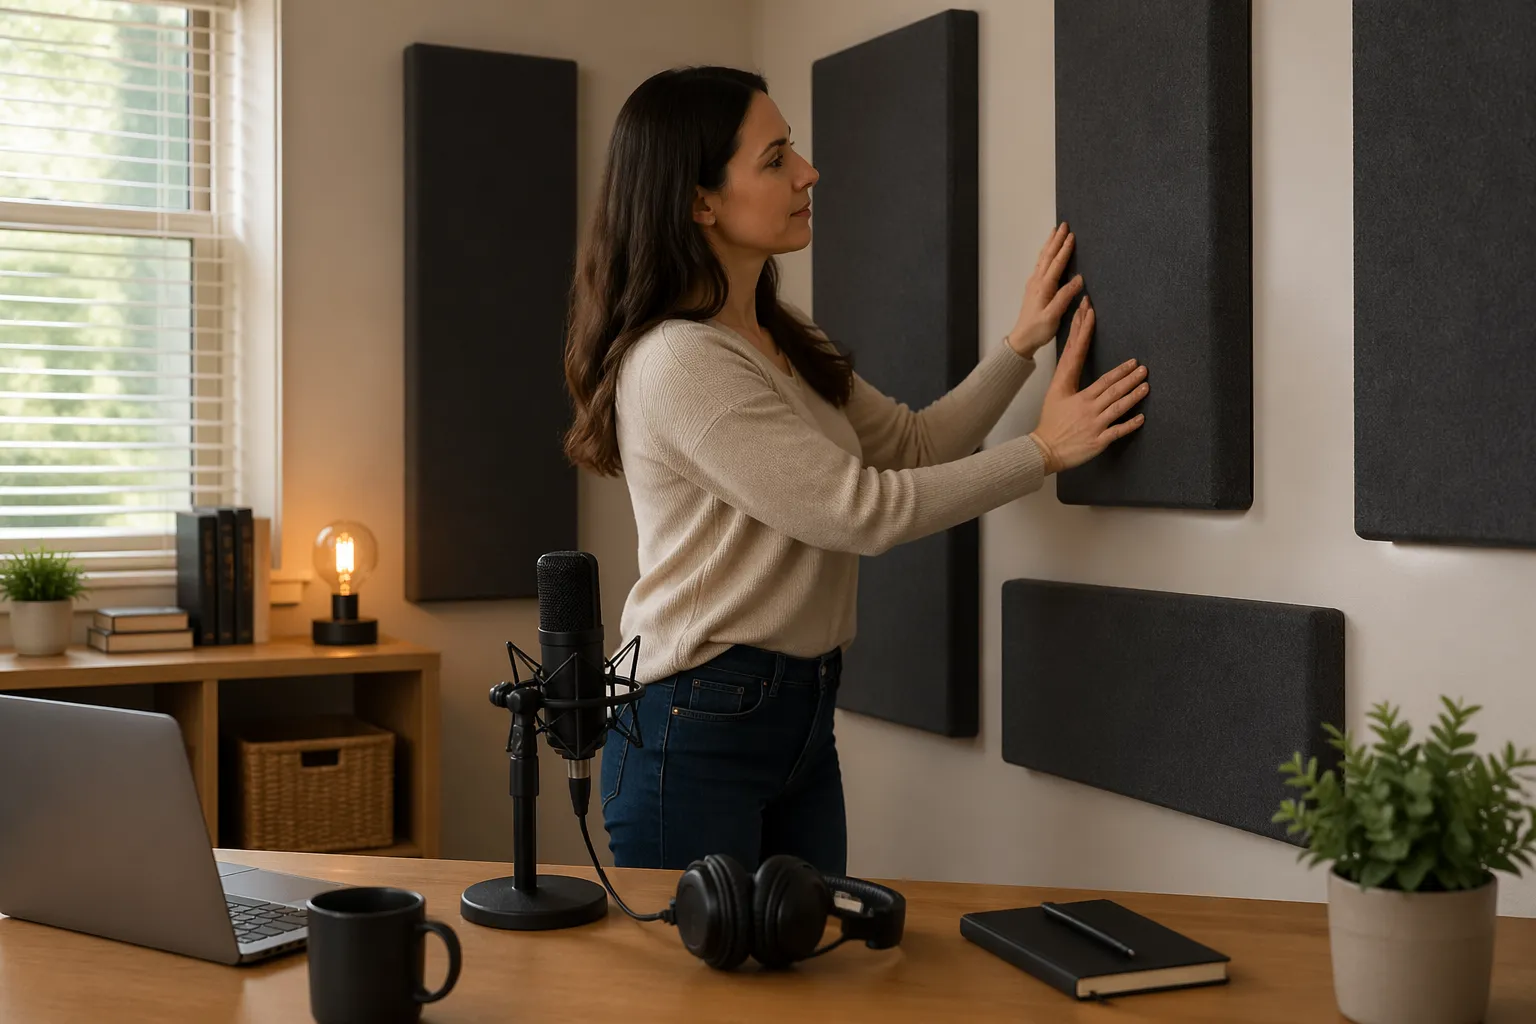
Layout beats quantity, because a few panels in the right places can make your voice sound like it is recorded in a treated booth. Start with the wall you face, the wall behind you, and the two side reflection points around the desk.
Once you control those early reflections, you can decide if you need to go thicker or just add coverage. The best acoustic panel thickness for voice recording depends on how close your boundaries are and how much of the room is still bare.
The easiest way to think about layout is to imagine a flashlight beam coming out of your mouth and bouncing off surfaces into the mic. Wherever that bounce is strong and fast, that is where panels do the most for speech.
First reflection points are not just for mixing rooms, they matter for voice too. If your mic is picking up a strong side-wall reflection, it can make the voice sound wider but also more comb-filtered and weird.
Behind the mic is often more important than people expect, especially with cardioid mics in small rooms. The mic rejects from the rear, but it still hears reflections that wrap around and arrive at the front.
A back wall panel behind your chair is one of the most reliable fixes for the “office bathroom” sound. If you can only afford two thick panels, putting them on that wall is rarely a mistake.
Ceiling clouds are underrated because they are out of sight, but the ceiling is a huge reflective surface. A cloud helps both your recording and your monitoring, because it reduces the vertical slap that makes rooms feel tense.
If you are doing video, you can place panels just outside the camera frame and still get the benefit. You do not have to turn your background into a wall of foam to get clean audio.
For 1-inch panels, think “spot treatment” for obvious high-frequency issues. They are best used to break up a specific flutter path, not to solve overall voice quality.
For 2-inch panels, think “core reflection control” around the desk. A handful of 2-inch panels placed correctly can make a normal office sound like it has been professionally tuned for calls and narration.
For 4-inch panels, think “boxiness killers” on the closest big boundaries. They are especially effective on the back wall and front wall, and they also work well as chunky corner panels when you cannot build full bass traps.
If you have to choose between treating the wall and treating the door, treat the wall first unless the door is a giant hollow reflector. Doors can be surprisingly reflective, but the main walls usually dominate the early reflections in a desk setup.
Try to keep panels at roughly head height when seated, because that is where the reflections hit. Panels near the floor can help a little, but they often miss the main reflection paths for voice.
Symmetry helps if you are also monitoring audio, but voice recording can be more forgiving. The priority is stopping strong reflections from the nearest surfaces, even if the room ends up slightly asymmetrical.
If you want the room to stay natural, leave some reflective surfaces in play. A controlled room is not the same as a dead room, and a little life can keep your voice from sounding like it is trapped in a pillow fort.
- Two 2-inch panels at left and right first reflection points
- One 2-inch panel with a 2-inch air gap behind the monitor
- Two 4-inch panels on the wall behind your chair
- One ceiling cloud, 2-inch or 4-inch, centered over the desk
- Corner bass trap panels, 4-inch minimum, in the two closest corners
- Door wall panel, 2-inch flush, to cut slap echo on exits
If you follow a layout like that and the room still feels off, it is usually because one boundary is closer than the others. That is when you add thickness or an air gap on the closest wall instead of buying random extra panels.
It also helps to treat the room in stages, because each stage changes what you notice. After the first reflection points are handled, the remaining problems become clearer and easier to solve.
Do not ignore the corner near your desk, because desks often sit in corners by necessity. A thick corner panel can reduce the low-mid bloom that makes voice sound like it is coming from inside the furniture.
If you record standing up, the layout shifts upward, but the logic stays the same. Treat the surfaces closest to the mic and the surfaces that create the strongest early reflections back into the mic.
How to tell if you need more low-end control
If your voice sounds clear but still has a “whoom” or a hollow thump on certain words, you probably have a low frequency room mode. You hear it most when you lean back, move your head, or change where you speak by a foot.
Clap tests are fine for flutter echo, but they are bad at revealing bass problems. Record yourself reading the same paragraph while you slowly roll your chair forward and back, then listen for notes that swell or vanish.
If the low end changes a lot with tiny position shifts, thicker panels on flat walls will help only a little. That is when you start thinking about corner traps, thicker 4-inch panels with an air gap behind panels, or both.
You also see it in your EQ habits, because you keep cutting 120 to 250 Hz and the voice still sounds weird. When you fix the room, you can use smaller EQ moves and keep the voice sounding like a person instead of a filter.
Another clue is when your voice sounds different depending on the time of day, even though nothing obvious changed. Temperature, humidity, and even whether a door is open can shift modes just enough to make the low end feel inconsistent.
If you find yourself moving the mic around to “find a spot” where the voice sounds normal, that is a low-end control problem. A stable room lets you put the mic where it should be for performance, not where it should be to dodge a room mode.
Listen for the low mids after compression, because compression reveals what the room is doing. If the voice starts to sound like it is breathing or swelling in the background, the room is still contributing too much low-mid energy.
Headphones can hide room problems while you monitor, but they cannot hide them in the recording. If the recording sounds fine in headphones but messy on speakers, you are probably hearing a low-mid buildup that needs physical treatment.
You can also do a simple hum test, where you hum a steady note and walk around the room. If the hum gets louder in corners and quieter in the center, that is a sign the room is storing energy that panels on flat walls may not fully solve.
Low-end control is also about corners because corners are where pressure builds up. That is why corner traps and thick corner-mounted panels tend to outperform adding more thin panels on random flat surfaces.
If you have a deep voice, you will notice these issues sooner because your fundamental and low harmonics excite the room more. That does not mean you need a full studio build, but it does mean 4-inch panels and corner treatment become more valuable.
If you have a higher voice, you can still have low-mid issues because rooms ring regardless of your pitch. The “boxy” range is often about the room dimensions, not just the speaker’s voice type.
Do not confuse proximity effect with room modes, because they can stack on top of each other. If you move closer to the mic and the boom increases, that is proximity effect, but if the boom changes when you move around the room, that is the room.
A good sign you have enough low-end control is when your voice stays similar as you shift slightly in your chair. It will never be identical, but it should not feel like the room is changing microphones on you.
Once the room is controlled, your EQ becomes about taste instead of rescue. That is when a gentle high-pass and a small presence move can be enough, instead of aggressive cuts that make the voice thin.
Conclusion
If you want a safe recommendation, 2-inch panels are the best starting point for most home offices, and they handle midrange absorption well enough to clean up speech. When the room is small or the back wall is close, 4-inch panels usually sound tighter and more natural.
The smartest upgrade is often spacing panels off the wall, because an air gap behind panels can push absorption lower without eating your whole room. Treat the early reflection points first, then add thickness where the room still sounds boxy.
Do not get stuck on the 2 inch vs 4 inch panels debate as if one is always right. Pick the acoustic panel thickness for voice recording that fits your geometry, then place it like you care about what the mic actually hears.
If you take one idea from this, let it be that thin treatment in the wrong places is mostly decoration. A few correctly placed panels, with the right thickness or a smart air gap, can change your recordings more than swapping microphones.
Start with the closest walls, because that is where the strongest reflections come from. Once those are controlled, you can decide whether the room needs more coverage, more thickness, or just better spacing.
Keep the goal practical, which is a voice that sounds clean on calls and confident on recordings. You are not trying to eliminate all sound in the room, you are trying to eliminate the parts that make speech sound cheap.
When you get it right, you will notice you can speak at a normal level and still sound present and clear. That is the point where your room stops being a problem and starts being a tool.


