Bass problems show up fast in a home office studio, because the room is small and the listening position is close to every boundary. If your mixes sound tight on headphones but boomy on speakers, subwoofer placement in a small office studio is usually the first thing to fix.
I like practical methods that work even when you cannot rebuild the room, move a door, or add a wall of traps. A sub can make a small setup translate better, but only if you treat placement like a measurement task, not a guess.
This article lays out a step by step process you can do in one evening with a phone, a tape measure, and patience. You will use the sub crawl, pick a sane crossover frequency, and then lock in phase alignment so the sub and mains act like one system.
If you have ever felt like the low end changes every time you lean back in your chair, you are not imagining it. In a small office, a few inches can be the difference between a solid kick and a hollow hole.
The good news is that you do not need perfect acoustics to get a usable result. You just need a consistent process and the discipline to change one thing at a time.
What makes sub placement tricky in small rooms
Small rooms pack the low frequency modes close together, so a few notes can jump out while others vanish. That is why the same sub sounds “fine” in the living room and weird in a small office studio.
Those modes are basically the room acting like an instrument, with certain frequencies ringing louder depending on dimensions. When the room is short in length, width, or height, the first few modes land right in the kick and bass range.
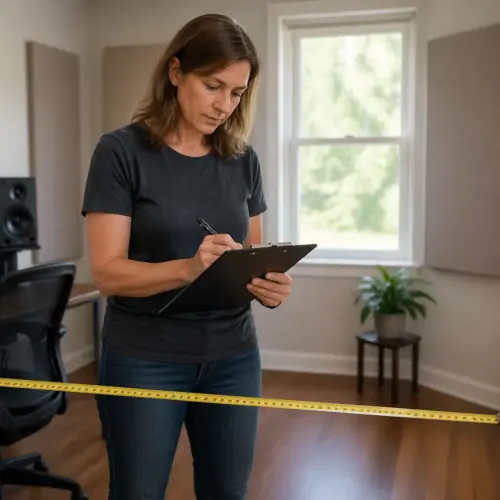
Distance to walls matters more than people expect, because boundary gain and cancellations start immediately below about 200 Hz. Move a sub six inches and you can change the level at 60 Hz by several dB at the chair.
That sensitivity is why copying someone else’s “best spot” rarely works, even if your rooms look similar. Your exact wall distances, furniture, and listening position shift the math enough to change the outcome.
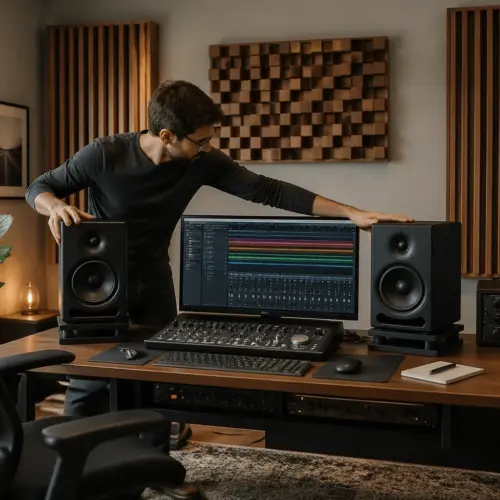
Your desk is also a big reflective surface, and it can create a notch in the upper bass where the sub and mains overlap. If you hear punch disappear around the kick drum’s body, the desk and the crossover region are often part of the problem.
Desktop reflections are sneaky because they do not sound like an obvious echo, they sound like missing energy. You can end up boosting 90 Hz in your mix to compensate, then the track explodes everywhere else.
Many home office studios force the listening position against a wall, and that spot is famous for exaggerated bass. If you can pull the chair forward even 8 to 12 inches, do it before you blame the sub.
Sitting against the back wall also makes timing cues worse, because reflections arrive almost immediately. Even if you cannot move far, a small change plus a thick cushion or bookshelf behind you can reduce the worst of it.
Another issue is that nearfield monitoring reduces the room’s influence in the mids and highs, but the lows still fill the whole room. That mismatch is why the top end can feel stable while the bass feels like it has a mind of its own.
Doors, closets, and windows also act like pressure leaks that change how the room holds low frequencies. An open door can shift the perceived bass balance, which is why you should set up with the room in its normal working state.
Finally, a lot of small office studios have asymmetry, like a desk jammed into a corner or a side wall that is closer on one side. Asymmetry is not automatically bad, but it can make left and right bass behavior different, which complicates integration.
Choosing a crossover and setting a clean starting point
Start by deciding what the sub is supposed to do, which is usually to cover the range your mains struggle with cleanly. In small nearfield setups with 4 to 6.5 inch woofers, a crossover frequency around 70 to 90 Hz is a common landing zone.
That range is popular because it is low enough that the sub is hard to localize, but high enough that small monitors are not forced into high excursion. When your mains stop working hard below the crossover, distortion drops and the midrange often clears up.
If your monitors are ported and get messy near their tuning, crossing a little higher can sound cleaner even if it feels counterintuitive. If your monitors are larger or sealed, 60 to 80 Hz often integrates with less localization.
Do not assume the number on the spec sheet tells you the real usable low end, because many speakers are rated at a friendly dB point. If your monitors claim 45 Hz but sound strained there, treat them like they are honest to 70 Hz and plan accordingly.
Set every “enhancement” off at first, including room EQ, bass boost, and any cinema mode on the sub. You want a plain baseline so your next moves tell you something real.
It is tempting to turn on auto EQ early because it feels like progress, but it can hide placement problems. If you EQ first, you may end up correcting a null that is actually a time alignment issue, and that rarely ends well.
Set the sub’s low pass to your target crossover, set the slope to whatever your gear allows, and set the phase to 0 degrees for now. If your interface or monitor controller has a high pass for the mains, engage it at the same crossover so you are not double counting bass.
If you do not have a high pass for the mains, you can still integrate a sub, but you will be balancing overlap instead of handing off cleanly. In that case, a slightly lower crossover and careful level matching can keep the overlap from sounding thick.
Set the subwoofer’s volume to a conservative starting point, because you want to hear changes in smoothness during placement. If the sub is blasting, every position will sound “impressive” and you will pick the wrong spot.
Also choose a consistent monitor volume for setup, because bass perception changes with level. A moderate level that you can tolerate for an hour is better than a loud level that makes you rush.
If your sub has a variable low pass and your monitors roll off naturally, you may need to treat the crossover as a region rather than a single number. The goal is a smooth combined response from about an octave below to an octave above the crossover point.
Doing the sub crawl the right way
The sub crawl works because it flips the problem around, letting you search for smooth bass where the sub could sit. In subwoofer placement in a small office studio, this is the fastest way to avoid the classic “one note bass” corner trap.
It also forces you to judge positions by what you actually hear, not what seems logical from the furniture layout. The room does not care that a corner is convenient, it cares about pressure zones and reflections.
Put the sub on your chair at ear height if possible, play a loop that covers 30 to 120 Hz, and crawl the perimeter at floor level with your head where the sub would go. Mark spots that sound even, not spots that sound loud, because loud usually means a peak that will ruin translation.
If putting the sub on the chair is impossible, put it on a sturdy box or a small table at roughly seated ear height. The point is consistency, because you want the crawl to represent what the sub will do when it is on the floor in that same spot.
Move slowly and pause in each location long enough to notice whether certain notes jump out. A smooth spot often sounds slightly less exciting at first, but it stays consistent as the bass line changes pitch.
Do not limit yourself to corners, because mid-wall positions can be surprisingly good in small rooms. If you have space, check along the front wall, side walls, and even a few feet into the room where a sub could realistically live.
Take notes like “front wall left third” or “right wall near desk leg,” because you will forget after ten minutes of crawling. Painter’s tape on the floor is a simple way to mark candidates without committing to anything.
If you are using a phone app for a rough SPL readout, treat it as a trend indicator, not a lab instrument. You are looking for fewer big swings as you move, not a perfect flat line.
When you find two or three promising spots, compare them with the same audio at the same volume. The best spot is the one where the bass line keeps its shape, not the one where the room shakes.
Also consider practicality, because a perfect spot that blocks a drawer or a doorway will not stay perfect once you move it. A slightly less ideal spot that you can keep consistent often wins in the long run.
| What to play during the crawl | What “good” sounds like | What to avoid |
|---|---|---|
| Slow sine sweep 20–200 Hz | Few obvious jumps in level | Big “whoom” notes at one pitch |
| Warble tone at 50–80 Hz | Steady loudness while you move | Hollow spots where bass drops out |
| Kick and bass loop you know well | Kick body stays consistent | Kick changes into a sub “thud” |
| Pink noise filtered 30–120 Hz | Even rumble without buzzing | Room “ringing” that hangs on |
If you only have time for one test signal, use a slow sine sweep and repeat it a few times. The sweep makes peaks and nulls obvious, and it helps you notice ringing that masks detail.
Once you pick a spot, place the sub there and return it to normal orientation on the floor. Recheck from the listening position before you commit, because sometimes the crawl reveals a good area but the exact final placement still needs small nudges.
It is normal to end up with the sub slightly off-center, even if your monitors are symmetrical. Symmetry is nice, but smooth response at the chair is the real target in a small office studio.
Phase and polarity: getting the sub and mains to add up
After you pick a location from the sub crawl, integration depends on phase alignment at the crossover region. If the sub and mains arrive out of time, they cancel and you get a dip right where you need punch.
This cancellation is why some setups sound like they have plenty of sub bass but no kick definition. The low end is there, but the crossover region is hollow, so the groove loses impact.
Polarity is the blunt tool, and phase is the fine tool, so start with polarity first if your sub has a 0/180 switch. Play a tone at the crossover frequency, flip polarity, and keep the setting that gives more level at the listening position.
Do this test at a moderate volume, because room rattles can trick you into thinking one setting is better. You are listening for stronger, more solid bass at the chair, not more noise from the room.
Now adjust phase, which might be a knob labeled 0 to 180 or 0 to 360, or it might be a distance setting in an AVR style menu. Move it slowly while playing a tone near the crossover frequency, and stop where the bass sounds strongest and tightest, not where it rattles the room.
If your sub has a continuously variable phase knob, make small moves and give your ears a second to adapt. The “best” point is often a narrow zone, and rushing past it makes you think phase does nothing.
Try a second tone slightly above and below the crossover, like 10 Hz up and 10 Hz down, to make sure you are not optimizing for one frequency only. A good integration point usually improves a small band, not just a single note.
If you use measurement software like REW, confirm by looking for the smoothest combined response through the crossover band. The best phase alignment often looks like the mains and sub traces crossing without a deep notch, and it usually sounds like the kick drum snaps back into place.
Even a simple measurement mic can save time here, because it shows you whether you are fixing a dip or creating a new one. If you do not have a mic, you can still do it by ear, but you should repeat the test the next day with fresh ears.
Remember that phase alignment is tied to distance, so moving the sub later will change the phase setting that worked. That is another reason to finish placement first and treat phase as a final integration step.
If your sub is far from the mains, the crossover can start to feel detached, especially if you cross too high. In small rooms, keeping the crossover lower and the phase aligned helps the bass feel like it comes from the front stage instead of a random corner.
Some subs also include a “delay” or “time” control, which is basically phase expressed in milliseconds. Use the same approach and aim for the strongest, cleanest sum around the crossover rather than chasing a specific number.
Level matching so bass sounds even (not louder)
Most people set the sub too hot because louder bass is exciting for about ten minutes. For mixing and long workdays, the goal is even bass that does not call attention to itself.
In a small office studio, a hot sub also makes the room sound worse, because peaks get louder and decay longer. That extra ring can make you think your mix has too much sustain when it is really the room ringing.
Start with the sub gain low, then raise it until the low end fills in but the midrange does not seem to shrink. If vocals and guitars feel like they moved backward, the sub level is probably masking the lower mids.
Pay attention to the 150 to 300 Hz area, because that is where “warmth” turns into “mud” fast. If that region feels thicker when the sub comes on, you may be crossing too high or running too much level.
Use a few references that you know are balanced, like a well mixed pop track and a dry kick and bass recording. If every reference suddenly sounds “clubby,” that is not accuracy, it is a level mistake.
It helps to use references that are not bass-forward, because they reveal when the sub is exaggerating the low end. A track with a simple kick pattern and steady bass notes is easier to judge than a dense master with heavy limiting.
A simple check is to bypass the sub and listen to the mains alone at the same monitor volume, then re enable the sub and confirm that the mix gets deeper but not thicker. When level matching is right, you miss the sub when it is off, but you do not notice it when it is on.
Another check is to turn the sub off and on while listening to spoken voice or a podcast at the same level. If the voice changes tone dramatically when the sub is on, the crossover or level is probably bleeding too high into the low mids.
If your sub has an auto-on feature, disable it during setup so it does not click in and out while you work. Consistency matters, and small interruptions can throw off your judgment.
Give your ears breaks, because low frequency judgment gets worse when you are fatigued. A five minute pause can do more for accuracy than another five minutes of knob turning.
Once you think the level is right, live with it for a day and check a few mixes in the car or on earbuds. If your mixes suddenly come out thin everywhere else, you probably ran the sub too loud at the desk.
Fixing desk and wall interactions around the crossover
In a home office, the desk and the front wall can mess with the crossover region more than the sub itself. That is why you can nail subwoofer placement in a small office studio and still hate the 80 to 120 Hz area.
This range is where wavelengths are long enough to involve the room, but short enough to be affected by furniture and speaker height. It is also where a lot of the “chest” of a kick and the weight of bass guitar live.
If your monitors sit on the desk, try lifting them on stands or isolation risers so the tweeters aim at your ears and the woofers clear the desktop edge. A couple inches can reduce a comb filter dip that makes bass sound disconnected from the rest of the mix.
Isolation also reduces the desk acting like a soundboard, which can add a fake resonance that is hard to identify. If your desk buzzes or hums on certain notes, you will chase that problem in your mix decisions.
Try pulling the monitors forward so their front baffles are closer to the desk edge, because that changes the reflection timing. If you can, keep the monitors and sub on the same front wall plane so the system behaves more predictably through the crossover frequency.
If the monitors are pushed back toward the wall, you can get a strong cancellation in the upper bass that makes you overcompensate. Sometimes the simplest fix is just reclaiming a few inches of desk depth for better speaker placement.
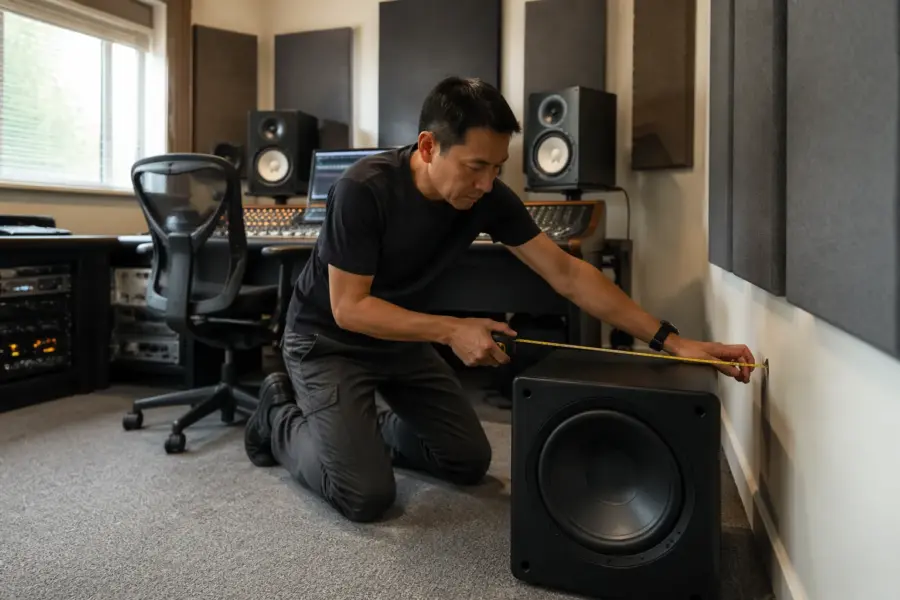
Front wall distance also controls SBIR, which is the cancellation caused by reflections off the wall behind the speakers. If you cannot move the desk, you can sometimes move the sub closer to the front wall to shift the cancellation down where the sub can handle it better.
For monitors, the common approaches are either very close to the front wall or far enough that the cancellation lands lower than the speaker’s range, but small rooms rarely allow the “far enough” option. That is why many office setups do better with speakers closer to the wall and careful low end management.
Side walls matter too, especially if one speaker is near a wall and the other is near an open space. If you can, keep the left and right monitor distances to side boundaries similar so the bass does not pull to one side.
If you have a big screen on the desk, it can reflect mid and upper frequencies, but it can also change how you position the speakers. A small change in speaker spacing can shift the crossover perception because your listening position changes relative to the room.
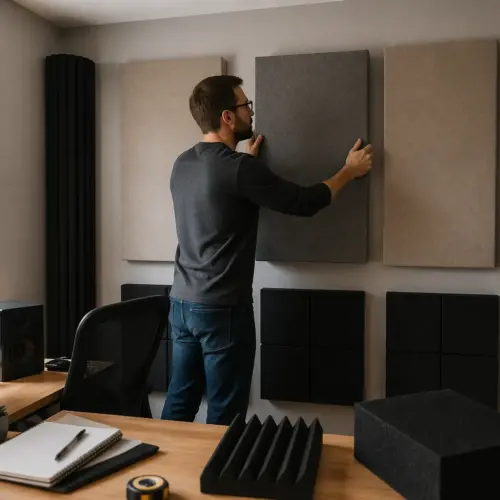
Small acoustic panels at the first reflection points help the stereo image, but they do not fix low frequency nulls by themselves. Still, cleaning up the mids and highs makes it easier to judge bass, because you are not distracted by harsh reflections.
If you can add any bass trapping, prioritize corners behind the monitors and the wall behind the listening position. Even two thick corner traps can reduce decay and make the sub feel tighter at the same level.
Do not forget mechanical issues like a hollow desk, a loose picture frame, or a rattling lamp. A rattle can make you think the sub is distorted when it is really the room complaining.
A quick checklist for repeatable results
Once you get a decent result, lock it in with a repeatable routine, because small rooms punish random tweaking. The sub crawl, crossover frequency choice, and phase alignment steps work best when you do them in the same order every time.
Repeatability matters because your ears adapt quickly, and you can talk yourself into almost any setting after an hour. A checklist keeps the process boring, and boring is what you want when you are trying to be accurate.
This checklist is the version I use when I help friends set up a spare bedroom or office studio. It keeps you from “fixing” the same problem three different ways and losing track of what changed.
If you make a change, write it down, even if it feels silly. Notes like “sub moved 10 cm left” or “phase from 0 to 70” save you from looping back to a worse setting later.
It also helps to take a quick photo of the final positions, especially if your office doubles as a living space. When you have to move things for a meeting, you can put them back without starting over.
- Set monitor and chair positions first
- Pick a starting crossover frequency, 70–90 Hz for small mains
- Disable room EQ and bass boost while placing the sub
- Run the sub crawl and mark two candidate spots
- Choose the spot with smoother bass, not louder bass
- Flip polarity at the crossover tone, keep the louder setting
- Adjust phase for maximum tightness at the chair
- Level match with reference tracks, then recheck the next day
After you complete the list, do one more pass at normal working volume and confirm nothing feels exaggerated. If the bass only sounds right when it is loud, it is probably not balanced.
Recheck after a full day of work, because fatigue changes how you perceive low end. If you still trust the bass after hours of listening, you are close to a stable setup.
If you later add a rug, a couch, or a bookshelf, expect the bass to shift slightly. Furniture changes absorption and reflection, so treat big room changes like a reason to redo the phase and level steps.
If you use room correction after placement, apply it gently and confirm it is not trying to boost deep nulls. A small cut to a peak is usually helpful, but a big boost often just eats headroom and makes the sub work harder.
When two subs make sense in a home office
Two subs can help in small rooms, but not because you want more bass. You want smoother bass across a small listening area, with fewer deep nulls that no EQ can fix.
The main win is consistency, especially if you move a little in your chair or if you have a second seat for a client. Two subs can make the “good spot” larger, so you are not mixing in a tiny sweet spot that disappears when you lean forward.
A single sub excites a set of room modes from one spot, so the response at the chair can have sharp peaks and holes. Two subs placed in different locations can average those modes, which often makes the low end easier to trust at lower volumes.
In practice, this can mean fewer extreme dips around 60 to 100 Hz, which is where a lot of small rooms struggle. When those dips are reduced, you stop over-EQing bass instruments to compensate for what the room is doing.
The most practical two sub layouts in a home office are front wall midpoints, or one front wall and one side wall near the middle. Avoid stacking them in the same corner unless you need output, because that usually reinforces the same problems you are trying to escape.
Another workable approach is putting one sub near the front left and the other near the front right, as long as you can manage cables and power. The goal is not symmetry for its own sake, it is exciting the room differently so the average response improves.
Two subs also add setup complexity, because you still need phase alignment between each sub and the mains, plus alignment between the subs. If you do not have measurement tools, you can still do it by ear, but plan on spending time and keeping notes.
If the subs have different models or different tuning, integration gets harder, so matching subs is usually the easier path. Even with matching subs, you should expect to adjust level and phase more carefully than with one sub.
It is also worth asking whether two subs are solving a placement problem you could solve with one sub and a better location. If you have not done a careful crawl and alignment with one sub, do that first before buying a second.
When two subs are done right, the biggest benefit is that you stop thinking about the subwoofers at all. The low end just behaves, and that is the whole point in a small office studio.
Conclusion
Good subwoofer placement in a small office studio comes from a method, not a lucky corner. Pick a sensible crossover frequency, do the sub crawl carefully, and then finish with phase alignment and level matching.
If you do those steps in order, the room stops arguing with you and bass decisions get easier. Your goal is boring, even low end that makes mixes travel well, and that is exactly what this process delivers.
Once you get there, resist the urge to keep tweaking just because you can. A stable setup that you learn is more valuable than a constantly changing setup that never becomes familiar.
If you want one final reality check, play a few mixes you trust at a low volume and see if the bass line is still readable. When the low end makes sense quietly, you have built a monitoring system you can actually work on.