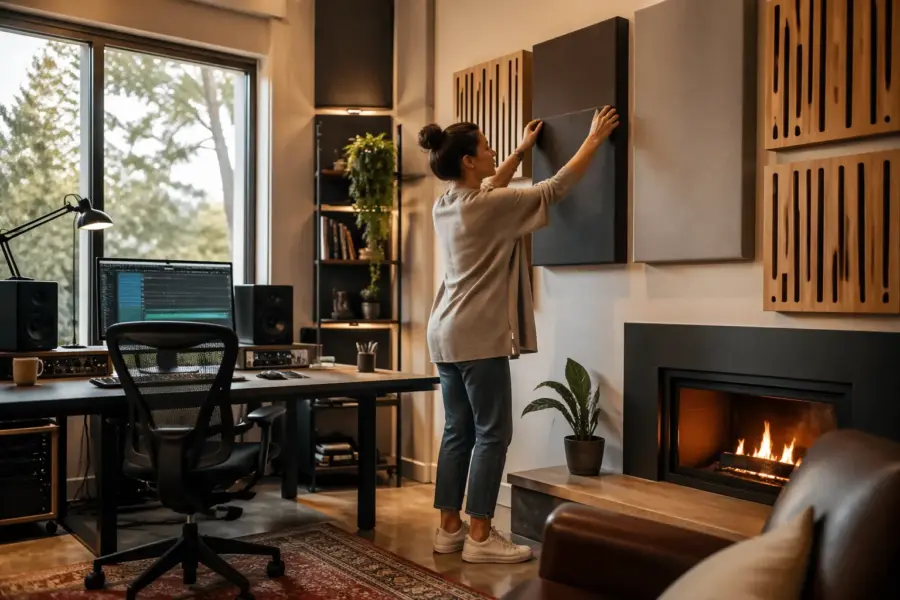
A fireplace on the front wall is a mood booster and a geometry problem at the same time. If you are trying to mix, edit podcasts, or take calls on monitors, that asymmetry can tug your stereo image to one side.
The good news is you can usually get a stable center image without remodeling the room or giving up the hearth. A smart home office studio layout with fireplace starts with acknowledging what the fireplace does to symmetry, reflections, and speaker spacing.
I have seen plenty of home setups where the owner kept chasing EQ when the real issue was the front wall shape. Once the layout respected front wall symmetry and controlled hard surface reflections, the desk position and monitors suddenly made sense.
What a fireplace does to your front wall geometry
A fireplace breaks the front wall into different depths, materials, and angles, and your speakers notice all of it. The mantel, surround, and firebox opening change early reflection timing, which can smear imaging before you even touch a plug in.
Even when the fireplace is centered, the surface is rarely uniform from left to right. One side might be stone and the other side might be painted drywall, and that difference shows up as a tonal imbalance in the early reflections.
If the hearth sticks out, one speaker may sit closer to a hard boundary than the other, and that changes boundary gain and midbass punch. You can end up with the phantom center leaning toward the side that has more nearby surface.
That boundary gain difference is not subtle when you are working in the near field. A few inches of distance change to a rigid surface can shift the low mids enough that you start compensating in your mix without realizing it.
Brick, stone, tile, and glass doors are all reflective in the upper mids, where localization cues live. Those hard surface reflections can sound like a subtle slap, or they can just make vocals feel wide and vague.
Fireplace glass is especially sneaky because it can act like a mirror for sound at certain angles. If one monitor has a direct line of sight to that glass and the other does not, your panning decisions can feel unstable.
Alcoves and built ins around a fireplace act like little waveguides, especially if one side is open and the other is boxed in. That is why the same speaker spacing that worked in a blank bedroom can fall apart when you move to the living room office with a hearth.
Those alcoves can also create narrow resonances that ring on certain notes, which makes bass feel “one note” even if the speakers are fine. If you hear a specific pitch bloom when you sweep a sine tone, the fireplace cavities are a prime suspect.
The mantel edge is another trouble spot because it is a sharp boundary close to the speaker baffle. That hard lip can cause comb filtering that shows up as a slightly phasey upper bass or low mid texture.
Think of the fireplace as a cluster of small acoustic events rather than one big object. Once you identify which parts are causing reflections, which parts are causing cavities, and which parts are causing asymmetry, the fixes become more targeted.
Decide whether the fireplace should be in front of you or behind you
Most people default to facing the fireplace because it feels natural, and sometimes it is the least bad option. If the room is longer than it is wide, facing the long dimension often gives smoother bass and more forgiving speaker spacing.
Facing the long dimension also tends to push the side walls farther away from the speakers. That extra distance can reduce the intensity of first reflections, which buys you time before you have to go heavy on treatment.
Facing the fireplace can still work if you can create a fake flat front wall with treatment and careful placement. The goal is predictable early reflections, not a perfect photo of front wall symmetry.
When you face the fireplace, you are basically deciding to manage the mess right in front of you. That can be a good decision if you like to iterate, because the problems are easy to hear and easy to measure from the listening position.
Putting the fireplace behind you can be easier for imaging because the front wall becomes simpler, but it can make the rear wall harsh. A reflective hearth behind the chair can throw energy right back into your ears, so you need real absorption, not thin foam.
If you do put the fireplace behind you, pay attention to the distance from your head to the rear wall. A short distance plus a hard surface is a recipe for flutter and a bright, fatiguing sound on calls and edits.
Another factor is screen placement and glare, because a fireplace often comes with windows nearby. If facing the fireplace puts your monitors and screen in a glare zone, you may end up rotating the whole setup for visual comfort anyway.
Heating and airflow matter too, especially if you actually use the fireplace. Hot air rising near one side of the room can change comfort and noise, and a quiet fan or HVAC vent can be more disruptive than the acoustic issues you are trying to solve.
I usually pick the orientation that gives me the most consistent left right boundaries near the speakers, then I fix the rest with treatment. A home office studio layout with fireplace is always a compromise, so choose the compromise that protects your stereo image first.
If you are unsure, test both orientations with a quick temporary setup and a familiar reference track. You will usually hear the better option within a few minutes when the vocal either locks in place or starts drifting with head movement.
Try not to overvalue how the room looks from the doorway compared to how it sounds at the chair. You can always make a practical layout look intentional, but you cannot “decorate” your way out of a collapsing phantom center.
Centering your setup when the fireplace isn’t centered
If the fireplace is off center, you have to decide what you are centering on, the room or the hearth. For serious monitoring, center on the room boundaries and treat the fireplace like a big reflective object you manage.
Centering on the room midpoint gives you the best chance of matching left and right side wall distances. That matching is a big deal because side wall reflections are often the first ones to mess with imaging in a small office.
If you center on the fireplace because the furniture demands it, you can still get stable imaging, but you must control asymmetry aggressively. That means matching reflection strength and timing on both sides, even if the walls are different shapes.
In practice, “matching” can mean adding absorption on the more reflective side and adding diffusion or a thicker panel on the side that is closer. The point is not identical materials, but similar acoustic behavior at the listening position.
Sometimes the best move is to keep the speakers symmetric and let the desk be a little weird. A desk that is a few inches off center is visually noticeable for about one day, but a drifting center image is noticeable every time you work.
If you are doing video calls, you can still frame the camera to look centered even when the desk is not. A slightly angled camera and a tighter crop can make the background look intentional while your monitors stay where they need to be.
Do not forget vertical centering, because fireplaces often come with a mantel shelf that sits right around tweeter height. If one speaker is near that shelf and the other is not, you can get a height and depth illusion that makes mixes feel oddly “tilted.”
When the fireplace is off center, it can also shift where you naturally place the chair. If you find yourself sitting slightly rotated toward the hearth, correct that first, because a rotated listening position can mimic asymmetry even in a perfectly symmetric speaker layout.
| Centering choice | What usually improves | What usually gets harder |
|---|---|---|
| Center on room midpoint | Front wall symmetry and imaging | Furniture flow around the hearth |
| Center on fireplace opening | Desk looks “right” in the space | Left right reflection matching |
| Split the difference | Practical walkways and cable runs | Repeatable speaker spacing |
| Offset desk, keep speakers symmetric | Imaging at the chair | Keyboard and screen ergonomics |
Use the table as a reality check, not a rulebook. The best choice is the one you can actually maintain day to day, because a layout that only works when everything is perfectly staged will slowly drift out of alignment.
If you share the room with family space, you may need a layout that resets quickly. In that case, prioritize repeatable speaker positions with floor marks, and accept that the desk might slide a little as long as the monitors stay consistent.
When you are forced to center on the fireplace, consider making the listening position slightly off the fireplace axis. A small offset can reduce the strength of a direct reflection off the hearth while still keeping the room visually balanced.
Also watch for asymmetry in what sits on the mantel, because decor can become an acoustic reflector at near field distances. A large framed picture on one side and nothing on the other can be just enough to make one side feel brighter.
Handle hard surfaces and alcoves without shifting your stereo image
The fastest win is to treat the first reflection points, because that is where hard surface reflections do the most damage to imaging. Use a mirror test on each side wall, then confirm with a quick clap and a sweep tone if you have measurement software.
If you do not have measurement software, you can still do a lot with careful listening. Play a mono vocal track and move your head slightly left and right, because strong reflections will make the vocal “pull” toward one speaker.
If one side has an alcove or built in, do not try to “balance” it with random decor on the other side. Balance comes from similar absorption and diffusion behavior, not similar objects.
Built ins often have shelves at different depths, and that can create a scattered reflection pattern that is hard to predict. A thick curtain or a removable panel in front of the shelves during work hours can simplify the acoustic picture.
A fireplace surround can create a strong specular reflection right next to one speaker, especially if the monitor sits near the mantel edge. I prefer thick broadband panels on stands that you can pull forward to form a more even plane around the speakers.
Stands matter because you can position them exactly where the reflection is happening, not where the wall happens to be. That flexibility is useful when the fireplace creates odd angles that fixed wall panels cannot fully address.
If the hearth has a deep recess, consider filling some of that cavity with absorption during work hours. A simple removable plug made from a wood frame and mineral wool can reduce cavity resonance and tame the “hollow” coloration.
Make the plug snug enough that it does not rattle, because rattles become obvious when you are monitoring quietly. If you want it to look nicer, wrap it in a dark fabric so it disappears when the room lights are low.
Do not ignore the floor in front of the fireplace, because tile and stone are basically acoustic mirrors at mid and high frequencies. A rug with a decent pad can reduce the brightness and help keep the center image from feeling forward and splashy.
If you have glass fireplace doors, test them open versus closed when the fireplace is not in use. Sometimes the open position changes the reflection angle enough to reduce a harsh spot at the listening position.
Alcoves can also create pressure build up that exaggerates certain low frequencies near the opening. If one speaker is near an alcove and the other is not, you may need to pull that speaker forward a few inches to reduce the coupling.
Diffusion can help, but only if you have enough distance for it to work. In a tight home office studio layout with fireplace, absorption is usually the safer first step because it is predictable in the near field.
Finally, treat the fireplace like a first reflection surface if it is within the mirror path from a speaker to your ears. People often treat side walls and forget that the front wall objects can be just as influential in small rooms.
Desk and speaker placement options around a hearth
Start by placing the listening position so your head is not exactly halfway between front and back walls, because that spot often lines up with a nasty axial null. A common starting point is about 38 percent of the room length from the front wall, then you fine tune by measurement and by ear.
That 38 percent number is not magic, but it gets you away from the worst symmetry points in many rectangular rooms. If the room is irregular because of the fireplace bump out, use it as a starting zone rather than a precise target.
Desk depth matters because a deep desk pushes the speakers closer to the front wall and closer to the fireplace surfaces. A shallower desk or a monitor stand setup behind the desk can give you more freedom to place the speakers where they behave best.
Try to keep the tweeters the same distance from your ears and the same distance to the nearest side boundary. When those distances match, you are giving the brain consistent timing cues, which is what makes a phantom center feel solid.
Speaker spacing should follow the equilateral triangle idea, but do not treat it like a rule carved in stone. In rooms with a fireplace bump out, a slightly narrower triangle can reduce early reflections off the hearth and keep the phantom center locked.
A narrower triangle can also reduce how much the speakers “see” the side walls, which is helpful if one side wall is broken up by built ins. The tradeoff is a slightly smaller sweet spot, but for a one person office that is usually fine.
If the fireplace is on the front wall, you can place the desk so the speakers straddle the hearth, but only if both speakers see similar boundaries. You may need to pull the speakers forward so their front baffles sit ahead of the mantel edge, which reduces comb filtering from that hard lip.
Pulling the speakers forward can also reduce SBIR issues that happen when the speaker is too close to the front wall. You may lose a bit of floor space, but you often gain clarity in the low mids where voices and guitars live.
If the hearth extension forces one speaker closer to you than the other, resist the temptation to “just toe it out.” Fix the distance first, because unequal distances create timing differences that no amount of toe in can fully erase.
If the fireplace is on a side wall, keep the speakers on the opposite wall when possible, because it makes front wall symmetry easier. You can still keep a cozy chair by the fire, but you do not want one monitor firing straight into stone while the other fires into drywall.
When the fireplace is on a side wall and you must place a speaker near it, aim to keep that speaker at least a couple feet away from the stone plane. That distance reduces the intensity of the earliest reflection and makes treatment more effective.
Consider monitor stands instead of desk stands if the desk has to be offset around the hearth. Stands let you keep the speakers symmetric even when the desktop is not, and they reduce vibration and resonance from the desk surface.
Also think about where your subwoofer would go if you use one, because fireplaces can steal the best sub locations. A sub crawl is still the best way to find a workable spot, but plan for cable runs and foot traffic around the hearth.
Do not forget that your chair position is part of the system. If the chair ends up too close to the fireplace or a rear wall, you will hear more reflected energy and less direct sound, which makes decisions feel less confident.
Practical layout templates you can steal
The “false wall” template is my go to when clients want the desk facing the fireplace for aesthetics. Two tall gobos or freestanding panels form a shallow arc that makes the front wall act more uniform to the speakers.
The trick with the false wall is to keep it close enough to intercept reflections but far enough to avoid feeling cramped. If you can leave a small air gap behind the panels, you often get better low frequency absorption than you would with panels tight to the surface.
In a living room office, the false wall can double as a visual backdrop for calls. Neutral fabric panels look cleaner than a busy fireplace surround and they make your camera framing easier.
The “offset desk, centered speakers” template works when the fireplace forces the desk to one side, but you still want good imaging at the chair. You place the monitors symmetrically in the room and slide the desk surface under them, then you accept that your keyboard is not perfectly centered on the hearth.
This template is especially useful when you have a wide room and the fireplace sits closer to one corner. You can keep the acoustic center in the right place while letting the furniture layout respect the hearth and walkways.
A third variation is the “floating desk” approach, where the desk sits a foot or two away from the front wall. That gap gives you space for cables, stands, and treatment, and it reduces reflections that bounce off the desk and into the microphones.
If you record voice, the floating desk approach also helps you keep the mic away from the fireplace reflections. Even a small change in position can reduce the boxy sound that comes from a hard front wall object.
- Speakers pulled 6 to 18 inches ahead of the mantel edge
- Listening position shifted 3 to 8 inches off the room midpoint
- Freestanding 4 inch panels at first reflection points
- Absorptive plug for a deep firebox recess
- Rug or mat in front of a reflective hearth extension
- Monitor stands decoupled from the desk surface
Those bullet points are small, but they stack, and stacking is how you win in an awkward room. You are trying to remove a handful of obvious problems rather than chasing perfection.
When you copy a template, commit long enough to evaluate it properly. Give yourself a few work sessions with reference tracks and real projects, because the best layout is the one that stays consistent when you are tired and moving fast.
If you can, keep the templates modular so you can revert quickly when the room needs to be a living room again. Freestanding panels, marked stand locations, and tidy cable looms make the layout feel less like a permanent takeover.
Also consider lighting and heat as part of the template, because comfort affects how long you can work. A layout that sounds good but bakes you on one side from the fireplace or a window will not last.
Small adjustments that usually beat a full room overhaul
Before you move furniture, lock in speaker height and toe in, because sloppy angles can mimic room problems. I like tweeters at ear height, moderate toe in so you see a sliver of the inner cabinet, and then tiny changes from there.
Toe in is also a way to manage how much energy hits the fireplace surfaces. If the hearth is creating a bright reflection, a small toe in change can reduce the amount of high frequency energy that reaches it directly.
Then chase symmetry in the near field, not symmetry in the entire room. If you can make the environment within three feet of each speaker behave similarly, your imaging improves even if the rest of the room is weird.
Near field symmetry includes what is on the desk, because a tall lamp on one side can create a reflection that feels like a missing detail on the other. Keep the space between speakers as clean and low profile as you can.
Use tape on the floor and mark speaker spacing in inches, because you will forget what “better” was after two hours of nudging stands. When you find a placement that centers vocals and keeps snare hits from wandering, take photos and write down distances to the front wall and side walls.
Mark the chair position too, because a chair that drifts back a few inches can change bass more than you expect. Consistency is what lets you learn a room, and learning a room is what makes mixes translate.
If bass is the real problem, treat corners and the wall ceiling line before you blame the fireplace. A couple of real bass traps often does more than rotating the whole home office studio layout with fireplace by ninety degrees.
Fireplaces can distract you because they are visually obvious, but bass problems usually come from room dimensions and boundary interactions. If the low end is lumpy, start with placement and trapping, then revisit the hearth reflections after.
Another small adjustment is decoupling, because fireplaces often come with hard floors that transmit vibration. Isolation pads under monitors and a stable stand can tighten the low end and reduce desk buzz that you might mistake for resonance.
Do not overlook simple level matching between speakers, especially if one is closer to a boundary. A tiny gain trim can help the phantom center snap into place while you work on the underlying reflection issues.
Finally, keep your fixes reversible and test one change at a time. If you move speakers, add panels, and change toe in all at once, you will not know which move actually helped.
Conclusion
A fireplace complicates front wall symmetry, but it does not force you into bad monitoring. If you pick the orientation that protects imaging, control hard surface reflections, and respect speaker spacing, the room can sound far more “normal” than it looks.
The goal is not to pretend the fireplace is not there, but to stop it from being the loudest acoustic feature in the room. Once reflections are controlled and the speakers see a more consistent environment, your ears stop fighting the space.
Most of the time, the fix is a handful of careful moves, not a demolition plan. Treat the hearth like a reflective boundary you can manage, and you can keep the fire and still trust what you hear.
If you take anything from this, let it be the idea that layout comes before EQ. When the geometry is reasonable, your monitors will sound more like themselves, and your work will translate with less second guessing.


