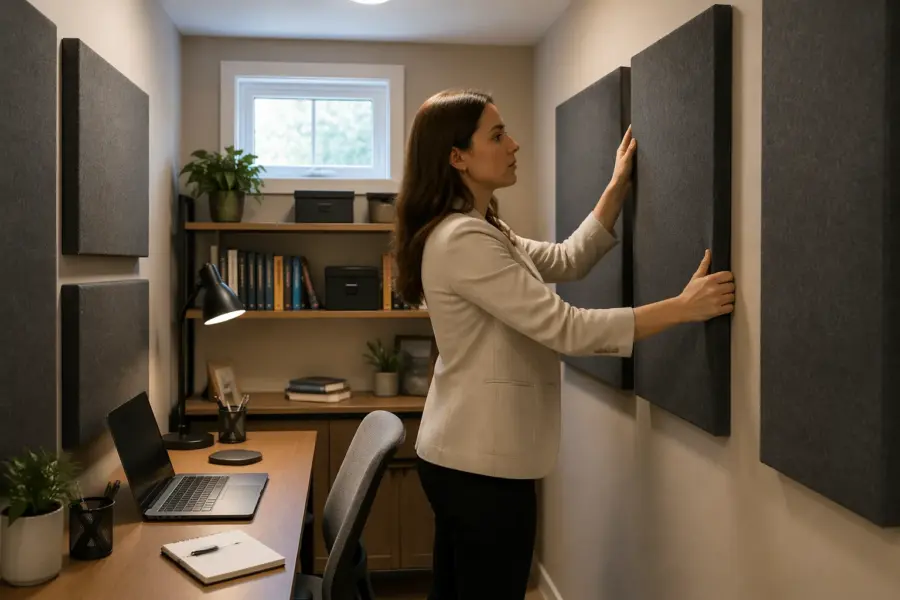
A closet office can make your voice sound like it is trapped in a cardboard box, even if your mic is decent and your internet is fine. The fix is not expensive gear, it is smart placement of acoustic panels for closet office walls and door surfaces.
Small room acoustics are weird because the room is so close to you that reflections arrive almost at the same time as your direct voice. That timing smears consonants, makes sibilance sting, and creates a hollow midrange that listeners describe as boxy.
The goal is clarity, not silence, so you do not want to cover every inch with foam and end up sounding like you are under a blanket. A closet office can sound natural and clean if you treat the right spots and leave some life in the room.
Most people notice the problem first on video calls, where the voice sounds sharp and cramped at the same time. That is usually not your voice, it is the room reacting to your voice.
A closet is also full of hard edges, like door trim, shelves, and corners, which makes reflections more chaotic than you would expect. The good news is that a few well placed panels can change the sound more than swapping microphones.
If you are recording narration, the closet effect can make editing harder because every sentence has a slightly different tone. Once the reflections are under control, your takes match better and your processing chain can stay lighter.
Why closet offices sound “boxy” and harsh
A closet office is basically a tiny rectangular tube, so your voice bounces between parallel surfaces with almost no travel distance. Those early reflections stack up in the 200 Hz to 800 Hz range, which is the exact zone that makes speech sound honky.
Because you sit inches or a couple feet from the walls, the reflection level is high compared to the direct sound. That is why even a good dynamic mic can pick up a harsh edge when the room is untreated.
Flutter echo control is another common problem, especially between the side walls and between the door and the back wall. You can hear it by clapping once and listening for a fast, metallic ping that seems to zip back and forth.
Low frequencies also misbehave in closets, but they do it in a sneaky way that feels like uneven warmth rather than obvious boom. You may hear one note in your voice get louder, then disappear when you lean forward, which is a classic small room acoustics mode issue.
Closets also exaggerate proximity effects because you tend to work closer to the mic to avoid room sound. That can be fine, but it makes the low mids even more sensitive to reflections and standing waves.
Another reason the sound gets harsh is that closets often have a hollow door and thin drywall that reflect high frequencies very efficiently. The reflections are not delayed enough to sound like reverb, so they just smear the direct voice.
If your closet has sliding doors, you can get extra zing from the glass or thin wood panels. Those surfaces act like little mirrors for sound, especially in the consonant range.
Even hanging clothes do not automatically fix the problem because they do not cover the right surfaces in the right thickness. Clothes can reduce some high frequency splash, but they rarely solve the midrange comb filtering that makes speech sound boxy.
The harshness can also be made worse by laptop fans and HVAC noise, because you raise your mic gain to compensate. Higher gain makes the room louder relative to your voice, so the reflections become more obvious.
When people describe a closet office as sounding like a phone call, they are often hearing strong early reflections plus a mic that is working too hard. Treating the room lets you lower gain and keep the mic in its comfort zone.
The fastest wins: treating the closest reflection points
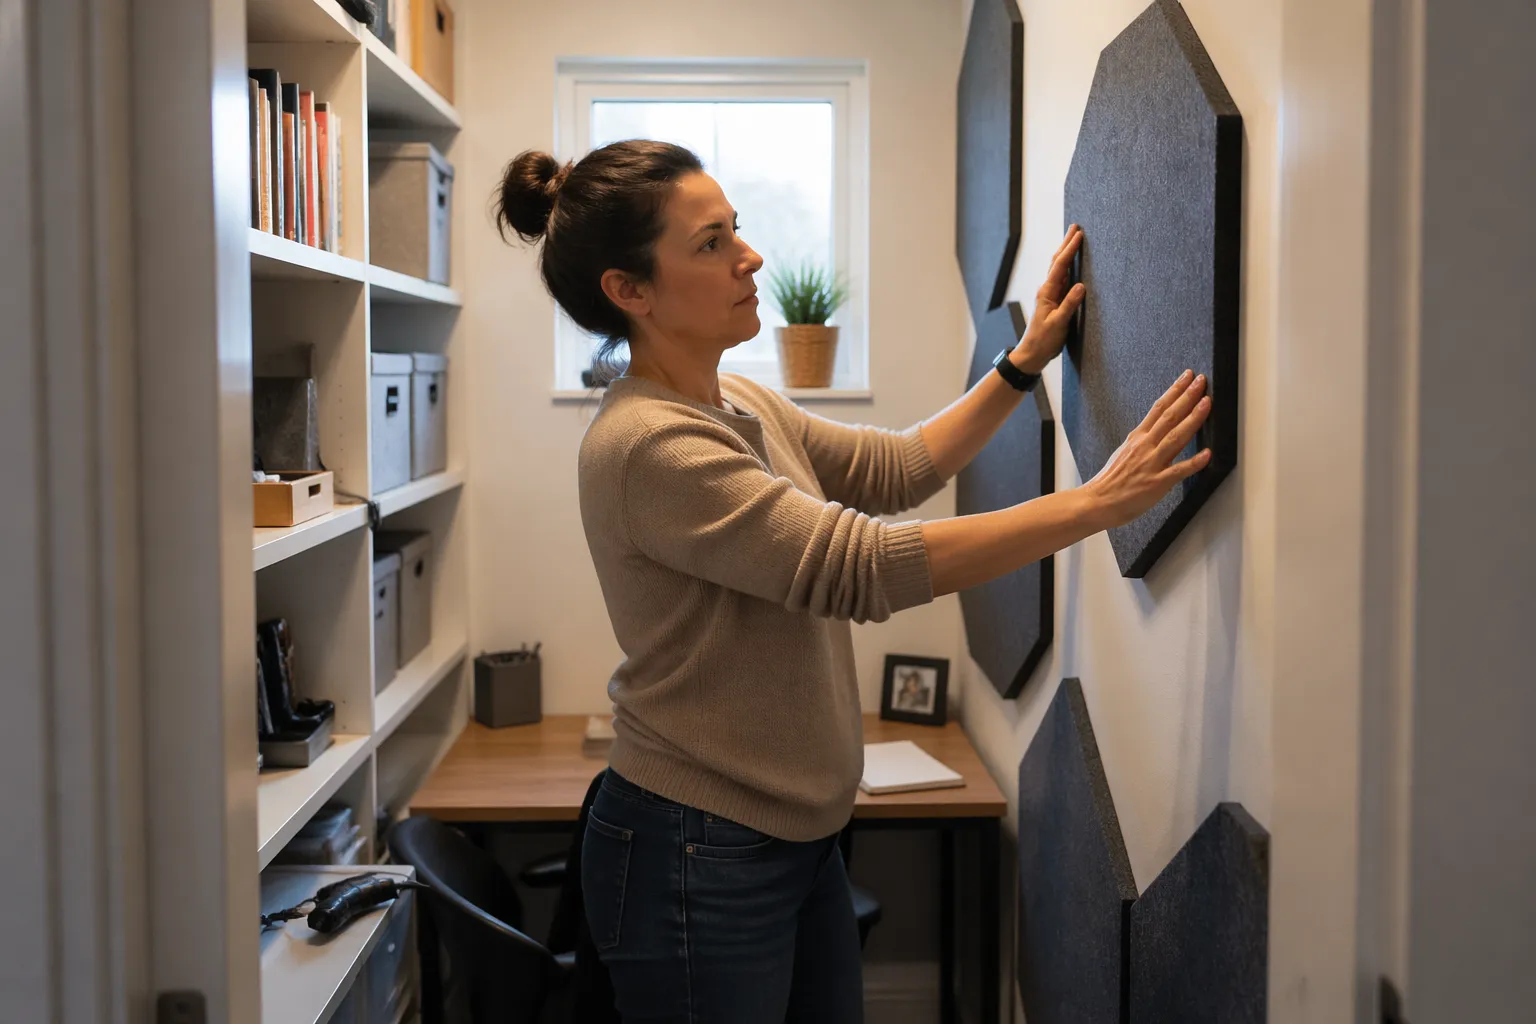
If you only buy a few acoustic panels for closet office use, put them where your voice hits first, not where they look nice. In practice that means the wall behind your monitor, the side walls near your shoulders, and the ceiling area above the mic position.
A simple trick is the mirror test, where you slide a mirror along the wall and mark the spot where you can see the mic capsule from your seated position. Wherever you see the mic in the mirror is a first reflection point worth treating.
For a nearfield voice setup, those first reflections matter more than what happens at the far end of the closet. Your mic is close, so you are fighting early comb filtering and flutter echo control, not long reverb tails.
Start with two panels on the side walls at mouth height and one panel behind the mic or behind you, depending on how you face the door. If you do that well, the boxy sound usually drops fast and your EQ needs get smaller.
Think of the first reflection points as the places that compete with your direct voice for attention. When you absorb those reflections, the mic hears more of you and less of the closet.
It helps to treat the wall you are speaking toward, because your voice is directional and that surface gets hit hard. If you talk toward a bare wall at two feet away, the reflection is basically guaranteed to be loud.
If your monitor is in the closet, the wall behind it is often a strong reflector because the monitor does not absorb much. A panel behind the screen can be one of the highest value placements in a tight setup.
Side wall panels should be centered around your mouth and mic height, not your eyes. If you mount them too high, you miss the reflection path and the room still sounds sharp.
Ceiling reflections are easy to ignore because you do not see them, but they are often the closest surface of all. A small cloud panel above the mic can remove a brittle edge that is hard to EQ out.
If you have one bare surface left, choose the one that is closest to the mic and most parallel to another surface. Parallel surfaces are where flutter echo control becomes a real issue.
Do not wait for a perfect plan before you start, because one or two panels can already tell you if you are on the right track. Once you hear the improvement, it becomes easier to decide where the next panel should go.
Avoiding an overly dead sound for calls and narration
A closet office can go from harsh to dull in a hurry if you carpet the walls with thin foam. For meetings and narration, you want less slap and less ring, but you still want a little air so your voice does not sound choked.
Over treating often shows up as a weird mismatch, where the highs are gone but the low mids stay, so your voice turns muddy. That happens because thin products absorb treble better than the frequencies that make closets sound boxy.
A good target is a sound that is controlled but not claustrophobic, like a small office with soft furnishings. If the room feels like it is swallowing your voice, you probably went too far near the mic.
Calls and narration also benefit from a little natural brightness, because it helps intelligibility at low playback volumes. If you remove too much top end acoustically, you may end up boosting highs in EQ and bringing noise back with it.
One way to avoid the dead booth effect is to use fewer, thicker panels instead of many thin ones. Thick panels absorb a wider range, so you do not end up with an unbalanced room that is dark but still boxy.
Another trick is to keep absorption concentrated at reflection points and leave some other surfaces partially reflective. That keeps your voice from sounding like it is coming from inside your head.
If you have clothes hanging in the closet, treat them as a bonus rather than the main plan. They can add a bit of diffusion and absorption, but they are inconsistent and change when you move things around.
For narration, a slightly drier sound is usually better than a roomy sound, but dry does not mean lifeless. You want the mic to capture detail and tone, not just mouth noise.
If you share the closet office with storage, you can use fabric bins and irregular items to keep reflections from being too uniform. Randomness helps, but it should not replace basic absorption where it matters.
When you are unsure, remove one panel and listen again rather than adding another. In a small space, one panel can be the difference between clean and over damped.
| Symptom you hear | Likely cause in a closet office | Fix without over treating |
|---|---|---|
| Hollow, nasal midrange | Early reflections causing comb filtering | Add 2 inch panels at first reflection points |
| Metallic ping after a clap | Parallel walls creating flutter echo | Offset panels on one wall, add door panel |
| Dull highs but still muddy | Too much thin foam, not enough thickness | Swap some foam for 4 inch mineral wool |
| Voice sounds like a blanket | Too much absorption near the mic | Remove one panel near the mouth, keep side panels |
The table is a quick reality check because symptoms in a closet can be misleading. A dull sound is not always a sign you need more treble, it can be a sign you absorbed only the treble.
If you are using noise reduction software, an overly dead room can make artifacts more noticeable because there is no natural ambience to mask them. A balanced room often makes your processing sound more transparent.
Also remember that your own body is an absorber, so the room changes when you sit down versus when you test it standing up. Do your listening tests in the exact position you use for real work.
Panel sizes and thicknesses that fit tight spaces
In a closet, the standard 24 by 48 inch panel can feel huge, but it still works if you place it vertically and keep it out of shoulder space. When space is truly tight, 12 by 48 inch panels can cover the same reflection line without blocking movement.
Thickness matters more than people want to admit, because 1 inch panels mainly tame hissy reflections while leaving the boxy band behind. For acoustic panels for closet office clarity, 2 inch is the baseline and 4 inch is the upgrade that makes voices sound less pinched.
If you can only fit thin panels on the side walls, use thicker treatment on the back wall or door where it will not catch elbows. A single 4 inch panel behind you can calm the low mid buildup that keeps showing up in small room acoustics.
Do not obsess over perfect symmetry if your closet has shelves or a filing cabinet on one side. A little unevenness can help flutter echo control, and your ears care more about the first reflection points than about matching left and right decor.
For most closet offices, a 24 by 48 panel is the best value because it covers a meaningful area with one piece. The trick is to mount it where it does the most work, not where it makes the closet feel smaller.
If you have a narrow closet, a pair of 12 by 48 panels can be easier to place than one wide panel. You can stagger them vertically to cover both mouth height and the area slightly above it.
Do not ignore the ceiling just because you cannot fit a big panel up there. Even a smaller panel above the mic can reduce the sharpness that makes your voice sound stressed.
Material matters too, and the general rule is that denser fiberglass or mineral wool panels outperform cheap foam in the vocal range. If you are comparing products, look for real absorption data rather than just thickness numbers.
If you are sensitive to dust or fibers, choose panels that are properly wrapped and sealed, not raw insulation. A good fabric wrap keeps the panel safe to use in a small space where you are breathing close to it.
Color and fabric are not just aesthetics in a closet office, because dark panels can make the space feel tighter. Lighter fabric can make the closet feel more open, which helps you actually use the space consistently.
When you are deciding between more coverage or more thickness, pick thickness first for voice. A few thick panels placed well usually beat a wall of thin foam for small room acoustics.
Air gaps and mounting tricks that improve absorption
An air gap behind a panel is the cheapest performance boost you can get in a closet office. Even a 1 to 2 inch gap can make a 2 inch panel behave more like a thicker absorber in the vocal low mids.
Mounting can be simple, like picture wire on two hooks, or industrial strength Velcro strips if you rent and cannot drill much. If you use adhesive strips, clean the wall first and avoid textured paint that lets panels sag over time.
For ceilings, a light cloud panel above your mic position is worth the effort because the ceiling reflection is often the loudest in a nearfield voice setup. Use eye hooks into studs or a ceiling grid, then hang the panel with short chain so it does not swing.
Corner mounting is tempting, but most closets do not have enough corner depth to make true bass traps practical. I would rather see you treat the side wall reflections well than cram skinny wedges into corners and call it done.
If you want an air gap without building a frame, you can use simple spacers like rubber bumpers or short blocks behind the panel. The goal is to keep the panel off the wall evenly so it does not rattle.
In a closet office, removable mounting is useful because you may need access to storage or electrical panels. French cleats, hook systems, or Velcro can make it easy to reposition panels after you test.
Try not to mount panels so low that they get kicked or scraped by chair arms. Damaged fabric is not just cosmetic, it can expose fibers and shorten the life of the panel.
If you are using command style strips, use more than you think you need and give the adhesive time to set. Closet humidity and temperature swings can weaken adhesives faster than a normal room.
For a door panel, over the door hooks can work well because they avoid drilling and they keep the panel aligned. Just make sure the panel does not hit the door frame when you close it.
Another mounting trick is to hang a panel like a picture and angle it slightly instead of keeping it perfectly flat. A slight angle can help with flutter echo control while still absorbing the reflection energy.
If you have a shelf, you can lean a panel against the back wall with a small gap behind it. That is not as clean as mounting, but it is a fast way to test placement before committing.
Do not forget cable management, because loose cables can buzz against panels or hooks. Little mechanical noises become obvious once you improve the acoustics and lower your noise floor.
Door and rear-wall strategies for a tiny footprint
The door is usually the largest flat surface in a closet office, and it is often the worst reflector because it sits close to your mic line. Treating the door with a panel or a thick moving blanket can kill a lot of flutter echo control problems in one move.
If you face the door while you work, the rear wall behind you becomes the main reflection source that your mic hears. If you face into the closet, then the door becomes the rear wall, so the same logic still applies.
A practical setup is one 24 by 48 inch, 2 to 4 inch panel on the door at mouth height, plus one panel on the wall behind your head. That pair often fixes the harshness that makes people reach for aggressive EQ cuts.
If you have a built in shelf behind you, fill it with books, fabric bins, or irregular items rather than leaving it empty. A cluttered shelf is not a replacement for panels, but it does break up reflections and helps small room acoustics sound less like a tube.
A hollow core door can act like a drum and reflect sound in a sharp, unpleasant way. Adding a panel also adds a little mass, which can make the door feel less lively acoustically.
If you cannot mount a rigid panel on the door, a thick quilted moving blanket can still help, especially if you hang it with some folds. The folds increase effective thickness and reduce the mirror like reflection you get from a flat surface.
Rear wall treatment is important because your mic is usually pointed away from the rear wall, but it still hears it through reflections. A strong rear reflection can sneak into the recording and make your voice sound phasey.
If the rear wall is very close, a thicker panel is usually worth it because the reflection is strong and immediate. This is one of the few places where 4 inch treatment can feel like a night and day change.
In some closets, the door has gaps that leak noise from the rest of the house. A door sweep and weatherstripping do not fix boxiness, but they can reduce distractions and let you record at lower gain.
If your closet office has a bi fold door, treat the panel that faces the mic most directly. Those doors can create multiple small reflections, and softening just one of the surfaces can help more than you expect.
Try to avoid placing a hard, reflective whiteboard or glass frame on the rear wall. If you need something like that in the closet, put it on a side wall that is already treated.
When you test door treatment, listen specifically for the metallic ping that happens after a clap. If that ping goes away, you are usually close to a workable setup.
Mic placement and a nearfield voice setup that works with panels
Acoustic panels for closet office use do more when your mic technique is consistent. Put the mic 4 to 8 inches from your mouth, aim it slightly off axis, and keep the gain lower than you think, so the room stays quieter in the recording.
A dynamic mic like an SM58 or an MV7 can be forgiving, but it still hears reflections when the walls are close. A small diaphragm condenser can sound great too, but it will punish you if flutter echo control is not handled.
Try to keep the mic capsule at least a foot from the nearest untreated wall if the closet allows it. If you cannot, that is fine, but it means those first reflection panels become non negotiable.
Pop filters and windscreens help plosives, but they do nothing for boxy tone caused by small room acoustics. Fix the room first, then use EQ as a light polish instead of a rescue mission.
Angle matters because pointing the mic directly at a reflective wall increases the amount of reflected energy it captures. A small rotation of your desk or mic stand can sometimes reduce harshness even before you add more panels.
If you use a cardioid mic, remember that the null is at the back, so you can aim the back of the mic toward the noisiest part of the house. That does not replace acoustic treatment, but it can improve your noise floor.
Keep the mic at a consistent height relative to your mouth, because moving up and down changes which surfaces reflect into it. In a closet office, small changes in angle can change the tone more than you would expect.
Do not place the mic exactly halfway between two parallel surfaces if you can avoid it. That position can exaggerate certain small room acoustics modes and make the low mids feel unstable.
If you are using a boom arm, make sure it is not vibrating against the desk or wall. Mechanical vibration can show up as low frequency rumble that sounds like room problems but is really hardware.
Headphones help you hear what the mic hears, but they can also make you overcorrect. Do a quick recording and listen back on speakers too, because boxiness is easier to judge in the open.
If you are doing long sessions, comfort matters because posture changes your mic distance. A chair that keeps you stable will make your tone more consistent than a chair that makes you lean forward and back.
Once the panels are in, you can often back the mic off slightly and still keep a clean sound. That can reduce plosives and mouth noise while keeping the room under control.
A quick shopping and placement checklist
If you are building this on a normal home office budget, buy fewer panels and make them thicker. A handful of well placed 2 to 4 inch absorbers beats a closet covered in bargain foam every time.
Measure the inside width and depth of the closet before you order, because returns are annoying and panel corners get damaged easily. Plan your layout around how you sit, where the mic is, and how the door swings.
Decide early whether the closet is primarily for calls or for recording, because that affects how far you push dryness. Calls can tolerate a little room, but narration often benefits from tighter control.
When you compare products, ignore marketing words and look for thickness, core material, and real absorption coefficients if they are available. If a product has no data and is very thin, assume it will mostly absorb highs.
Budget for mounting supplies because panels do not help if they end up leaning in a corner. Hooks, wire, Velcro, and spacers are small costs that make the setup actually usable.
Also plan for lighting and airflow, because a closet office can get hot fast once you add panels and close the door. A quiet fan outside the closet and a small gap under the door can keep you comfortable without ruining recordings.
- Two 24 x 48 x 2 inch panels for side walls at mouth height
- One 24 x 48 x 4 inch panel for rear wall or door
- One ceiling cloud panel above the mic position
- One inch to two inch air gap behind key panels
- Mirror test marks for first reflection points
- Door sweep or weatherstrip for noise leaks
If your closet is extremely narrow, swap the side panels for 12 x 48 panels and keep the thickness. The coverage can be slimmer as long as it still hits the reflection path.
If you can only buy three panels, prioritize two side reflection panels and one door or rear wall panel. That set usually gives the biggest reduction in boxiness per dollar.
If you are buying used panels, inspect the frames and fabric for sagging and smell issues. A closet office is too close to tolerate panels that shed fibers or carry odors.
Do not forget a simple rug if the floor is hard, because floor bounce can add a subtle brightness that stacks with the other reflections. A rug is not a replacement for panels, but it can smooth the overall tone.
Finally, keep a little budget for a longer mic cable or a better boom arm if your current setup forces bad placement. Good acoustics plus bad mic placement still sounds like a closet.
Simple checks to dial in clarity without losing natural tone
Do a before and after voice memo with the same mic distance and the same gain, because your memory lies about sound. Listen for the consonants, especially T, K, and S, and check whether they stay sharp without turning spitty.
Clap once and speak a few lines, then step six inches forward and repeat, because small room acoustics change fast with position. If one spot sounds hollow and another sounds clear, move your chair before you buy more treatment.
For flutter echo control, snap your fingers while facing different directions and pay attention to the zing that follows. If you still hear a quick metallic ring, rotate a panel, add a door panel, or break up a bare parallel surface.
If the room starts to sound too dead, remove one panel closest to your mouth and keep the side reflection panels in place. That small change often brings back a natural tone while keeping the boxy sound from returning.
Record a short paragraph and listen for the way your voice tails off at the end of sentences. If the tail sounds like it collapses or gets papery, you may be hearing reflections that are still too strong.
Pay attention to how your voice sounds when you laugh or speak louder, because harsh rooms get worse with volume. If the closet stays controlled when you get animated, your treatment is doing its job.
Check for rattles by speaking in a low voice and then in a loud voice while listening for buzzing. Closet doors, shelves, and loose hooks can vibrate and mimic low frequency room problems.
If you use compression, test with compression on and off, because compression raises the level of room sound between words. A treated closet should still sound clean when you compress lightly for consistency.
Try a simple EQ bypass test by recording with no EQ and then adding a gentle high pass and a small low mid cut. If you need extreme EQ moves, you probably still have a placement or reflection issue.
Listen on a phone speaker, because that is where boxiness is easiest to hear. If your voice stays clear on a phone without sounding thin, you are in a good place.
Do not change five things at once, because you will not know what helped. Move one panel, record ten seconds, and keep the change only if it is clearly better.
Once you like the sound, take a photo of the setup and mark panel positions lightly with painter’s tape. Closets get rearranged, and having a reference makes it easy to return to your best layout.
Conclusion
A closet office does not need a full studio build to sound good, but it does need targeted acoustic treatment that matches how close everything is. When you place acoustic panels for closet office use at first reflection points and treat the door or rear wall, speech gets clearer fast.
Keep your nearfield voice setup consistent, use enough thickness to handle the low mids, and do not chase a totally dead booth sound. If you listen critically and adjust one panel at a time, you can tame small room acoustics and keep your voice sounding like a person in a room.
The biggest mindset shift is that you are not trying to build a perfect studio, you are trying to remove the specific problems that a closet creates. Once the harsh reflections and flutter echo control issues are handled, everything else becomes optional refinement.
Start small, treat the closest surfaces, and let your recordings tell you what is missing. With a few smart moves, your closet office can sound clean enough that people stop commenting on your audio and just listen to what you are saying.


