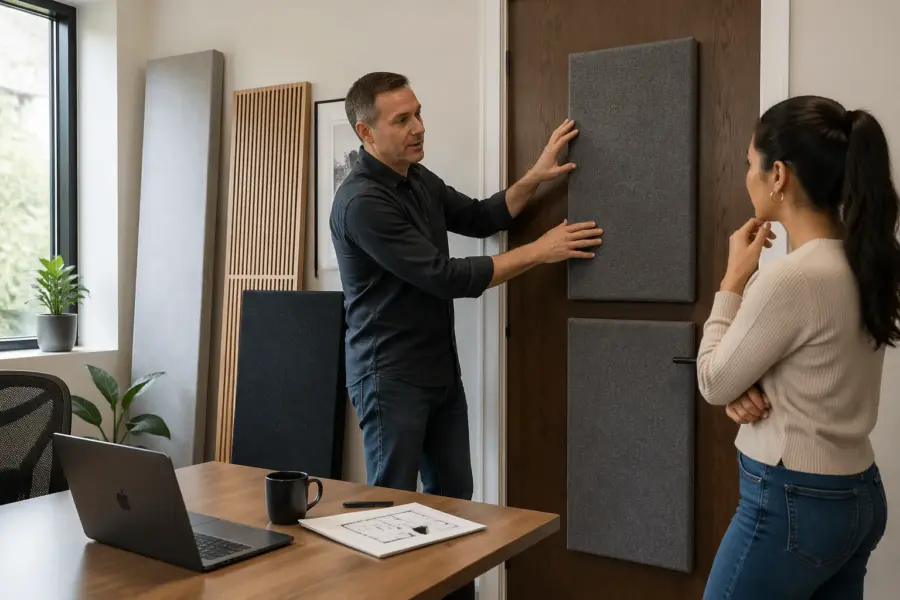
Door reflections are one of those home office problems you can hear in five seconds, but you can spend weeks treating everything except the door. If your desk sits near a door, the door can act like a hard, flat mirror for mid and high frequencies.
The fix is usually simple, but it has to be placed where the reflection is actually happening. This article focuses on acoustic panels for door reflections, with practical mounting ideas that do not wreck the door or your rental deposit.
I see people throw a thick panel behind a monitor and wonder why their voice still sounds splashy on calls. The door is often the real culprit, especially with hollow core door acoustics that bounce sound right back toward the mic.
How doors create reflections near your desk
A door near your desk is usually a big, smooth surface that sits close to your ears and microphone. That combination creates a fast reflection that arrives a few milliseconds after the direct sound, which your brain hears as brightness or slap.
That timing is the annoying part, because it is early enough to blend with the direct sound instead of sounding like a separate echo. You end up with comb filtering that makes some syllables pop and others disappear.
In a typical bedroom office, the door is off to one side, so the reflection hits one ear more than the other. That can pull your stereo image sideways when you listen to music, and it can make spoken voice sound thin on recordings.
Even if you do not care about mixing, that lopsided bounce can make fatigue set in faster because your brain is constantly trying to reconcile the imbalance. It is subtle, but you notice it when you switch to headphones and everything suddenly feels calmer.
Hard doors also create a small cavity effect with the wall and trim, especially when the door is partly open. The reflection path changes as the door swings, so your sound changes when you move it a few inches.
This is why a room can sound “fine” one day and weird the next, even though nothing else changed. A door that is cracked open for airflow can shift the first reflection point enough to bring the problem back.
Hollow core door acoustics make this worse in a sneaky way because the door skin can flex and ring. You get a mix of reflection and a papery resonance that sits right in the speech range, which is why calls can sound harsh even at low volume.
That resonance is also why some doors seem to “talk back” when you play audio through speakers, like the door is a cheap drum head. If you put a hand on the door during playback and feel vibration, you are not imagining it.
Glass panes, glossy paint, and flat panel designs tend to be the worst offenders because they reflect more cleanly. A door with heavy texture or soft coverings can scatter a little, but it is still usually reflective enough to matter at desk distance.
Distance is the multiplier here, because a door that is three feet from your mic is a completely different problem than a door that is ten feet away. In tight rooms, the door reflection can be as loud as the reflection from the wall beside you.
Decide whether you need treatment on the door or near it
Before you buy anything, figure out whether the door reflection is a first reflection point or just a general hard surface in the room. If the door is beside your desk and you can see it in a mirror placed on the door while seated, it is likely a first reflection point.
The mirror test sounds goofy, but it is basically a laser pointer for reflections. It also keeps you from guessing and putting panels where they look balanced instead of where they actually work.
First reflection points are where treatment pays off fast because you are stopping a strong, early bounce. If the door is behind you, a panel can still help, but you may get more improvement by treating the wall behind your mic or the corners.
Another clue is whether the “splash” changes when you lean toward or away from the door. If a small head movement changes the tone a lot, you are probably dealing with an early reflection rather than general reverb.
Also decide what you are optimizing for, voice calls, voice recording, or speaker listening. Acoustic panels for door reflections matter most for clear speech and imaging, while low frequency issues usually need thicker traps elsewhere.
For meetings, you are usually trying to reduce harshness and make the voice sound less like it is in a tiled bathroom. For recording, you are trying to reduce room signature so edits and noise reduction do not sound obvious.
If you rent, you may prefer a reversible approach, like an over the door panel hung from hooks. If you own the place, you can combine door treatment with sealing, because door gap sound is often the bigger annoyance than the reflection itself.
There is also a practical question: do you actually use the door all day, or is it basically a wall that occasionally moves. If the door is constantly opening, a heavy panel on it can become a daily irritation even if it sounds great.
Also check what else is on that side of the room, like a closet door, a hallway opening, or a hard dresser. Sometimes the “door problem” is really a cluster of hard surfaces, and you get better results by treating the area rather than the slab itself.
If you are using a directional mic, pay attention to where the null points are aimed. You can sometimes reduce door reflections just by rotating the mic so the door sits closer to the mic’s rejection zone.
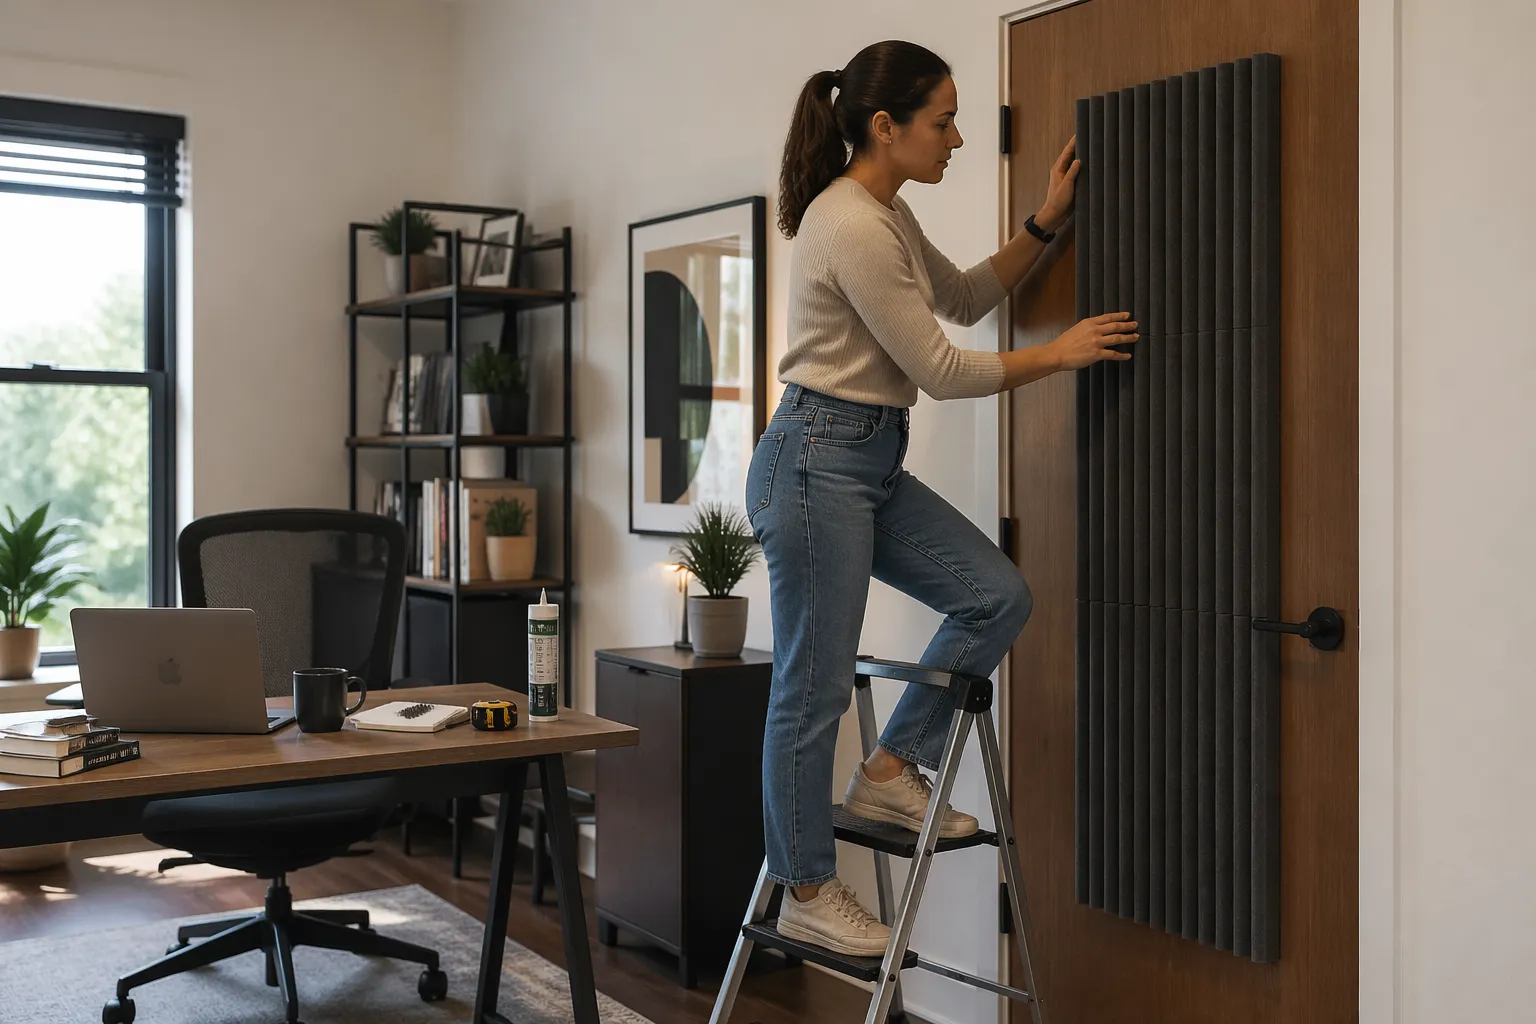
Over-the-door panel mounting options
An over the door panel is the quickest way to tame a reflection without moving furniture. The main trick is keeping the panel stable so it does not swing, scrape, or thump every time the door moves.
Stability matters because a moving panel can create its own noise, and it can also slowly chew up paint on the top edge of the door. If you hear a faint tick or creak when the HVAC kicks on, the panel may be shifting.
For most home offices, a 2 inch or 3 inch thick fiberglass or mineral wool panel is a good start, sized around 24 by 48 inches. If the door is very close to your head, a thicker panel can sound better, but weight and mounting become the limiting factors.
A smaller panel can still work if it is placed at the right height, especially for a single mic position. The goal is not to cover the whole door, but to cover the part of the door that the sound actually hits on the way to your ears or mic.
If you build your own panel, a rigid frame helps keep it from bowing and keeps the insulation from sagging over time. A soft, floppy panel can still absorb, but it is harder to mount cleanly and it can look messy fast.
Over-door hooks are popular because they are reversible, but they can create a gap that makes the panel sit at a slight angle. If the panel is angled, it can reflect some sound instead of absorbing it, especially at higher frequencies.
Two-point hanging is a nice compromise because you can tension the panel so it stays flat to the door. If you do it right, the panel feels more like part of the door than a thing dangling from it.
Command-style strips can work if the panel is very light and the door surface is clean and smooth. If the door has any texture or the room gets warm, the adhesive can creep and you end up catching the panel with your foot when it falls.
If you are tempted to use a French cleat, measure twice and account for the door swing and trim. A cleat mount is great, but it is the least forgiving option if you are trying to avoid permanent marks.
Magnetic mounting is underrated for steel doors, but you want wide magnets rather than tiny points. Small magnets can slide and leave scuffs, while larger pads spread the force and keep the panel from drifting.
| Mounting method | Best for | Watch out for |
|---|---|---|
| Over-door hooks with a wire or strap | Renters and quick testing | Panel sway, hook scratching paint |
| Command-style picture hanging strips | Lightweight foam or thin panels | Can fail with heavy mineral wool frames |
| French cleat screwed to door | Permanent, very solid mounting | Holes in door, alignment matters |
| Two-point hanging with eyelets and short chain | Keeping the panel flat to the door | Rattle risk if hardware is loose |
| Magnetic mounts on metal doors | Offices with steel doors | Limited pull strength, sliding marks |
Whatever method you use, think about what happens when the door is fully open, not just closed. A panel that clears the jamb when closed can still slam into a wall or a piece of furniture when you swing the door wide.
I also like adding a soft bumper where the panel might contact the door, because hard contact points can transmit vibration. A little rubber or felt can keep the panel quiet and keep the door from sounding like it gained a new rattle.
If you are testing, start with a temporary hang and live with it for a day. The best acoustic solution is the one you do not remove after a week because it is annoying.
Treating the wall next to the door for better results
Sometimes the best move is to leave the door alone and treat the wall beside it. If the door has trim, hinges, or a raised panel shape, the surface is not as consistent as a wall, so a wall panel can give a more predictable improvement.
That predictability matters if you are trying to get repeatable results for recordings. You do not want your room tone to change because the door is open two inches more than yesterday.
A wall panel also avoids the mechanical problems that come with hanging weight on a moving slab. If you open and close the door a lot during the day, a fixed wall panel stays quiet and stays aligned.
It also avoids the issue of door clearance, especially in older homes where doors already barely clear rugs. A thick panel on the door can turn a smooth swing into a scrape, and you will hear it every time.
To place it, sit at your desk and have a friend slide a mirror along the wall near the door. Wherever you can see your speaker or your microphone in the mirror is a good candidate spot for absorption.
If you work alone, you can tape a small mirror to a book and slide it yourself while staying seated. It is slower, but it still beats guessing based on where you think the sound “should” go.
If you can only fit one panel, I would rather see it on the wall at ear height than on the lower half of the door. Low placement looks tidy, but it misses the reflection path and you end up blaming the panel when placement was the issue.
Ear height is the money zone because it catches both the speaker-to-ear path and the mouth-to-mic path in a lot of desk setups. If your mic is on a boom arm, check the mirror position for the mic capsule, not just your head.
Another advantage of wall placement is you can add an air gap more easily. A two-inch panel with a two-inch gap often outperforms the same panel pressed flat to a surface, especially in the low mids.
If the wall space is narrow because the door trim eats up the area, a tall skinny panel can still do the job. A 12 by 48 inch panel at the right spot can be more effective than a bigger panel in the wrong place.
Wall treatment can also be easier to make look intentional, like a fabric art panel. If you are on video calls all day, a clean-looking wall panel usually blends in better than something strapped to the door.
Choosing panel thickness and materials for door areas
Door reflections mostly live in the midrange and treble, so even a 2 inch panel can make a clear difference. Still, thickness matters because thicker panels absorb lower into the mids, which is where boxy voice and room honk tend to sit.
The low mids are also where cheap laptop mics and webcam mics tend to get weird, because they already have uneven response. When you clean up the room, those mics suddenly sound more expensive than they are.
If you record voice, I like 3 inch to 4 inch mineral wool panels near the door when space allows. If you mainly do meetings, 2 inch panels are often enough, and they weigh less on an over the door panel mount.
Weight is not just a mounting issue, it is also a door hinge issue if you are hanging a lot of mass on the slab. A heavy panel can make a door feel different to open, and it can exaggerate sag on older hinges.
Foam tiles can reduce some flutter, but they rarely fix the sharp reflection that makes your mic sound brittle. A framed panel with proper insulation, like Owens Corning 703 or Rockwool Safe’n’Sound, is a more reliable tool for acoustic panels for door reflections.
If you are buying panels, look for published absorption data or at least a clear description of what is inside. If the listing is vague and the panel feels suspiciously light, it is probably more decoration than treatment.
Fabric choice matters more than people think, because the fabric has to be breathable. If you cannot blow air through it easily, it will reflect more high frequencies than you want, which defeats the whole point.
Leave an air gap if you can, even one inch helps, because it increases low mid absorption without adding thickness. On a door, the air gap is tricky, but you can space the panel off with rubber bumpers at the corners.
Those bumpers also protect the door finish and keep the panel from buzzing against the surface. If the panel touches the door at only one hard point, it can transmit vibration and you end up with a new resonance.
Do not overthink diffusion for a door reflection problem, because you usually want absorption at the first reflection point. Diffusion can be helpful in larger rooms, but in a small office it often just moves the problem around.
If you are sensitive to fiber shedding, use panels that are properly wrapped and sealed at the back, or choose a product designed for indoor air exposure. A clean build is not just safer, it also lasts longer when it gets bumped by a door handle or chair.
Handling door rattles and hardware noise
Reflections are one problem, but door noise is another, and both can show up on a sensitive mic. If you hear buzzing when you talk loudly or play music, you likely have loose hardware or a door that does not latch tightly.
Rattles can also trick you into thinking you have a bass problem, because they show up when low frequencies excite the door. You can spend money on bass traps and still have the same buzz because it was a loose strike plate the whole time.
Start with the hinge screws and strike plate screws, and replace any short screws with longer ones that bite into the stud. Then check the knob and latch for play, because a tiny wobble can turn into a loud rattle in recordings.
Pay attention to the hinge pins too, because some hinges develop a little slop that clicks when the door vibrates. A drop of appropriate lubricant and a quick alignment check can quiet a surprising amount of noise.
If the door is loose in the frame, felt pads can help, but you want to place them where the door actually contacts the stop. Too many pads can make the latch hard to close, and then people start slamming the door, which is its own problem.
Also listen for the doorknob itself, because some knobs buzz internally when the latch is not fully seated. If you can wiggle the knob and hear a click, that click will show up on a mic when the room is quiet.
- Tighten hinge and strike plate screws
- Add thin felt pads at jamb contact points
- Use a silicone door sweep for door gap sound
- Install weatherstripping on the stop molding
- Wrap loose strike plates with a thin gasket
- Lubricate latch bolt with dry graphite
Do one change at a time and test, because it is easy to fix one rattle and accidentally create another. If a new buzz appears after you mount a panel, it is usually the panel hardware, not the door magically getting worse.
If you have a mail slot, a loose vent grille, or a door knocker, treat those like little rattling instruments. A tiny bit of foam tape behind metal parts can save you hours of troubleshooting later.
For recording, the quietest door is the one that is latched and slightly compressed against the seals. A door that is “closed” but not latched often vibrates more, and it leaks more sound too.
Keeping doors functional and panels looking clean
A door still has to open, close, and latch without drama, or you will hate your own setup. The cleanest installs keep the panel inside the door perimeter so it does not catch on the jamb or rub the trim.
Measure the door width between the trim lines, not just the slab width, because trim can steal the clearance you thought you had. If the panel is even a half inch too wide, you will hear it every time the door moves.
If you use over-door hooks, pick hooks with a thin profile and add tape where metal touches paint. I also like adding two small adhesive bumpers behind the panel so it sits flat and does not tap the door when you move it.
Those bumpers also keep the panel from slowly polishing a shiny spot into the paint. A door is a high-touch surface, and scuffs stand out more there than on a wall.
Think about sightlines on video calls, because a panel that looks like a mattress strapped to the door can be distracting. A simple fabric color that matches your curtains or rug reads like decor, and it keeps the room from looking like a lab.
If you are in a shared space, looks matter because other people have to live with it too. A panel that blends in is less likely to get removed “temporarily” and never put back.
If you want the panel to disappear, mount it on the wall next to the door and hang a framed print over it with a small standoff. You will not get full absorption through a solid print, but a breathable fabric print can work well and still looks like a normal home office.
Another clean option is to use a panel that is already designed as an art piece, as long as the face fabric is acoustically transparent. If it looks good, you will keep it up, and consistency is what makes the room easier to work in.
Keep an eye on door handles and locks, because they can protrude and hit a thick panel. If the handle hits the panel, you will either dent the panel or you will stop using the door like a normal person.
If you need the door to open fully against a wall, consider a thinner panel or a wall-mounted solution instead. A door stop can help, but it is better to avoid creating a situation where the panel becomes the stop.
Door gaps, seals, and what panels cannot fix
Acoustic panels reduce reflections, but they do almost nothing for sound leaking through cracks. If you can hear hallway noise, or other people can hear your meetings, door gap sound is the first place to look.
This is where people get disappointed, because they expect a panel to add privacy. Absorption changes what happens inside the room, while sealing changes what passes through the boundary.
The bottom gap is usually the worst offender, because it is often a half inch or more. A door sweep or automatic door bottom can make a bigger change to privacy than any panel you hang on the door face.
If you have carpet, the gap can be inconsistent, so choose a sweep that can tolerate uneven floor height. A sweep that drags too hard will make you hate the door, and then it ends up removed.
Weatherstripping around the jamb helps too, but it has to compress evenly or the door will not latch. If the door is warped or the latch is misaligned, fix that first, because a bad latch makes every seal upgrade annoying.
Seals also work best when the door is solid and stable in the frame. If the door wiggles, the seal compression changes and you get little leaks that behave like tiny whistles for sound.
Hollow core door acoustics also limit how much isolation you can get, because the door itself is light. If isolation is the goal, a solid core slab plus good seals beats stacking more absorption on the interior side.
It is worth separating “my voice sounds bright in the room” from “people can hear me outside the room,” because they are different problems. You can fix the reflection and still have leakage, and that is normal.
If you cannot replace the door, you can still improve isolation a bit by sealing and adding mass where practical, but expect diminishing returns. At some point, the weak link becomes the walls, vents, or the gap under the door you did not fully close.
Panels are still useful even when you are sealing, because a less reflective room lets you speak at a lower level and still sound clear. Speaking quieter is a real-world isolation strategy that costs nothing.
Placement tricks when the door sits behind you
If the door is behind your chair, the reflection can still hit your microphone, especially if you use an omni pattern or a webcam mic. In that case, treating the door can help, but treating the wall behind you often helps more.
Behind-you reflections tend to show up as a little halo around the voice rather than a sharp slap. That halo is what makes recordings sound like they were done in a normal room instead of a controlled space.
A simple test is to clap once while seated and then once while standing near the door. If the clap sounds sharper at the desk position, the door is likely feeding a strong bounce into your listening spot.
You can also do a voice test by reading the same sentence while facing forward and then turning slightly toward the door. If the tone changes a lot when you rotate, the door is participating more than you want.
For voice recording, I prefer absorption behind the mic and behind the talent, because it reduces the room tone that makes edits obvious. If the door is directly behind you in frame, an over the door panel can double as a visual backdrop and a reflection fix.
If you do this, keep the panel high enough to cover the area behind your head and shoulders, not just the lower door. The reflection you care about is usually around mouth height and above, not near the floor.
If you use speakers, aim for symmetry first, because an untreated door on one side and a bookshelf on the other side can skew imaging. Sometimes the best answer is moving the desk six inches, which costs nothing and can change the reflection path a lot.
Small moves work because early reflections are geometry problems. If shifting the desk makes the door no longer a first reflection point, you can save panels for other parts of the room.
If the door is behind you and slightly to one side, you can sometimes fix the imbalance by treating only the door-side area. The goal is not perfect symmetry in the room, but a balanced set of early reflections at the listening position.
Also consider what happens when the door is open, because an open door can expose a hard hallway wall that becomes the new reflector. In some layouts, closing the door and treating it is easier than treating the space beyond it.
Quick listening checks to verify the fix
After you install acoustic panels for door reflections, do a fast before and after check that you can repeat later. Record ten seconds of speech on the same mic position, then listen for the sharp edge on S sounds and the papery ring that often comes from hollow core door acoustics.
Keep the recording level the same, because louder recordings can trick you into thinking the room got brighter. If your interface has a knob, take a photo of the position so you can match it later.
For speaker checks, play pink noise quietly and move your head a few inches left and right. If the door reflection was strong, the tonal balance will shift less after treatment, and the center image will feel more stable.
You can also use a familiar vocal track and listen for where the singer “locks” in the center. When the door reflection is tamed, the vocal tends to stop wandering when you shift your posture.
A clap test still works if you do it carefully, but use it as a rough indicator rather than a score. You want the clap to sound shorter and less splashy, not completely dead, because an overly dead nearfield can feel weird for long workdays.
If you hate the sound after treatment, you may have overdone only the highs while leaving the low mids untouched. That is usually a sign you used very thin material or placed it where it only catches the brightest reflection.
If you can, run a simple sweep in Room EQ Wizard and look at the impulse response around the first 20 milliseconds. You do not need perfect graphs, you just want the early reflection peak from the door area to drop after you add the panel or treat the wall next to it.
Even a phone app that shows a basic spectrogram can help you spot obvious ringing. The goal is not lab-grade measurement, it is confirming that the change you made actually targeted the door reflection.
Give your ears a day to adjust before you decide it did nothing. Early reflections are one of those things you stop noticing quickly, and then you notice immediately when they come back.
Conclusion
Doors cause reflections because they sit close, they are hard, and they usually land right in the path between your mouth, your mic, and your ears. If your desk is near a door, acoustic panels for door reflections are often one of the highest return upgrades you can make.
The key is treating the actual reflection point instead of treating whatever surface feels convenient. A single well-placed panel can outperform a whole pack of random foam squares.
Choose between an over the door panel and a wall panel based on how often the door moves and where the true reflection point sits. Then handle door gap sound and rattles separately, because absorption fixes tone, while seals and hardware fixes handle noise and privacy.
If you are on a budget, do the free steps first, like desk position tweaks and tightening hardware, and then add panels where they count. You will get a cleaner result and you will understand why it worked.
Keep the setup practical so you will live with it, and do quick listening checks so you know what changed. Once the door stops acting like a mirror, your calls get clearer and your room sounds less like a spare bedroom.


