If your home office is a square, you have probably noticed the same weird pattern, one bass note explodes and the next one disappears. Bass control in a square room is less about buying fancy gear and more about making the room stop fighting you.
Square rooms are unforgiving because symmetry stacks problems on top of each other, so small placement changes can sound like huge EQ moves. That is why people end up chasing their tail with plugins instead of fixing the layout and the pressure zones.
This article focuses on practical steps you can do in a normal home office, not a build-from-scratch studio. You will use room proportions as a guide, manage modal ringing with absorption where it counts, and pick a listening position that gives you a reliable low end.
Why square rooms exaggerate certain bass notes
A square room tends to pile multiple room modes on the same frequencies, so a few notes become way louder than they should be. That stacking is why bass control in a square room feels harder than in a rectangular space of the same size.
In a rectangle, room proportions spread modes out so peaks and dips are less coincident, even if the room is still small. In a square, the length and width modes match, and the room reinforces itself like a drum shell.
When the same frequency is supported by more than one dimension, the peak is not just taller, it is harder to tame because energy is being stored in multiple paths. That is why a single bass note can feel like it is coming from the walls instead of the speakers.
Ceiling height adds another set of modes, and in many home offices the height is low enough that those modes sit right in the upper bass and low midrange. If the height mode lines up with the stacked length/width modes, the room can sound thick and boxy even at moderate volume.
Modal ringing is the other half of the problem, because those boosted notes also hang around longer than the rest of the spectrum. You hear that as one-note bass, kick drums that smear, and bass guitar lines that lose pitch definition.
That ringing is also why you can feel like your mix is loud but not punchy, because the room is filling the gaps between hits with leftover low frequency energy. The more sustained the ringing, the more your brain stops trusting transient detail.
It helps to remember that modes are not a mysterious “studio problem,” they are just physics in a small box. If you clap and hear a flutter or a zing, you are hearing the same concept at higher frequencies, just with shorter wavelengths.
You cannot EQ your way out of a deep null, because the null is a cancellation at the listening position, not a lack of speaker output. You also cannot fix long decay with EQ, because the room keeps storing and releasing energy after the sound stops.
EQ can still be useful after you do the physical work, because it can shave down remaining peaks that are consistent across small head movements. The mistake is using EQ as the first move, because you end up boosting into a cancellation and making the room work even harder.
A simple way to hear the stacking effect is to play a slow sine sweep or a bass-heavy track and walk around the room. You will notice that the loud spots and quiet spots form a predictable grid, and in a square room that grid tends to be more dramatic and more symmetrical.
If you produce or mix at low volume, square-room bass issues can be even more confusing because the room still shapes the response even when the speakers are barely working. The goal is not “perfect bass,” it is bass that is consistent enough that your decisions translate outside the room.
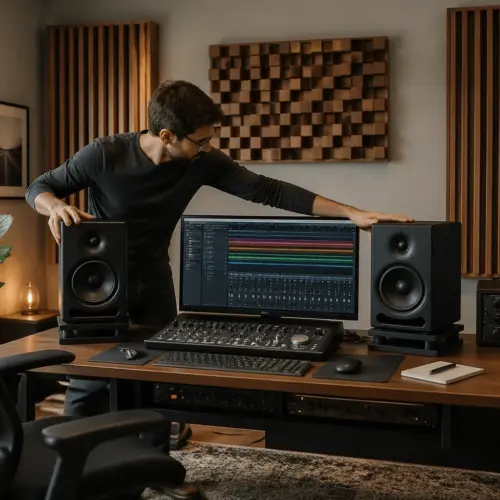
Choosing the best orientation for your desk and speakers
In a square room, orientation still matters, even though you do not get the classic “fire down the long dimension” advantage. Your goal is to break symmetry with furniture and treatment while keeping left-right imaging clean.
Start by placing the desk so you face a wall, not a corner, because corner-facing setups often exaggerate low end and make early reflections messy. If the door or window forces a compromise, choose the wall that lets you keep both speakers the same distance from side boundaries.
Try to keep the room as symmetrical as possible from the listening position forward, even if the rest of the room is messy. If one side has a closet opening and the other side is a hard wall, you will fight a tilted stereo image and uneven bass coupling.
In practical terms, that means you might put a movable panel or thick curtain on the more reflective side to match the other side. You are not trying to make the room pretty, you are trying to make it predictable.
Keep the speakers off the exact midpoints of the wall, because midpoints often line up with strong modal behavior in square geometry. A small shift, even 6 to 10 inches, can change how the first width mode couples into the room.
Also avoid placing the speakers at exactly the same distance from the front wall as your ears are from the rear wall, because that can create a repeating pattern of cancellations. Small asymmetries in distance can reduce how strongly one cancellation dominates.
Speaker height matters too, because the floor and ceiling act like boundaries that create their own interference pattern. If your tweeters are at ear height but the woofers are close to a desk surface, the desk can add a low-mid bump that feels like “extra bass” but is really smear.
Use stands when possible, and if you must use the desk, pull the speakers forward so the front baffle is close to the desk edge. That reduces the size of the reflective surface directly in front of the speaker and usually tightens the low mids.
Do not jam the speakers tight to the wall unless you are intentionally using boundary loading and you have thick trapping to handle it. Most home offices do better with the speakers 8 to 24 inches from the front wall, then you fine-tune by measurement and by ear.
If you have rear-ported speakers, the “distance from the wall” discussion becomes even more sensitive because the port output couples strongly to the boundary. That does not mean rear ports are bad, it just means you should expect a narrower sweet spot for placement.
Toe-in is another lever that indirectly affects bass perception because it changes how much sidewall energy reaches your ears. A bit more toe-in can reduce early reflections and make the low end feel clearer, even if the actual bass response is unchanged.
Keep your speaker triangle realistic for the room, because a super wide setup can push you closer to side boundaries and excite modes more unevenly. In many square offices, a slightly narrower triangle with a stable phantom center translates better than trying to “fill the room.”
If you use a subwoofer, orientation becomes a two-part problem because the sub can go somewhere else entirely. In a square room, that flexibility is valuable, but only if you are willing to measure and integrate it instead of guessing.
Even without a sub, you can think like a subwoofer user by treating speaker placement as an experiment, not a one-time setup. Mark positions with painter’s tape so you can return to a known baseline after each test.
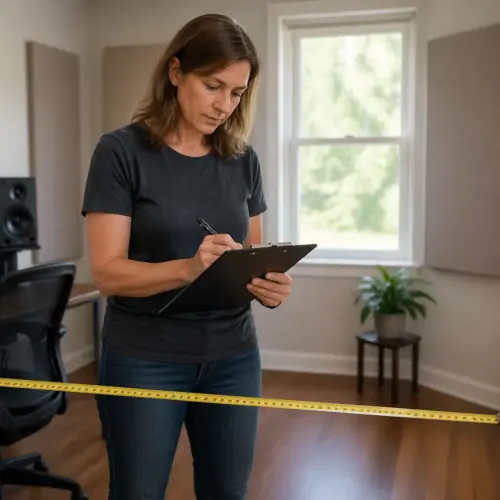
Finding a listening position that avoids the worst nulls
The listening position is where bass control in a square room either starts working or completely falls apart. If you sit in a null, you will keep adding bass in your mixes and they will blow up everywhere else.
A good starting point is to avoid the exact center of the room, because the center is often a pressure minimum for several axial modes. Move forward from the back wall so your ears land around 35 to 40 percent of the room length, then adjust in small steps.
In a square room, the “38% rule” is not magic, but it is a useful place to begin because it tends to dodge the strongest center null. The real win comes from moving in small increments and noticing when the low end stops changing wildly from note to note.
Keep your ears away from the exact midpoint between floor and ceiling as well, because height symmetry can create its own cancellation. You do not need to sit on the floor, but a chair height change of an inch or two can sometimes smooth a stubborn dip.
Try to keep the listening position and speakers aligned so the triangle is centered in the room, even if the desk is slightly off-center for practical reasons. If you offset the entire setup too far left or right, you can end up with different bass response in each ear.
Head movement is a useful diagnostic tool, because if the bass changes dramatically when you lean forward a few inches, you are sitting in a steep gradient between a peak and a null. That is a sign you should move the whole chair, not just “learn the room.”
Do not ignore the back wall distance just because you plan to add rear-wall absorption later. Absorption helps, but starting from a position that is already less extreme makes every panel you add more effective.
If your desk forces you to sit too close to the back wall, consider rotating the entire setup 90 degrees and testing again. In a square room you might not gain dimension length, but you can gain practical distance from the rear boundary depending on doors and furniture.
It also helps to keep the listening position away from exact fractions of the room dimension, like 1/2 or 1/4, because those positions often align with mode nodes. You do not have to calculate it perfectly, you just want to avoid the obvious symmetry points.
When you find a promising spot, listen to a few references you know well and focus on bass pitch, not just bass quantity. If the bass line becomes easier to follow, you are probably reducing cancellations and shortening decay in a way that matters for mixing.
Once you pick a listening position, commit to it for a while so you can evaluate changes consistently. Constantly moving the chair without tracking measurements makes it hard to know whether traps or placement are actually helping.
| Listening position option | What you often hear in a square room | Practical adjustment |
|---|---|---|
| Exact center of the room | Big bass hole around the first axial region | Move 12 to 24 inches toward the front wall |
| About 38% from the front wall | More even bass, fewer dramatic cancellations | Slide in 2 to 4 inch steps while measuring |
| Very close to the back wall | Boomy peaks and strong rear-wall reflections | Pull forward and plan rear absorption |
| Too close to the front wall | Boundary boost, muddy low mids | Increase speaker distance or add front-wall trapping |
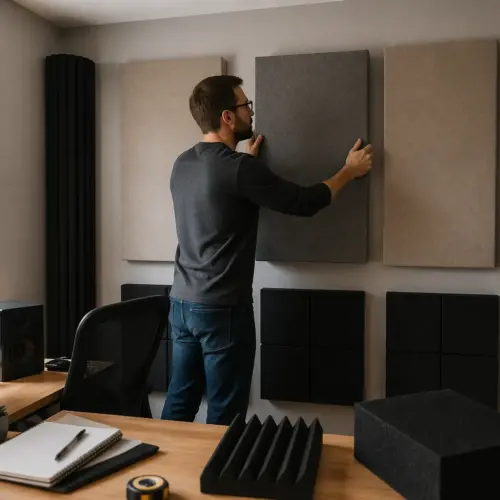
Corner trapping plan for square-room pressure zones
Corners are where low frequency pressure builds, and square rooms tend to make those pressure zones more dominant. If you want bass control in a square room, corner trapping is the first place to spend effort and money.
Think of corners as the room’s storage bins for bass energy, because multiple boundaries meet there and reinforce pressure. When you treat corners, you are not “fixing one frequency,” you are reducing how strongly the room can ring across a range of low notes.
Prioritize the vertical corners behind the speakers, because that is where the room gets hit hardest and early. Thick traps there also help with front wall boundary effects that can smear the low mids.
If you have a choice between perfectly covering one corner and partially covering four corners, start with the best two front corners and do them properly. A half-measure trap that is too thin often turns into a decoration that does not change the decay time.
Use traps that are actually thick enough to matter, which usually means 4 to 6 inches of mineral wool or fiberglass with an air gap, or a superchunk style fill. Thin foam wedges look tidy but they barely touch the modal region that causes the real headaches.
Air gaps are not a hack, they are a way to make a given panel act thicker by placing it where particle velocity is higher. If you can leave even a few inches behind a panel straddling a corner, you usually get more low-frequency effectiveness for the same material cost.
Ceiling-to-wall corners are often ignored in home offices, but they can be useful when floor space is limited. A long soffit-style trap or a row of smaller panels along the ceiling perimeter can reduce ringing without making the room feel cramped.
Door corners can be tricky because you still need the door to open, so use a movable trap or a hinged panel if that is your only available corner. Even a freestanding trap placed close to the corner during mixing can be worth it if it is thick enough.
If you can only afford two big traps, put them in the front corners and measure again before buying more. In a square room, those first traps often reduce modal ringing enough that speaker and listening position tweaks start making sense.
After the first pair, the next most useful spots are usually the rear vertical corners, because the back wall is where low end piles up when it reflects. Treating front and rear corners together often tightens the bass in a way that feels like the speakers suddenly got faster.
Do not forget that corner traps also help the midrange by reducing early reflections that bounce around the front of the room. That can make the stereo image more stable, which indirectly helps bass decisions because you stop compensating for a blurry center.
If you build your own traps, use breathable fabric and avoid sealing the front with plastic or vinyl, because that reduces absorption in the range you are trying to control. The goal is to let air move through the material so the energy turns into heat instead of bouncing back.
Corner trapping is not all-or-nothing, but it rewards consistency, so try to match trap size and placement on left and right. When the front corners are treated unevenly, you can get a low-end imbalance that makes panning decisions feel strange.
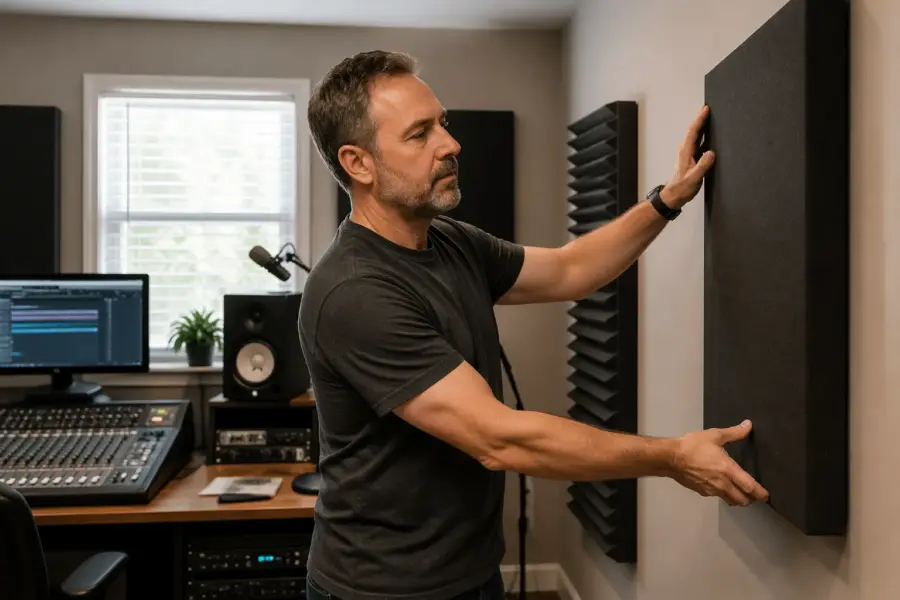
Rear wall solutions to reduce booming and ringing
The rear wall is a troublemaker in small rooms because it is close enough to act like a bass reflector and a midrange slap-back source. When you sit too close to it, you get boosted lows plus a time smear that makes mixes feel cloudy.
In a square room, the rear wall is also part of the symmetry problem, because the front-to-back path is the same length as the side-to-side path. That makes rear-wall reflections feel more “locked in” to the same notes that are already being exaggerated by the other dimension.
For bass control in a square room, thick absorption on the rear wall usually beats fancy diffusion, because you do not have enough distance for diffusion to develop. Aim for 6 inches of absorption if you can, and leave a 2 to 4 inch air gap behind it if space allows.
If 6 inches sounds impossible, do what you can but keep the goal in mind, because 2-inch panels mainly help mids and highs. A thinner panel is still useful for slap-back and clarity, but it will not solve the “boomy then hollow” bass pattern by itself.
One practical approach is to place a wide absorber centered on the rear wall at ear height, then add smaller panels above and below as space allows. Width matters because the rear wall reflection is not a pinpoint, it is a broad wavefront that benefits from broad coverage.
If the rear wall must hold shelves or a cabinet, use that to your advantage by adding absorption above and around it instead of pretending it is not there. A packed bookshelf can scatter upper mids, but it will not stop low frequency modal ringing on its own.
Cabinets and shelves can also create little cavities that resonate, especially if they have doors or hollow sections. If you hear a specific honk or rattle, tighten hardware and consider adding damping inside the furniture so it does not become part of the problem.
Watch the temptation to put a couch back there and call it a bass trap, because most couches are not thick or dense enough at the frequencies you care about. A couch is fine for comfort and some midbass damping, but you still need real panels if you want control.
If you already have a couch, you can improve it by placing a thick absorber panel behind it, turning the couch into a spacer rather than the absorber. That setup can be surprisingly effective because it creates a deeper overall system without stealing more floor space.
Rear-wall treatment also helps you hear reverb tails and delays more accurately, because the room is not adding its own “fake tail” on top. When the back wall is under control, you can set ambience levels with less guesswork.
If you do want diffusion, treat it as a finishing move after you have enough absorption to control decay. In a small square office, diffusion can make the room feel nicer, but it rarely fixes the core low-frequency translation problem.
Another overlooked rear-wall issue is noise, because computers and fans often end up behind you in a home office. If you can relocate noisy gear to the side or under the desk, your monitoring improves even if the frequency response stays the same.
Once the rear wall is treated, re-check your listening position because you might be able to sit slightly closer without the same penalty. The goal is not to sit as far forward as possible, it is to sit where the bass is even and the time response is clean.
How to verify improvements with simple measurements
You do not need a lab to confirm progress, you need repeatable measurements and the patience to change one thing at a time. A cheap USB mic like the miniDSP UMIK-1 plus Room EQ Wizard is enough to show whether your bass control in a square room is improving.
Before you measure, set a consistent monitoring level and do not change it between sweeps, because level changes can make graphs look “better” when nothing meaningful happened. Turn off any correction plugins while measuring so you can see the room and speaker behavior directly.
Focus on frequency response below 300 Hz and on decay, because modal ringing often sounds worse than a simple peak. If you see a big dip that barely changes with EQ, that is usually a listening position issue, not a speaker problem.
Waterfall and spectrogram views are especially useful because they show you which notes linger, not just which notes are loud. A room can measure “flat enough” but still sound slow if the decay below 150 Hz is dragging on.
When you measure each speaker separately, you can spot asymmetries caused by sidewall differences or furniture. If one speaker shows a deep notch that the other does not, the fix is often placement or local treatment, not global EQ.
Take multiple measurements in a small cluster around your head position, because your head is not a single point in space. If the response changes wildly across a 6-inch area, that is a sign you are still sitting in a sensitive spot between peaks and nulls.
Do not obsess over making every dip disappear, because some cancellations are too position-specific to fix perfectly in a tiny room. What you want is fewer extreme swings and shorter decay, so your bass decisions stop being a gamble.
If you add a subwoofer later, measurements become even more important because phase and crossover settings can create new cancellations. The same tools you use now will help you integrate the sub so it fills gaps instead of making the room more uneven.
- Measure left speaker alone, then right speaker alone
- Run sweeps at the same mic height as your ears
- Check decay plots for long tails below 200 Hz
- Move the chair 2 to 4 inches and re-measure
- Add one trap, then repeat the same sweep
- Save each measurement with clear filenames
Keep a simple log of what you changed, because it is easy to forget whether a panel moved 6 inches or 16 inches after a few experiments. When you can correlate a graph improvement with a specific change, you can repeat the method instead of relying on luck.
After measurements look better, confirm with listening tests using a few reference tracks and a couple of your own mixes. The point of measurement is not to win a graph contest, it is to make your decisions in the low end feel consistent day to day.
Finally, re-check after a week of normal use, because adding a rug, moving a chair, or opening a closet door can change the response more than you expect in a small square room. The more you treat and stabilize the room, the less those everyday changes will matter.
Conclusion
Bass control in a square room is a game of stacking small wins, because the geometry stacks problems in the first place. You get the biggest payoff by choosing a sane orientation, picking a listening position that avoids the worst nulls, and trapping corners and the rear wall with enough thickness to matter.
The most important mindset shift is that placement and treatment are part of your monitoring, not optional accessories that you add later. When the room is fighting you less, you spend less time compensating and more time making creative choices that actually translate.
Once the room stops ringing, your mixes translate better and you stop second-guessing every kick drum and bass note. Treat the room like part of the monitoring chain, because in a square home office it is the loudest piece of gear you own.