Ceiling height is one of those home studio variables you cannot EQ away, and it can make a mix position sound weird even when your speakers are good. The ceiling height impact on home studio sound shows up as bass unevenness, smeared imaging, and a nagging sense that the room is “talking back.”
If you work in a home office, you are probably dealing with an 8 foot ceiling, a desk jammed into a wall, and a chair that lands wherever it fits. That geometry decides where vertical modes pile up and where early reflections hit your ears, long before you buy a single panel.
I have heard small rooms with modest gear translate better than expensive rigs in bad geometry, and the ceiling is often the hidden reason. Once you understand what low and high ceilings change, you can place the desk, speakers, and cloud placement so the room stops fighting you.
What changes when your ceiling is low vs high
A low ceiling shortens the distance between boundaries, so reflections return faster and the room’s resonances spread farther up into the midrange. That means small changes in chair height or monitor tilt can change what you hear more than you expect.
With a higher ceiling, the first ceiling reflection arrives later and often lower in level, which gives your brain a clearer direct sound. You still get vertical modes, but they tend to be spaced differently and can be easier to manage with placement.
Low ceilings also push you into practical compromises like a tall monitor, a shelf, or a ceiling fan right above the listening position. Those objects can create extra flutter and comb filtering that you mistake for harsh speakers.
High ceilings are not automatically “better” because they can come with sloped drywall, open lofts, or exposed joists that scatter energy in unpredictable ways. The win is that you have more room to create separation between your ears and the ceiling reflection zone.
In an 8 foot room, your ears are often around 4 to 5 feet high when seated, which puts you near the middle of the floor to ceiling dimension. That midpoint is exactly where certain vertical modes produce nulls, so bass can vanish at the chair and boom a foot above it.
Vertical modes: why bass can feel uneven
Vertical modes are standing waves between the floor and ceiling, and they create repeating zones of peaks and nulls as you move up and down. If you have ever stood up and the kick drum suddenly got louder, you have met the ceiling height impact on home studio sound in real life.
The first vertical mode is often in the 60 to 80 Hz range for common home ceilings, and that is right where kick fundamentals and bass notes live. When that mode lines up badly with your ear height, you can end up mixing thin low end that turns into mud everywhere else.
Higher order vertical modes reach into the low mids, which can make male vocals, guitars, and snare body feel strangely hollow or boxy. This is why a room can sound “fine” at low volume, then fall apart when you push the monitors and excite those modes harder.
Carpet does not fix vertical modes because the problem is pressure buildup, not just flutter echo. Thick bass traps help, but the smartest move is to reduce how strongly your listening position sits in a null by adjusting seat and speaker height first.
If you can measure, do it, because a simple sweep and an RTA will show a vertical null as a deep notch that barely changes left to right. If you cannot measure, use a track with steady bass and move your head up and down a few inches to hear how dramatic the change is.
Early reflections from the ceiling and desk area
Early reflections are the fast echoes that arrive within the first few milliseconds, and the ceiling and desk are usually the worst offenders in a home office. They smear imaging, exaggerate sibilance, and can make you chase EQ moves that never translate.
A low ceiling reflection often lands close enough in time to cause comb filtering through the upper mids, which is where clarity lives. The desk reflection stacks on top of that, especially if you have a big flat surface and speakers that sit low and fire across it.
| Reflection path | What you tend to hear | Common geometry trigger |
|---|---|---|
| Ceiling to ears | Blurry center image, brittle top end | Low ceiling, speakers aimed too flat |
| Speaker to desk to ears | Hollow upper mids, “phasey” vocals | Large desk surface, speakers too low |
| Ceiling to desk to ears | Extra zing on cymbals, harshness at volume | Hard desk, reflective ceiling paint |
| Monitor screen bounce | Small notch in presence, odd imaging shifts | Screen between speakers, screen tilted back |
Choosing speaker and ear height with ceiling height in mind
Most advice says put the tweeters at ear height, and that is a good baseline, but ceiling height changes how strict you need to be. In a low room, a couple inches of ear height change can move you into a different vertical mode zone, so the chair matters as much as the stands.
If your ceiling is low, I like to start with a slightly lower ear height than “perfect tweeter height,” then tilt the speakers down a touch to aim at your head. That keeps the direct sound strong while reducing the strength of the ceiling bounce compared to firing straight ahead.
In a higher ceiling room, you can often keep tweeters dead on ear height and focus on symmetry and distance from the front wall. The ceiling reflection arrives later, so you can prioritize a stable stereo triangle without the ceiling dominating the first reflection pattern.
Desk height is the quiet troublemaker because it decides how much of the speaker’s output hits the desktop before it hits you. If you can raise the speakers so the tweeters clear the desk edge, the desk reflection drops in level and the midrange cleans up fast.
Do not ignore the floor, because the floor and ceiling act as a pair in the vertical dimension. A thick rug can tame some high frequency slap, but the real win comes from keeping your ears out of the worst vertical nulls while keeping the direct speaker path clean.
Practical geometry fixes before you add treatment
Before you buy panels, lock down the big geometry choices because they are free and they change everything. If you get the layout wrong, you can hang a perfect ceiling cloud and still fight a bass hole at the chair.
Start by placing the desk on the short wall so the speakers fire down the long dimension, because that usually gives smoother bass and more distance to the back wall. Keep the listening position out of the dead center of the room height and length, since centers are where nulls like to live.
Next, minimize hard surfaces between the speakers and your ears, which often means pulling the screen back or lowering it. If the monitor has to sit high, consider placing the speakers wider and slightly forward so the screen is not in the direct reflection zone.
Use small moves and listen for big changes, because vertical modes respond to inches, not feet. A two inch change in chair height or speaker stand height can beat a hundred dollars of foam every time.
If you have a ceiling fan, a light fixture, or exposed beams, do not assume they “diffuse” in a helpful way. Sometimes they create a lopsided reflection pattern, so try shifting the whole setup left or right to keep the listening position under the cleanest part of the ceiling.
Room ratios and the ceiling height trap in home offices
Many home offices land near cube-like proportions, such as 10 by 10 by 8 feet, and that stacks modes on top of each other. When the height relates too neatly to the length or width, you get repeated peaks that make bass notes bunch up.
You cannot rebuild the room, but you can avoid sitting where those stacked modes cancel. Moving the desk off the exact centerline and avoiding a 50 percent listening position along the length often reduces how extreme the worst null feels.
If your ceiling is low and the room is short, you can end up with vertical modes and front to back modes crowding the same frequency band. That is when the bass sounds one-note, and you keep turning the sub up and down without ever being satisfied.
Doors and closets can help more than people think because they act like leaky pressure vents at low frequencies. A slightly open closet door behind you sometimes smooths a low end hump better than a random panel on the wall.
When you hear someone say their room “has no bass,” I usually suspect a listening position null, not a lack of speaker output. Ceiling height is part of that story because it locks in where the vertical pressure zones sit.
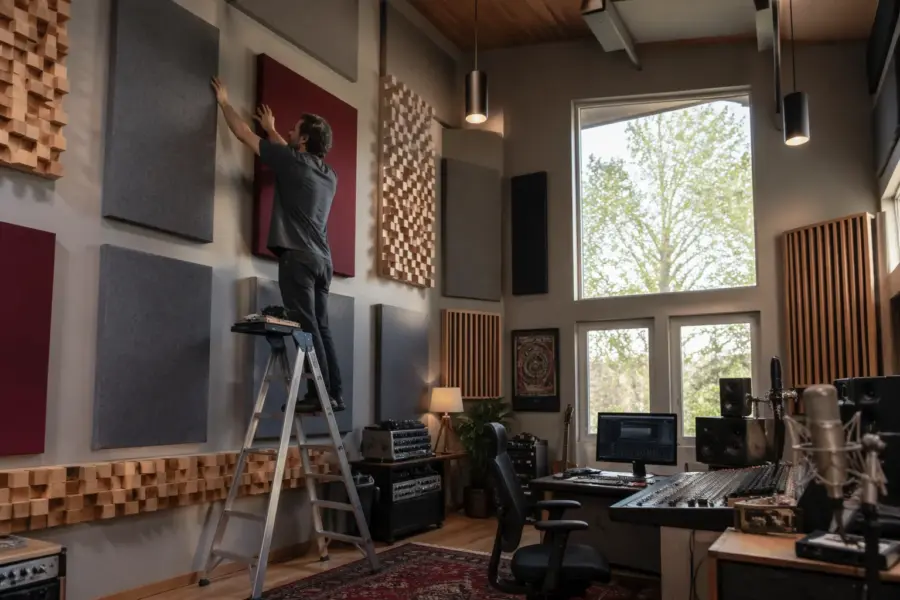
When a ceiling cloud makes the biggest difference
A ceiling cloud makes the biggest difference when the ceiling reflection is strong and early, which is most low ceiling home offices. If you clap and hear a sharp slap back from above, you are a good candidate for a cloud placement plan.
The cloud should sit above the listening position, but it also needs to cover the reflection points from both speakers, which are often slightly forward of your head. If you mount it too far back, you treat the wrong spot and keep the comb filtering you meant to fix.
- Find ceiling reflection points with a hand mirror
- Center the cloud slightly in front of the listening position
- Use 4 inch thick mineral wool or fiberglass if possible
- Leave a 2 to 4 inch air gap above the cloud
- Cover at least the width of the speaker triangle
- Avoid tiny “postage stamp” clouds over only the chair
Cloud placement details that people get wrong
The most common mistake is hanging a cloud that is too small, because a narrow panel only treats a narrow slice of the reflection. You want coverage that includes both speaker-to-ceiling-to-ear paths, not just the space directly above your head.
The second mistake is mounting the cloud flat to the ceiling with no air gap, which wastes low frequency absorption potential. Even a small gap increases effective thickness, and that helps the cloud reach lower into the range where the ceiling bounce is still audible.
People also forget that the desk reflection can be as loud as the ceiling reflection, so the cloud alone may not “fix” the harshness. If you still hear a phasey midrange after installing a cloud, look at speaker height and desk size before you blame the panels.
If your ceiling is high, a cloud can still help, but you might notice less dramatic change because the reflection arrives later and lower in level. In that case, corner bass trapping and first reflection points on the side walls often give a bigger audible payoff.
Cloud placement also interacts with lighting and HVAC, and I would rather see a slightly smaller cloud in the correct reflection zone than a huge one shoved off to the side to avoid a light. If the room forces a compromise, prioritize the reflection points first and treat the rest later.
Dealing with very low ceilings, basements and sloped drywall
Basement studios with 7 foot ceilings can sound shockingly good, but only if you accept that you are building around the ceiling. You will fight early reflections and vertical modes harder, so you need cleaner geometry and thicker absorption than a taller room.
With very low ceilings, consider lowering the listening height slightly and using stands that let you tilt the speakers down toward your ears. That keeps the direct path dominant and reduces the ceiling bounce without forcing you into a weird posture.
Sloped ceilings can help by breaking up parallel surfaces, but they can also make left and right reflections different if the slope is asymmetric. If one speaker sits under the slope and the other sits under a flat section, your stereo image can pull to one side.
In rooms with exposed joists, you can sometimes tuck absorption between the joists and get a thicker effective cloud without losing headroom. That approach can be cleaner than hanging a big panel low enough to bump your head every time you stand up.
If you have to choose where to spend limited treatment, treat the ceiling reflection and corners before you start covering random wall space. The ceiling height impact on home studio sound is strongest in the first reflection window and the lowest octave, so go after those first.
Conclusion
Ceiling height decides how your room stores bass vertically and how fast the ceiling reflection hits your ears, so it shapes both tone and imaging. If you ignore it, you will keep correcting problems that are really geometry problems.
Start with placement, especially ear height, speaker height, and desk position, because those moves can reduce vertical modes and early reflections without spending money. Then use cloud placement and targeted trapping to lock in the improvements and make your mixes translate.


