Small home offices have a special talent for making low end audio sound bigger and worse at the same time. You get boomy notes, missing notes, and a desk that seems to hum along with your kick drum.
If you are chasing bass control with limited space, you cannot treat the room like a spare bedroom studio with open floor and big soffit traps. You have to pick targets that change what you hear at the chair, not what looks impressive on a shopping list.
The good news is that small rooms respond fast when you do a few things correctly. The bad news is that the wrong “thin foam everywhere” plan can make the room dull up top while the bass stays messy.
This article focuses on high impact treatment that fits around a desk, a door swing, and the normal clutter of work life. You will see where space-saving bass traps make sense, where they do not, and how wall-ceiling treatment can save a compact studio layout.
Setting realistic bass goals for a tight room
In a tight room, “flat to 20 Hz” is a fantasy unless you rebuild the space. A more realistic goal is even bass from about 50 to 200 Hz at the listening position, with fewer deep nulls that make mixes lie to you.
That range matters because it is where kick fundamentals, bass guitar weight, and the body of synths live in most modern productions. If that band is uneven, you will either under-mix the low end or overcompensate and ship boomy mixes.
Room modes stack up closer together as dimensions shrink, so one note can jump out while the next disappears. That is why you can turn an EQ knob and still not fix the real problem, because the room is doing most of the EQ for you.
In practical terms, you are not fighting your monitors as much as the boundaries around them. The walls, ceiling, and desk create a set of predictable problems that show up every time you play a sine wave or a bass line.
Start by deciding what “good enough” means for your work. If you mainly do voice, podcasts, and calls, you may only need to stop the 80 to 150 Hz chest boom and desk resonance.
For spoken word, the goal is often clarity and consistency rather than sub-bass extension. If the room stops adding a hollow thump to certain vowels, you have already improved the end result more than most microphone upgrades would.
If you mix music, you need bass that stays consistent when you slide your chair a few inches or lean back. That usually means you are chasing smoother decay times and fewer seat-to-seat swings, not perfection on a graph.
Consistency also means the low end should not change dramatically when you turn the volume down, because small rooms can feel balanced only at one loudness. When the room is under control, you can mix at moderate levels and still trust what you hear.
It helps to think in terms of problems you can actually solve with treatment. You can reduce ringing, tame peaks, and make the bass response less position-sensitive, but you cannot make a tiny room behave like a large control room with deep front-wall construction.
Another realistic goal is to make translation easier, not to eliminate every bump. If your mixes stop surprising you in the car and on headphones, the room is doing its job even if the measurement still looks a little lumpy.
Measure if you can, but do not let the measurement become the hobby. A simple USB mic like a MiniDSP UMIK-1 with REW can show whether your changes reduce ringing, and your ears will tell you if kick and bass stop fighting.
Measurements are most useful when they answer a specific question, like whether a rear wall panel shortened decay around 90 Hz. If you find yourself taking twenty graphs a night without making changes, pause and go back to listening.
Even without a mic, you can set goals by using reference tracks you know well. Pick two or three songs with steady low end and listen for whether the bass line stays even or turns into a few loud notes and a few missing ones.
Write down the main symptoms you want to fix, because that keeps you from chasing random improvements. “Kick is too long,” “E notes vanish,” and “desk buzzes at 100 Hz” are targets you can actually address.
Prioritizing the biggest wins: corners, rear wall, and placement
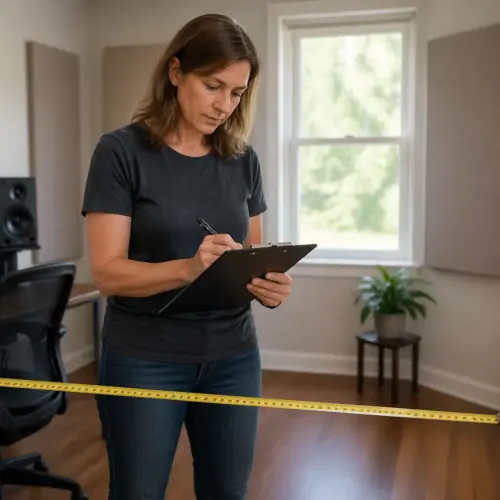
When you have bass control with limited space, placement is free and it often beats buying more panels. Before you hang anything, move the desk so you are not sitting in the dead center of the room, because that spot is mode trouble in most rectangles.
The center of the room often lines up with a big null for one or more low frequencies, so you end up mixing bass into a hole. When you move forward or backward and the bass suddenly appears, that is the room telling you the listening position is the first “treatment.”
A common starting point is to put your ears around 38 percent of the room length from the front wall, then adjust by ear and measurement. In many home offices you cannot hit that number exactly, but you can usually avoid the exact middle and still win.
Try small moves and pay attention to what changes, because a few inches can shift a null enough to matter. In a tight room, you are often looking for the least-bad compromise rather than a single magic spot.
Next, focus on the corners you actually have, not the ones you wish you had. Front vertical corners near the speakers are usually the first place to treat, because they see high pressure and they help both speakers at once.
If one corner is blocked by a closet door or shelving, treat the other corner anyway rather than doing nothing. Symmetry is nice, but reducing the worst buildup is still a net improvement, and you can balance later with placement tweaks.
The rear wall is the next big lever, especially if your chair is close to it. A thick absorber behind you often cleans up one note boom and shortens low end decay more than scattering thin panels around the room.
When the chair is near the back wall, you are sitting where pressure is high for several modes, so the room feels louder and slower in the low end. A serious rear wall panel is basically a way to give the bass somewhere to go besides back into your ears.
Speaker distance from the front wall matters more in small rooms than many people admit. If you can, test two extremes, very close to the wall or farther out, because the boundary interference dip can move into or out of the bass range.
Very close can work because it pushes the cancellation higher, sometimes above the worst bass region, and it can reduce time smear from early reflections. Farther out can work if it lands the dip in a less important spot, but in small rooms it often steals too much space.
Keep speaker symmetry tight, because uneven distances to side walls can make one channel’s bass behave differently than the other. That kind of imbalance is sneaky, since it can sound like “stereo width” until you realize the low end is leaning to one side.
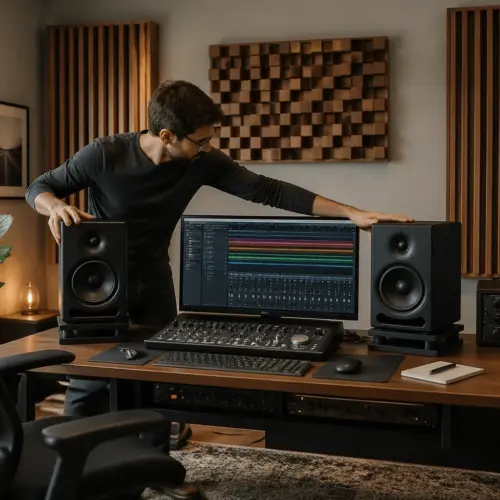
Desk placement matters too, because the desk is a big reflective surface that can reinforce certain low-mid and upper-bass issues. If you can lower the monitors, reduce the desk overhang, or use stands that decouple them, you often get a cleaner low end and clearer mids.
Decoupling is not a bass trap, but it can reduce the feeling that the furniture is singing along. If your desk vibrates, you are hearing extra energy that does not exist in the recording, and that can trick you into mixing the bass too light.
Do not forget the simple test of flipping the room if you have the option. Sometimes swapping which wall is “front” gives you better corner access, a better rear wall situation, and a more workable door swing for treatment.
Finally, accept that you might need to prioritize one listening position rather than the whole room. In a small office, the goal is a truthful spot at the chair, not perfect bass in every corner and walkway.
Space-saving trap styles that still work
Space-saving bass traps are real, but the marketing around them can get silly fast. In a small office, you want traps that keep real thickness, because bass does not care that your room is busy.
If a product claims huge low frequency absorption in an inch or two of material, assume it is only helping above the true bass range. That does not mean it is useless, but it means it will not solve the “one note boom” problem you came here to fix.
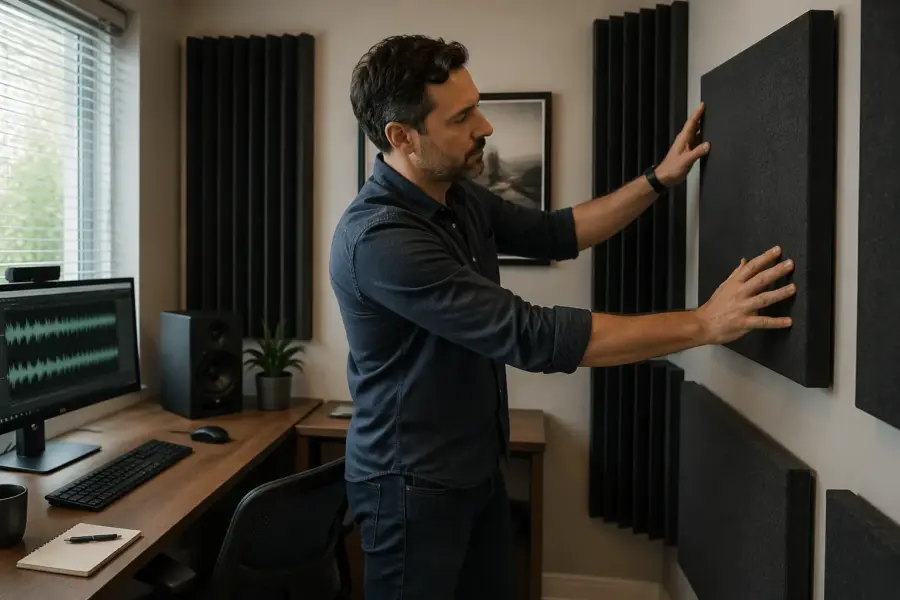
If you can only fit one style, pick thick broadband absorbers placed where pressure is high, usually corners and the back wall. Membrane traps and tuned boxes can work, but they are harder to build, harder to place, and easier to get wrong in a compact studio.
Broadband traps are forgiving because they help multiple issues at once, including some low-mid mess that makes bass feel blurry. In a small room, that low-mid cleanup can be as valuable as the deepest bass absorption, because it improves definition and punch.
Straddling a corner with a 4 to 6 inch panel and a decent air gap is one of the best space-to-performance moves you can make. The air gap is not an optional detail, because it effectively increases low frequency performance without increasing how far the panel sticks into the room.
Superchunks work well, but they eat corners, and corners are where small offices store lamps, bags, and spare cables. If you can spare one corner for a superchunk, pick the corner that is closest to the speakers and least likely to be blocked by daily life.
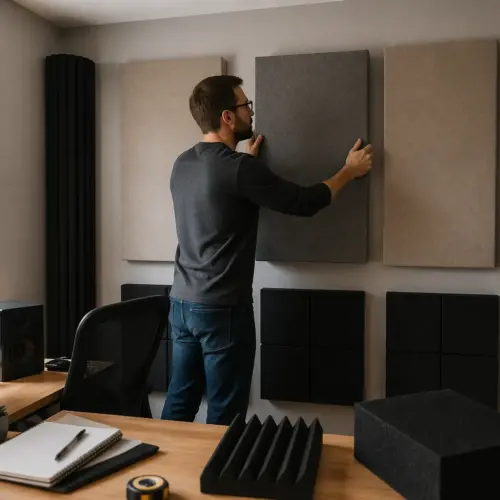
Rear wall traps can be built as a single thick panel or as multiple sections that cover the area behind your head and shoulders. In a small room, width matters because the rear wall reflection is not a pinpoint, it is a broad wavefront that hits a big area.
Ceiling clouds are sometimes sold as “reflection control,” but they also matter for bass control with limited space because they add more total absorption volume. If you build them thicker and leave a gap, they start contributing in the upper bass where many rooms feel muddy.
Membrane-faced broadband panels can be a smart compromise when you need more low end absorption without making the room too dead in the highs. The membrane reflects some top end while still letting low frequencies move the panel and get absorbed in the insulation behind it.
Tuned traps are tempting when you have one brutal mode, but they can become a rabbit hole fast. If you do not know the exact frequency, the bandwidth, and the placement, you can build a beautiful box that does almost nothing where you need it.
Another space-saving trick is to use thicker traps in fewer locations rather than thin traps everywhere. Four serious panels in the right places usually beat twelve thin panels that mainly absorb highs and leave the bass untouched.
Whatever style you choose, pay attention to how it mounts and how it affects the room’s daily use. A trap that is constantly in the way will eventually get moved to a worse spot, and then it becomes expensive decoration.
| Trap style | Typical thickness or depth | Best use in a small home office |
|---|---|---|
| Superchunk corner fill (triangular) | 12 to 24 inches across the face | Maximum low end absorption when you can spare a corner |
| Straddled corner panel (broadband) | 4 to 8 inches plus air gap | Good compromise for space-saving bass traps in front corners |
| Thick rear wall panel | 6 to 10 inches plus air gap | Reduces boom and ringing when the chair is near the back wall |
| Ceiling cloud with perimeter gap | 4 to 6 inches plus 4 to 8 inch gap | Helps upper bass and low mids while improving imaging |
| Panel absorber with membrane face | 6 to 12 inches total depth | Targeted control when one mode dominates and space is tight |
Do not read the table as a strict menu where you must pick one item and ignore the rest. Most small rooms need a blend, with corners and rear wall doing the heavy lifting and the ceiling cloud making the whole picture cleaner.
Also remember that “space-saving” can mean vertical, overhead, or dual-purpose, not just thin. A thick trap that lives above a door frame or along a ceiling edge can be more space-efficient than a slim panel that steals elbow room beside your chair.
Using wall-ceiling corners when floor space is gone
When the floor is taken by a desk, chair, filing cabinet, and maybe a guitar stand, the ceiling line becomes your best real estate. Wall-ceiling treatment works because those edges are also pressure zones, and you can run long traps without tripping over them.
This is where bass control with limited space starts to feel less limiting, because you can add a lot of absorption volume without changing how you walk through the room. The best part is that long runs tend to be more effective than tiny “accent” traps scattered around.
A simple approach is a long “soffit style” absorber where the wall meets the ceiling, built from a wood frame and filled with mineral wool. You do not need to seal it like a duct, but you do need enough depth, because a skinny tube does not do much below 150 Hz.
Depth is the hard truth here, so plan for something that is visibly substantial and then decide how to make it look intentional. If you treat it like trim work and keep the lines clean, it can look like a design choice instead of a science project.
If you cannot build a continuous run, place shorter sections in the front half of the room first. Treating the wall-ceiling corners above the speakers often tightens the low end and makes the stereo image stop wobbling when bass hits.
Front-half coverage also tends to be easier because you can mount above the desk area where you already accept “studio stuff.” In many offices, the rear half has doors, closets, or windows that make continuous treatment harder.
Keep an air gap behind these traps when possible, because the gap acts like extra thickness. Even a 3 to 6 inch gap can shift the useful range downward, which is exactly what bass control with limited space needs.
If you are building a triangular soffit, the “gap” is naturally built in as the empty space behind the face, so do not pack it solid unless you have a reason. Leaving that cavity helps the trap behave like a deeper absorber without adding weight and cost.
Do not ignore the ceiling itself, because a thick cloud above the desk cleans up early reflections and also catches some upper bass. In a compact studio, the cloud plus wall-ceiling corners often gives a bigger improvement than swapping monitors.
A cloud is also a good way to reduce fatigue, because harsh early reflections can make you turn the volume down and still feel tired. When the top end is cleaner, you can listen longer and make better low end decisions because the whole balance is easier to read.
Wall-ceiling corners can also help with flutter and slap that show up between parallel surfaces, even if your main complaint is bass. When the room stops “talking back” in the mids, the bass becomes easier to judge because the mix is not masked by extra room sound.
If you have crown molding or a ceiling fan, you may need to adapt the design rather than forcing a perfect rectangle. A series of shorter modules that fit around obstacles can still add up to meaningful absorption volume.
Be realistic about mounting, because overhead traps need to be secure and safe. If you are not confident in anchors and joists, use lighter frames, more attachment points, and avoid relying on a single screw into drywall.
Finally, do not assume you must treat every edge to get results. One long run above the front wall and a cloud above the desk can shift the room from “hopeless” to “workable” faster than you would expect.
Multi-use solutions: movable traps and furniture-friendly options
If your office has to look like an office, treatment has to earn its keep. Movable traps on stands can act like a temporary rear wall absorber during mixing, then slide away when you need the room for a call or a workout.
Movable traps also let you experiment with placement without committing holes to the wall. In a small room, being able to try “behind the chair” versus “rear corners” in ten minutes is a big advantage.
One of my favorite tricks is a pair of thick gobos that live beside the desk like end tables. When you work on music, you rotate them to straddle corners or sit behind the chair, and when you work on spreadsheets they just look like furniture.
If you build gobos, make them heavy enough to be stable and thick enough to matter, because a flimsy divider is mostly a visual prop. A good gobo is basically a portable bass trap, not a privacy screen.
Bookshelves can help, but only if you treat them honestly. Random books and bins scatter highs and mids, yet they do very little for bass unless you add thick absorption behind or above them.
A bookshelf can be a great place to hide absorption, because you can line the back with mineral wool panels and still keep the front usable. That turns a normal piece of furniture into a hybrid absorber-diffuser that does not scream “studio.”
Large, soft furniture can help with upper bass, so a couch along the rear wall is not wasted space if you already wanted seating. A thin office chair and a small rug do almost nothing for the low end, so do not count them as treatment.
A thick rug with underlay can reduce some floor reflection harshness, but it will not solve modal bass issues. If the room sounds better after adding a rug, that is usually because the highs calmed down, not because the bass got controlled.
If you record vocals, a movable trap behind the mic often gives a cleaner take than foam on the wall. That same trap can become a rear wall absorber at mix time, which is a practical way to stretch a small budget.
For vocals, think about the space behind the singer as much as the space behind the mic, because the room reflections that hit the mic are coming from all directions. Two gobos in a shallow “V” behind the singer can sound surprisingly controlled without building a booth.
Another multi-use option is to treat the inside of a closet door or the back of a room divider. If it is already a surface that exists in the room, adding absorption there can be a low-drama way to increase total coverage.
Wall art can also be a delivery system for treatment if you build panels that look like frames. The key is to keep the panel thick enough and avoid sealing it behind glass, because the goal is absorption, not a shiny poster.
Do not underestimate how much “office-friendly” matters for long-term success. A plan you can live with every day will keep working, while an ugly or inconvenient plan will slowly get dismantled one panel at a time.
If you share the space with someone else, movable and furniture-like solutions reduce friction. When the room still functions as a normal office, you are more likely to keep the treatment in place and keep benefiting from it.
Checking your work with quick tests and simple measurements
You can hear a lot with two quick tests, a sine sweep and familiar bass-heavy music. Walk around while the sweep plays and notice where the bass piles up, because those spots are telling you where pressure lives.
Pay attention to corners, wall-ceiling edges, and the area right behind your chair, because those are common hotspots in small rooms. If the sweep suddenly gets loud near a boundary, that is a hint that absorption there will be more efficient than absorption in the middle of a wall.
At the chair, listen for notes that hang on too long, because that is usually decay, not volume. When treatment works, the bass sounds shorter and more even, and you stop chasing it with EQ.
Long decay often makes bass feel “big” at first and then exhausting over time, because the room keeps adding low end after the note is supposed to stop. Tightening decay makes grooves feel clearer and helps you set compression and release times with more confidence.
If you use REW, focus on the waterfall or decay view, not just the frequency line. A smoother line looks nice, but shorter decay in the 60 to 200 Hz range is where small rooms start behaving.
Also look at the spectrogram if you like visuals, because it makes ringing stand out as bright streaks that refuse to fade. When you add the right trap, those streaks shorten, and you can see the improvement even if the frequency response only changes a little.
Do measurements in small steps, and label everything, because it is easy to forget which graph was “trap in corner” versus “trap moved two feet.” You will learn faster by changing one thing at a time than by rearranging the entire room and guessing what helped.
Small steps also protect you from placebo, because it is easy to “hear” improvement when you just did a bunch of work. If one change produces a repeatable improvement in decay or smoothness, you can trust it and build the next step on top of it.
When you measure, keep the mic position consistent and do not hold it in your hand. A mic on a stand at ear height, pointed the same way each time, gives you data you can compare without guessing what moved.
Use a sensible sweep level and avoid clipping, because distorted sweeps can make the room look worse than it is. If the graphs are messy, lower the level and try again before you assume the room is impossible.
Listening tests should include quiet playback as well as moderate playback. If the bass only feels balanced when it is loud, that can be a sign that you are still sitting in a null and turning up to “fill it in.”
Another quick check is to flip the polarity on one speaker temporarily and listen for how the low end changes at the chair. If the bass collapses dramatically, your setup is sensitive to phase and boundary effects, and placement and symmetry deserve extra attention.
Keep your expectations grounded, because a compact studio has hard limits set by its dimensions. If you knock down the worst peaks and tighten decay, you have already achieved bass control with limited space that many bigger rooms never get.
Translation is the final test, so compare your mixes on headphones, a car system, and a small speaker. When the room is improved, you will spend less time doing “bass apology revisions” after checking elsewhere.
A phased plan you can implement over a few weekends
A phased plan keeps you from buying random panels and hoping for a miracle. It also lets you stop early if you hit “good enough” for your work and your tolerance for gear projects.
Phasing matters because each step changes what the next step should be. If you add a huge rear wall trap first, you might discover you need less corner treatment than you thought, or you might find that speaker placement becomes easier to dial in.
Weekend one is placement and the first real absorption, because those changes are immediate. Move the desk, set speaker symmetry, and add the thickest traps you can manage in the front corners, even if they are temporary stands at first.
Do not worry about making it pretty on the first weekend, because the goal is proof, not perfection. If two temporary traps make the bass noticeably tighter, you have earned the right to build nicer versions later.
Weekend two is usually rear wall and ceiling work, because that is where small rooms tend to store the most audible problems. A thick rear wall panel and a cloud can make the room feel less “boxy” even before you add more corner coverage.
If you cannot mount a rear wall panel, use a movable trap behind the chair and treat it like a permanent part of your workflow. Many people get stuck because they think treatment must be fixed to the wall to count, but portable solutions can still be serious.
Weekend three is refinement, which means filling the gaps that measurements and listening tests point to. That might be adding wall-ceiling corner sections, adding a membrane face to keep the room from getting too dead, or improving symmetry if one side is more reflective.
As you add absorption, check that the room does not become unnaturally dull in the highs while still being messy in the lows. If that happens, you likely need thicker low frequency treatment rather than more thin panels, and you may want to keep some reflective surfaces.
Budget-wise, it is often smarter to build fewer, thicker panels than to buy many thin ones. If you are buying pre-made, prioritize thickness and mounting flexibility, because those two factors decide whether the panels will end up in the right places.
- Move the listening position off the room center line
- Test speakers close to the front wall versus pulled out
- Add two thick corner traps at the front wall corners
- Hang a 4 to 6 inch ceiling cloud above the desk
- Place a thick panel on the rear wall at ear height
- Measure decay changes after each single move
After you complete the list, live with the room for a few days before you decide what is next. Real work sessions reveal problems that quick tests miss, like whether the low end stays consistent across different keys and different arrangements.
If you still have one stubborn boom, consider targeted options like a membrane-faced panel or a deeper corner trap in the worst spot. The point of the phased plan is that you earn the right to get fancy only after the basics are locked in.
Keep a simple log of what you did and what you heard, because memory is unreliable when you are excited about improvements. A few notes like “rear wall panel reduced 90 Hz ring” will save you from undoing progress later.
Finally, do not forget that bass control is tied to workflow. If you can keep the room consistent, keep the listening position consistent, and keep the treatment in place, your decisions get faster and your mixes get more repeatable.
Conclusion
Bass problems in a small home office can make good speakers sound cheap and make you second-guess every mix decision. The fix is not more gadgets, it is smart placement and a few thick absorbers where the room stores low frequency energy.
Most of the frustration comes from trying to solve bass with thin materials and random placement, which mainly changes the treble and leaves the real problem untouched. When you aim your effort at corners, the rear wall, and the ceiling line, the room starts responding in a predictable way.
If you treat corners, respect the rear wall, and use wall-ceiling treatment when floor space is gone, the room starts cooperating. That is what bass control with limited space looks like in real life, and it is achievable without turning your office into a construction site.
The best outcome is not a perfect graph, it is a room where you can trust the low end enough to work quickly. When kick and bass feel stable, you stop guessing, and the whole mix process becomes calmer and more consistent.
Start with the free moves, add thickness where it counts, and measure just enough to stay honest. A small room will always be a small room, but it can still be a reliable one.