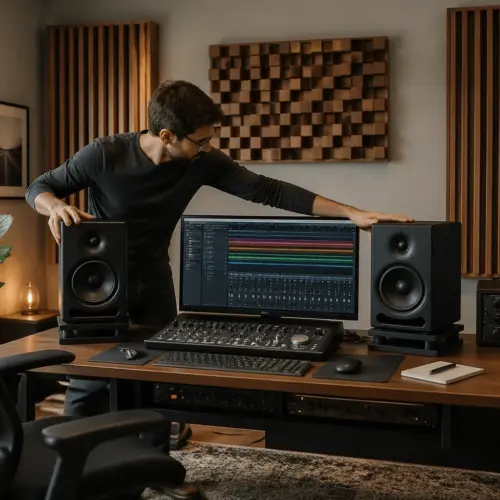
If your home office doubles as a mixing room, podcast booth, or just a place where you want music to sound sane, corners are where the low end goes to misbehave. Treating corners for bass in a home office is the fastest way to stop the room from lying to you.
You can buy nicer monitors, swap interfaces, and chase plugins all day, but the room still decides what you hear below about 200 Hz. Corners are the room’s favorite hiding spot for bass problems, and they are also the easiest place to attack them.
The good news is that you do not need a dedicated studio to get real improvement. With a little planning, every corner in a normal office, including the weird ones around doors and closets, can do useful work.
The goal is not to make the room dead, it is to make the low end predictable. When bass is predictable, you stop second guessing your decisions and you work faster.
Corner treatment is also one of the few upgrades that helps everything you do in the room, from mixing to Zoom calls to casual listening. It is boring compared to buying gear, but it is the kind of boring that pays rent.
Why corners collect bass energy
Bass builds up in corners because boundaries force the air particle motion to slow down, which pushes sound pressure up. When two walls meet, that pressure increase stacks, and when three surfaces meet at a tri-corner, it stacks again.
That pressure pileup is exactly what makes corners such strong targets for thick, porous absorption. If you put the same absorber flat on a wall, it sits where bass particle velocity is low, so it works less where you need it most.
Most home offices have room modes that ring at a few specific low frequencies, often between 40 Hz and 120 Hz. Those modes create boomy notes in one spot and missing notes a couple feet away, which is why you can’t EQ your way out of it.
Modes are basically the room resonating like a big box, and the room dimensions decide the notes. That is why two rooms with the same speakers can sound completely different in the bass.
In a small office, the first few modes are spaced far apart, so the bass response tends to be lumpy instead of smooth. You hear that as certain notes jumping out while others vanish, even when the source is consistent.
Corners also act like collection points for multiple modes at once, so treatment there tends to improve several problems together. That is why treating corners for bass in a home office usually beats random panels on random walls.
Another reason corners feel dramatic is that they are where reflections meet each other quickly, so the room stores energy and releases it late. That late energy is what makes bass sound smeared, like the room is adding its own tail to every kick hit.
If you clap in a small office you hear flutter and slap, but bass problems are the same idea at a slower time scale. You might not hear a “ring” as a tone, but you feel it as thickness and lack of definition.
When you treat corners, you are reducing both the peaks in frequency response and the decay time that makes the room feel slow. The combination is what makes bass suddenly sound tighter rather than just quieter.
Prioritizing corners: which ones matter most first
Start with the two vertical corners in front of you, the ones behind your speakers, because they get hammered by speaker output and front wall reflections. If you only treat two corners, treat those first and you will hear it right away.
The front corners also influence what you think the low end is doing at the listening position, because they are close to the source. Cleaning them up can reduce the “one note bass” effect that makes you under-mix or over-mix the bottom.
If your speakers are close to the front wall, those corners become even more important, because boundary reinforcement is stronger. A few inches of placement change can alter the bass a lot, so corner treatment helps stabilize that variable.
Next, hit the rear vertical corners behind your chair, because the back wall is where low frequency reflections pile up and smear kick and bass timing. A lot of small rooms sound “slow” in the low end because the back corners are bare drywall.
Rear corners are also where you often have furniture that does not help acoustically, like a filing cabinet or a tall drawer unit. Even if you cannot go floor to ceiling, adding meaningful absorption in the upper part of those corners can reduce the worst ringing.
After the four vertical corners, look for the strongest tri-corner opportunities, especially where wall meets wall meets ceiling. Those spots can take smaller amounts of material and still help, because the pressure is high there.
Ceiling height matters here, because low ceilings tend to exaggerate certain modes and make the room feel more boxed in. Treating the wall-ceiling line can make the room feel taller sonically even if the dimensions do not change.
If your desk is centered on the short wall, you may have left-right symmetry that makes corner work more predictable. If your setup is shoved into one side of the room, treat the closer corner first, because that side usually dominates what you hear.
When you treat only one side in an asymmetrical setup, you are not chasing perfect symmetry, you are reducing the strongest offender. The goal is to stop the closest boundaries from acting like a bass megaphone right next to your head.
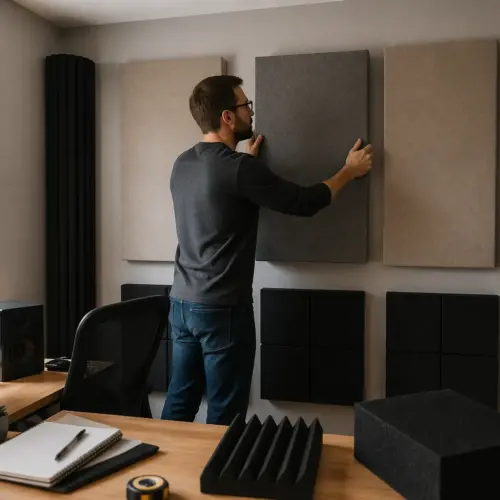
Also pay attention to corners that are “hard” versus “soft,” like a corner with a heavy curtain versus a corner with bare drywall. The hard corners usually need the help first, because they reflect more and store more energy.
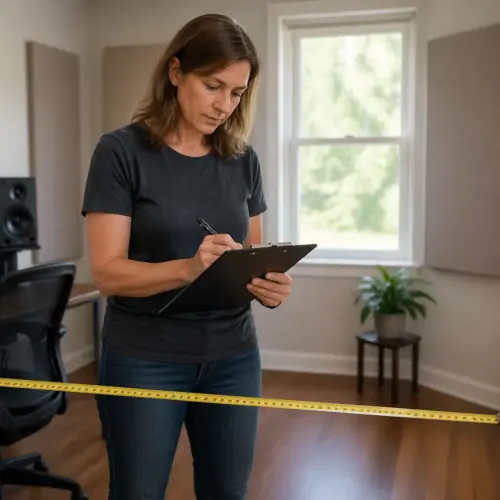
If you are unsure which corners are worst, walk the room while playing a sine sweep or bass-heavy track at a moderate level. You will feel the bass get louder and quieter, and the loudest pressure zones often line up with corners and wall boundaries.
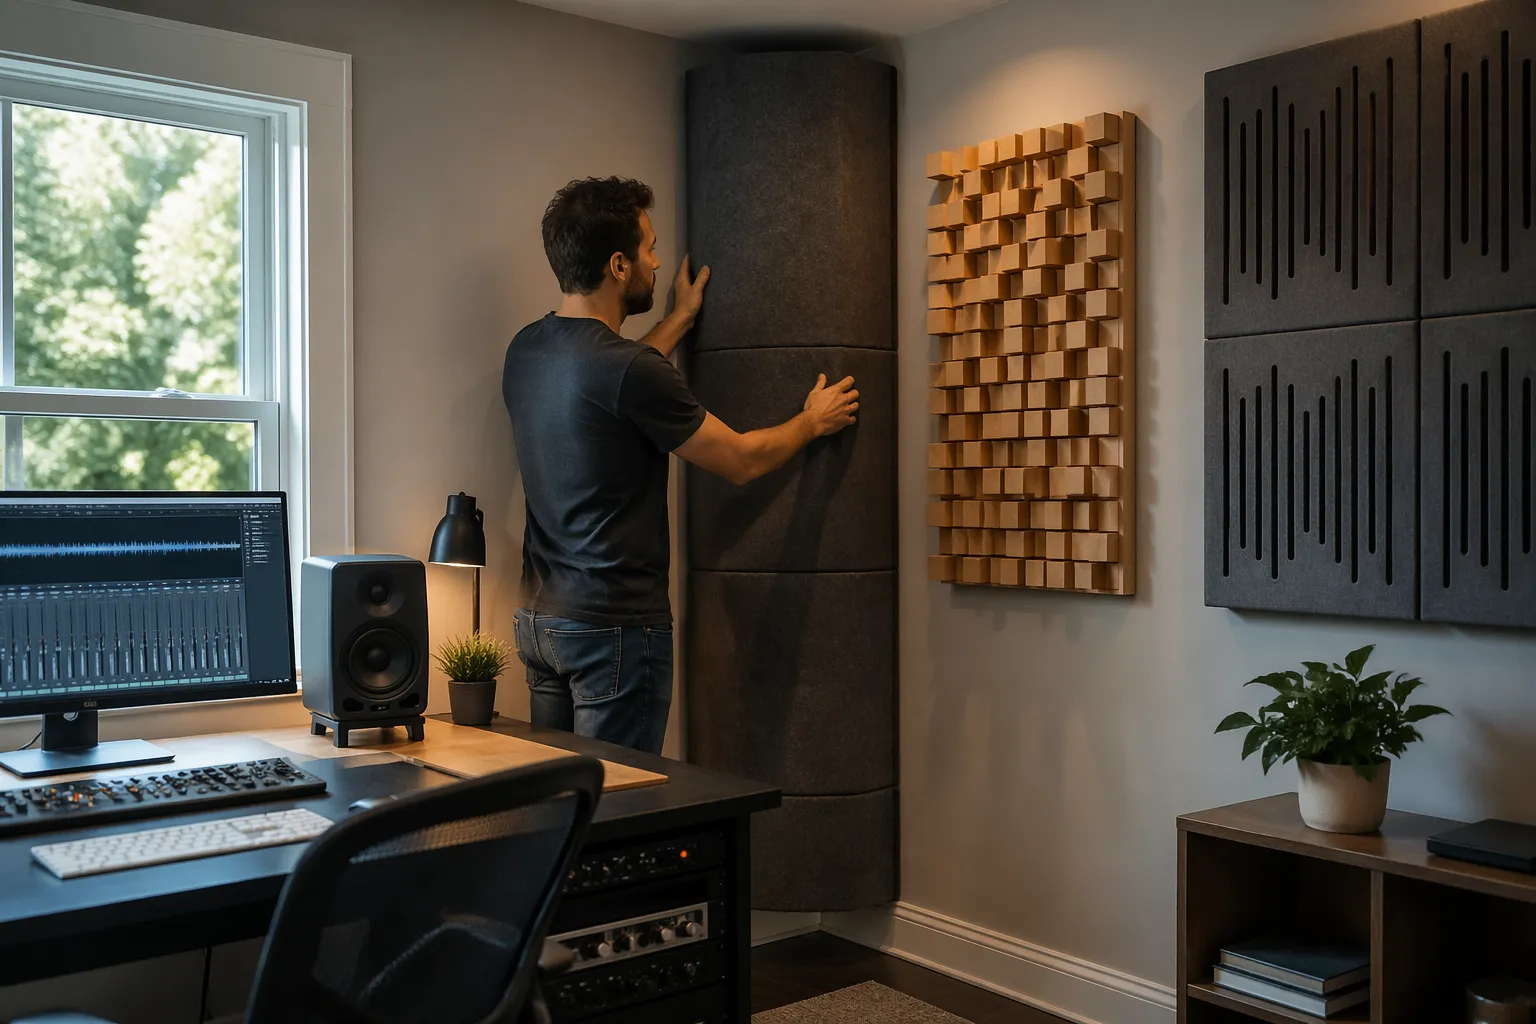
Vertical corner traps vs superchunks: pros and tradeoffs
Vertical corner traps are usually rectangular panels straddling the corner with an air gap behind them, and they are the most space friendly option. Superchunk traps are big triangles of insulation stacked floor to ceiling, and they are the “go big” move for stubborn low end.
I like straddled panels when the room is a real office and you still need to walk, open drawers, and not feel boxed in. I like superchunk traps when the room is small, the bass is messy, and you can spare the footprint because results matter more than aesthetics.
Straddled panels also have the advantage of being easier to move and upgrade later, because they are basically big frames. If you decide to change rooms or reconfigure your desk, you can often take them with you without rebuilding everything.
Superchunks are simple in concept but can be more work in practice, because you need a lot of material and a clean way to cover it. They also tend to collect dust if you do not wrap and seal them properly with fabric and a decent frame.
In terms of performance, both approaches can work well if they are thick enough and cover enough area. The reason superchunks have a reputation is that people usually make them large, and large traps tend to work better in the bass.
A straddled panel can punch above its size if you leave a generous air gap behind it, because the effective depth increases. That air gap is not wasted space, it is part of the absorber system.
Hybrid traps are worth mentioning because they are often the best compromise for offices, where you want clean edges but you also want more depth. Stuffing the cavity behind a straddled panel with fluffy insulation can add low end absorption without the full superchunk footprint.
Another tradeoff is durability, because a rigid framed panel can take bumps from chairs and vacuum cleaners better than exposed insulation. If your office is a daily-use space, durability is not a luxury, it is what keeps you from hating your setup.
| Trap type | Typical build | Best use case |
|---|---|---|
| Straddled vertical panel | 4 to 6 inch mineral wool panel with 2 to 6 inch air gap | General bass cleanup with minimal floor loss |
| Thick vertical panel | 8 to 10 inch panel straddling the corner | When 4 inch traps are not enough and you still want a slim look |
| Superchunk trap | Triangular stacked insulation, often 17 to 24 inch face | Maximum broadband bass control in small rooms |
| Hybrid corner trap | Panel plus stuffed cavity behind it | When you want near superchunk performance with cleaner edges |
If you are buying instead of building, check the real thickness and the mounting style, not just the marketing name. A product called a “bass trap” can still be too thin to matter where you actually have problems.
If you are building, use breathable fabric so sound can get into the insulation, and do not wrap it in plastic or vinyl. If you want a cleaner look, add a thin decorative outer layer, but keep the acoustic path open.
Also think about fire safety and cleanliness, especially in a home office where you spend hours a day. Use materials intended for building insulation and keep fibers contained with fabric and a proper frame.
Wall-ceiling corner treatment that doesn’t take floor space
Wall-ceiling corners are underrated because they do not steal any walking space, and they often sit unused above shelves and monitors anyway. A long soffit style trap up there can calm the room without changing how your office functions.
These traps also help because they cover a lot of linear distance, which is a big deal in small rooms. A long run of absorption can reduce multiple resonances at once even if the trap is not extremely deep.
You can run 12 to 16 inch deep “cloud soffits” along the front wall-ceiling corners, and it helps with both bass buildup and early reflections. If you do video calls, this also cleans up the boxy voice sound that makes your mic feel cheap.
Front wall-ceiling treatment is especially useful if your speakers are close to the wall, because it reduces the strength of the early boundary interaction. It can also reduce the sense that bass is coming from the wall instead of from the speakers.
Rear wall-ceiling corners matter too, because they are often the longest uninterrupted corner line in an office. Treating the back wall-ceiling line can make the room feel less like it is pushing bass back at you.
For DIY, build a simple wooden frame, fill it with mineral wool or fiberglass, wrap it in breathable fabric, then mount it with L brackets into studs or ceiling joists. If you cannot hit framing, use proper toggle anchors and keep the trap lighter by using 3 to 4 inch material with an air gap.
When you mount these, leave a small air gap between the trap and the ceiling or wall if you can, because it improves low frequency performance. Even a couple inches of spacing can make the same material work harder.
If you are worried about looks, treat the wall-ceiling corners in sections that align with existing lines, like the width of a window or a shelf. A trap that looks intentional is easier to live with than one that looks like an afterthought.
When you treat wall-ceiling corners, you are basically treating a long tri-corner line across the room. That is why these traps can punch above their weight compared to a random panel hung mid wall.
Another bonus is that wall-ceiling traps can reduce the amount of treatment you need at ear level, which keeps the room feeling open. In an office, comfort matters because you are in there for long sessions, not just quick checks.
If you already have a ceiling cloud over the desk, wall-ceiling corner traps can complement it by extending absorption to the boundaries. The cloud handles reflections, while the corner line helps with pressure buildup and decay.
Using the tri-corner to your advantage
The tri-corner is where two walls and the ceiling meet, and it is one of the highest pressure zones in the room. If you can only add a small amount of absorption, placing it near a tri-corner usually beats placing it in the middle of a wall.
Think of tri-corners as the room’s pressure valves, because that is where energy likes to collect. When you treat them, you are not fixing a single reflection, you are reducing how much the room stores and replays.
A compact triangular “corner cap” trap mounted at the very top of a vertical corner can help, even if the rest of that corner stays open for furniture. This is a nice compromise for home offices where floor to ceiling traps would annoy you every day.
Corner caps are also easy to experiment with, because they are light and small compared to full traps. You can move them from front to rear corners and listen for which placement gives you the biggest improvement.
Tri-corner treatment also plays well with lighting and decor, because you can hide it behind crown molding lines or above tall bookcases. If you keep the fabric color close to the wall paint, most people will not notice it on a video call.
If you have LED strip lighting near the ceiling, you can even integrate the trap visually by keeping it in the same line. The goal is to make the room feel like a finished office, not a science project.
If you already have vertical corner traps, adding small tri-corner pieces at the top can smooth the last bit of low end ringing. That last bit is the part that makes bass guitars sound like they have one note.
Tri-corner pieces can also reduce how sensitive the room is to tiny head movements, which is a big deal in small spaces. When the bass response is less twitchy, you can sit naturally instead of freezing in one “magic” spot.
If you want to get nerdy, tri-corner treatment can improve decay more than it improves frequency response, and that is still a win. A flatter graph is nice, but a shorter decay is what makes bass feel controlled and musical.
Do not feel like you need to treat every tri-corner equally, because furniture and layout change how useful each one is. Prioritize the tri-corners closest to the speakers and the back wall first, then fill in the others if you still hear problems.
Door, window, and closet corner workarounds
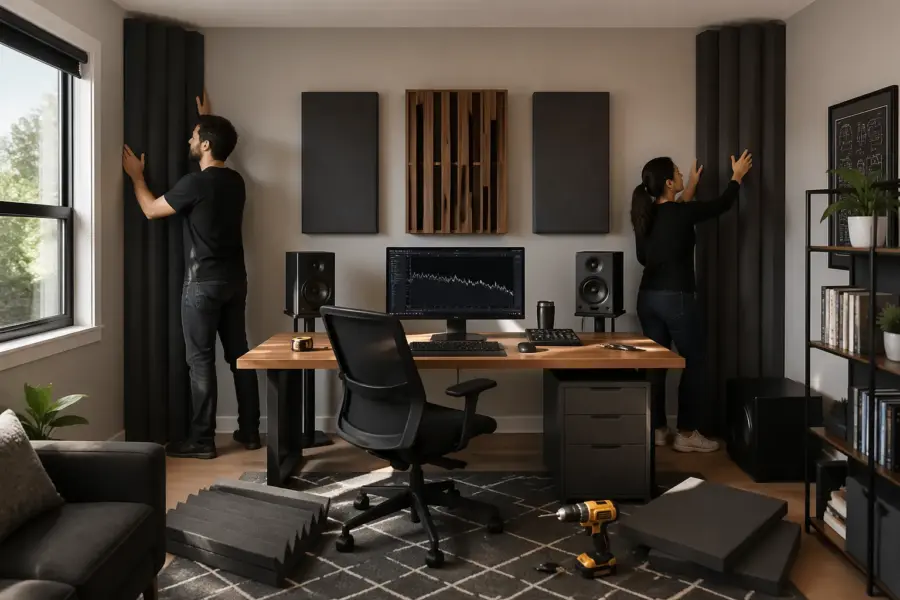
Real rooms have doors, windows, and closets, and those corners still matter even when they are awkward. Treating corners for bass in a home office often means using partial height traps, movable traps, or wall-ceiling options where the floor area is blocked.
The mindset shift is that you are treating the acoustic corner, not the architectural perfection of the corner. Even if the corner is interrupted, the pressure zone still exists around it, so partial solutions still help.
For a door corner, a common trick is a freestanding trap on a base that you slide out when you work and slide back when you need the door. If that sounds annoying, build a thinner straddled panel and mount it higher, leaving clearance for the door swing.
You can also treat the wall-ceiling corner above the door, which is often completely unused space. That one move can reduce how much the door corner acts like a hard reflective boundary.
For windows, avoid sealing the window with thick treatment if you need daylight, but do not leave the corner bare just because there is glass. Put a trap in the adjacent vertical corner, then add a wall-ceiling corner trap above the window line to catch the worst buildup.
If you have heavy curtains, they can help a little in the highs and upper mids, but they are not bass traps. Treat the corners around the window as if the window is just another hard boundary, because in the bass it mostly is.
Closet corners are weird because an open closet can act like a bass leak, and a closed closet can act like a reflective wall. If you can, keep the closet door position consistent when you measure and mix, then treat the corners around it like the closet is part of the room.
If the closet is deep and you can leave it open, it sometimes behaves like a crude bass absorber by letting energy escape into a larger volume. That can be helpful, but it is inconsistent if you keep changing it, so pick a routine and stick to it.
For sliding closet doors, you can often treat the wall-ceiling corner above the closet without interfering with anything. That is a clean way to get more absorption into the room without sacrificing storage.
For corners blocked by radiators or vents, keep airflow in mind and do not cover anything that needs to breathe. In those cases, treat the upper corner and the opposite corners more aggressively to compensate.
If the room has a weird nook, treat it like a corner even if it is not a perfect 90 degrees. Bass does not care about your floor plan, it cares about boundaries and pressure zones.
Sizing and placement rules that actually matter
Thickness beats fancy materials, and that is not a hot take, it is how porous absorbers work at low frequencies. A 2 inch panel in a corner is better than nothing, but it is rarely the fix people want it to be.
If you want audible bass control, aim for 4 to 6 inch panels straddling corners with an air gap, or build superchunk traps with a large face. If you are stuck with thinner traps, cover more corner length and add wall-ceiling corners to compensate.
Air gaps are not magic, but they are free performance when you are straddling corners. A 4 inch panel with a 4 inch gap behaves more like a deeper system than a 4 inch panel glued flat to a surface.
Mount traps so they span as much of the corner as you can, because bass problems are not polite enough to stay at ear height. Floor to ceiling coverage is ideal, but even a 4 foot trap placed with its center around the speaker height can move the needle.
If you have to choose between a taller trap and a thicker trap, thickness usually wins in the lowest octave, but height wins in overall consistency. In practice, a mix of decent thickness and decent coverage is better than an extreme in only one direction.
Do not overthink “exact” placement before you have enough coverage to matter, because one small trap rarely solves a modal issue by itself. Get meaningful area covered first, then fine tune with measurements and small moves.
When you fine tune, small changes in speaker distance to the front wall can interact with your corner treatment in a good way. Corner traps reduce the penalty of experimenting, because the room is less reactive and less boomy.
Try to keep left and right corner treatment roughly matched in the front of the room, even if the rest of the room is imperfect. A balanced front end helps preserve imaging and keeps low mids from leaning to one side.
If you are using a subwoofer, corner treatment becomes even more important because you are injecting more energy into the modal region. A sub can sound amazing in a treated room and completely unhinged in an untreated one.
Do not forget that the desk itself can create reflections and resonances, so keep the speakers on solid stands or isolation pads and aim them properly. Corner treatment helps the room, but you still want a clean direct path from speaker to ears.
Wall-ceiling corner trap ideas for renters
If you rent, you can still treat wall-ceiling corners without turning the place into a construction project. The trick is to use lightweight frames, minimal holes, and mounting methods that land in studs where possible.
It also helps to think modular, so you can remove everything in an afternoon if you move. A renter-friendly trap is one that is effective but not married to the building.
Picture rail hooks, small L brackets into a single joist, or even tension rod style supports can hold a short soffit trap if you keep it light. I have seen renters get solid results with 3 inch mineral wool in a frame, spaced a couple inches off the ceiling.
If you use tension supports, make sure the load is spread out so you do not dent drywall or crack paint. A simple wood strip or rubber pad can make the contact points safer and more stable.
Another renter friendly option is a tall bookcase placed near a corner with absorption mounted on the wall-ceiling line above it. You still get corner work, but you avoid the “giant foam wedge” look that landlords hate.
The bookcase trick also helps visually because it makes the treatment look like part of the furniture layout. If you keep the trap aligned with the top of the shelf, it reads like a normal architectural detail.
If you want to avoid holes completely, build a freestanding “goalpost” frame that sits behind the desk and supports a corner cloud. It looks a little odd up close, but on camera it reads as a normal office shelf system.
Freestanding corner traps on simple bases are also renter-friendly, especially for rear corners. If you make them stable and tall, they can do real work without touching the walls at all.
For adhesives, be careful with anything that claims to be removable, because paint quality varies and you can still peel a layer off. If you must use adhesive, test it in a hidden spot and keep the load light.
Renter setups benefit from focusing on the big wins, which are the front corners and the wall-ceiling lines. You do not need to treat every surface, you just need to stop the low end from dominating your decisions.
How to check if corner treatment is working
Your ears can tell you some things fast, like whether kick drums stop sounding like they are inside a cardboard box. Your ears also lie, especially after you have listened for an hour and your brain starts adapting.
A quick listening test is to play a familiar track with steady bass and walk around the room, then sit back down and notice whether the bass is less jumpy. If the room feels more consistent, the corner treatment is doing its job.
Use measurements to keep yourself honest, even if you keep it simple with a cheap USB mic like a UMIK-1 and free software like REW. Measure before and after, then look at the decay times in the bass and the size of the peaks and nulls around your listening position.
When you measure, do not chase a perfectly flat line, because small rooms rarely give you that without extreme treatment. Look for improvements in the big peaks, fewer deep nulls, and shorter decay in the 40 to 150 Hz region.
Also measure each speaker by itself, because left and right can behave differently even in a symmetrical room. A corner treatment change might help one side more, which is useful information for your next move.
Decay is often the most audible improvement, because it changes how bass notes start and stop. If the waterfall plot shows faster drop-off, you will usually hear tighter transients and clearer pitch.
- REW sweep at the listening position
- Waterfall plot for 30 to 200 Hz decay
- RT60 or Topt estimate trend, not the exact number
- Left and right speaker measured separately
- Repeat with the chair moved 6 to 12 inches
- Same closet and door positions every time
Do not forget to level match your listening tests, because louder almost always sounds better at first. If you change anything in your monitor controller or interface, note it so you are not comparing apples to oranges.
Give yourself a day between major changes if you can, because your brain needs time to recalibrate. What sounds “less exciting” at first is often what translates better outside the room.
If you do voice work, record a short spoken sample before and after, because bass decay shows up as boxiness and boom in speech too. A cleaner voice recording is a nice side benefit that makes the upgrade feel obvious.
Common mistakes that waste corner treatment
The biggest mistake is buying small “bass traps” that are basically thin foam triangles and expecting them to fix 60 Hz. They can tame some upper bass, but they rarely touch the low end that makes mixes translate badly.
Foam is not automatically useless, but it is usually a thickness problem, not a brand problem. If it is thin, it is mostly doing midrange and high frequency work, which is not what corners need most.
Another mistake is leaving big gaps at the bottom or top of a corner because a cabinet or plant is in the way. If you cannot go full height, at least treat the wall-ceiling corners above the obstruction so the corner still does work.
A related mistake is putting a trap near a corner but not actually spanning the corner, like mounting it flat on one wall next to the corner. Straddling the corner with an air gap is usually much more effective for the same material.
People also forget that symmetry matters, and they treat one front corner heavily while the other stays bare. That can pull the stereo image sideways in the low mids, which is a weird problem to create on purpose.
Another common issue is adding a lot of absorption in one area and none elsewhere, then blaming the traps when the room still sounds uneven. Bass control is about coverage and balance, not a single magic panel.
Some people also mount traps so tightly into the corner that they compress the insulation and reduce performance. You want the material to stay fluffy enough to let air move through it, because that movement is how porous absorption works.
Last, do not confuse “more absorption” with “better sound” if you ignore the rest of the room. Corner traps fix bass, but you still need basic early reflection control and a sensible speaker and desk layout.
If you treat corners but leave the speakers in a bad spot, you can still end up fighting big nulls at the listening position. Treatment helps, but placement is still a free tool that should be used.
Also do not assume that one weekend of treatment means you are done forever, because rooms change when you add furniture and gear. If you add a big couch, a new shelf, or a second monitor, recheck the low end and adjust if needed.
Conclusion
Corners are where bass piles up, so treating them is the most direct way to get a calmer, more readable low end in a home office. If you focus on the front vertical corners first, then expand to rear corners and wall-ceiling corners, the room usually stops fighting you.
The payoff is not just better bass, it is better decision making, because you are no longer mixing around a room problem you cannot see. When the low end is stable, you stop doing weird compensations that only work in your room.
Choose vertical corner traps when you need a clean footprint, and choose superchunk traps when you want maximum broadband control and can spare the space. Mix in tri-corner and wall-ceiling corners to squeeze more performance out of rooms that have doors, windows, and closets.
Do not let perfect be the enemy of better, because even partial corner coverage can be a night-and-day improvement in a small office. Start with what you can fit, then build toward a more complete system as you learn what the room needs.
Verify changes with simple before and after measurements, because the bass region can trick you. Once the corner work is right, everything else you do, from EQ to monitor upgrades, starts making more sense.
If you want a simple plan, treat the front corners, treat the back corners, then treat the wall-ceiling line, and only then worry about smaller tweaks. That order keeps you focused on the moves that usually deliver the biggest audible improvement.