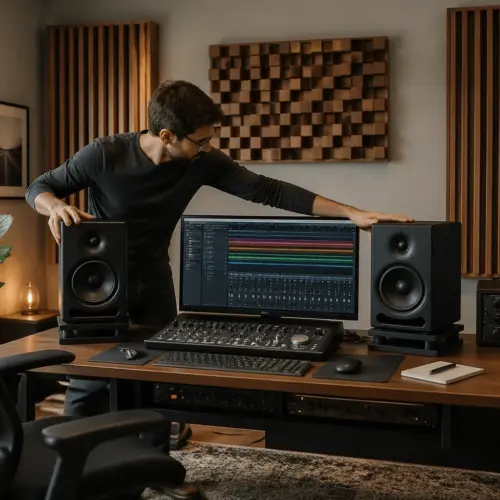
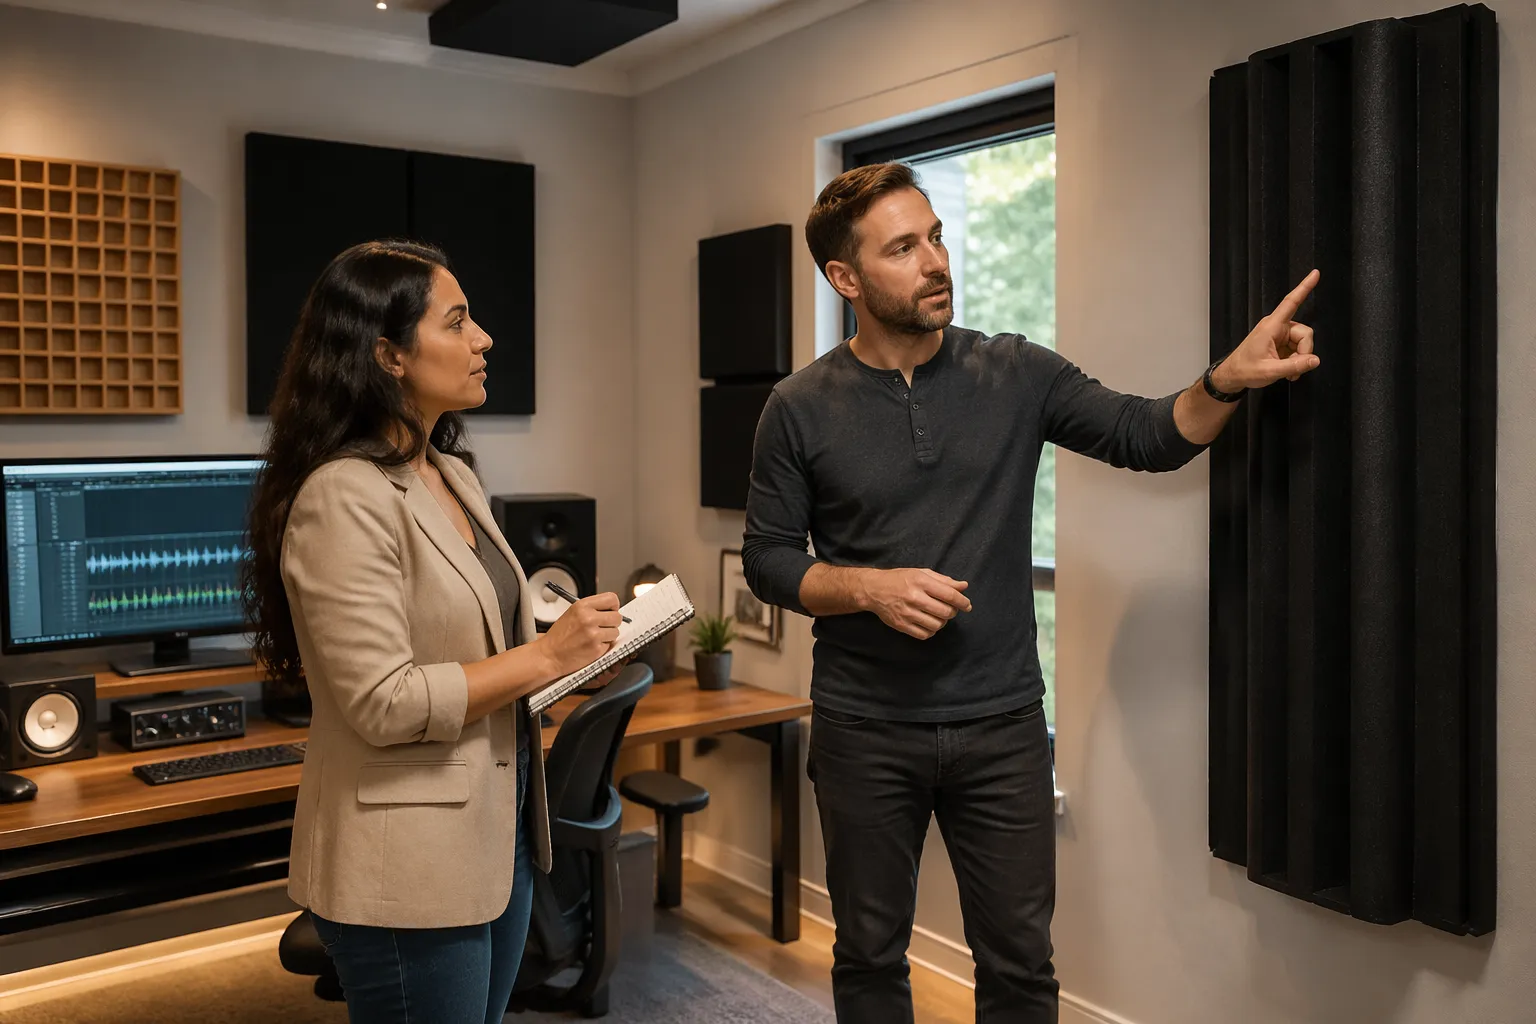
If your home office doubles as a studio, bass is the part that refuses to behave. You can buy better monitors, swap interfaces, and still end up chasing the same low end problems.
The fix usually starts with bass traps for home office studio setups, because small rooms exaggerate certain notes and erase others. When the low end stops lying to you, every mix decision gets easier.
I am not talking about foam squares or thin “soundproofing” panels that look good on a product page. I mean real trapping that targets bass buildup and smooths the room’s worst resonances.
This article focuses on what to buy, how to choose between corner bass traps and broadband absorbers, and where placement matters most. You will also get practical numbers, because “add more treatment” is not a plan.
What bass traps actually do in a small office
Bass traps reduce the strength and decay time of low frequency resonances that build up between your walls, floor, and ceiling. In a small office, those resonances are close together and loud enough to dominate what you hear at the desk.
When you play a kick drum, the room stores energy at certain frequencies and releases it slowly. That “hangover” makes bass notes smear together, so you turn the bass down and your mix falls apart everywhere else.
Traps do not remove bass from your music, they remove extra bass from the room’s reflections. The goal is a flatter response at the listening position and a shorter, more even low end decay.
Bass traps for home office studio rooms also improve imaging because the low end stops modulating your perception of the mids. Once the room stops booming at one note, you can place vocals and guitars without second guessing every move.
In practical terms, bass trapping turns “I think the bass is loud” into “the bass is loud at 63 Hz and it rings for half a second.” That difference matters because you can fix a specific problem, instead of remixing the whole song around a room artifact.
Small rooms tend to have strong axial modes, meaning the energy bounces between two parallel surfaces and stacks up. Bass traps reduce how hard those modes hit and how long they linger after the sound stops.
Without trapping, you might hear a bass line as uneven even when it is perfectly consistent in the DAW. With trapping, the same line becomes more predictable, so compression and EQ choices become less of a guessing game.
Another underrated benefit is that you can monitor at lower volume and still judge the low end. When the room is ringing, you often crank the level to “hear through it,” which just excites the room more.
Bass traps also help when you are editing, because low frequency buildup can mask clicks, pops, and low-end distortion. When the room is calmer, you catch problems earlier and spend less time doing corrective passes.
If you record in the same space, trapping reduces the room tone that gets printed into mics, especially on voice and acoustic guitar. You still need mic technique, but you are no longer fighting a low-mid boxiness that is baked into every take.
Spotting bass problems you can fix with trapping
The classic symptom is bass that changes wildly as you move your head a few inches. One spot has too much 80 Hz, another spot has none, and your chair becomes an EQ knob.
Another giveaway is a kick that sounds big in your room but tiny in your car or headphones. That usually means your room has a peak, so you mixed against bass buildup instead of the track.
You can also hear problems in the time domain, where bass notes ring longer than they should. If a low synth note “blooms” after the key press, your room is adding sustain that is not in the recording.
A quick check is to play a slow sine sweep and listen for notes that jump out or disappear. If you can point to two or three obvious hot spots, trapping can help a lot more than another plugin.
Pay attention to bass that feels “one-note,” where different notes all seem to land on the same pitch in the room. That usually points to a dominant mode that is masking the musical movement of the line.
If you find yourself constantly changing the crossover or low shelf on your monitors, you might be compensating for the room instead of the speakers. Trapping will not fix everything, but it can stop you from chasing the same issue with hardware switches.
Listen to how long the room “talks back” after you stop playback, especially with 808s and sustained bass notes. If the room keeps humming after the music pauses, that is decay you can usually shorten with more corner coverage.
Another sign is that reference tracks sound inconsistent, where one song has massive bass and the next seems thin even though both are commercial mixes. A bad room makes your references less trustworthy, which makes your own decisions less anchored.
You can also spot problems by clapping and listening for flutter echo, because flutter often lives alongside bass issues in untreated offices. Fixing flutter does not fix bass, but it tells you the room has lots of hard, parallel surfaces that are likely reinforcing modes too.
If you use a measurement mic, look for deep nulls and sharp peaks below about 200 Hz at the listening position. Trapping tends to tame peaks and shorten decay more reliably than it fills deep nulls, so set expectations accordingly.
When you hear bass vanish at the desk but explode near the back wall, that is a clue about pressure zones. Traps placed where the room stores energy, not where you sit, are often the fastest path to improvement.
Choosing trap types: corner, panel, and hybrid options
Corner bass traps work because corners are where pressure tends to pile up across many room modes. If you only buy one type of treatment, start there because it is hard to waste a good corner trap in a small office.
Broadband absorbers are flat panels that handle mids and highs well, and if they are thick enough, they also help with upper bass. Hybrids combine absorption with a face that keeps some high end energy in the room, which can prevent an over-deadened desk area.
Think of corner traps as your low end foundation and broadband panels as your clarity and imaging tools. In a home office, you usually need both because you are dealing with bass modes and early reflections at the same time.
Straddled corner traps are popular because they create a big air cavity behind the panel, which increases low frequency effectiveness without needing a huge block of material. They also tend to be easier to mount and move if you change the room later.
Superchunks take up more space, but they can deliver more absorption lower in frequency when built large enough. If your room has a stubborn boom that lives below 80 Hz, superchunks are one of the few passive tools that can make a dent.
Broadband panels come in many sizes, but the real difference is thickness and mounting method. A 4 inch panel with a gap is a different tool than a 2 inch panel glued to drywall, even if they look similar in photos.
Hybrids with slats or membranes can be a smart choice in offices where you cannot cover every surface with absorption. They keep some brightness and life in the room while still helping the low end, which can make long sessions feel less fatiguing.
There are also tuned traps that target a narrow band, but they are rarely the best first purchase for a home office. Most small rooms have multiple problems, and broadband solutions usually give more improvement per dollar early on.
If you are tempted by “all-in-one” kits, check what is included and how thick the pieces are. Many kits are heavy on thin panels because they are cheaper to ship, and that is the opposite of what your low end needs.
| Trap type | What it is best at | Where it usually goes |
|---|---|---|
| Straddled corner bass trap (4 to 6 inch) | Broad low end control, reduces bass buildup across modes | Front vertical corners behind speakers |
| Superchunk corner trap | Deeper low frequency absorption, strong decay reduction | All vertical corners if space allows |
| Broadband absorber panel (4 inch) | Early reflections, upper bass smoothing, cleaner stereo image | Side walls, ceiling cloud, rear wall |
| Hybrid absorber with slats or membrane | Low end control with less high frequency deadening | Rear wall and corners in small offices |
| Thin foam “bass trap” wedge | Mostly high mids, little true bass absorption | Only useful for flutter echo, not bass |
When you compare products, look for published absorption data, not just marketing phrases like “professional grade.” Even basic coefficients or third-party test references are better than a listing that avoids numbers entirely.
Also consider how modular the system is, because offices change and gear moves. A trap that can be relocated, stacked, or repurposed as a gobo tends to keep its value longer than something that only works in one corner.
Thickness, density, and why air gaps matter
Thickness is the first spec I look at, because bass needs depth to lose energy. A 2 inch panel can make the room sound less harsh, but it will not do much for the low end that ruins mixes.
For bass traps for home office studio use, 4 inches is a workable minimum for panels, and 6 inches is better if you have the space. Corners effectively create extra depth, which is why corner bass traps punch above their size.
Density matters, but people obsess over it in the wrong way. Medium density mineral wool or fiberglass often performs better across a wider range than very high density boards, especially when you add an air gap.
An air gap behind a panel increases low frequency absorption because the velocity of the wave is higher away from the boundary. If you mount a 4 inch broadband absorber with a 4 inch gap, you usually get closer to the performance of a thicker panel without eating more wall space.
One way to think about it is that bass wavelengths are long, so you need more “path” for the energy to interact with the absorber. More thickness and smart spacing give the wave more opportunity to lose energy as heat inside the fibers.
Very high density material can start reflecting more low end than you expect if it is too rigid, especially when used thin. That is why a softer, thicker build often beats a thin, hard board even when the spec sheet looks impressive.
Air gaps are also a practical hack for renters, because you can mount panels on simple brackets or picture wire and keep the wall damage minimal. The panel ends up doing more work while you keep the room functional as an office.
For corner traps, the “gap” is built into the geometry, which is part of the magic. A straddled panel across a 90-degree corner creates a triangular cavity that acts like extra depth without extra material cost.
Do not confuse thickness with “how far it sticks out,” because mounting style changes the effective depth. A 4 inch panel mounted with a 4 inch gap is often more useful than a 6 inch panel mounted flat to the wall.
Fabric matters too, because a non-breathable cover can reduce performance by reflecting high frequencies and limiting airflow. If you cannot blow air through the fabric easily, it is probably not the right choice for an absorber face.
When you see very thin traps advertised with dramatic bass claims, the physics does not change just because the listing is confident. If the product is light, thin, and cheap to ship, it is almost never a serious bass solution.
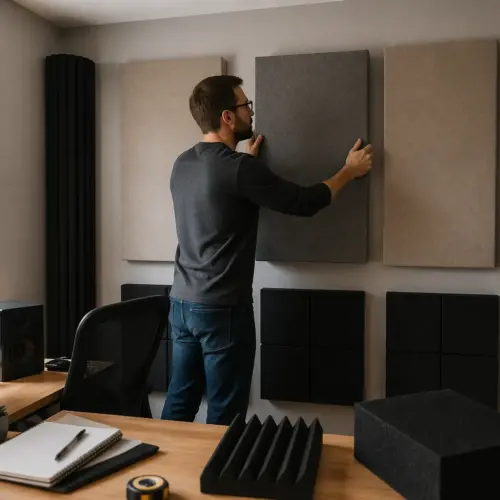
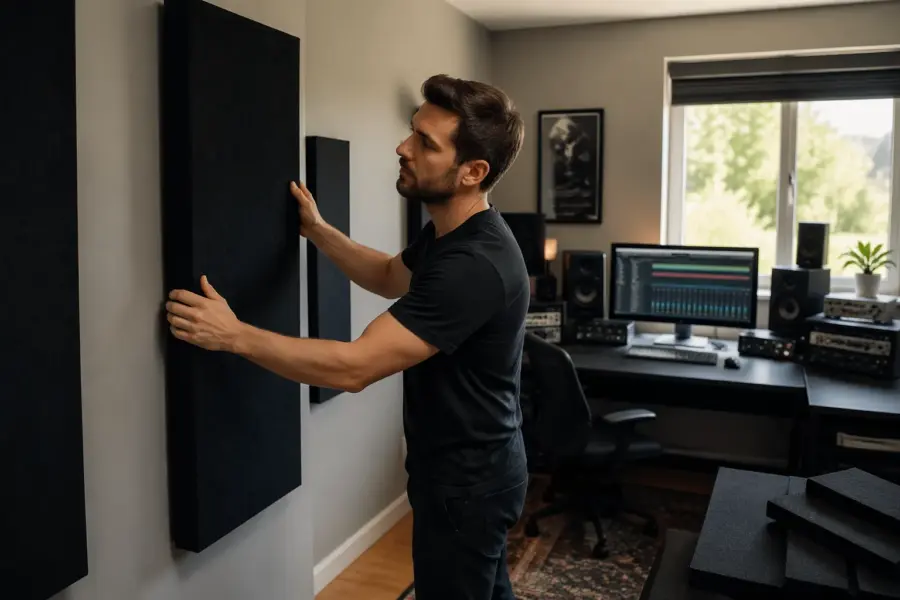
The best placements in a typical home office layout
Most home offices put the desk against a wall, with speakers firing down the length of the room if you are lucky. Start by treating the two front vertical corners, because that is where bass buildup from the speaker boundary interaction gets ugly fast.
If your desk is centered on the short wall, place corner bass traps behind the monitors and run them as high as you can. Floor to ceiling coverage is not mandatory, but it is one of the few upgrades that almost always measures better.
Next, handle the first reflection points with thick broadband absorbers on the side walls and a ceiling cloud above the desk. This does not replace bass trapping, but it stops the room from smearing the stereo field while you fix the low end.
Finally, treat the rear wall, because a hard wall a few feet behind your head can create a low frequency pressure zone and a nasty slap in the mids. If the room is short, a thick absorber or hybrid on the back wall often does more than another small panel near the desk.
In a typical office, you also have a door, a closet, and at least one window, which means your boundaries are not perfectly symmetrical. That is fine, but it makes it even more important to treat the big, consistent surfaces like corners and the ceiling line.
Front wall treatment is often overlooked because people assume the speakers “need to breathe,” but the wall behind the speakers is part of the system. A couple of thick panels or a hybrid behind the monitors can reduce front-wall reflections and tighten the perceived punch.
If you cannot treat the entire rear wall, treat the center area directly behind your head first. That spot tends to contribute the most obvious slap and low-mid buildup at the listening position.
Ceiling clouds work best when they are centered over the listening position and sized to cover the area between you and the speakers. If the cloud is too small or too far forward, you miss the strongest reflection path.
Side wall panels should be placed at ear height when you are seated, not at standing height because it looks nicer. The mirror trick still works: if you can see a speaker in a mirror from the listening position, that is a reflection point worth treating.
Do not ignore wall-to-ceiling corners if you have the option to add soffit-style traps or smaller corner pieces. Those edges can store a surprising amount of low frequency energy, especially in rooms with low ceilings.
If you have bookshelves, a couch, or storage in the room, treat them as part of the layout rather than obstacles. A thick absorber behind a couch, or a trap integrated above a bookshelf, can improve the room without making the office feel like a padded cell.
How many traps you need for noticeable results
People want a number, so here is mine for a typical 10 by 12 foot office with an 8 foot ceiling. You usually hear a clear improvement with four serious corner bass traps and two to four thick broadband absorbers.
If you only buy two traps, put them in the front corners and do not overthink it. That move alone can reduce the worst bass buildup and make the kick and bass relationship easier to judge.
For mixing, I like a “minimum viable” package of four corner positions treated, plus a ceiling cloud and two side panels. If the room is very small, put more budget into thicker traps rather than spreading thin panels everywhere.
For recording vocals or acoustic instruments at the same desk, add rear wall absorption and consider extra corner bass traps in the back corners. That keeps the room from sounding boxy and stops low end from swelling on sustained notes.
Noticeable results are usually about coverage, not perfection, and that is good news for home offices. You do not need to hit an ideal studio curve, you just need the room to stop sabotaging your low end decisions.
If you add treatment and the room suddenly feels “quieter” even at the same monitoring level, that is often the decay improving. A tighter decay makes bass feel more controlled even if the frequency response is not perfectly flat.
As you add traps, you will often hear the biggest jump from the first four corner pieces, then smaller improvements from each additional panel. That diminishing return is normal, and it is why a plan beats random buying.
If your room is extremely small, like a 9 by 9 or a converted closet office, you may need more corner coverage than you expect. Square-ish rooms tend to stack modes, so you are fighting fewer problems but they are stronger.
In larger offices, you can sometimes get away with fewer traps if you can place the desk well and keep the speakers away from boundaries. In most real homes, furniture and workflow decide placement, so treatment becomes the flexible tool.
Think in terms of surface area and depth, because “one more panel” only matters if it is thick and placed where energy is high. A single 6 inch corner trap can outperform multiple thin panels placed randomly around the room.
If you are measuring, look for smoother bass response and shorter decay below 200 Hz as you add treatment. If the graph barely changes, the next purchase should probably be thicker or moved to a better location, not just “more of the same.”
What to buy: materials, builds, and what I avoid
If you are buying premade, look for mineral wool or fiberglass traps that are at least 4 inches thick, with a breathable fabric. If the product does not publish thickness and core material, I assume it is decoration.
For corner bass traps, I prefer straddled panels with an air cavity behind them, or full corner fills if the room allows it. Tube traps can work, but they are usually expensive per square foot, and square footage is what wins in small rooms.
I avoid thin foam wedges marketed as bass traps because they mostly absorb upper mids. You can use foam for flutter echo, but it will not fix the low end problems that make your mixes translate poorly.
If you are building DIY, use safe handling practices and seal the insulation in fabric that breathes, like Guilford of Maine style material or a good burlap alternative. DIY can outperform store bought at the same cost, but only if you build thick and mount with smart gaps.
When you shop, pay attention to the frame depth, not just the “panel size,” because listings love to highlight width and height. A big panel that is only 2 inches thick is still a 2 inch panel, no matter how large the photo looks.
Look for solid construction that does not flex or rattle, because a loose frame can create noises and reduce confidence in what you are hearing. In a home office where you might bump things with a chair, durability matters more than it does in a dedicated studio.
Corner options that include mounting hardware or simple brackets are worth considering if you are not handy. A trap that sits in the box because mounting is annoying is the most expensive acoustic treatment you can buy.
For hybrids, I like designs that explain what the face is doing, whether it is slats, a limp membrane, or a perforated panel. If the hybrid is just a fancy front with no explanation, assume it is mostly cosmetic.
If you are renting, consider freestanding traps or panels on simple stands, because they let you add air gaps without drilling a lot of holes. Freestanding corner stacks can be surprisingly effective when they are thick and tall.
I also avoid products that promise “soundproofing” when they are clearly absorbers, because that tells you the marketing is sloppy. Soundproofing is isolation, and isolation is a different problem with different materials and costs.
Finally, do not underestimate shipping and weight when you plan a purchase, because thick traps are bulky. Sometimes the best value is local pickup or DIY simply because you are not paying to ship air across the country.
A practical placement checklist you can follow in one afternoon
Most rooms fail because people place panels where they look good, not where the room needs them. If you place bass traps for home office studio work in a repeatable order, you avoid that trap and you can stop when the results are good enough.
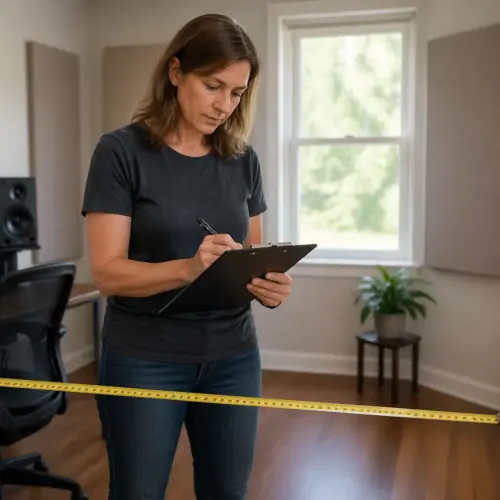
Do the front of the room first, then the reflection points, then the rear wall, and only then fill in gaps. Take a quick before and after measurement with REW if you can, because your ears adapt fast and lie politely.
Before you mount anything, clear the corners and make sure you can actually run traps high without blocking a door or a closet. A clean setup step saves you from “almost fits” compromises that reduce coverage.
Start with a quick listening test using a few reference tracks you know well, then repeat the same tracks after each step. You are listening for tighter bass notes and clearer vocal placement, not a dramatic “different room” effect after one panel.
If you are measuring, take one baseline sweep at the listening position and save it. After each placement step, take another sweep and label it, because memory is not a reliable data management system.
When you install corner traps, focus on making them airtight to the corner area rather than leaving big gaps at the edges. Small gaps are fine, but major leaks reduce the effective air cavity and can make the trap feel weaker than it should.
For side panels and ceiling clouds, prioritize symmetry around the listening position so reflections are controlled evenly. If you can only treat one side due to a door or window, treat the other side and use a thicker or larger panel to compensate where possible.
On the rear wall, go thicker than you think you need, because thin rear treatment often just kills highs and leaves the low-mid pressure zone intact. A thicker rear absorber is one of the best “why does everything sound clearer now” upgrades in small rooms.
- Front vertical corners behind the monitors
- Ceiling cloud centered over the listening position
- Side wall first reflection points at ear height
- Rear wall thick absorber or hybrid panel
- Back vertical corners if the low end still rings
- Front wall area between and behind speakers if space allows
After you finish the checklist, sit and work for 20 minutes and see what feels different in normal use. The best treatment is the kind you notice while mixing, not just while doing test tones.
If you still hear a strong boom, try moving the listening position slightly forward or backward before buying more gear. A small position change can shift you away from a null or peak and make your existing traps feel like a bigger upgrade.
Once you are happy, take photos and notes of the final layout so you can restore it after cleaning or rearranging the office. Consistency is part of translation, because you cannot learn a room that keeps changing every week.
Avoiding common mistakes that waste money and space
The biggest mistake is buying a dozen thin panels and calling it “treated.” You end up with a room that sounds dull on top while the bass buildup stays exactly where it was.
Another mistake is pushing the desk into a corner because it frees up floor space. That location stacks boundary effects, so you hear more low end chaos and you need more trapping to get back to normal.
People also mount good panels flat to the wall with no gap, then wonder why the low end barely changes. If you cannot spare a gap, go thicker, or move the panel to a corner where the geometry helps you.
Finally, do not ignore the ceiling because it is “out of the way.” A ceiling cloud is often the cleanest improvement you can make in a home office, and it makes your other treatment choices easier to hear.
A common budget mistake is buying based on aesthetics first, then trying to “make it work” acoustically. If you need the room to look professional, choose traps that look good, but do not let looks force you into thin or undersized treatment.
Another waste is treating only the front wall and side walls while leaving all corners bare. Early reflection control is great, but without bass control you are polishing the part of the sound that is not causing the translation failures.
People also expect a single product to fix bass, echo, isolation, and neighbor complaints in one purchase. Bass traps improve what you hear inside the room, but they do not stop bass from traveling through walls like real isolation would.
Do not assume that “more expensive” automatically means “more effective,” because some premium products are priced around design and branding. A thick, simple mineral wool trap often beats a fancy thin panel with a logo plate.
Another mistake is leaving large reflective surfaces near the listening position, like a bare desk surface or a big monitor screen, and blaming the room for harshness. You cannot trap your way out of a reflection that is happening six inches from your ears.
It is also easy to forget that open closet doors and movable furniture change the acoustics. If you measure and tune the room, keep the room in its “mixing state” so your results stay consistent.
Finally, do not treat randomly and stop when you get tired, because you will end up with a scattered set of panels that do not work together. A simple order of operations keeps the money focused on the highest-impact surfaces first.
Working with studio geometry, not against it
Geometry decides where modes pile up, and traps work best where the room stores energy. Corners, wall to ceiling lines, and the rear wall behind the listening position are repeat offenders in small rectangles.
If you can choose the desk wall, face the short wall and fire down the long dimension. That setup usually gives you smoother modal spacing at the listening position, which means your bass traps have less chaos to fight.
Speaker distance to walls matters more than most people want to admit, because it creates deep nulls you cannot EQ away. Before you buy more corner bass traps, try small moves like pulling the desk 6 to 12 inches off the wall and rechecking the low end.
Symmetry matters for imaging, but do not chase perfect symmetry at the cost of terrible bass. If the room forces compromises, treat the worst boundaries and use measurement to pick the least bad listening position.
A good starting point is to sit around 38% of the room length from the front wall, because it often avoids the strongest axial nulls. It is not a law, but it is a decent first guess before you fine-tune with measurement.
Keep the speakers equidistant from side walls when possible, and keep toe-in consistent so the stereo image is stable. If one speaker is closer to a side wall than the other, treat that side more aggressively to reduce imbalance.
Desk height and monitor stand height also matter because they change the reflection paths to your ears. A small change in speaker height can reduce a desk reflection that makes the upper bass and low mids feel cloudy.
If your ceiling is low, the floor-to-ceiling mode can be a major contributor to bass weirdness around the desk. That is another reason ceiling clouds are not optional “nice-to-haves” in office studios.
Try to keep large reflective objects out of the front corners, because they steal space that could be used for the highest-impact traps. If you must store things there, consider freestanding traps that can sit in front of storage without blocking access.
Windows and doors can actually help a little by breaking up symmetry, but they can also create rattles and buzzes that mimic bass distortion. If you hear buzzing on certain notes, check loose frames and hardware before you blame your mix.
The goal is not to “defeat” the room, it is to make the room predictable enough that you can learn it. Once the geometry is working with your treatment, your ears adapt in a good way and your mixes start translating faster.
Conclusion
Good bass traps for home office studio rooms do one job, they reduce bass buildup so you can trust what you hear. Start with corner bass traps, add thick broadband absorbers at reflection points, and leave thin foam to the influencers.
Placement and depth beat fancy marketing, and air gaps are a cheap upgrade when you cannot go thicker. If you treat the front corners, the ceiling, and the rear wall with intent, the room stops arguing with your mixes.
If you want the shortest path to results, buy fewer pieces but make them thicker and place them where the room stores energy. The low end does not need perfection, it needs consistency so you can make decisions that hold up outside the office.
Once the bass is under control, you will spend less time second guessing and more time finishing tracks. That is the real payoff of bass traps in a home office studio, because confidence is the most underrated piece of gear you can own.