If your home office sounds “bad,” you probably blame outside noise first, then you buy something labeled soundproof. That mix-up is why the acoustic panels vs foam for home office debate gets so frustrating so fast.
Most people are dealing with echo, harsh reflections, and a boxy tone on calls, not true isolation problems. Panels and foam both change what your microphone and ears pick up, but they do it in very different ways.
I have seen plenty of setups with foam squares everywhere that still sound thin and splashy, especially on male voices. The fix usually is not more foam, it is better coverage in the right places and more low frequency control.
Home office audio also gets judged harder because you are so close to the mic and the camera. Small problems that would disappear in a living room become obvious when your voice is the main signal.
Another reason this topic gets confusing is that online advice mixes music studio goals with video call goals. You do not need a perfect vocal booth to sound clear, but you do need to tame the worst reflections.
The problem most people are trying to solve (and mislabel)
When you hear your own voice bouncing back at you, that is echo and early reflections, not “noise.” Noise is the HVAC rumble, the neighbor’s lawn mower, and the garbage truck outside your window.
Echo makes recordings sound roomy and makes speech harder to understand on Zoom, even if your room is quiet. Noise makes your signal to noise ratio worse, even if your room has zero echo.
Foam and panels mainly address reflections inside the room, so they help echo more than noise. If you want less street sound, you need mass and sealing, like a solid core door, weatherstripping, and better window gaps.
Once you separate noise vs echo, the buying decision gets simpler. You can treat echo with absorption, then decide whether you also need separate steps for isolation.
A quick test is to record a voice memo while the room is quiet, then listen for the “room” around your words. If you hear a tail, a slap, or a hollow ring, you are mostly dealing with reflections.
Another test is to pause and listen for the constant background layer your mic would hear. If there is a steady hiss, hum, or rumble, that is noise and it will not disappear with wall foam.
People also mislabel reverb as echo, and that matters because the fix is similar but the symptoms feel different. Reverb is the overall wash in the room, while echo is the more obvious bounce you can almost count.
On video calls, early reflections are usually the bigger problem than long reverb because they smear consonants. That is why a room can feel “not that echoey” yet still sound messy on a mic.
Rooms with hard floors and bare desks add their own kind of reflection that people forget about. The desk itself can act like a mirror for sound and create a sharp, nasal tone in your recording.
Even if you use headphones, your voice still excites the room and your mic still hears the room. The goal is not silence, it is a clean direct sound that stays consistent from day to day.
How panels and foam differ in real performance
Acoustic foam is light and porous, so it mostly absorbs higher frequencies like hissy consonants and keyboard clicks. It does much less in the lows and low mids where rooms get boomy and voices get muddy.
Broadband panels use thicker porous material, usually fiberglass or mineral wool, and the extra depth changes everything. A 4 inch panel with an air gap can grab energy down into the low mids, which is where small rooms sound cheap.
The foam absorption limits show up when you clap and the room still has that hollow ring, even after you cover a wall. That ring often lives around 200 to 500 Hz, and thin foam does not have enough thickness to do much there.
Panels also behave more predictably across a wider range, which is why people call them broadband panels. If you treat only the highs with foam, you can end up with a dull top end but a boxy low mid that still masks speech.
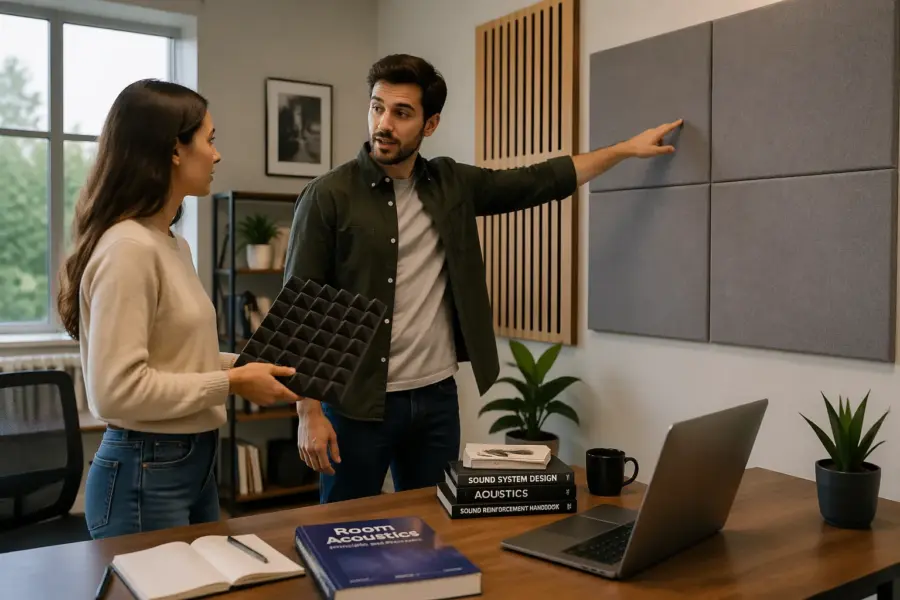
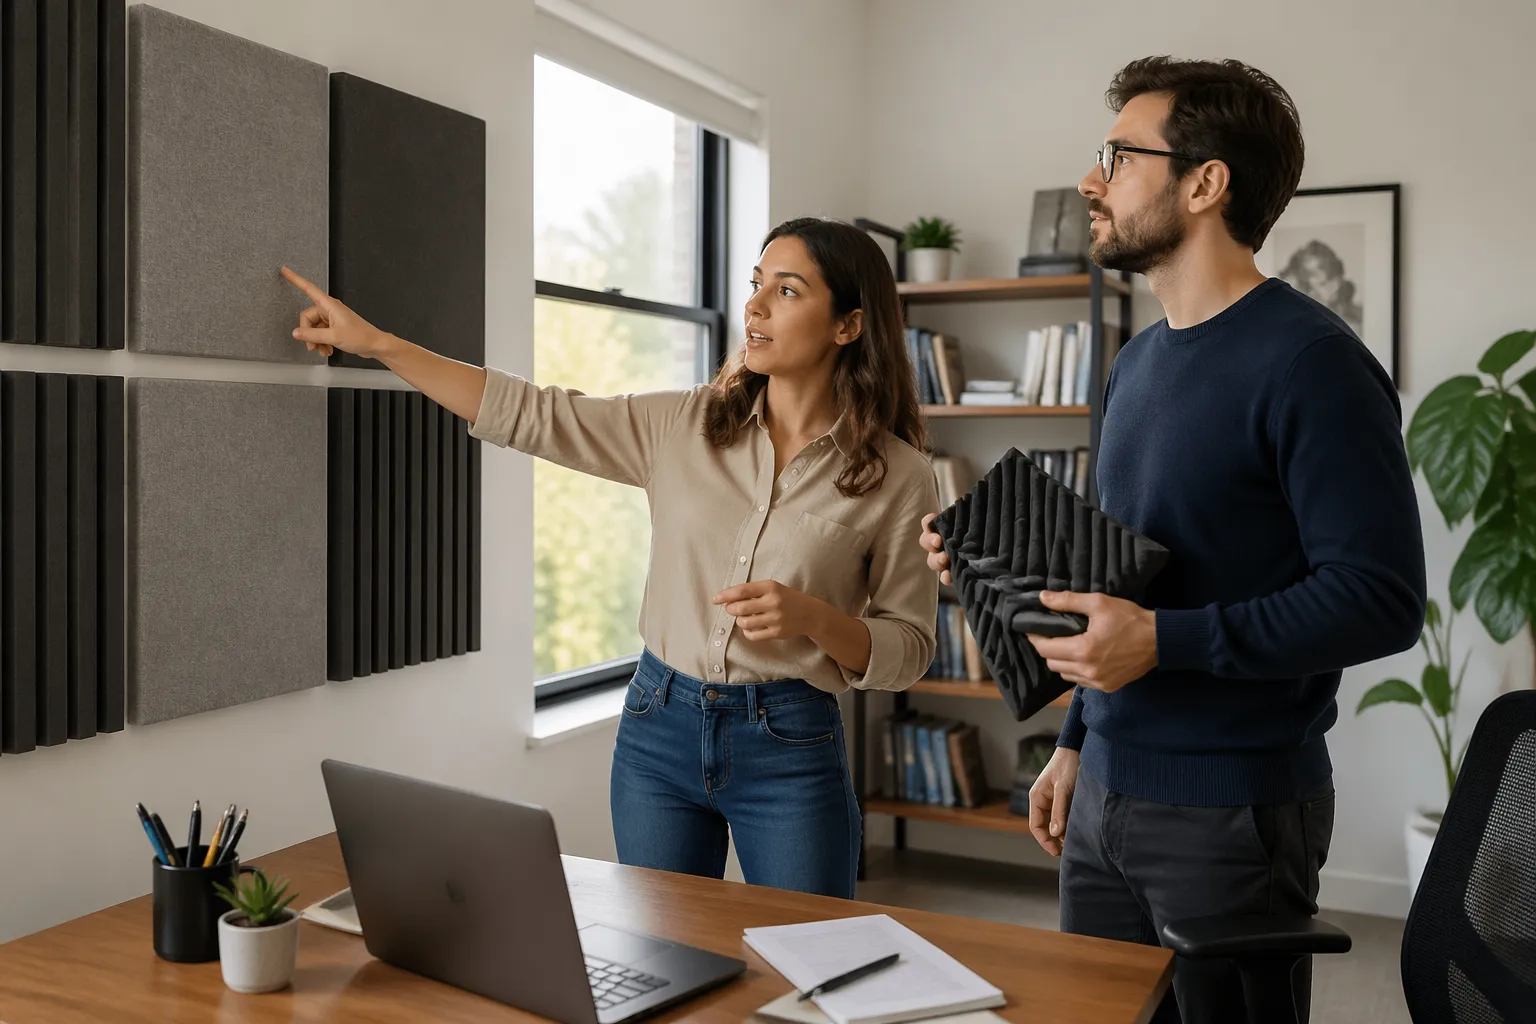
Thickness is the quiet part people skip, because photos make everything look similar. A 1 inch foam tile and a 4 inch mineral wool panel are not competing products, even if they both get called “acoustic treatment.”
Foam can still be useful, but it is more like a high frequency eraser than a full spectrum solution. When you rely on it as the main treatment, you often end up chasing the problem with more and more squares.
Panels also benefit from their density and the way they slow down air movement through the core. That is what turns sound energy into heat, and it works better when the material is thick enough to interact with longer wavelengths.
In real rooms, the low mids are where the “cardboard” sound lives, especially in small bedrooms and spare offices. That range is also where many laptop mics and cheap headsets already struggle, so the room makes it worse.
Foam is often sold in wedge or pyramid shapes, which look technical but do not magically increase low frequency absorption. The shape mostly increases surface area and helps scatter a bit, but it does not replace thickness.
Panels can also be built as corner traps, which is where low frequency pressure builds up. Even if you are not recording music, those corners affect how your voice sits in the room.
Another difference is how each product interacts with placement mistakes. Foam tends to be forgiving visually but unforgiving acoustically, because it is easy to cover random spots that do not matter much.
Panels are usually fewer and larger, so you are forced to think about where they go. That planning step is annoying, but it is often why panels “work” faster for most people.
What each option does best in a home office
Foam can work when your main issue is flutter echo between bare parallel walls, and you sit close to the mic. It is also handy for taming a harsh desk reflection if you can place it right at the reflection point.
Panels win when you want your voice to sound natural, full, and controlled across different speaking volumes. They also help more with the “room tone” your mic hears, which matters when you use an open back headset mic or a desktop USB mic.
If you are in a very small office, foam can reduce the sharpness that makes you sound like you are in a bathroom. The catch is that you usually need enough coverage to break up the parallel wall bounce, not just a few decorative tiles.
Foam is also convenient when you need something lightweight for a temporary setup. If you are moving soon or you cannot drill, foam with removable strips can be a quick improvement.
Panels are better when you want a consistent sound across different mic positions. A lot of people switch between a headset, a USB mic, and a laptop mic, and panels make all of them sound less room-dependent.
Panels also help when you speak off-axis or move around during calls. If you turn your head to look at a second monitor, the mic hears more room, and broadband absorption keeps that from getting ugly.
If your room has a hard ceiling and you sit under it, panels can do something foam rarely does well: reduce the ceiling bounce without killing the life of the whole room. A single ceiling cloud panel over the desk can be a big upgrade.
Foam can be helpful inside small enclosures like a DIY mic shield or a closet-style nook, but it is not a substitute for treating the room around you. Those shields can even make voices sound boxy if the space is too tight.
For people who do webinars or record training videos, panels make editing easier because the room tone stays stable. You will spend less time trying to EQ out weird resonances or gate out reflections.
If you are mostly on calls and never record, you still benefit from treatment because compression on conferencing apps exaggerates room problems. The more the app compresses your voice, the more it drags up reflections between words.
| Home office goal | Acoustic foam | Broadband panels |
|---|---|---|
| Reduce flutter echo on bare walls | Good if coverage is wide | Excellent with fewer pieces |
| Improve voice clarity on calls | Fair, can get dull if overused | Strong, keeps tone balanced |
| Tame low mid boxiness (200 to 500 Hz) | Poor, foam absorption limits show here | Good, especially 4 inch with air gap |
| Make recordings sound “studio dry” | Okay for highs, limited overall | Best choice for most rooms |
| Handle a small room with hard floors | Needs a lot, still uneven | Works with targeted placement |
The table is a shortcut, but the real takeaway is balance. You want to reduce reflections without turning your room into a dead, unnatural space that makes you speak differently.
In practice, a hybrid approach is common, with panels doing the heavy lifting and small amounts of foam used for annoying little hotspots. That is usually more effective than trying to solve everything with foam alone.
Cost, durability, and long-term value
Foam looks cheap per piece, but the math changes when you need real coverage to make a dent. Many people end up buying twice because the first batch fixes only the zingy top end and leaves the room sounding weird.
Good panels cost more up front, but you need fewer of them to get the same audible change. If you buy panels built with mineral wool or rigid fiberglass and a solid frame, they last for years without sagging.
Durability is not only about the core, it is also about the facing fabric and corners. Foam can tear, crumble with UV exposure, and collect dust in a way that is hard to clean.
Panels also move with you, which matters if you rent or rearrange your office. If you mount them with picture wire, French cleats, or simple hooks, you can take them down without wrecking the wall.
There is also a resale and reuse angle that people ignore. A decent panel can be repurposed into a different room, used as a freestanding gobo, or even sold locally if you change your setup.
Foam is harder to reuse because it deforms and because adhesive residue becomes the real cost. Once it has been peeled off a wall, it often looks rough and does not mount cleanly again.
Another cost factor is fire safety and smell, which varies wildly in cheap foam. Panels from reputable builders usually have clearer specs and fewer complaints about lingering chemical odor.
Shipping matters too, because foam is bulky but light, while panels are heavier and more expensive to ship. If you can buy panels locally or from a shop with reasonable freight, the value improves fast.
DIY panels can be a sweet spot if you are comfortable with basic tools. When you price out mineral wool, fabric, and wood, you often get near-pro performance for less than premium prebuilt kits.
The long-term value is also about how quickly you stop thinking about your audio. If you spend less time troubleshooting and more time working, the more expensive option can be cheaper in the way that matters.
One more hidden cost is how treatment changes your monitoring and listening comfort. A room with controlled reflections reduces fatigue, which is hard to price but easy to feel after long call days.
Placement tips that matter more than material
Most bad results come from treating the wrong surfaces, not from choosing the wrong product. If you cover the wall behind your monitor but ignore the side walls, you will still hear slap and comb filtering on your mic.
Start with first reflection points, which are the spots where sound from your mouth hits a surface and bounces straight into the mic. In a typical desk setup, that is the side walls near ear height, the wall behind the mic, and sometimes the ceiling above the desk.
If you can only treat one area, treat behind you, because your mic often points away from your mouth and into the room. That rear wall reflection is a big part of the “roomy Zoom” sound people hate.
Leave an air gap when you can, because even a 2 inch gap behind a panel improves low frequency absorption. The difference is easy to hear on deeper voices and on rooms with hardwood floors.
Think of your mic like a flashlight, because it “sees” whatever is in front of it. If the mic is aimed at a bare wall, it will capture more reflections no matter what is behind your head.
Desk reflections are sneaky because they happen close to the mic and arrive very fast. A desk mat, a slightly different mic height, or a small absorber on the desk can reduce that sharpness a lot.
Hard floors are another big contributor, especially if your desk is in the center of the room. A rug under the chair area helps more than people expect, and it works with panels rather than replacing them.
Bookshelves and soft furniture can act like partial treatment, but they are not a plan by themselves. They can reduce some reflections, yet the main first reflection points still need deliberate absorption.
If your office is also a bedroom, the bed is actually a useful acoustic tool. Positioning your desk so the bed is behind you can reduce the strength of the rear wall reflection.
Corner placement matters when the room sounds boomy or when your voice feels like it has a weird chesty buildup. Even one or two corner traps can smooth out the low mid mess that makes calls sound congested.
Symmetry helps, especially for side wall reflections. If one side is treated and the other side is glass, your voice can sound lopsided and inconsistent when you move slightly.
Do not forget the door, because a hollow door can rattle and reflect. A thick curtain on the door side or a panel near it can reduce that bright slap you get when speaking toward it.
Finally, treat the space you actually use, not the room you imagine using. If you always lean back during calls, place treatment for that posture, not just for the perfect upright position.
A simple buying checklist for either choice
Shopping gets messy because every listing claims “studio quality” and shows a cool looking wall. If you keep your checklist practical, the acoustic panels vs foam for home office decision becomes more about constraints than hype.
Think in terms of coverage, thickness, and where you can mount things without starting a home renovation. Once you know your room size and your mic position, you can buy fewer pieces and get a bigger result.
It also helps to decide what “better” means for you before you buy anything. Clearer speech on calls is a different target than a dead room for voiceover, and the shopping cart should reflect that.
Pay attention to the dimensions, not just the count of pieces. Twelve small squares can look like a lot online, but they might cover less area than two properly sized panels.
If you are choosing panels, check thickness first and then check whether the seller lists the core material. Vague descriptions usually mean thin filler that looks fine but performs like decoration.
If you are choosing foam, be realistic about how much you need to cover. Foam works best when it interrupts large reflective surfaces, not when it is arranged like a few scattered stickers.
Mounting is part of the purchase, not an afterthought. If you cannot mount it cleanly, you will either never install it or you will install it in the wrong place because it is convenient.
Also think about how your setup might change over time. A panel you can move and rehang makes it easier to upgrade your desk layout without losing your sound improvements.
- Measure wall space at first reflection points
- Choose 4 inch panels for voice if budget allows
- Plan for an air gap using spacers or hooks
- Check fire rating and odor complaints in reviews
- Buy enough to cover at least 15 to 25 percent of surfaces near the desk
- Pick mounting hardware that matches your wall type
If you follow the checklist, you will avoid the common trap of buying what looks good on camera instead of what sounds good on mic. The best-looking wall is not always the best-sounding wall.
It is also worth budgeting for one or two “problem solvers” like a rug or heavy curtains. Those items are not acoustic panels, but they often remove the last bit of harshness that makes a room feel unfinished.
Common myths that lead to bad results
Myth one is that foam “soundproofs” a room, which it does not. Lightweight absorption does almost nothing to stop bass from coming through a wall, and it barely touches traffic noise.
Myth two is that any panel is the same as any other panel. A thin decorative panel with a hard back can reflect lows right back into the room, even if it looks thick in photos.
Myth three is that you should treat every inch of the room to get a pro sound. Over treating highs with foam can make the room sound like a closet while the low mids still ring, which is the worst of both worlds.
Myth four is that your mic will fix the room if you buy a better one. A $400 mic in a reflective room usually sounds worse than a basic dynamic mic in a treated room.
Another myth is that more texture automatically means more absorption. Egg-crate foam and thin sculpted tiles can look aggressive, but performance still comes down to thickness and material.
People also assume that placing foam behind the monitor is the main move because it is visible on camera. That spot can help a little, but it is rarely the main reflection path into the mic.
There is also a myth that you can “EQ out” room problems. EQ can reduce some resonances, but it cannot remove the time-based smear of reflections that arrive milliseconds after your voice.
Another common mistake is thinking that a noise gate is a replacement for treatment. A gate can hide noise between words, but it does nothing to improve clarity while you are speaking.
Some people believe that a smaller room is easier to treat because there is less space. Small rooms are often harder because reflections return faster and low frequency problems stack up more aggressively.
Finally, there is a myth that you need a perfectly dead room for professional speech. A controlled room is the goal, because a little natural liveliness can keep your voice sounding human and relaxed.
Conclusion
For most people, broadband panels are the safer bet because they address the range that makes speech sound boxy and tiring. Foam can still help in specific spots, but the foam absorption limits show up quickly in small offices.
If you keep noise vs echo straight, you will stop expecting wall treatment to block the neighbor’s dog. Treat reflections first with smart placement, then handle isolation separately if outside noise still ruins your calls.
If you want a simple rule, prioritize thickness and placement over aesthetics. A few well-placed panels can beat a whole wall of thin foam in the ways that actually matter for voice.
Once your room is under control, your mic technique and basic settings become easier too. You will sound more consistent, and you will spend less time fighting your space every time you hit “Join meeting.”


