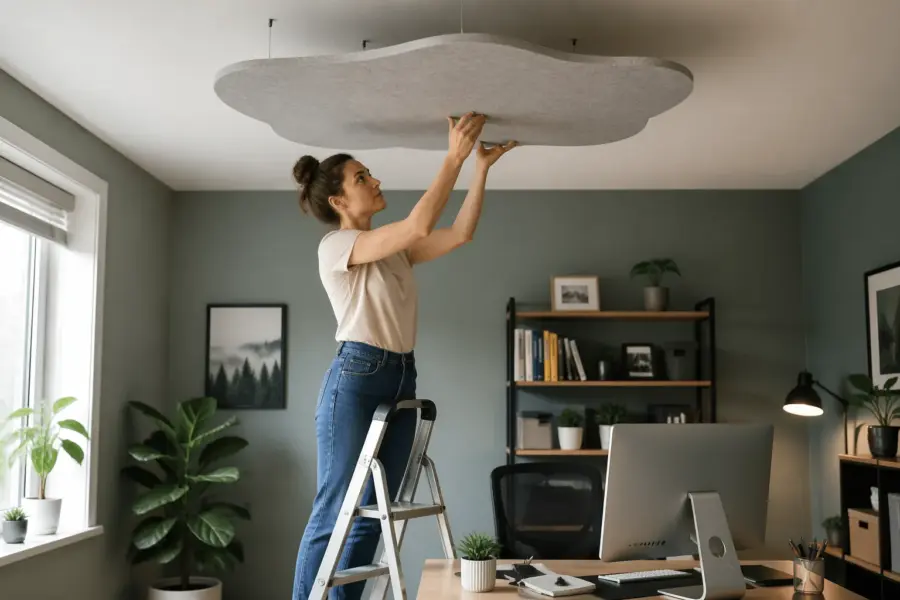
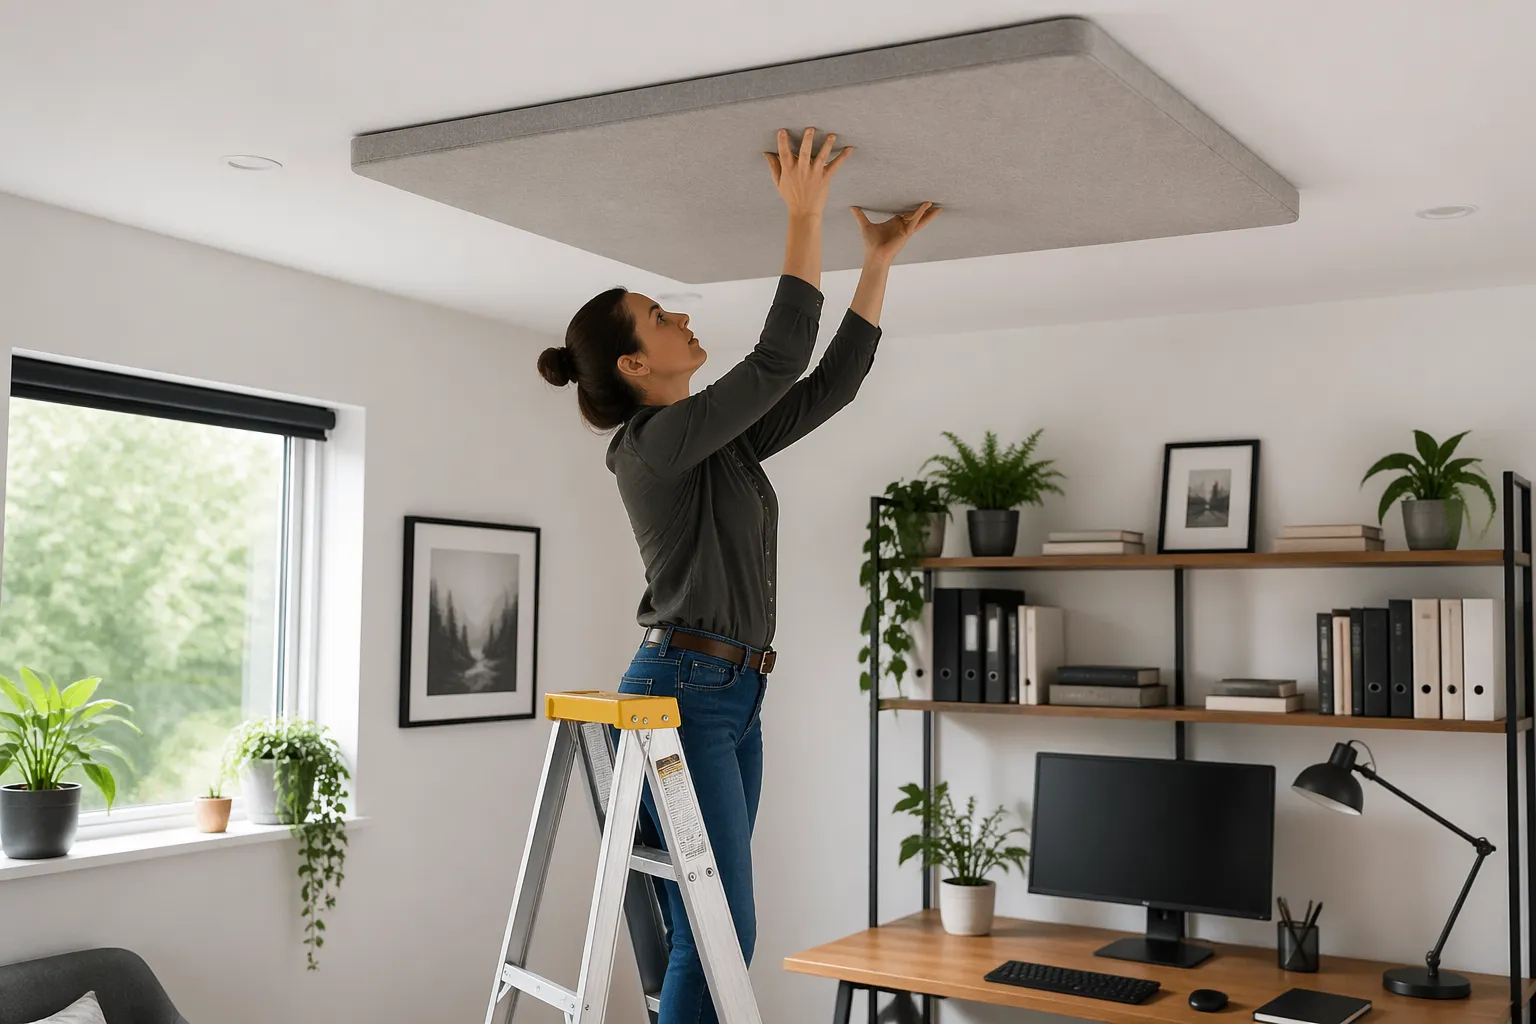
If your home office sounds a little sharp, boxy, or oddly tiring, the ceiling is often the reason. A ceiling acoustic panel cloud home office setup fixes the one surface most people ignore, the one that loves to throw sound right back at your ears.
When you talk on calls, record voice, or listen to music at your desk, the first bounce usually comes off the ceiling. Those ceiling reflections smear consonants, make your mic sound farther away, and can turn a clean speaker setup into a splashy mess.
A ceiling cloud is simply a thick acoustic panel hung horizontally above your work area. It is one of the fastest upgrades you can make without covering your walls in foam or rearranging the whole room.
I like ceiling clouds because they solve a real problem with a single object you can measure, mount, and verify. You do not have to guess where the sound is bouncing if you know your desk is directly under a hard, flat lid.
In a typical spare bedroom office, the ceiling is also the closest large boundary to your ears, so its reflections are loud and fast. That timing is what makes the room feel “in your face” in a bad way, even when the volume is low.
People often try to fix this with software processing, but the room still prints itself on every word you say. A cloud reduces the problem at the source, so your mic and your speakers have less mess to fight.
Ceiling treatment also helps when you move around during the day, because the reflection path stays similar over the desk area. You get a more consistent sound whether you are leaning in to type or sitting back to think.
If you have ever listened back to a recording and wondered why it sounds “hollow” compared to what you heard in the moment, the ceiling is a usual suspect. The cloud is basically a soft lid that keeps your room from talking back so much.
When a ceiling cloud makes the biggest difference
A ceiling cloud matters most when your ceiling is low and hard, like painted drywall, plaster, or a textured popcorn finish. In those rooms, ceiling reflections arrive so quickly that your brain blends them with the direct sound, and clarity drops.
If you use a condenser mic on Zoom, Teams, or for narration, the ceiling bounce often lands right in the mic’s pickup pattern. The result is a roomy sheen that sounds like you are speaking in a bathroom, even when the room looks “normal.”
Desk setups with speakers also benefit because the ceiling is a strong early reflection point for nearfield monitors. You can treat side walls and still hear a bright splash if the ceiling remains bare.
Rooms with lots of glass, wood floors, or minimal furniture get an even bigger improvement because the cloud adds real absorption area. If your office already has thick carpet, a stuffed couch, and bookcases, you will still hear a change, but it will be less dramatic.
If your ceiling height is around 7.5 to 8 feet, the bounce is so close that it can make your voice sound like it is coming from above you. That “ceiling voice” effect is subtle on a laptop mic, but it becomes obvious on a decent headset or USB mic.
Clouds also shine in small square rooms where reflections stack up and create a nasal, honky midrange. The ceiling path is often part of that loop, so breaking it helps the whole room calm down.
If you do any kind of screen recording, tutorials, or client demos, a cloud can make you sound more confident without changing your delivery. Clearer speech reads as more professional, even when the content is casual.
For music listening, the biggest win is not “more bass” or “more treble,” but better separation. When early reflections drop, you can place instruments more easily, and you stop turning the volume up just to hear detail.
Even if you only use laptop speakers, the ceiling can still create harshness because the room is doing half the work. A cloud will not turn a laptop into studio monitors, but it can make the room less irritating during long sessions.
If you have a standing desk, the cloud can still help, but you need to plan for the standing ear position too. In that case, a slightly larger cloud or a longer placement zone keeps both positions covered.
Another high impact case is a room with a ceiling fan or light fixture that forces you to place the desk off center. A cloud lets you treat the reflection point above the desk even when the room layout is awkward.
If you are doing any acoustic guitar or vocal tracking in the office, the ceiling reflection is basically guaranteed to show up in the recording. A cloud makes the raw track easier to mix because you are not battling a hard slap from above.
When people say their room sounds “phasey” or “swirly” as they move their head, early reflections are usually involved. A cloud reduces that effect around your main working position, so the sound stays stable.
Choosing cloud size, thickness, and placement
Start with where your head and mic actually live, not where you wish they lived. The best placement is centered over your listening position and desk, because that is where the strongest ceiling reflections line up.
For most home offices, a practical cloud panel size is either 2×4 feet or 4×4 feet, with 2×4 being easier to mount and move. If your desk is wide or you sit far back, two 2×4 panels with a small gap between them often beat one undersized panel.
Thickness is where people cheap out and regret it later, because thin panels mainly tame highs and leave the room sounding oddly dull but still boomy. I consider 2 inches the minimum for a cloud, and 4 inches is the sweet spot if you can handle the visual bulk.
If your goal is cleaner voice on calls, a 2 inch panel with a good air gap can work well. If you want better translation for speakers and less low mid buildup, a 4 inch cloud gives you more useful broadband absorption.
Think of the cloud as a target that should cover the “reflection footprint” above your chair, not just the desk surface. If you can slide your chair back a foot during the day, plan for that movement so you do not step out from under the treatment.
For a single 2×4 panel, I like the long dimension running left to right across the desk, because it covers both speakers and your head position more naturally. If your desk is narrow and deep, front to back can work, but measure first.
If you are using a boom arm mic that sits slightly in front of you, center the cloud over the space between your mouth and the mic capsule. That is where the ceiling reflection tends to be most audible in voice recordings.
Panel density matters too, because fluffy insulation and rigid mineral wool behave differently at different frequencies. For a general home office cloud, a medium density broadband panel is usually the safest choice.
If you are buying panels, look for real acoustic data, not just marketing words like “soundproof” or “noise canceling.” A cloud is about absorption inside the room, not blocking sound from leaving the room.
If you are building your own, keep the back open or use a breathable backing so the panel can actually absorb. A sealed plastic back can reduce performance and sometimes creates weird resonances.
In a room where you also care about aesthetics, two thinner panels can look cleaner than one thick slab, but performance is not the same. If you split thickness, compensate with a larger area and a generous air gap.
Placement relative to speakers matters more than people think, because early reflections mess with imaging and tone. If your monitors are on stands behind the desk, shift the cloud slightly back so it covers the path from speaker to ceiling to ears.
If you only care about voice and you use headphones, you can bias the cloud toward the chair position instead of the speaker triangle. That is a good way to keep the panel smaller while still getting the main benefit.
Do not ignore the height of the cloud itself, because a panel hung too close to the ceiling behaves more like a thin layer. If you cannot hang it low, prioritize thickness so you still get meaningful absorption.
When in doubt, go a little bigger than you think, because you can always add a second panel later. A too small cloud often leads to a slow upgrade path where you end up buying twice.
Safe hanging options for different ceiling types
Hanging acoustic panels is simple when you match the hardware to the ceiling, because the ceiling is where mistakes become expensive. The safest approach is always to anchor into structure, then use rated hardware that exceeds the panel’s weight by a wide margin.
If you are renting, you can still do a clean install with tiny holes, but you should avoid sketchy “sticky hook” solutions for anything heavier than a lightweight decorative panel. A real acoustic cloud made from mineral wool or fiberglass is not the place to gamble.
Before you drill anything, weigh the panel or check the manufacturer’s listed weight, then assume the real load is higher. Hardware is cheap compared to repairing a ceiling or replacing a monitor that gets hit by a falling corner.
Four-point hanging is the default for a reason, because it keeps the panel stable and spreads the load. Two-point hanging can work on very light panels, but it is easier for the cloud to swing and slowly loosen hardware.
Chains are forgiving because you can adjust link by link, but they can look industrial in a home office. Aircraft cable with grippers looks cleaner and is easy to level, as long as you buy components rated for overhead use.
If you are anchoring into joists, predrill and use proper screw eyes or eye bolts designed for wood. Avoid tiny cup hooks, because they are meant for plants and decor, not a panel that might weigh 10 to 25 pounds.
If you must use toggles in drywall, use metal toggles rated for ceiling loads and follow the instructions exactly. The goal is to clamp the drywall between the toggle and the bolt head, not to rely on friction from a plastic sleeve.
On concrete, use anchors that match the load and the hole size, and do not guess with random screws. Concrete installs feel intimidating, but they are very solid when done with the right bit and the right anchor.
Suspended grid ceilings are a special case, because the grid is not designed for point loads. If you have a drop ceiling, run wires up to the structure above, or consider a wall-mounted frame that supports the cloud without touching the grid.
If you have a ceiling light in the exact place you want the cloud, do not hang from the light box unless you know it is rated for the load. It is safer to offset the cloud slightly and keep the electrical box out of the equation.
In older homes, plaster ceilings can crumble if you treat them like drywall, so find framing and go slow. If you are not sure what you have, a small test hole in an inconspicuous spot can save you from a bigger mess.
Whatever ceiling type you have, use locking hardware where you can, like lock nuts or thread locker on bolts. Vibrations from doors, footsteps, and even speakers can slowly loosen anything that is only finger tight.
Plan the install so you can take the cloud down later without destroying it, because you may want to move it or repaint. Quick links, carabiners rated for load, or cable grippers make maintenance realistic.
| Ceiling type | Recommended anchor approach | Notes for safe hanging |
|---|---|---|
| Drywall over joists | Screw eye hooks into joists | Find joists with a stud finder, predrill to prevent splitting |
| Drywall no joist access at location | Toggle bolts rated for ceiling load | Use four points, keep the panel light, avoid cheap plastic anchors |
| Concrete slab | Masonry anchors or drop in anchors | Use a hammer drill, vacuum dust, match bit size to anchor |
| Wood plank or exposed beams | Lag eye bolts into solid wood | Predrill, use washers, do not rely on thin decorative boards |
| Suspended grid ceiling | Do not hang from the grid | Hang from structure above with proper wires, or use a freestanding frame |
If you are using a kit panel with built-in hanging brackets, make sure the brackets are actually secured to the frame and not just stapled fabric. A solid frame with corner reinforcement is a lot more trustworthy overhead.
When you are done, do a gentle pull test on each point before you hang the full weight. It should feel like the ceiling is part of the panel, not like the panel is politely asking the ceiling for permission.
If you have kids, pets, or a chair that rolls, assume something will bump the cloud at some point. Stability is not just about preventing a fall, it is also about preventing annoying sway that makes the room feel cluttered.
How much air gap to leave above the cloud
An air gap above the cloud makes the panel act thicker at lower frequencies, which is exactly what most home offices need. You get more absorption where speech chest tones and speaker low mids tend to hang around.
A good starting point is a 2 to 6 inch gap for a 2 inch panel, and a 4 to 8 inch gap for a 4 inch panel. If your ceiling is low, even a 2 inch gap is worth doing because it reduces the strength of the earliest ceiling reflections.
If you have the headroom, I like a gap roughly equal to the panel thickness, because it is easy to remember and usually performs well. Past about 10 to 12 inches, the returns shrink in typical small rooms, and the cloud starts to feel like a hanging obstacle.
Keep the gap consistent at all corners, because a tilted panel changes the reflection path and looks sloppy. If you need a larger gap for performance, use longer chain or aircraft cable rather than mixing random spacers.
The air gap is also a practical comfort choice, because a cloud that hangs too low can feel like it is hovering over you. You want absorption, not a low ceiling vibe that makes the room feel smaller.
If you have an 8 foot ceiling and a tall chair, measure from the floor to the bottom of the cloud and make sure you still have visual breathing room. A good rule is that you should not feel the need to duck when you stand up.
In rooms with HVAC vents, the gap can affect airflow and noise, so keep the cloud out of the vent’s direct path. A panel placed right under a vent can create a hiss or whistle that you will notice on quiet recordings.
A larger gap can also help if your panel is only 2 inches thick and you are trying to stretch performance. It will not turn a thin panel into a bass trap, but it does make the cloud more useful in the low mids.
If you are using multiple panels, keep the air gap consistent across all of them so they behave similarly. Mixed gaps can work, but it is harder to predict and harder to make look intentional.
Try not to let the cloud touch the ceiling at any point, even if the chains are short, because vibration and rattles can show up later. A panel that lightly taps the ceiling when a door closes will drive you crazy once you notice it.
If you want a very tight look, you can use a shallow gap and a thicker panel, which often performs better than a thin panel with almost no gap. The goal is broadband absorption, not just a cosmetic soft patch overhead.
When you are deciding on the final gap, think about lighting too, because a cloud can cast a shadow on your desk. Sometimes raising it an inch or two keeps your desk lighting even while still keeping the acoustic benefit.
Keeping it level and centered over your desk
A ceiling cloud works best when it is where the reflection is, and that usually means centered over the spot where your ears sit during work. If you mount it over the middle of the room because it “looks right,” you can miss the problem area by a foot or two.
Use a simple method: sit in your chair, have someone hold a small mirror flat to the ceiling, and move it until you can see your speaker in the mirror. That mirror point is a strong ceiling reflection point, and your cloud should cover it with margin.
For leveling, a $15 torpedo level works, but a cross line laser makes the job calmer and faster. Mark two light pencil lines or painter’s tape on the ceiling so you can measure equal distances from the desk edge and side walls.
Do not trust your eyes alone, because ceilings and trim are often out of square. Measure diagonals between hanging points, then adjust chain links or cable grippers until the panel sits flat and stays put when you bump the desk.
If you work at different times of day, check the cloud alignment with the lights on and off, because shadows can make a level panel look crooked. A quick tape measure check beats staring at it and second guessing yourself.
Centering is easier if you reference your chair position rather than the desk, because chairs move less than you think once you find your normal spot. Put a small piece of tape on the floor at the chair’s front wheel line so you can return to the same position.
If you are using nearfield monitors, measure from each speaker to the cloud edges so you know the coverage is symmetrical. Symmetry is not just for looks, it helps keep the stereo image from pulling to one side.
When you hang the cloud, start with it slightly higher than your target height, then lower it as you level it. It is easier to shorten chain or cable than to redo anchors because you ran out of adjustment.
Check that the cloud is not twisted, because a panel can be level on two corners and still be rotated. A quick diagonal measurement from corner to corner catches that problem fast.
If you have a ceiling fan, make sure the cloud is outside the blade sweep and far enough away to avoid airflow buffeting. Even if it is safe, the fan can create a low flutter that makes the panel move and look distracting.
For multi-panel clouds, keep the gap between panels consistent and aligned with the desk centerline. A clean, even gap looks intentional and makes the install feel like part of the room design.
After you think it is done, sit down and do a quick listening check before you pack up tools. A small shift forward or back can sometimes sound better, and it is easier to adjust immediately than later.
Once you are happy, take a few measurements and write them down, because you will forget the exact spacing. If you ever move the desk or repaint, those notes make reinstalling painless.
Common mistakes that make clouds underperform
The most common mistake is a cloud that is too small, hung too high, and placed too far forward. You end up treating the space above your monitor while the real ceiling reflections hit above your head and chair.
Another mistake is using thin foam tiles and calling it a cloud, because foam mainly handles top end and leaves the room’s low mids untouched. If your voice still sounds boxy after “treatment,” thin material is usually why.
People also mount clouds tight to the ceiling because it feels secure, but that throws away easy performance. Even a small air gap changes how the panel interacts with pressure and velocity near the boundary.
Finally, some installs look neat but are unsafe, like hooks in drywall with unknown anchors or a single center hanger point. A cloud should hang from at least four points so it cannot spin, drop a corner, or slowly pull out hardware over time.
A sneaky mistake is treating the cloud like a decoration and choosing fabric that is not acoustically transparent. If you cannot breathe through the fabric easily, sound also struggles to get through it.
Another underperformance issue is putting the cloud over the wrong “zone” because the desk is not where the listening happens. If you sit off to the side for calls or you turn to a second monitor, the cloud may not be covering the main reflection path.
Some people install a cloud and then keep the mic far away, which makes room sound come back in through sheer distance. The cloud helps, but mic technique still matters, so keep the mic close enough to get a strong direct signal.
Using a single small cloud and expecting it to fix the whole room is also a common expectation trap. A cloud is a high impact piece, but it works best as part of a basic plan that includes at least some soft surfaces elsewhere.
Another mistake is forgetting about rattles, because chains, quick links, and frames can buzz when speakers play. A tiny piece of felt, a tighter link, or a different hanger can eliminate noises that make you think the room still sounds bad.
Clouds can also underperform if the panel is built like a sealed box with a hard back. That construction can reflect sound back down instead of letting the absorber do its job.
Some installs fail because the panel ends up too close to a light fixture and heat becomes an issue. Keep clearance around recessed lights and anything that gets warm, because safety beats acoustics every time.
People sometimes over-treat the very top end and then blame the cloud for making the room “dead.” A proper cloud should reduce harshness without making speech lifeless, which is why thickness and broadband materials matter.
Lastly, do not ignore the rest of the reflection chain, because a ceiling cloud cannot fix a bare glass wall next to your desk by itself. If you still hear sharpness after the cloud, the next strongest reflection is usually a side wall or the desktop.
Visual design ideas that still perform well
You can make a ceiling acoustic panel cloud home office setup look intentional instead of like studio leftovers. The trick is to treat fabric, frame depth, and spacing as part of the room, while keeping the absorber thick enough to matter.
If your office is modern, a simple black or light gray fabric wrapped panel looks clean and hides dust. In a warmer room, linen style acoustically transparent fabric in tan or oatmeal can blend with wood furniture without looking like office gear.
Edge details change the vibe a lot, so consider a slim wood frame with a small reveal rather than a bulky box. A 1×2 pine frame, sanded and stained, looks like a fixture, and it still allows plenty of absorption if the back stays open.
If you want something bolder, you can split one large cloud into two panels with a 2 to 4 inch gap between them. That gap can look like a design choice, and it also makes installation easier because each panel weighs less.
Color matching goes a long way, so pull a tone from your rug, curtains, or desk accessories and repeat it in the cloud fabric. When the cloud echoes something already in the room, it reads as design instead of equipment.
If you have a white ceiling and you want the cloud to disappear, a white or off-white fabric can work, but choose a fabric that does not yellow easily. A slightly warmer white often looks better than a stark bright white under indoor lighting.
You can also treat the hanging hardware as part of the look by using black cable and black eye bolts for a clean, minimal vibe. If you prefer a softer look, thin white cable can blend into the ceiling and make the panel look like it is floating.
For a more architectural feel, some people build a shallow perimeter frame and hang the absorber inside it like an inset. That approach hides the panel edges while still leaving the back open for absorption.
Lighting can be integrated too, but keep it simple and safe, like adding a separate desk lamp rather than attaching fixtures to the cloud. A cloud should not become an electrical project unless you really know what you are doing.
If you are worried about the panel looking heavy, a beveled frame edge can visually thin it out. The absorber stays thick, but the silhouette looks lighter from across the room.
Patterns can work if they are subtle, like a tight weave or a small texture that hides minor dust. Loud prints can be distracting on camera, especially if you do video calls and the cloud ends up in the background.
If your office doubles as a guest room, two smaller clouds can look more like decor than one big slab. Smaller panels also make it easier to avoid ceiling fixtures and still cover the reflection zone.
Keep in mind that a cloud can show up in webcam framing if your camera is angled up, so check your shot before you finalize the look. A clean, neutral panel reads better on video than something that pulls attention away from your face.
If you are building DIY panels, take time on the fabric wrapping and corners, because sloppy corners make the whole install look temporary. A neat wrap job can make a budget panel look like a custom piece.
Quick tests to confirm the improvement
You do not need lab gear to hear whether ceiling reflections got under control. You need repeatable tests you can do before and after, in the same chair position, at the same volume.
The fastest test is a hand clap while sitting at your desk, listening for a sharp “zing” or flutter that comes back from above. After a good cloud install, the clap sounds shorter and less spitty, even if the room still has some reverb.
For voice, record ten seconds of speech on your normal mic settings, then do it again after the cloud goes up. Listen for clearer consonants, less papery ring, and less need to crank noise reduction that makes you sound processed.
If you want numbers, use a free app like Room EQ Wizard with a basic USB mic such as the miniDSP UMIK 1. You can look at the impulse response and see the early reflection energy drop, which lines up with what you hear.
A simple real-world test is to join a call with a friend and ask them to describe the change without telling them what you did. If they say you sound “closer” or “less echoey,” the cloud is doing its job.
Another easy check is to play a familiar podcast or spoken word track through your speakers at a modest volume. Speech should sound more focused, and you should be able to understand words without leaning forward.
If you mix or edit audio, listen to sibilant sounds like S and T, because they are the first to get smeared by reflections. After the cloud, those sounds should be clearer without needing harsh de-essing.
For speakers, use a mono track and sit centered, because mono makes imaging problems obvious. With the cloud installed, the phantom center should lock in more solidly instead of wandering with small head movements.
You can also do a quick “walk test” by talking while moving around the desk area. The room will still change as you move, but the harshest ceiling slap should be reduced near your main working spot.
If you use a noise gate or automatic echo cancellation, try turning it down after installing the cloud. Often you can use less aggressive settings, which makes your voice sound more natural and less chopped up.
For a basic measurement without extra gear, some phones can record a spectrogram or show decay visually in audio apps. It is not lab accurate, but you can still see a shorter, cleaner tail after the clap.
Give yourself a day or two to adjust, because your ears adapt quickly and you may forget how bad the ceiling reflection was. That is why keeping a before recording is useful, because it keeps you honest.
If you want to be extra sure, temporarily take the cloud down and repeat the clap test once, then put it back up. That quick A/B is usually enough to make the improvement obvious.
Conclusion
A ceiling cloud is one of the rare home office upgrades that is easy to aim, easy to verify, and hard to regret. When you control ceiling reflections, your voice gets closer, your speakers image better, and long workdays sound less fatiguing.
Pick a sensible cloud panel size, use enough thickness, and hang it safely with an air gap that fits your room. If you keep it level and centered over your desk, you will hear the change right away, and your recordings will confirm it later.
If you only do one acoustic treatment in a home office, the ceiling cloud is a strong candidate because it targets a consistent early reflection path. It is also a treatment you can take with you if you move, which makes it feel less like a permanent renovation.
Once the cloud is up, you may notice other issues more clearly, like a bright side wall or a resonant corner, and that is a good sign. It means the room is getting quieter in the right places, so the remaining problems are easier to identify and fix.
The best part is that the improvement is not subtle when the room needs it, especially for speech. Your mic captures less room, your listeners work less to understand you, and you spend less time tweaking settings to compensate.
Do it once, do it safely, and treat it like a real piece of the room rather than an afterthought. A good ceiling acoustic panel cloud home office setup makes the space feel calmer, clearer, and more comfortable to be in every day.


