A ceiling fan is great for comfort, but it can be a sneaky enemy in a home office studio. The blades sit right in the first reflection zone for many desk setups, and that can smear the top end in a way that feels like your speakers suddenly got cheap.
Most people blame their monitors, their interface, or the room in general when mixes start sounding fuzzy. A lot of the time the problem is simpler, home office studio ceiling fan reflections are bouncing sound back down to your ears a few milliseconds late.
Room geometry decides whether that bounce is a mild annoyance or a full-on comb filtering mess. If you work in a small spare bedroom, the ceiling reflection path is short, strong, and hard to ignore.
This article stays practical and opinionated, because you need moves you can make today with tape, a chair, and a little patience. You will see how fan placement, speaker height, and the listening triangle work together, and how to pick the least bad compromise.
How a ceiling fan can affect clarity in a small room
A ceiling fan changes what the ceiling does acoustically, even when it is off. Those blades act like angled reflectors, so the ceiling reflection that would have been a single bounce becomes a cluster of slightly different bounces.
In a small room, those time offsets are tiny, which is exactly why they are annoying. Your brain hears them as a phasey haze on cymbals, vocal air, and reverb tails.
That haze is basically comb filtering, where some frequencies add and others cancel depending on the path length difference. You do not need a huge delay for that to happen, just a strong reflection arriving close enough to the direct sound.
Ceiling fans make it worse because the reflection is not coming from one flat surface with one predictable angle. Each blade presents a slightly different angle, so you get several similar reflections stacked together.
In practice, this can make the high end feel both dull and sharp at the same time. You lose clean transients, but certain narrow bands jump out and make you reach for EQ that you would not touch in a better setup.
In a small room, the ceiling is close enough that the reflection is loud relative to the direct sound. If your monitors are already near a wall, you are stacking problems, and the fan just becomes the most irritating piece of the pile.
When the fan is on, you add moving surfaces, and that can modulate the reflection in a subtle warble. It is the same reason a rotating Leslie speaker sounds alive, except here it just makes your stereo image feel unstable.
The modulation can be subtle enough that you do not notice it as “fan sound,” but you notice it as a lack of confidence. Panning decisions feel slippery, and reverbs do not sit in a stable place behind the vocal.
Even if you are not running the fan, the blades still break up the smooth ceiling plane and create extra edges. Edges matter because they scatter and reflect high frequencies more than low frequencies, which is exactly where mix clarity lives.
Home office studio ceiling fan reflections also tend to hit both ears in a similar way, so they do not sound like a distinct echo. They sound like the speakers lost focus, especially right around 2 kHz to 8 kHz where our ears are picky.
That frequency range is also where vocal intelligibility and snare crack sit, so you end up chasing clarity with boosts that do not translate. The room is stealing definition, and you are trying to buy it back with EQ.
The worst part is that you can get used to it and start mixing into the problem. Then you take the mix to the car, and suddenly the top end is harsh because you kept pushing highs to fight the blur.
It also affects compression decisions, because smeared transients make you think the track is too soft. You clamp down harder than you should, and the mix ends up flatter than it needs to be.
Another side effect is that you may start monitoring louder to “see through” the haze. Loud monitoring makes the room sound better for a minute, but it is a shortcut that usually leads to fatigue and worse decisions.
If you have ever moved your chair a foot forward and thought, why did the snare just change, that is geometry talking. The fan is part of that geometry, whether you like it or not.
Small rooms exaggerate these changes because every inch is a meaningful percentage of the total distance. When the ceiling is only a few feet above your head, you are always one small adjustment away from a different reflection pattern.
None of this means you cannot mix in a room with a ceiling fan, but it does mean you should treat it like a real acoustic surface. If you ignore it, you will keep blaming your gear for a problem that is literally hanging above you.
Check fan position relative to your desk and speakers
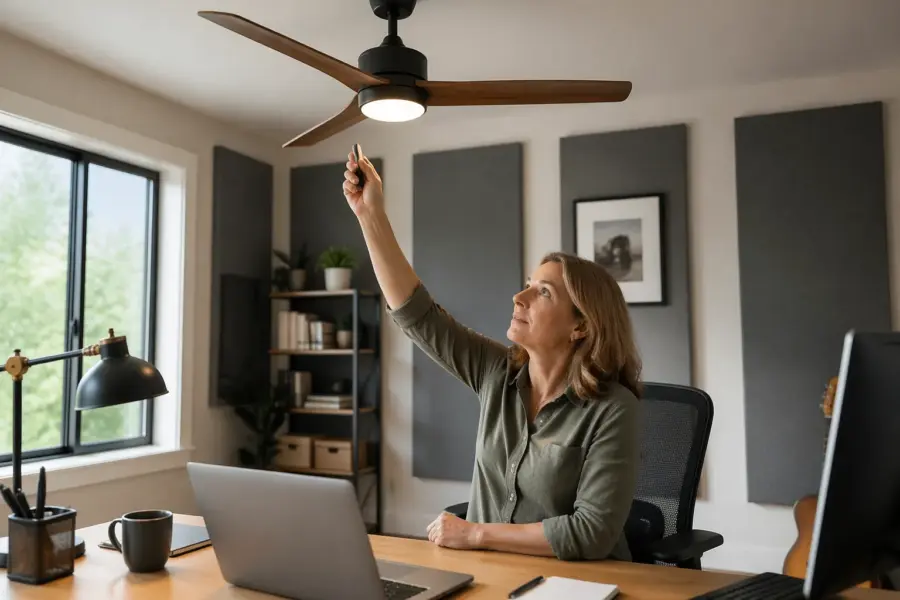
Start by standing where your head normally is and look straight up. If the fan is directly above the listening position, you are basically aiming your ceiling reflection at a spinning set of paddles.
Now look at where the fan sits relative to the line between your speakers and your head. If the fan is centered over that line, it is more likely to affect both channels in a similar way and smear the whole image.
If the fan is offset to one side, it can create an uneven reflection that is harder to diagnose. You might think one speaker is louder or brighter, when the real issue is that one speaker is “seeing” more blade area than the other.
Next, look at where the speakers point, because tweeters are the main culprit for sharp ceiling reflection. If the line from tweeter to your ear also has a clean line to the fan blades, you have a strong reflection path.
Do not assume a small toe-in change is harmless, because toe-in changes what part of the ceiling gets hit. A few degrees can move the strongest reflection from a plain ceiling section to the blade sweep zone, or the other way around.
Also check how close the fan is to the speakers themselves, not just your head. If the speakers are tall and the fan is low, the fan can sit in the near-field reflection zone and behave like a weird overhead reflector.
A quick test is to temporarily stop the fan and hang a thick moving blanket from the fan housing with clothespins, keeping it clear of the blades and motor vents. If clarity improves fast, you just proved the fan is a reflection surface you notice.
Keep the test simple and short, because you are listening for an obvious change, not perfection. If the difference is subtle, it may still matter, but you should also check other ceiling and wall reflection points.
Another test is to slide the desk forward or back by 6 to 12 inches and replay a bright reference track you know well. If the treble shifts in a comb-filter way, the ceiling reflection is in play and the fan may be strengthening it.
Do the same test with a mono source, like a podcast voice or a centered vocal stem. Mono makes it easier to hear the “phasey” effect because you are not distracted by width and stereo reverb.
Pay attention to symmetry, because a fan that is offset can pull the image to one side if one speaker sees more blade area than the other. That can make center vocals feel like they lean left or right even when your listening triangle looks correct.
If you have a measurement mic and software, a quick impulse response can show you the ceiling reflection timing. You do not need to be a scientist, you just want to see if there is a strong early reflection that lines up with the ceiling and fan geometry.
Even without measurement tools, you can clap and listen for a sharp flutter or zing that seems to come from above. It is not a perfect test, but it can point you toward the ceiling as a problem area instead of the side walls.
In most bedrooms, the fan sits near the center of the room, while the desk gets shoved against a wall for convenience. That mismatch often puts the fan right over the desk edge, which is a bad spot for reflections and a worse spot for airflow noise.
When the desk is against a wall, you also tend to sit closer to the ceiling reflection point because you are not centered in the room. That can make the fan feel like it is “in the way” even if it is not directly over your head.
If you can, take a photo from your listening position looking up and forward toward the speakers. Seeing the geometry in a picture makes it easier to spot when the fan is sitting right in the path you are trying to keep clean.
Choose speaker and ear height to reduce ceiling interaction
Speaker height is not only about tweeters at ear level, it is about where the first ceiling reflection lands. If your speakers are too low, the tweeter fires up at a steeper angle, and the ceiling reflection gets stronger.
That “stronger” reflection is not just louder, it is also earlier in time because the path is short. Early reflections are the ones that mess with imaging and clarity the most, especially in the presence and brilliance ranges.
I like to start with tweeters at ear height, then adjust in small steps while listening for the point where the top end snaps into place. Sometimes raising the speakers an inch reduces the ceiling reflection more than adding a thin foam tile ever will.
When you adjust height, do it in a controlled way so you are not also changing distance and toe-in by accident. Mark your speaker stand positions with tape so you can return to a known baseline if you get lost.
Chair height matters just as much, because your ears are the target you are trying to protect. A chair that is too low can put your ears closer to the ceiling bounce angle, even if the speakers are technically “correct” on paper.
Desk height can force bad chair height, which is why home office furniture is often the hidden enemy. If you are shrugging your shoulders to type, you are probably also sitting in a weird acoustic spot without realizing it.
Try a simple check: sit normally, then sit two inches taller by adding a firm cushion, and listen to the same chorus. If the vocal sibilance and cymbal sheen change a lot, your ear height is interacting with the ceiling and fan.
Also consider speaker tilt, because a slight downward tilt can reduce how much energy hits the ceiling. Tilt is not a substitute for correct height, but it is a useful fine-tuning tool when the fan is in a stubborn spot.
Be careful with extreme tilt, because it can make the direct sound off-axis and change the tonal balance in a different way. The goal is less ceiling interaction without turning your monitors into dull boxes.
If you use a laptop stand or a big display between the speakers, that can bounce highs upward too. Those extra bounces can combine with home office studio ceiling fan reflections and make the ceiling feel even more “busy.”
Nearfield monitors help because the direct sound is stronger relative to the room, but they are not magic. If the fan reflection is strong and early, it can still compete with the direct sound and blur the image.
Head position is the last piece, because leaning forward or slouching changes your ear height and distance in one move. If your mix position changes every time you get tired, your perception of the ceiling reflection changes too.
| Setup choice | What it changes | What you usually hear |
|---|---|---|
| Tweeter below ear level | Steeper upward aim toward ceiling and fan | Brighter but smeared highs, unstable image |
| Tweeter at ear level | Flattest direct path in the listening triangle | More focused center, less splashy cymbals |
| Tweeter slightly above ear level | Reduced upward firing, more downward directivity | Smoother top end, sometimes less “air” |
| Chair too low for desk | Ear moves closer to ceiling reflection angle | Phasey presence region, vocals get edgy |
| Chair height corrected | Ear sits on-axis with tweeter | Cleaner transients, better depth cues |
Use the table as a starting point, but trust your ears with reference material you know. If a small height change makes the phantom center lock in, that is usually a sign you reduced early reflection damage.
Once you find a good height, commit to it and stop fiddling for a week. Consistency is underrated, and a stable setup helps you learn the room even if the room is not perfect.
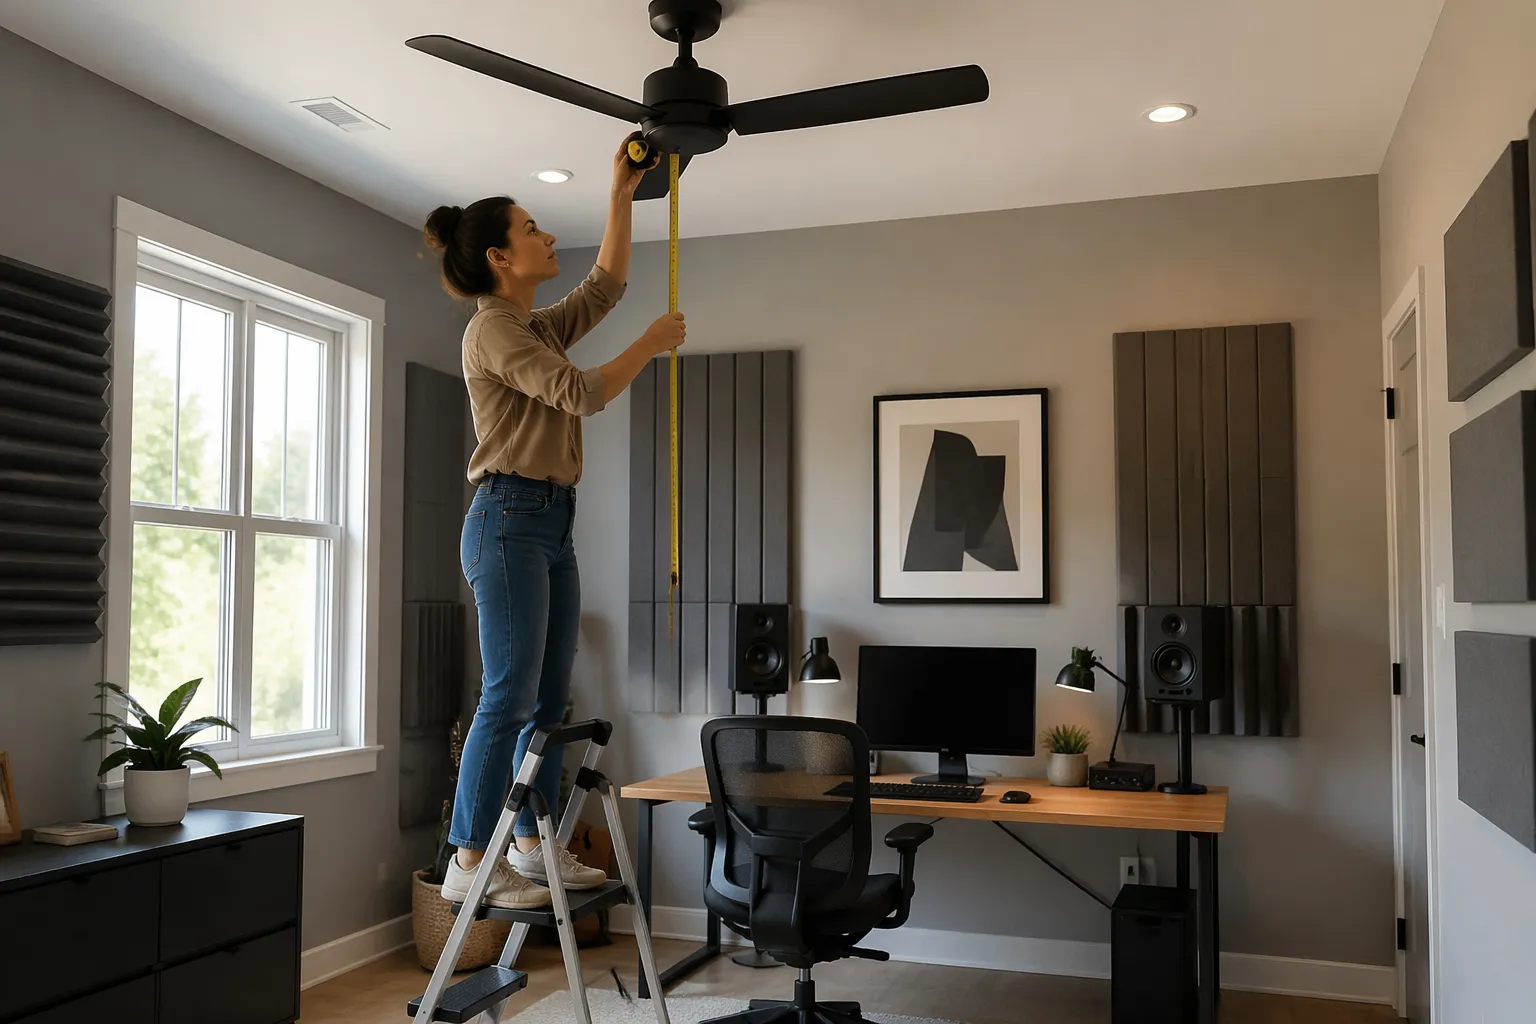
Place your desk to avoid the strongest overhead reflection path
The best desk position in a home office studio is rarely centered under the fan, even if the room looks nicer that way. You want the first ceiling reflection to miss your ears or at least hit a treated zone, not bounce off blades and drop straight down.
Think of the desk as a steering wheel for the whole setup, because moving it changes where you sit and where the speakers end up. A small desk move can change the ceiling reflection timing enough to make the fan go from obvious to irrelevant.
Use the mirror trick, but do it on the ceiling with help. Have someone slide a small mirror across the ceiling while you sit at the listening position, and mark where you can see each speaker’s tweeter.
Reduce turbulence noise and vibration through layout choices
Even if you solve reflections, a ceiling fan can still ruin recordings with broadband whoosh. The fix starts with not placing your mic directly under the airflow column, because that turns a quiet room into a wind tunnel.
Airflow noise is sneaky because it sits right in the same band as breath, room tone, and soft consonants. You can gate it, but the gate will sound like a gate, and you still lose the natural tail of the performance.
If you track voice, acoustic guitar, or anything with quiet detail, treat the fan like a noise source you control, not a background feature. A fan that sounds “fine” to you can sound huge to a condenser mic a foot below it.
Vibration is the other issue, especially in older houses where the fan box is loose or the blades wobble. That vibration can travel through the ceiling and show up as low rumble in sensitive condensers, and it can even rattle light fixtures.
Some fans also click or tick once per rotation, which is the kind of sound your brain ignores but a mic captures perfectly. If you hear any mechanical rhythm, assume it will end up in your takes unless the fan is off.
Put your desk and mic stand where the fan is not the nearest ceiling object, because proximity makes both noise and vibration feel louder. If you must track vocals in the same room, pick a corner that is out of the fan’s direct downwash.
When you pick that corner, also check that you are not trading fan noise for a nasty corner bass build-up. A corner can be great for isolation from airflow, but it can be a low-frequency trap in the bad way if you do not treat it.
For mixing, airflow noise matters because it masks quiet details, and you end up mixing too loud. I would rather sweat a little and mix at 75 dB than run the fan and wonder why my reverbs keep disappearing.
Masking is also why you start over-EQing the top end when the fan is on. You are trying to hear micro-details through a moving layer of noise, so you push brightness until the mix feels “present” again.
Also check what the fan does to your monitor stands and desk surface, because a light desk can act like a drumhead. If you feel a faint buzz in your wrists while typing, your speakers are not the only things shaking the room.
That buzz can show up as sympathetic rattles, especially if you have loose cable clips, a lamp, or a drawer that is slightly open. Chasing rattles is part of home studio life, but the fan can make it a daily hobby if you let it.
A practical compromise is to run the fan at the lowest stable speed while you edit, then turn it off for critical EQ and panning decisions. That habit alone reduces the amount of compensating you do without realizing it.
If you need airflow for comfort, consider aiming a quiet floor fan away from the mic and toward a wall so it diffuses. It is easier to place a small fan strategically than to make a ceiling fan behave in a studio context.
For vibration, make sure the fan is balanced and properly mounted, because wobble is not just annoying, it is an acoustic problem. Tightening hardware and using a balancing kit can reduce the mechanical energy that ends up in your room.
If your room has a suspended light kit on the fan, that can be another rattle source. Sometimes removing the light kit or securing it better is the difference between clean takes and a low-level buzz you cannot unhear.
When relocating the desk beats relocating the fan
Relocating a ceiling fan is a weekend project with electrical risk, drywall work, and usually a spouse or landlord who says no. Relocating a desk is a 30-minute experiment, and it often fixes home office studio ceiling fan reflections more than you expect.
It is also reversible, which makes it a low-stress way to learn your room. You can try a few positions, take notes, and go back to the original layout if the cure is worse than the disease.
Before you touch the fan, map three candidate desk spots and listen in each one for an hour. Use the same reference tracks, keep speaker spacing consistent, and keep the listening triangle tight so you are comparing geometry, not randomness.
One good candidate is often a position where the desk is slightly off-center, but the speakers are symmetrical to the side walls. Symmetry at the speakers matters more than symmetry in the furniture layout, even if it looks less “perfect.”
Another candidate is rotating the desk to face a different wall, especially if that moves the listening position away from the fan sweep area. Rotation can also change how the room modes hit you, so listen to bass as well as treble.
When you test positions, keep the speaker distance from the front wall as consistent as you can. If you change that distance a lot, you will be hearing front wall effects on bass and low mids, not just ceiling fan reflection changes.
Do not rush the listening part, because your ears need a few minutes to settle. The first impression is useful, but the real test is whether you stop thinking about the top end after 20 minutes and just work.
- Mark the current chair position with painter’s tape
- Move the desk in 8 to 12 inch steps, front to back
- Rebuild the listening triangle each time, same speaker spacing
- Check ceiling reflection with the mirror marks
- Listen for center image stability on a mono vocal
- Measure fan noise at your ear with a phone SPL app
Add one more rule for yourself: only change one variable at a time. If you move the desk and change speaker height and add a rug all at once, you will not know which move actually helped.
If you find a better position, live with it for a few sessions before you declare victory. The best sign is not that it sounds impressive, but that your mix decisions get faster and you stop second guessing the same frequency range.
Sometimes the best compromise is a layout that is slightly worse for comfort but much better for translation. In a home office studio, you are always balancing ergonomics, noise, and acoustics, and the desk is the easiest lever to pull.
If you truly cannot find a desk position that avoids the fan reflection, that is when ceiling treatment becomes the next move. A good cloud placed at the mirror points can make the fan less relevant, even if it is still physically in the zone.
Relocating the fan can still be worth it if the room is dedicated and you own the place, but it is rarely the first fix. Most people get 80% of the improvement by moving the desk and dialing in height and symmetry.
Conclusion
A ceiling fan can be the difference between a home office studio that translates and one that keeps you second guessing the treble. The geometry is simple, the ceiling reflection is short, and the fan blades can turn that reflection into a messy cluster.
The good news is that you can usually hear the issue quickly once you know what to listen for. If cymbals feel phasey, vocals lose edge, and the stereo image will not sit still, look up before you buy new gear.
Check the fan relative to your speakers, tune speaker height and chair height, and keep the listening triangle honest. If you can move the desk so the strongest overhead reflection path misses the fan sweep, you will hear the room calm down fast.
Do the simple tests, like the mirror marks and small desk shifts, and do them with repeatable reference tracks. When the change is real, it is not subtle, it feels like the speakers suddenly got more expensive.
Handle airflow noise like you would handle a loud computer fan, because it pushes you into bad monitoring habits. If you cannot change the fan, change your layout, then add ceiling treatment where the mirror marks tell you to.
Also remember that a fan can be both a reflection problem and a noise problem, and you may need to address both. Turning it off for critical listening is not a defeat, it is just good studio discipline.
You do not need a perfect room to do good work, but you do need a predictable one. Once home office studio ceiling fan reflections stop messing with your top end, your EQ moves get smaller, and your mixes start traveling better.


