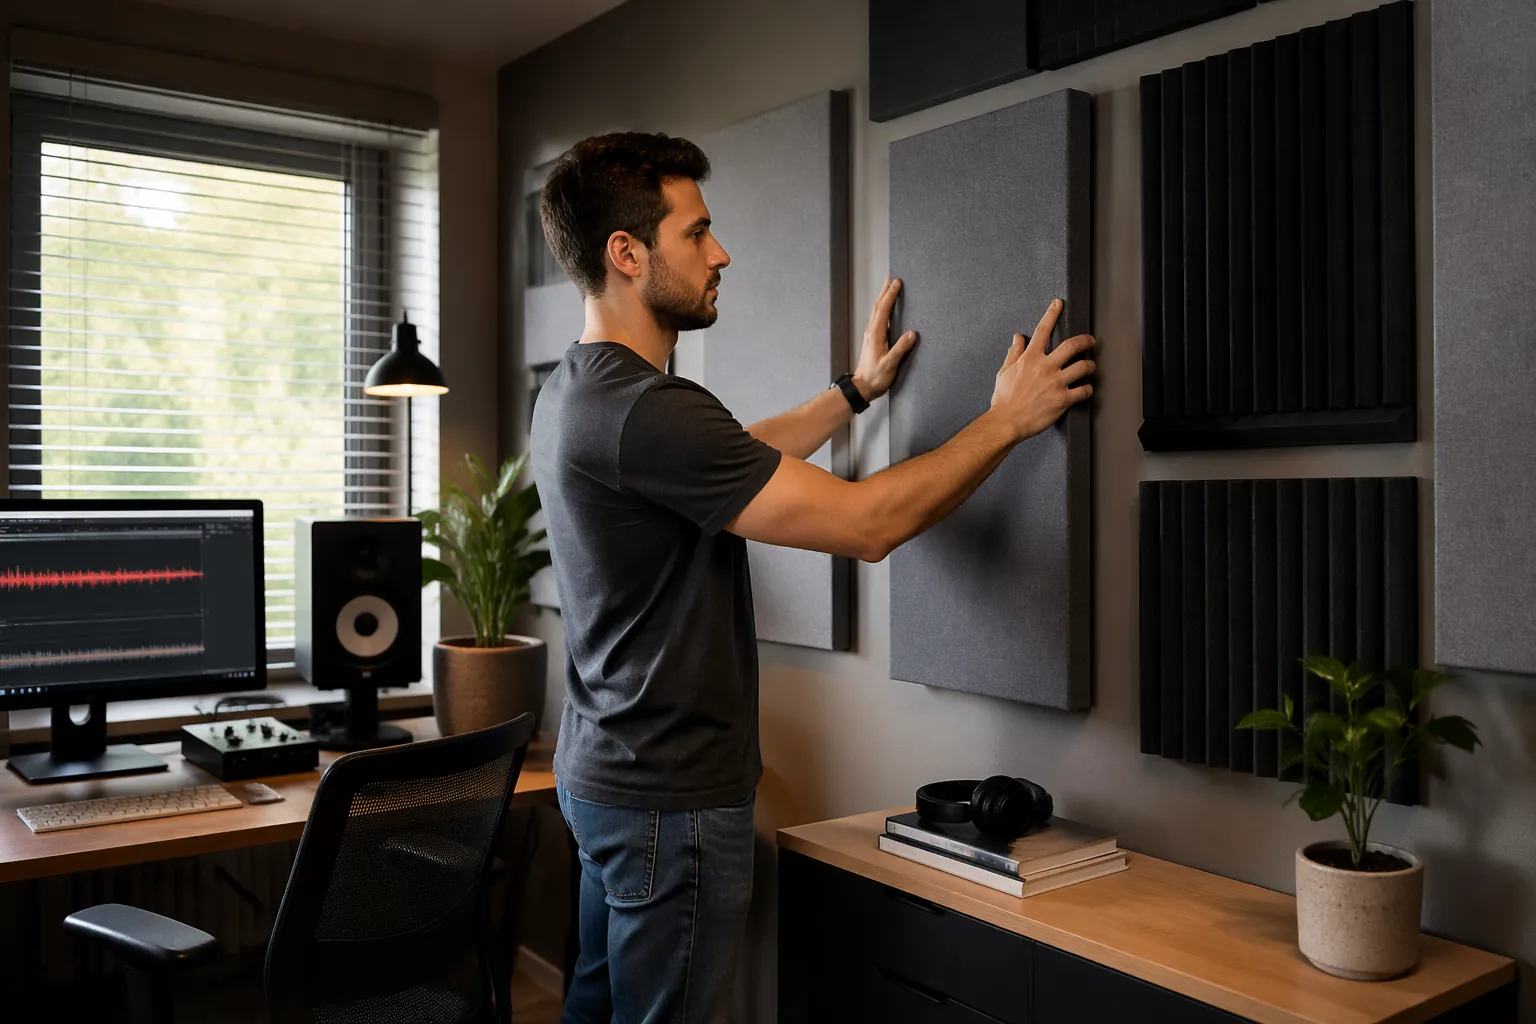
Bass rattles are the fastest way to make a home office studio feel cheap, even if your speakers and interface are solid. The annoying part is that the buzz usually has nothing to do with your mix and everything to do with some tiny object shaking itself loose.
If you are searching for how to stop bass rattling in a home office, start by assuming the sound is mechanical, not musical. Low notes are basically a stress test for every screw, hinge, and hollow panel in the room.
The good news is you can fix most rattles with basic tools and a little patience. The better news is that once you do, your monitoring gets clearer because your ears stop chasing phantom distortion.
Identify whether you have a room problem or a rattle problem
First, decide if you are hearing bass buildup or an actual buzz that rides on top of the bass note. Bass buildup sounds like the room is “boomy” or uneven, while a rattle sounds like a kazoo, a click, or a plastic chatter.
A useful clue is whether the noise has a pitch of its own or if it is just extra low-end energy. Rattles often have a bright, papery edge that your brain interprets as distortion.
Pay attention to whether the noise follows the bass line or whether it only happens on certain notes. A room mode will make some notes louder and others quieter, but it will not usually add a separate buzzing layer.
Play a slow sine sweep from 20 Hz to 200 Hz at a moderate level and listen for a specific frequency that triggers the noise. If the noise appears at one narrow spot and disappears right after, you are almost certainly dealing with loose objects or a vibrating surface.
Do the sweep twice, because your first pass is often just you learning what to listen for. On the second pass, you will catch the exact moment the buzz starts and stops, which makes the hunt faster.
If you do not have a sweep file, a tone generator plugin or even a YouTube sweep works well enough for diagnosis. The key is slow movement through the low end so the rattle has time to reveal itself.
Walk around while the tone plays and put your ear close to likely culprits like shelves, the desk, and the window frame. Room modes change with position, but a rattle stays “attached” to the thing that is shaking.
Do not be afraid to get unglamorous and listen near the floor, behind the desk, and in the closet. Bass energy finds weird paths, and the loudest rattle is often coming from the least obvious corner.
Try opening and closing doors while the tone plays, because a door that is slightly ajar can change the whole symptom. A rattle that disappears when you crack a door is still a rattle problem, just one that is sensitive to pressure changes.
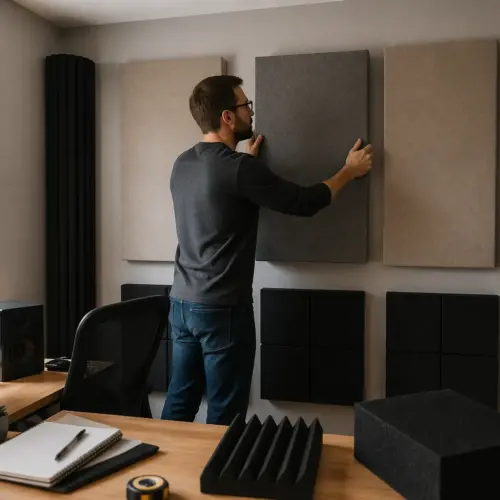
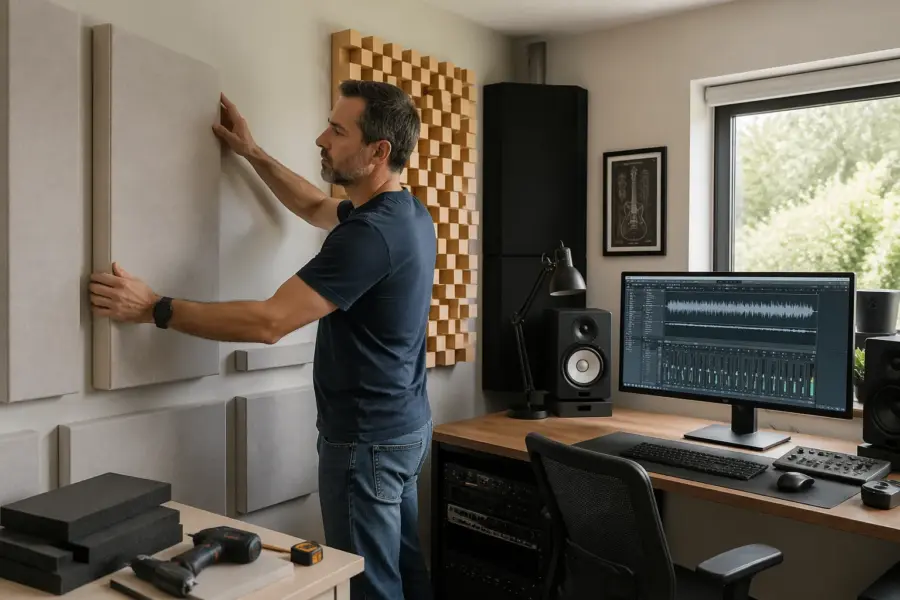
If the problem is bass balance rather than buzzing, treat it like acoustics, not repairs. Bass traps, speaker placement, and listening position are the right tools, but they will not stop a loose hinge from singing along.
It helps to separate the goals in your mind: first eliminate mechanical noises, then evaluate the room response. Otherwise you will keep changing your mix decisions to compensate for a fake sound that is not in the speakers.
A quick sanity check is to listen on headphones at the same moment you hear the rattle. If the buzz is gone on headphones, your mix is fine and your room is the problem.
The most common home office rattle sources (and quick fixes)
Start with the obvious clutter because loose objects love low notes. Empty bottles, pen cups, picture frames, and even a stapler can create a sharp desk vibration noise that reads like speaker distortion.
Do a fast “clear the surfaces” pass where you temporarily remove anything not bolted down. If the rattle disappears, add items back one at a time until it returns.
Small items can also rattle against each other, like coins in a dish or a stack of USB drives in a tray. Separating them with a bit of felt or moving them to a drawer is often all it takes.
Bookshelves are repeat offenders because the back panel is often thin hardboard that flexes. Push gently on the back while bass plays, and if the noise stops, add a few screws into studs or use small L brackets to stiffen it.
Also check the shelves themselves, because adjustable shelves can chatter on their pins. A tiny piece of folded paper, felt, or rubber at the contact points can stop the micro-movement.
If you have a shelf full of records, the spines can buzz as they vibrate against each other. Packing the shelf a bit tighter or adding a bookend with a soft pad can quiet that down.
Drawers and cabinet doors rattle when the latch is sloppy or the face is slightly warped. Stick-on felt pads or silicone bumpers are cheap and they stop the chatter immediately.
Check the drawer slides too, because metal-on-metal play can sound like a high-frequency tick. A small adjustment to the slide screws or a thin adhesive felt strip can remove the slack.
Filing cabinets can resonate like a drum if the drawers are empty or half full. Adding weight, adding a liner, or simply keeping drawers fully closed reduces the vibration.
HVAC grilles, ceiling light covers, and printer trays also buzz because they are designed for convenience, not acoustics. Tighten what you can, then use thin foam tape where metal meets metal so the parts cannot slap together.
Listen for buzzes that happen only when the air is running, because airflow can combine with bass to make a grille vibrate. If the noise changes when you turn the system off, you may have two problems layered together.
Closet doors and sliding panels are another classic, especially if they have loose tracks. A little felt in the track or a small adjustment to the rollers can stop a surprisingly loud rattle.
Wall decor is easy to overlook because it looks “flat,” but frames can chatter against nails or hooks. Add rubber bumpers to the bottom corners so the frame cannot tap the wall.
Even a trash can can be the culprit if it is thin plastic and sitting next to the desk. Moving it a foot away or putting a small weight inside can stop the drum-like resonance.
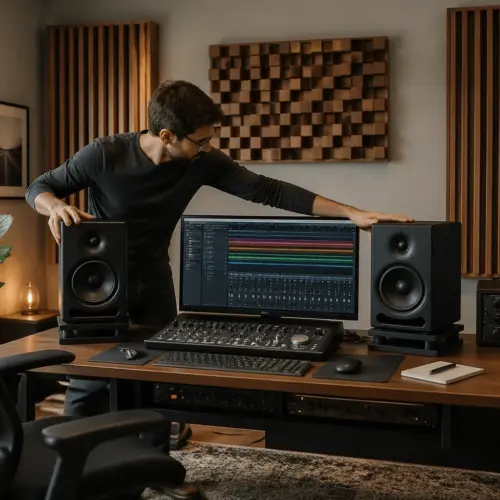
Desk and monitor stand vibration control you can do today
If your desk is acting like a soundboard, you will hear bass rattling even at reasonable levels, and your hands may feel it through the keyboard. That is why desk vibration control is often the biggest win in a home office studio.
Many desks are built like lightweight furniture, which is great for shipping and terrible for bass. A desk that flexes a millimeter can still amplify a rattle because it keeps feeding energy into everything sitting on it.
Before you buy anything, press down on the desk top and see if it creaks or shifts. If it moves, bass will absolutely find that weakness and turn it into noise.
Monitor isolation matters because speakers sitting directly on a hollow desktop transfer energy into the whole structure. Even basic foam isolation pads help, and sturdier options like IsoAcoustics-style stands reduce the amount of bass that turns into furniture motion.
Isolation also helps your low end sound tighter because less energy is wasted shaking the desk. You are not “adding bass,” you are removing a layer of blur that makes bass decisions harder.
If you use small nearfields, you can often get a big improvement with a thick desk mat plus isolation pads. The mat adds damping and the pads reduce direct coupling, which is a solid one-two punch.
Check your speaker angle and stability, because a slightly rocking speaker can click on the desk with each kick. A stable stand with a grippy top surface prevents that tiny movement.
| Problem spot | What it sounds like | Fast fix |
|---|---|---|
| Speakers on desk | Buzz on kick notes, smeared low end | Foam pads or isolation stands |
| Hollow desk top | Woody resonance, keyboard area shakes | Add a desk mat, brace underside, tighten fasteners |
| Monitor arm joints | Metallic tick at one frequency | Tighten pivots, add threadlocker, add rubber washer |
| Loose monitor base | Plastic chatter, screen trembles | Neoprene pad under base, tighten base screws |
| Wobbly desk legs | Low thump plus rattle | Level feet, add corner braces, wall anchor if needed |
Monitor arms deserve special attention because they have multiple joints, springs, and tension points. One slightly loose pivot can sound like a mysterious tick that only happens at one bass note.
After tightening, retest, because over-tightening can create a different noise if metal parts bind and then slip. You want firm contact, not stressed parts that snap under vibration.
If your desk has a keyboard tray, remove it for a test pass. Trays are basically rattle machines because they are long, thin, and mounted on sliding rails.
Under-desk cable trays can also resonate if they are thin metal. A strip of foam tape along the tray edge and a few extra mounting screws can turn a ringing tray into a dead one.
Do not ignore the chair, especially if it has a hollow plastic back or loose arm rests. A chair can rattle in sympathy and trick you into thinking the noise is coming from the speakers.
If you have a standing desk, check the crossbar and motor housing covers. Those parts are often lightly fastened and can buzz when the desk is at a certain height.
Treating doors, windows, and vents that buzz on low notes
Doors buzz because the slab is loose in the frame, the latch has play, or the hinges are slightly backed out. Put a hand on the door edge during a bass tone, and if the buzz changes, you found your culprit.
Hinges are especially common because the screws can loosen slowly over time without looking obviously loose. If the hinge is stripped in the frame, longer screws that bite into the stud can be a permanent fix.
Sometimes the door itself vibrates because the panels are not tight, especially on older hollow-core doors. In that case, adding compression at the jamb and stopping movement at the latch still reduces the symptom a lot.
Weatherstripping is an underrated fix because it adds compression and stops the tiny impacts that create noise. Use adhesive foam tape around the jamb, then adjust the strike plate so the latch pulls the door snug.
If the strike plate is misaligned, the latch can sit there and chatter instead of locking in firmly. A small screwdriver adjustment can change a constant buzz into total silence.
Do not forget the door handle and lock hardware, because loose trim rings can buzz like a little cymbal. Tighten the handle screws and check that the latch faceplate is snug.
Windows rattle when the sash has clearance or the blinds hardware shakes against the frame. Tighten the lock, add thin felt where the sash meets the stop, and check the blind brackets for slack.
Blinds are notorious because the bottom bar can tap the window or the wall on bass hits. A small clear bumper or a bit of felt where it contacts will stop the tapping without changing how the blinds work.
If you have a window AC unit, treat it like a giant rattle source with lots of panels and screws. Even tightening the outer cover and adding foam at contact points can make a huge difference.
Vents and registers buzz when the grille flexes or the duct behind it resonates. Tighten the grille screws, add foam tape on the contact points, and if the duct itself rings, a small piece of duct liner or even a folded towel temporarily proves the diagnosis.
Some registers buzz because the damper lever is loose and vibrates against the grille. A tiny piece of foam under the lever or a slight bend to increase friction can stop it.
If you hear a rattle that seems to come from inside the wall, it can be a duct or a pipe vibrating against framing. You may not fix that perfectly without opening things up, but you can often reduce it by lowering the bass level at that triggering frequency and decoupling nearby objects.
Cable management and small hardware that stops hidden noise
Cables are sneaky because they slap the wall, desk leg, or monitor arm only on certain notes. When you hear a rattle, lightly grab the cable bundle, and if the sound changes you just saved yourself an hour of guessing.
Look for cables that have a long free span, because that is where motion builds up. Even a light HDMI cable can make a surprisingly loud tick if it taps a metal leg repeatedly.
Patch cables behind speakers can also buzz if they touch the speaker cabinet or the stand. Giving them a little clearance and a gentle loop reduces contact noise.
Use Velcro ties to bundle slack, then anchor the bundle so it cannot swing. Adhesive cable clips work, but I trust screw-in clamps more because bass vibration can slowly peel adhesives off painted drywall.
If you rent and cannot screw into things, use heavier-duty adhesive mounts and clean the surface with isopropyl alcohol first. The goal is not perfection, it is preventing movement and contact.
Route cables so they do not touch speaker stands, desk legs, or the wall behind the desk. A cable that lightly rests on a surface can become a percussion instrument at 60 Hz.
Power strips and wall warts also buzz when they hang midair or rest against a hollow surface. Mount the strip under the desk, and make sure transformers are not touching each other like dominoes.
Some wall warts physically hum, and bass can make that hum louder by vibrating the prongs in the outlet. If you suspect this, test by holding the adapter firmly or moving it to a different outlet.
USB hubs and small DACs can rattle if their rubber feet are missing or hardened. Replacing feet or putting the device on a thin neoprene pad is a clean fix.
Small hardware fixes solve stubborn cases, especially on monitor arms and desk frames. Keep felt pads, rubber washers, blue threadlocker, and a few zip ties in a drawer so you can lock down a noise the moment it shows up.
Threadlocker is great for screws that keep backing out, but use the removable kind so you can service things later. A tiny drop is enough, because you are preventing vibration loosening, not gluing a bridge together.
Rubber washers are perfect when two hard surfaces meet and want to click. That little bit of compliance stops the micro-impacts that your ears interpret as buzz.
A step-by-step “rattle hunt” test you can repeat
Consistency is the trick because random music playback hides the exact frequency that triggers the buzz. Build a short test playlist with a 30 to 120 Hz sine sweep, a few steady bass notes, and one kick-heavy track you know well.
Add a pink noise file if you want, because it can reveal broadband rattles that do not show up on a single tone. Keep the test files short so you actually use them instead of avoiding the process.
It helps to label the files with their frequency ranges so you can jump right to the problem area. When you are troubleshooting, friction is the enemy, so make the test easy to repeat.
Start at a level you actually mix at, not club volume, because you want realistic results. If the rattle only happens at extreme volume, the fix is usually turning down or changing the speaker position, not rebuilding your office.
That said, do one quick pass slightly louder than your normal level to check your headroom for client playback. You want to know whether the room stays quiet when you show someone a loud chorus.
Use a simple note on your phone to log what you hear, because your memory will lie to you after ten minutes of tones. Writing “80 Hz, right window” beats redoing the whole sweep from scratch.
- Play a slow sine sweep at moderate level
- Mark the frequency where the buzz starts
- Walk the room and listen up close
- Touch suspect surfaces to change the vibration
- Remove loose objects from desk and shelves
- Tighten one item, then retest the same tone
- Log fixes and remaining frequencies in a note
Touch testing is powerful because it lets you “mute” objects with your hand and confirm the source instantly. If you touch something and the buzz stops, you are not guessing anymore.
When you tighten or pad something, change only one variable at a time. If you do five fixes at once, you will not learn what actually worked, and the next rattle will take longer.
Work from the listening position outward, because the loudest perceived rattle is not always the closest one. A buzzing vent behind you can sound like it is coming from the speakers in front of you.
After you think you fixed it, repeat the exact same tone at the exact same level. This is where most people skip the boring part and then wonder why the rattle “came back” later.
Once the room is quiet, save your test playlist and keep it for future changes. Any time you move furniture, add a shelf, or change speakers, run the test again and catch problems early.
Speaker placement tweaks that reduce rattle triggers
Sometimes the room excites a specific object because the speaker placement pumps that frequency right into it. A small move can change the energy hitting a desk corner or a window frame, and that can stop the buzz without touching the object.
Think of it like moving a flashlight beam, where the beam is bass pressure. You are not eliminating bass, you are changing where the strongest pressure zones land.
Even moving a speaker one or two inches can shift a peak enough to stop a marginal rattle. This is why it is worth trying placement tweaks before you start adding foam everywhere.
Pull speakers away from the wall behind them if you can, even a few inches helps. Boundary reinforcement boosts bass near walls, and that extra low end often turns marginal rattles into obvious ones.
If you cannot pull them far out, try moving them slightly left or right to avoid firing directly at a window or shelf. A direct line of energy into a resonant surface is basically a rattle invitation.
Also check the distance to side walls, because asymmetry can cause one side of the room to get hit harder. That can make you chase a “right side rattle” that is really just a placement imbalance.
Keep the speakers symmetrical and aimed at your head, then adjust your listening position before you start random treatment purchases. If you sit with your head against a wall, you are asking the room to exaggerate low frequencies and shake everything nearby.
A good rule is to keep your listening position away from exact room centers and exact wall boundaries. Those positions often align with strong modes that make the low end feel bigger than it really is.
If your desk is shoved into a corner, consider rotating the setup so the speakers fire down the longer dimension of the room. That often reduces the intensity of certain low-frequency peaks that trigger rattles.
If you use a subwoofer, try the crawl method and do not assume the “best bass” spot is the “least rattle” spot. A sub in a corner can be fun, but it is also the fastest way to energize doors, vents, and loose objects across the room.
Try lowering the sub level and raising the crossover slightly if the sub is doing too much heavy lifting. A sub that is 3 dB too hot can turn “barely there” rattles into constant distractions.
Phase and polarity settings can also change how bass sums at the listening position and around the room. If a rattle is triggered by a narrow peak, a phase adjustment can sometimes reduce that peak without changing your whole setup.
Finally, check that your speakers are stable on their stands and not rocking. A stand that wobbles slightly can create its own rattle and also amplify everything else in the room.
Fixing buzzing from computer gear and peripherals
Computer gear makes its own noises, and bass can make those noises worse. A loose laptop hinge, a rattly keyboard tray, or a cheap mic arm can all join the low end like unwanted percussion.
Start by muting your speakers and physically tapping suspicious items to see what already has play. If something rattles from a finger tap, bass will definitely make it sing.
Mic arms are common offenders because the springs and joints are designed for movement. Tighten the joints, and add a small piece of rubber where metal parts meet if you hear clicking.
Put your audio interface, dock, and external drives on a dense mat so they do not chatter against the desk surface. Cork, neoprene, and thick rubber work well, and they also reduce the “tap” sound when you set things down.
If you stack devices, make sure the stack is not a tower of hard plastic feet on hard wood. A thin pad between devices can stop the tiny impacts that become audible at bass-heavy moments.
External hard drives can also vibrate on their own because of spinning disks. Bass can push them into a sympathetic resonance, so isolating them is extra useful.
Mechanical keyboards can buzz if the case resonates, especially on a thin desk top. A desk mat and a few strips of shelf liner under the keyboard feet can stop the case from skating and cut the vibration path.
If your keyboard has flip-out feet, check that they are not loose or uneven. A keyboard rocking on one foot can chatter like crazy once the desk starts moving.
Monitor bezels and plastic stands can also buzz, especially on cheaper displays. Tightening the stand screws and adding a thin neoprene pad under the base usually fixes it.
Printer and scanner trays are classic loose objects because they are designed to slide. If you do not need the printer within arm’s reach, move it out of the studio area and you remove a whole category of rattles.
If you must keep a printer nearby, push all trays fully in and wedge a small felt pad where the tray meets the body. You are basically removing the free play that bass loves to exploit.
Desk fans and small air purifiers can also buzz when their housings are slightly loose. Bass can shake the casing and make it sound like the fan is broken even when it is not.
When monitor isolation is not enough, decouple the whole desk
Monitor isolation stops a lot of energy, but a lightweight desk can still resonate from air pressure alone. If the desk top is thin MDF on a flimsy frame, bass makes it act like a drum head.
This is why some people hear rattles even after they “did everything right” with foam pads. The desk is still being excited by the room, not just by direct contact with the speakers.
A quick test is to play a bass tone and press down on the desk top in different spots. If the sound changes when you add hand pressure, the desk is part of the system.
Add mass where it counts, like a thick rubber mat or a heavy butcher block top, and the resonance drops. If you cannot replace the top, bracing the underside with a simple 1×3 stiffener can reduce flex more than people expect.
Mass is not just weight for weight’s sake, it is about moving the resonance lower and reducing how much the desk responds in the audible range. A heavier, stiffer surface tends to “stay put” when bass hits.
If you add a mat, make sure it is dense and not just squishy foam that bottoms out. Dense rubber and thick cork composites usually work better than soft packing foam.
Check every bolt on the frame, because “hand tight” is not tight once bass starts working the joints. I have fixed desk vibration by tightening four leg bolts a quarter turn, which is annoying because it is so simple.
Look for joints that rub, because rubbing can become a squeak or a chirp at certain frequencies. A firm connection plus a thin washer can stop that friction noise.
If your desk has adjustable feet, level it so all legs carry weight evenly. A desk that rocks slightly will rattle more because each bass hit makes it shift and settle.
If the desk sits on a hard floor, add isolation feet or dense pads under each leg. This does not magically fix room acoustics, but it can stop vibration transfer into the floor that comes back as rattles in baseboards and nearby furniture.
On carpet, the problem can flip, because thick carpet can make a desk feel stable while still allowing micro-movement in the frame. A rigid platform under the desk plus isolation pads can sometimes be more consistent.
If your desk is against a wall, make sure it is not lightly touching the wall in a way that creates tapping. A few millimeters of clearance can stop an annoying wall knock that only happens on kick drums.
Decoupling is about breaking vibration paths, so look for any hard contact between desk, wall, and other furniture. The fewer rigid bridges you have, the fewer places bass can turn into noise.
Stopping wall and baseboard buzzes without tearing up drywall
Baseboards and outlet covers buzz when they are slightly loose, and bass pressure makes them tap the wall. You will hear a papery tick that seems to come from everywhere, which makes it extra irritating.
These are the rattles that make you question your sanity because they are hard to localize. The trick is to get close to the wall and listen while the tone plays, then use touch to confirm.
Sometimes the buzz is actually two surfaces rubbing, like trim against drywall or a plate against paint. That rubbing can sound like a faint distortion that follows the bass.
Tighten outlet and switch plate screws, but do not crank them so hard that the plastic warps. If a plate still rattles, a thin foam gasket behind it is a clean fix and costs almost nothing.
If the electrical box itself is loose in the wall, the plate can never fully quiet down. In that case, an electrician-style box shim or a careful tightening of the box mounting screws can stabilize it.
Check any blank plates too, because those are often installed quickly and left a bit loose. A blank plate buzzing at 90 Hz can sound like it is coming from your left speaker.
For baseboards, run your hand along the trim while a low note plays, and you will feel the spot that is moving. A couple of finish nails into studs solves it, and a tiny bead of paintable caulk can stop edge chatter where wood meets drywall.
If you cannot nail, you can sometimes use a careful bead of caulk alone to stop the tapping, especially where the gap is small. Caulk is basically a flexible damper that prevents the trim from snapping back and forth.
Radiator covers and baseboard heaters can also buzz if panels are loose. Tightening fasteners and adding felt at contact points keeps them from acting like a snare drum on low notes.
If a wall shelf buzzes, the problem is usually the bracket, not the shelf itself. Remove the shelf, tighten the bracket into a stud or proper anchors, and add a thin rubber washer between bracket and shelf to kill the metal-on-wood click.
Floating shelves can also buzz if the hidden mounting hardware has any play. Re-seating the shelf and adding a thin shim can remove the tiny movement that turns into noise.
Picture rails and curtain rods are worth checking because they span long distances and can resonate. A loose bracket screw can create a sharp tick that you will swear is coming from your desk.
If you have laminate flooring, listen for buzzes near transitions and thresholds. Those strips can lift slightly and rattle when the floor vibrates, especially if a subwoofer is in the room.
Conclusion
Most people chasing how to stop bass rattling in a home office waste time on expensive acoustic panels when the real issue is a loose object or a vibrating joint. If you treat the room and ignore the buzz, you will still hear that same annoying rattle on every kick drum.
Mechanical fixes are not glamorous, but they are the highest ROI improvement you can make for monitoring confidence. A quiet room makes your speakers sound better because you stop hearing the room’s junk on top of your music.
Start with the repeatable rattle hunt test, then work from the desk outward, because desk vibration and monitor isolation problems are common in home setups. Once the mechanical noise is gone, you can make smarter decisions about bass traps and studio geometry based on what you actually hear.
Keep a small kit of pads, tape, and basic tools so you can fix new rattles in minutes instead of living with them for months. Every time you change something in the room, assume you may have introduced a new buzz and run your short test playlist.
When your low end is clean, you will mix faster, trust your decisions more, and stop chasing problems that are not in the audio. That is the real win: bass that sounds like bass, not like your office falling apart.