If your front wall has a door, you have probably noticed that the low end gets weird fast. Bass control with a door in the front wall is possible, but you have to stop treating that wall like a normal, continuous boundary.
The door changes how pressure builds in the room, and it also ruins the clean left-right symmetry most speaker setups depend on. If you ignore it, you can end up chasing bass with EQ and never really fixing the room.
The good news is that you can get solid results with layout choices, smart front wall treatment, and a few practical hacks that do not block the door. The trick is to think in terms of repeatable geometry and predictable boundaries, not perfect-looking foam coverage.
Why a front-wall door can throw off bass balance
A solid front wall reflects bass pressure back into the room, which is part of why speaker-to-front-wall distance changes the low end so much. A door is a different boundary, it flexes, leaks air, and often has a hollow cavity that soaks up some frequencies while spitting others back out.
Even if the door is closed, it rarely behaves like the drywall next to it, so the reflection and absorption balance changes across the wall. That makes the front boundary less predictable, which is exactly what bass hates.
In small rooms, the front wall is not just a reflector, it is part of the system that sets up standing waves. When one part of that wall is “soft” compared to the rest, the modes do not load evenly.
That mismatch can make one speaker sound like it has more punch even when levels match. You might also hear bass notes that seem to shift left or right as you play a scale, which is a classic sign that the boundary conditions are not the same on both sides.
What makes it confusing is that the imbalance is not always obvious on pink noise, because it can be narrow and note-specific. You can feel like your monitors are fine until a kick hits one note and the room suddenly leans.
Doors also tend to sit off-center, so one speaker sees more uninterrupted wall than the other. That creates different early reflections and different boundary interference patterns, and those differences are big enough to show up below 200 Hz in small rooms.
The classic front-wall issue is SBIR, where the reflected wave cancels the direct wave at some frequency based on distance. If the door side reflects less or reflects later, the cancellation notch is not the same left and right.
Sometimes the door acts like a panel absorber, which can be helpful at one frequency and harmful at another. That is why you can “fix” one note by accident and make the next note worse.
If the door opens into a hallway or a larger space, it can act like a pressure relief path when it leaks. That can make the bass seem thinner at the listening position while still booming in corners, which is a frustrating combination when you are trying to mix.
Even when the door is shut, the gap under it can act like a small vent, and vents change low-frequency behavior more than people expect. The result can be less “weight” in the center of the room but more unevenness as you move around.
If the door is hollow-core, it can also resonate like a drum head and store energy. That stored energy comes back as smear, so the bass can feel slow or disconnected from the kick transient.
All of this gets worse if the door side is also near a corner, because corners amplify whatever imbalance is already there. A door near a corner can turn a normal room mode into a lopsided problem that pulls the low end to one side.
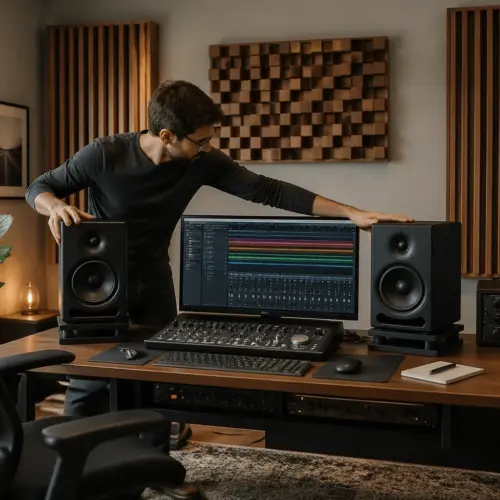
Desk and speaker placement options that keep symmetry
Start by deciding what kind of symmetry you can realistically keep, acoustic symmetry matters more than visual symmetry. If the door is on the front wall, you can often keep speaker symmetry by shifting the entire setup so the speakers see similar side wall distances and similar corner conditions.
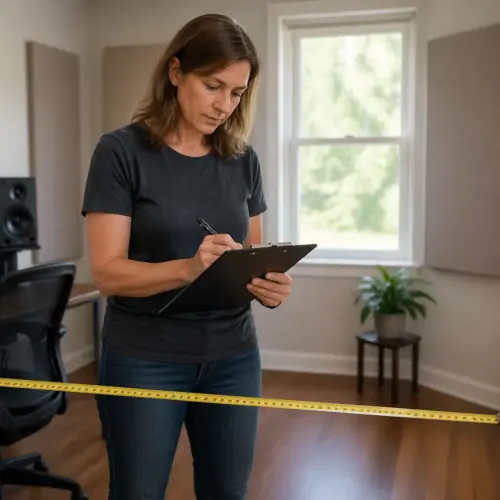
Before you move anything, measure the room and mark a centerline, because small placement errors add up quickly at low frequencies. A tape measure and painter’s tape can save you hours of guessing later.
Try to keep the speakers the same distance from the front wall, even if that distance is not ideal, because mismatched distances create mismatched SBIR notches. If one speaker ends up closer because of the door trim or casing, you will hear it.
One option is to center your desk on the room, then pull it forward so the speakers are closer to the front wall than you would normally choose. That can reduce the depth of the front-wall cancellation notch, and it also makes the door’s influence more similar for both speakers because the reflection path is shorter.
When you go closer to the wall, commit to it and get both speakers equally close, because half-measures can land you in the worst spot. Many rooms behave better with the speakers very close to the front wall than with the speakers “kind of close.”
Pay attention to the desk itself, because a big reflective desk surface can create its own low-mid combing that masks bass issues. If you reduce desk reflections with a smaller desk or a different monitor stand setup, it becomes easier to hear what the door is doing.
Another option is to rotate the room and use a different wall as the front, even if it feels wrong at first. If one of the side walls is uninterrupted and the door ends up behind you, many rooms behave better and your bass control work becomes simpler.
Rotating is especially worth testing if the room is close to square, because square-ish rooms are already mode-heavy. Changing the orientation can move your listening position away from a stubborn null you were sitting in.
If you rotate, keep the same basic triangle geometry and do not assume the old listening distance will still be right. The best listening position is often a compromise between modal smoothness and practical space.
When you cannot rotate, use symmetry fixes that are measurable, not guessed, like matching speaker-to-side-wall distance within half an inch. Keep the listening position centered between the side walls, then adjust front-back distance in small steps while watching what happens around 60 to 150 Hz.
Move in small increments, because a few inches can shift a cancellation notch by a meaningful amount. If you move the desk a foot at a time, you can skip right past the best compromise position.
Keep the speakers level and matched in height, because a door problem can trick you into “fixing” bass by changing tilt or stand height. If you change too many variables at once, you will not know what actually helped.
Also check that both speakers have similar clearance around the front baffle, because one speaker tucked near a door casing can diffract differently. That diffraction can show up as a weird low-mid character that feels like bass imbalance.
If you use a subwoofer, treat it like a separate placement problem and do not assume it belongs in the middle. A door on the front wall can make the “obvious” sub location the worst one in the room.
When you find a placement that seems better, lock it in with floor marks so you can return to it after experiments. Repeatability is what turns random luck into a real setup.
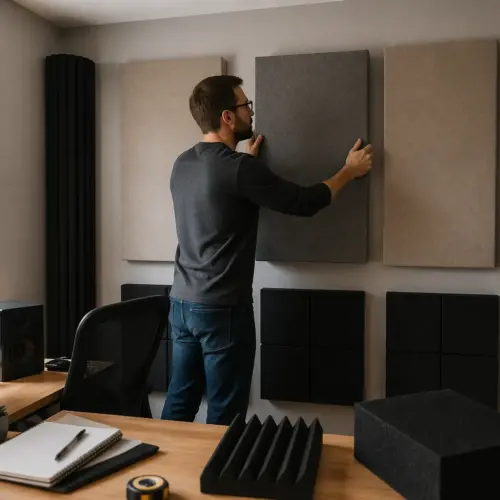
Treating the wall area you do have (without blocking the door)
Front wall treatment still matters even when a door steals part of the surface, because you can control what the speakers see on the remaining wall. The goal is to reduce strong midbass and low mid reflections while adding as much broadband absorption as you can fit.
Think of the front wall as a place to reduce contrast, because contrast is what creates left-right differences. If one side is reflective drywall and the other side is a flexy door, you want to make both sides behave closer to the same.
Thick panels beat thin ones here, and I mean thick in real terms, like 4 to 6 inches of mineral wool with an air gap if possible. If you only have narrow strips of wall on either side of the door, treat those strips with the thickest panels you can mount safely.
If you can leave a 2 to 4 inch air gap behind the panel, do it, because that increases low-frequency effectiveness without adding more material. An air gap is basically free performance if you have the depth.
When the available wall strips are narrow, prioritize height over width so you cover the vertical span between speaker and ear level. A tall, narrow panel can still do a lot if it sits where the reflection would otherwise hit.
Do not forget the area above the door, because that is often unused real estate. A thick panel above the door can help reduce flutter and tame some of the low-mid splash that makes bass feel less defined.
If the door has a big casing or trim, treat the adjacent wall in a way that does not create a hard edge right next to the speaker. Hard edges near the speaker can create diffraction that you will misread as tonal imbalance.
When you mount panels, keep them secure and avoid mounting methods that buzz, because buzzing hardware is a fake bass problem waiting to happen. A panel that vibrates can make you think you have a resonance peak around the panel’s rattle frequency.
If you have to choose between one big panel and two smaller ones, the big panel is usually better on the front wall because it reduces boundary variation. The more continuous you can make the treated surface, the less the door stands out acoustically.
| Workaround | When it makes sense | What it helps most |
|---|---|---|
| Two thick panels flanking the door | Door is near center, wall space exists on both sides | Front wall treatment symmetry and early reflection control |
| One extra-thick panel on the solid side | Door is close to one corner, one side has real wall area | Reducing imbalance in low mids and midbass |
| Ceiling cloud pushed forward | Front wall is compromised, ceiling is clear | Front reflection path reduction and imaging stability |
| Corner bass traps at both front corners | You can fit traps without blocking swing or trim | Modal control below 150 Hz and smoother decay |
Use the table as a menu, not a checklist, because every door placement is different. The best choice is the one that makes the two speakers “see” the most similar environment.
If you have a window on the same wall as the door, treat the window side too, because glass is another boundary mismatch. Two mismatches on one wall can compound into a low end that never feels stable.
When you treat only one side heavily, you may improve bass but damage imaging, so keep an eye on both. A room that measures better but feels lopsided is still going to slow you down in real work.
If you can add diffusion anywhere on the front wall, keep it secondary to absorption in small rooms. Diffusion needs space to work, and the front wall is usually too close for it to be the first priority.
Using a movable panel for sessions and storing it after
A movable absorber is the cleanest hack when the door is the problem but you still need to use it daily. You roll it into place for mixing, then park it against a side wall when you are done.
This is also the most renter-friendly approach, because you are not permanently changing the door or the wall. If you are experimenting, movable panels let you test ideas without committing.
Build or buy a free-standing panel that is heavy enough to not tip, with a footprint that clears the door swing. A 24 by 60 inch panel that is 6 inches thick, filled with Rockwool Safe’n’Sound or Owens Corning 703, works well if you add a simple wood base.
Wider is fine if you have the space, but do not go so wide that it becomes awkward to position precisely. Precision matters more than maximum coverage when you are trying to equalize left and right behavior.
If you want more low-frequency performance, you can make it thicker instead of wider, because thickness with an air gap is what buys you bass absorption. A 6 inch panel with a few inches of gap can outperform a thin, wide panel that sits flush.
Place the panel so it covers as much of the door as possible without touching the knob or rubbing the hinges. If you can leave a small air gap between the panel and the door, you usually get better low frequency absorption than if it sits flush.
Make sure the panel does not couple to the door, because contact can transmit vibration and create rattles. A little clearance also keeps the door usable without scuffing the fabric.
Try two positions: centered on the door and offset toward the speaker-side edge of the door, because the reflection path is not always centered. A few inches of offset can change how much the speaker “sees” the panel.
This approach also helps with symmetry fixes, because you can match the treated area on the door side to the treated area on the solid wall side. If the other side already has a fixed front wall panel, mirror its size and thickness with the movable one.
If you do not have a fixed panel on the other side, you can still use the movable panel as a reference by placing it on the solid side for a test. If it helps more on the solid side than on the door side, the door is already acting like partial absorption.
Storage matters, because a panel that is annoying to store will not get used consistently. Give it a dedicated spot so your “mix position” setup becomes a habit instead of a chore.
If you want the panel to double as a gobo for recording, use fabric that is durable and does not shed fibers. A panel that works for both mixing and tracking is easier to justify in a tight room.
When door gaps and rattles make bass feel worse
Many people blame the door panel itself, but the gaps around the door are often the real villain. Air leaks change how the room pressurizes, and a leaky door can make bass notes seem uneven even if your speaker placement is decent.
A leak is basically a tiny port, and ports have tuning behavior whether you want them or not. The tuning might not be musical, but it can still change the way certain notes build up and decay.
If the door opens to a closet, the closet volume can interact with the room through the gap like a crude resonator. That can create a weird “one note” boom that is hard to identify until you seal the door.
Rattles are a separate problem, and they can trick you into thinking you have a resonance peak when it is just hardware buzzing. A loose strike plate, a cheap hollow-core slab, or even the doorstop can add a nasty sympathetic noise right around kick drum fundamentals.
Rattles also mask detail, so you can lose the ability to judge bass texture and pitch. If the door is buzzing, you will often mix the bass too loud just to hear it clearly.
Door seals are worth doing because they are cheap and reversible, and they also help with isolation if you take calls in the same room. Use a real perimeter seal and an adjustable door sweep, then close the latch tight so the gasket actually compresses.
Do not overdo the sweep pressure, because a sweep that drags can pull the door out of alignment over time. You want contact, not friction.
If the door still buzzes, fix the mechanics before you buy more panels. Tighten hinge screws into longer framing screws, add felt pads where the door contacts the stop, and secure the knob and strike so nothing moves when the bass hits.
Check the door casing too, because trim can rattle against drywall if it was installed with minimal nails. A tiny bead of removable caulk behind a loose trim edge can eliminate a buzz that drives you crazy.
Also check anything mounted on the door, like hooks, mirrors, or hangers, because those can resonate loudly. Removing one cheap hook can do more than adding another expensive panel.
Once rattles are gone, your measurements get cleaner and your ears stop chasing phantom peaks. A quiet room is not just nicer, it is easier to tune.
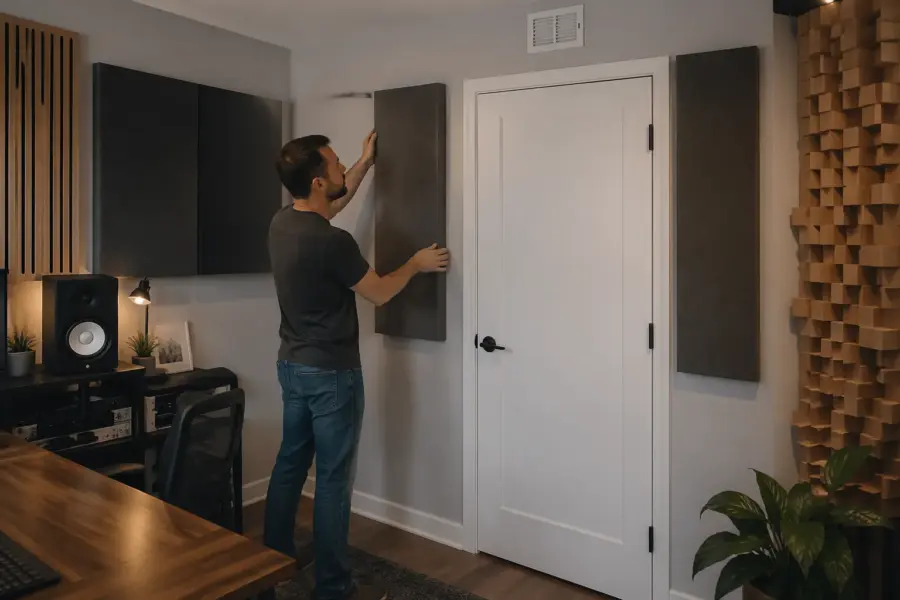
Front wall treatment priorities when the door steals space
If you only treat one thing, treat the front corners first, because corners collect pressure and do not care where the door is. Big corner traps make bass control with a door in the front wall much easier because they reduce modal ringing that swamps smaller improvements.
Corner traps also help both speakers at once, which is valuable when the main problem is left-right mismatch. If you can only afford or fit two big items, front corners are usually the best bet.
When you install corner traps, go as big as you can without creating a new obstruction for the door swing. A trap that forces you to keep the door half-open is going to become a daily annoyance.
Next, treat whatever solid front wall area is closest to each speaker, even if it is just a narrow section. The reflection from that area hits your ears early, and when it differs left to right you end up doing constant symmetry fixes with toe-in and level instead of solving the cause.
Try to keep the treatment around each speaker similar in size and thickness, even if the exact positions are not perfectly mirrored. Similar behavior beats perfect-looking symmetry that does not match acoustically.
If the door is close to one speaker, that speaker may need more help from nearby absorption to keep its early reflections under control. That can mean treating the adjacent wall strip and pushing the ceiling cloud forward a little more than you expected.
Do not waste time with thin foam tiles on the door, they mostly change the upper mids and leave the real problem untouched. If you want the door area treated, use thickness, air gap, and mass, or use a movable panel that actually has depth.
Foam can also give you a false sense of progress, because the room sounds less bright while the bass stays broken. That is how people end up with a dull room that still has lumpy low end.
When you have a ceiling cloud, move it slightly forward so it catches the first reflection path between speakers and your head. This is a sneaky way to regain some of the stability you lose when the front wall is not uniform.
A cloud also reduces the “ceiling slap” that can blur the low mids, which makes bass feel less tight. When the low mids clean up, you can judge bass levels more confidently.
If you have any budget left, treat the back wall or back corners, because front-wall problems often interact with rear-wall buildup. A smoother decay in the back half of the room can make the front wall feel less critical.
Do not try to solve everything with the front wall alone, because modes are room-wide. The door is a complication, but the room still needs overall bass management.
Practical symmetry fixes that do not require rebuilding the room
Symmetry fixes work best when you pick a reference and stick to it, like matching the acoustic environment of each speaker as closely as you can. That can mean adding absorption on the solid side to match the door side, or adding controlled reflection on the door side to match the solid side.
The key is to decide what “matched” means in your room, because a door might already be acting like a lossy absorber. If you try to make the door side reflective like drywall, you can end up fighting physics.
Sometimes the best fix is counterintuitive, like putting a thick panel on the solid wall side and leaving the door mostly alone. If the door already leaks and flexes, it can act like accidental bass absorption, so you may need to bring the other side closer to that behavior.
This is why measurement helps, because your ears can interpret “less bass” as “worse” even when it is actually smoother. A smoother response often feels less exciting at first, but it translates better.
Another symmetry trick is to keep the speakers equally toed in and then rotate both together rather than adjusting one speaker. If you toe one speaker more to compensate for the door, you can fix imaging while breaking tonal balance.
Also check that both speakers are the same distance from the listening position, because small differences can create a phantom center shift that feels like bass imbalance. A shifted phantom center makes low end decisions feel unstable even when the bass is technically fine.
If you use isolation pads or stands, use the same model on both sides and keep the height identical. A few degrees of vertical aim difference can change the crossover region and make one side feel heavier.
- Match speaker-to-side-wall distance within 0.5 inch
- Mirror front-corner trap size and placement
- Use identical panel thickness left and right when possible
- Add a movable panel to equalize the door side
- Toe speakers in equally, then adjust in 1 degree steps
- Keep the desk centered, then shift the whole setup, not one speaker
Use the list as a process, not a one-time setup, because you may need to iterate after each change. The door makes the room more sensitive, so small improvements can stack into a big result.
When you shift the whole setup, keep the speakers locked relative to the desk so your triangle stays consistent. If the triangle changes every time, you cannot tell whether the room got better or you just changed monitoring geometry.
If you have to compromise, compromise on convenience, not on matching distances. A setup that is slightly awkward but symmetrical will outperform a convenient setup that is lopsided.
Finally, do not forget that symmetry includes what is on the side walls and even what is on the desk. A tall rack on one side and open air on the other can create a midbass difference that feels like a door problem.
Door seals and control of the boundary, what actually matters
Door seals do not magically absorb bass, but they change the boundary from “leaky and loose” to “predictable and tight.” Predictable is what you want, because you can treat and measure a predictable room.
A predictable boundary also makes your speaker placement decisions more consistent, because the room stops changing every time the door sits slightly differently. If the door sometimes latches and sometimes does not, your bass can literally change day to day.
Use weatherstripping that compresses evenly, and avoid the squishy stuff that falls off after a month. I like foam or silicone gaskets meant for exterior doors, plus a sweep that reaches the threshold without dragging like a sled.
Pay attention to the latch side, because that is where most doors leak. If the latch does not pull the door tight, the seal will not do much no matter how good it is.
If you rent, you can still do this cleanly with adhesive seals and a stick-on sweep, and you can remove them later with minimal mess. If you own the place, a proper door bottom seal and a tighter latch are worth the small hassle.
If the door is hollow-core and you want to go further, adding mass can help, but it is not always necessary for bass balance. In many rooms, sealing and controlling rattles gives you most of the practical benefit.
After sealing, re-check your bass balance, because the room may gain a little low end simply by holding pressure better. That change is often good, but it can expose a mode you did not notice when the door was leaking.
If the room gains bass after sealing, do not panic and start cutting everything with EQ. Give yourself time to adjust, then address any new peaks with placement and trapping first.
Also remember that sealing can slightly improve isolation, which changes how much outside noise masks your bass perception. When the room gets quieter, you can hear low end detail you were missing before.
The goal is not to turn the door into concrete, it is to make it behave consistently. Consistency is what lets you build a repeatable monitoring environment.
How to confirm the fix with quick repeatable checks
You do not need a full lab setup, but you do need repeatable checks that tell you if bass control improved or if you just moved the problem. Pick two or three tests and run them the same way every time, with the same chair position and the same monitor level.
Write down your settings and positions, because memory is unreliable when you are doing small acoustic changes. If you can repeat the test tomorrow and get the same result, you are doing it right.
The fastest check is a sine sweep or stepped tones from 30 Hz to 200 Hz, played in mono through both speakers. Listen for notes that jump out, vanish, or pull to one side, because that is where the door and front wall treatment differences show up.
Do the same sweep with just the left speaker and then just the right speaker, because that reveals asymmetry faster than listening in stereo. If one side has a deeper null at a specific frequency, you will hear it immediately.
Walk the room during the sweep and notice where the bass piles up or disappears, because that tells you which modes are dominant. If the door is acting like a vent, you may notice a different pattern near the doorway.
If you can, use Room EQ Wizard with a basic USB mic like the UMIK-1 and take before-and-after measurements at the listening position. Pay attention to decay times and not just frequency response, because a door-related issue often shows up as uneven ringing rather than a simple peak.
Look at waterfall or spectrogram views around 40 to 150 Hz, because that is where small rooms usually struggle. If decay gets shorter and more even left to right, you are winning even if the curve is not perfectly flat.
Take a few measurements around the listening position, like a small grid, because one mic position can land in a null. A good fix should improve the average behavior, not just one lucky spot.
Finish with a few known mixes that you trust, especially tracks with steady bass guitar or long 808 notes. If the bass stays centered and consistent as you move your head a few inches, your symmetry fixes are doing real work.
Also test at low volume, because low-volume listening makes room modes more obvious relative to the direct sound. If the bass still feels even when you listen quietly, your setup is probably solid.
When you get a result you like, take photos and notes so you can restore it after cleaning or moving furniture. The best bass fix is the one you can keep consistent over time.
Conclusion
A front-wall door is annoying, but it is not a dealbreaker if you treat it as a geometry problem with a boundary that behaves differently. Bass control with a door in the front wall comes from keeping symmetry where you can, then using targeted front wall treatment and movable absorption to cover the rest.
The door does not have to be “fixed” in a perfect way, it just has to stop being a wild card. Once the boundary is predictable, you can make normal acoustic decisions again.
Start with placement and big traps, then tighten the door with seals and fix any rattles that fake a bass problem. Once the room is predictable, your EQ moves get smaller, your low end decisions get faster, and the door stops running the session.
If you approach it step by step and measure or listen consistently, you can get a front wall with a door to behave surprisingly well. The payoff is not just better bass, it is confidence that what you hear will translate outside the room.