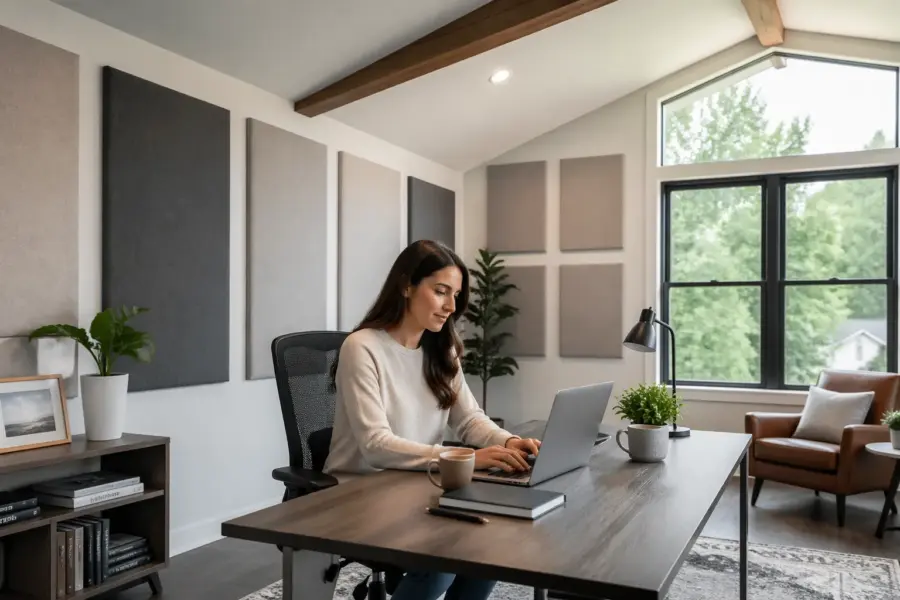
A vaulted ceiling can make a home office look bigger, but it also makes your voice and speakers bounce around in ways you do not expect. If you have been shopping for acoustic panels for vaulted ceiling office setups, the good news is you can get real improvement without turning the room into a recording booth.
Most people notice the problem on video calls first, because the room adds a bright ring to your consonants and a papery slap behind your words. Music playback suffers too, since the stereo image gets smeared by early reflections that arrive slightly late and slightly louder than they should.
The trick is to treat the strongest reflection paths instead of trying to cover every surface. Once you understand where sloped ceiling reflections go, panel placement becomes a practical layout exercise instead of a guessing game.
How vaulted ceilings change reflections and speech clarity
In a flat ceiling room, the first ceiling reflection usually lands in a predictable strip above the desk. With a vault, the ceiling acts more like an angled mirror that throws sound toward one wall, then back toward you.
That redirection is why people with vaulted ceilings often hear a “zing” even when the room has carpet and curtains. The ceiling is not absorbing anything, it is steering energy into a harder, more reflective path.
In practical terms, the vault can turn one wall into a megaphone that you did not plan for. You end up treating the wall you hear, even though the slope is the reason that wall got loud in the first place.
Another change is that the reflection is not just earlier or later, it can be more focused. A steep pitch can concentrate mid and high frequencies into a narrower area, which is why the room can feel fine in one chair and harsh in another.
Speech clarity takes the hit because your microphone captures both direct voice and the first few reflections, and those reflections blur syllables. You may sound louder but less readable, which is the worst combination for calls.
On calls, the problem often shows up as a thin, splashy edge on your voice rather than obvious echo. Noise suppression can make it worse by pumping the room tone up and down between words.
If you share the room with a partner or kids in the next room, the vault can also carry your voice farther than you expect. That is not just volume, it is intelligibility, because reflections keep consonants alive in the air.
For listening, angled surfaces can create uneven left to right timing, especially when the vault is not centered over the desk. That is why one speaker can sound “sharper” even when your levels match.
The ear is extremely sensitive to early reflections that arrive within a few milliseconds of the direct sound. In a vaulted office, those reflections can arrive from above and from the side at the same time, which makes the image feel wide but unstable.
Vaults also tend to reduce parallel surfaces, which sounds like a good thing, but the tradeoff is unpredictable bounce angles. You can eliminate classic flutter echo and still end up with a single strong slap that dominates everything.
If you have hard floors, the ceiling and floor can work together like a pinball lane, sending energy down and back up. That is why a rug sometimes fixes more than people expect, even though the ceiling is the thing that looks suspicious.
When the ceiling peak runs front to back, it can create a long reflective corridor above your head. When the peak runs left to right, it can exaggerate side-to-side differences and make one wall feel closer acoustically than it is physically.
Finding the strongest reflection paths in a sloped room
You do not need measurement software to find the main offenders, but you do need to think like a cue ball. Sound leaves your mouth or speakers, hits the slope, and then travels to the nearest big surface that faces you.
The key is to focus on the first two bounces, because those are the ones that mess with clarity and imaging. Later reverberation matters, but early reflections are what make your voice sound like it is coming from a bathroom.
Start with the wall the slope “aims” at, because that wall often becomes the real reflection source you hear. In many rooms, the vault shoots energy down to the upper half of the front wall, then straight back to the desk.
If your desk faces the short wall under the low end of the vault, the aim wall might actually be behind you. That is when you get the classic “slap behind my head” feeling that makes you talk quieter without realizing it.
Do a simple walk-and-talk pass with your normal speaking voice and listen for spots where consonants get edgy. Those spots are usually near the reflection path, and they tell you where the room is adding energy instead of just carrying it.
A cheap hand mirror helps, and yes it works on ceilings if you tape it to a yardstick. Sit at your normal position, then move the mirror along the wall and the sloped ceiling until you can see each speaker in it.
If you do not use speakers and you are mostly on calls, treat your mouth as the source and your microphone as the listener. The same mirror idea still applies, because the mic “hears” reflections from the same geometry your ears do.
Where you see the speaker is a first reflection point, and those are prime spots for panels or thick absorption. When people complain about sloped ceiling reflections, they usually have two or three hot zones, not a whole ceiling problem.
Take photos of the mirror points so you can mark them later without repeating the whole process. A little painter’s tape on the wall is enough to keep your placement accurate while you decide on panel sizes.
It also helps to identify any hard, flat objects near the desk that act like mini reflectors. A big framed print, a glass cabinet door, or even a second monitor can add a sharp reflection that feels like it is coming from the ceiling.
If your room has a ceiling fan, note whether the fan blades sit in the reflection path. Fans rarely fix acoustics, but they can create tiny fluttery artifacts that make the room feel more “busy” on bright voices.
Do not ignore corners just because the ceiling is sloped, because corners still trap and re-radiate energy. A vault can create odd corner shapes where the ceiling meets a tall wall, and those intersections can be surprisingly loud.
If you want a quick sanity check, move your chair forward or backward a foot and listen again. If the problem changes a lot with small moves, you are dealing with early reflections and placement, not just general reverberation.
Wall-first layouts that work when ceiling mounting is hard
If you rent, or if the slope is high and awkward, treat the walls first and you can still win. The best acoustic panels for vaulted ceiling office use are often placed on walls because walls are reachable, square, and easy to anchor safely.
Wall-first does not mean you are ignoring the ceiling, it means you are intercepting the ceiling’s redirected energy where it lands. In many vaults, the wall is the real mirror, and the slope is just the thing pointing the mirror at you.
Put your first panels at ear height on the left and right reflection points, then add a thicker panel behind your monitor if that wall is close. After that, treat the wall the vault aims at, especially the upper area that catches redirected energy.
If you are using nearfield speakers, side wall panels can feel like a bigger upgrade than anything else because the speakers are so close to you. Nearfield setups are forgiving, but a vault can still inject a strong early bounce that ruins that advantage.
For call-heavy offices, the wall behind you is often a priority even if it is not a textbook reflection point. A hard back wall can throw your voice right into the mic, especially if you use a laptop mic or a webcam mic.
If you cannot mount panels permanently, use removable strips, freestanding gobos, or even a bookshelf with irregular items as a partial diffuser. It is not as clean as purpose-built treatment, but it can break up a harsh path while you plan a better solution.
Try to keep the left and right wall treatment visually consistent, even if one side needs more absorption. You can do that by matching panel fabric and size, then stacking or doubling panels on the problem side where it looks intentional.
| Layout constraint | Wall-first panel placement | What it fixes |
|---|---|---|
| Cannot drill into the sloped ceiling | 2 panels at side reflection points, 2 panels high on the “aim” wall | Early reflections and slap back into the mic |
| Desk must stay under the peak | 1 panel behind monitor, 2 panels on side walls, 1 panel on door wall | Comb filtering and hollow voice tone |
| One side wall is open to a hallway | 2 panels on the solid side, 1 freestanding panel near the open side | Left-right imbalance and image drift |
| Window takes up the main reflection zone | Panel on a stand near the window, heavy curtain, panel on opposite wall | High frequency glare and flutter echo |
In the window case, the curtain is doing more than blocking light, it is adding a soft surface where the glass would otherwise act like a hard reflector. A thick curtain plus a nearby panel is often enough to take the edge off without changing the whole room.
If you have built-in cabinets, treat the cabinet faces like walls and use panels on the flat sections. Cabinetry can be a reflection nightmare because it is usually smooth, wide, and directly in the line of fire.
Do not forget the door wall, because hollow core doors can reflect mids in a way that sounds like a cheap reverb. A single panel on or near the door can calm that down, and it also makes the room feel quieter from the hallway.
If your desk is in a corner, you may need to treat both walls that meet behind your monitors. Corner desks can work, but they create short reflection paths that are strong and hard to ignore.
When you are limited on panel count, prioritize the surfaces closest to the mic and speakers. A panel ten feet away is rarely as valuable as a panel three feet away, even if the far wall looks like the biggest empty surface.
Once the walls are controlled, the vaulted ceiling becomes less scary because you are no longer hearing the ceiling indirectly through loud wall slap. That is the moment when a small, targeted ceiling panel starts to make sense instead of feeling like a gamble.
Safe ways to hang panels on slopes without visual clutter
Ceiling treatment options get complicated on a slope because gravity wants to slide everything downhill. If you pick the right hanging panel hardware, you can mount securely and keep the room looking like a home office, not a stage rig.
Before you hang anything, decide whether you want the panel to sit flush to the slope or hang level like a traditional cloud. Flush looks simpler, while level can be more effective if you can create a deeper air gap without making it look bulky.
For framed panels, I like simple D-rings with two anchor points into a joist, then a short length of picture wire pulled tight so the panel cannot rotate. On a slope, two points matter because a single hook lets the panel swing and drift out of alignment.
If the panel is heavy, use hardware rated well above the panel weight and assume the slope increases the stress on fasteners. The failure mode you want to avoid is slow creep, where the panel looks fine for weeks and then starts to slide.
If you cannot find joists where you need them, use a cleat system that spreads load across two studs or a ceiling beam, then hang the panel from that cleat. This is cleaner than a bunch of eye hooks because you can hide the cleat behind the panel.
Cleats also make it easier to take panels down if you need to repaint or access wiring. In a home office, that matters, because the room has to stay functional and not become a permanent construction project.
If you are working with lightweight panels, you can sometimes use industrial hook-and-loop strips, but only if the surface is clean and the temperature stays stable. On a warm ceiling, adhesives can soften and fail, so do not treat this like a poster.
A small air gap helps absorption, so do not press the panel flat to drywall if you can avoid it. Even a one inch spacer, like rubber bumpers or small wood blocks at the corners, can improve midrange control where speech lives.
If you want a bigger air gap without a bigger visual footprint, hang the panel on short standoffs that keep it parallel to the slope. The panel still reads as part of the ceiling plane, but acoustically it behaves like a thicker absorber.
To reduce visual clutter, match panel fabric to the ceiling color or choose a neutral tone that blends with trim. A vault draws the eye upward, so anything high-contrast on the slope will look larger than it is.
Keep cables and chains short and symmetrical if you hang panels level, because uneven suspension looks messy fast. A clean, minimal suspension also prevents the panel from twisting when air moves from HVAC vents.
If you have recessed lighting, map the fixtures before you commit to panel placement. You do not want a panel blocking a can light or forcing you into a layout that treats the wrong reflection point just to avoid a bulb.
For safety, avoid mounting panels where they could fall onto a standing desk path or a chair that moves. Even a light panel is a problem if it drops onto a monitor, so treat the geometry like you are hanging a shelf, not a decoration.
Ceiling treatment options that make sense for a vaulted home office
When people say “ceiling cloud,” they usually picture a big rectangle centered over the desk, but a vault rarely rewards that. A better plan is to treat the sloped area that has a direct line to your ears or microphone, even if that patch is off to one side.
Think of the ceiling treatment as a patch on a path, not a blanket over the room. If you can break the first reflection, the rest of the room often becomes much easier to live with.
If you have a ridge beam, a narrow cloud hung parallel to the ridge can work because it stays visually straight and does not fight the slope. If you do not have a ridge beam, a pair of smaller panels placed like stepping stones along the reflection path often looks cleaner.
Smaller panels are also easier to position around lights, sprinklers, or vents. In many offices, the best spot acoustically is not the best spot mechanically, so flexibility matters.
Consider thickness before you chase coverage, because thin foam on a vault mostly changes the treble and leaves the boxy midrange intact. A two to four inch mineral wool or fiberglass panel is the workhorse for an office where speech and small speakers matter.
If you are trying to tame low-mid buildup from a bigger room, lean toward four inches and keep the air gap if you can. That range is where voices get chesty and where small rooms start to sound like they have a lid on them.
If the ceiling is very high, you may get more value from treating the walls and adding a thick rug than from hanging panels in the air. High vaults push the first ceiling reflection later in time, and that can make wall reflections the bigger problem.
In a tall vault, ceiling treatment can still help, but it becomes a second step rather than the first purchase. You are usually better off getting the desk area controlled and then deciding if the remaining brightness is worth chasing overhead.
Another ceiling option is to treat only the lower portion of the slope, where the angle points most directly at the desk. The upper portion near the peak might look like the culprit, but the lower slope is often the real reflector.
If your office doubles as a guest room, you can use decorative acoustic panels that read like art pieces on the slope. The goal is to keep the space feeling like a home, while still controlling the reflection that makes calls fatiguing.
Do not overlook soft furniture and bookshelves as part of the ceiling plan, because they change what the ceiling reflection hits next. If the slope aims at a packed bookshelf instead of a bare wall, you may need fewer ceiling panels overall.
If you are tempted by acoustic tiles, be careful with anything designed for drop ceilings, because it may not mount well on a slope. Many tiles are also too thin to help much with speech clarity, so you end up with a cosmetic change instead of a functional one.
When you add ceiling panels, leave enough space for airflow and maintenance access, especially near HVAC returns. A panel that blocks a return can change room pressure and noise, which is a different kind of problem you do not want to introduce.
Dealing with asymmetry: keeping your setup balanced
Vaulted rooms are rarely symmetrical, and that asymmetry can wreck stereo balance and call quality in a sneaky way. One side might have a short knee wall while the other side opens to a taller slope, so reflections arrive with different tone and timing.
Asymmetry also affects how loud the room feels, because one side may store and return more energy than the other. That can make your voice sound different depending on which way you turn your head, which is distracting on long calls.
Start by making the listening position symmetrical even if the room is not, which usually means centering your desk on the wall you face. If you cannot do that, you can still balance the reflection strength by adding more absorption to the louder side.
Sometimes the best compromise is to center your speakers and monitor on the desk, even if the desk itself is not centered in the room. Your ears care more about symmetry around the listening triangle than symmetry of furniture to walls.
A practical move is to use matching panels on both side walls at ear height, then add an extra panel or thicker panel on the side with the more aggressive reflection. Your eyes will see “matched,” but your ears will hear “even,” which is the goal.
If one side is open to a hallway or stairwell, you may need a freestanding panel to create a temporary boundary. That is not just about absorption, it is about giving the open side a similar acoustic “presence” to the closed side.
For listening, toe-in and speaker distance can help you reduce how much energy hits the problem side wall. Small changes in angle can shift the first reflection point by a foot or more, which is sometimes all you need to land on a treated area.
For calls, the mic position matters as much as the panel count, so keep the microphone close and pointed away from the most reflective wall. That simple change can reduce how much room sound gets into the signal, even before you add treatment.
If you use a cardioid mic, aim the null toward the loudest reflection, which is often the aim wall or a side wall. If you use an omnidirectional mic, you have less control, so you will rely more on panels and distance reduction.
Pay attention to the ceiling line above each speaker, because a vault can make one speaker fire into a closer surface than the other. Even if the speakers are symmetric on the desk, the ceiling geometry above them might not be.
If you are mixing work and gaming, keep your chair position consistent when you evaluate changes. A vaulted room can sound dramatically different a foot back, so you want your treatment decisions based on the position you actually use.
When you add absorption to fix asymmetry, check that you did not over-dampen one side and make the room feel lopsided in a different way. The goal is balance and clarity, not making one ear feel like it is under a pillow.
Panel sizes and placement distances that work in real offices
Most home offices do well with 24 by 48 inch panels because they cover reflection zones without taking over the wall. If you go smaller, you need more pieces to cover the same path, and the mounting starts to look busy.
That size also tends to fit between common wall obstacles like switches, thermostats, and shelves. It is large enough to matter, but small enough to place with intent instead of just filling space.
For side reflections, place the panel so its center is roughly at seated ear height, which is often 42 to 48 inches from the floor. If your speakers sit high on a shelf, raise the panels a bit, because the reflection point climbs with the tweeter.
If you switch between sitting and standing, split the difference or use taller panels that cover both positions. Another option is to prioritize the seated position for listening and the standing position for calls, depending on how you work.
Behind the monitor, a single thicker panel often beats two thin ones, because you are fighting a short, strong reflection. If that wall is more than five feet behind the desk, the benefit drops, so I would spend that panel on the side walls instead.
If the wall behind the monitor is close, even a small gap between the speakers and the wall can help before you add treatment. Pulling the desk forward a few inches can reduce boundary buildup and make the panel’s job easier.
On the wall the vault aims at, mount panels higher than you think, because the redirected energy usually hits above head level. A panel that starts at five feet off the floor can do more than one that sits low like a picture frame.
If you are unsure how high to go, start high and adjust downward only if you do not hear improvement. People tend to mount panels too low because it looks natural, but the vault is not behaving like a normal ceiling.
In small offices, four to six panels total is often enough to make calls sound clean and speakers sound focused. In bigger loft-style rooms, you may need more, but you still want to add them in stages so you do not overshoot.
Spacing matters less than coverage of the reflection zone, but avoid leaving a hard strip right where the mirror points are. If you have two panels, a small gap between them is fine as long as the hot spot is not sitting in that gap.
Thickness and density matter more than fancy shapes, so do not get distracted by wedge patterns and studio aesthetics. A plain, well-built panel placed correctly will beat a stylish panel placed randomly every time.
If you are trying to keep the office looking professional on camera, place panels where they read like intentional decor. A pair of panels behind you can look like wall art, while still reducing the room sound your mic captures.
Leave a few inches of clearance around outlets and cable runs so you are not fighting your own setup later. The best layout is the one you can live with day to day without constantly bumping into it.
Quick tests to confirm improvement for calls and listening
You can confirm progress with two fast checks, one for speech and one for playback, and you do not need special tools. Record ten seconds of voice on your normal call mic, then listen for a hard “shh” smear on S and T sounds.
Do the recording at the same time of day if possible, because HVAC noise can mask changes. Keep the mic distance identical, because moving closer can sound like “better acoustics” when it is really just more direct signal.
After you add panels, you should hear the voice get more solid and less splashy, even if it is not totally dead. The goal is to remove the distracting ring, not to remove the room entirely.
For listening, play pink noise or a vocal heavy track you know well, then move your head a few inches left and right. If the center image jumps around, you still have a strong early reflection or an asymmetry problem.
Also listen at a low volume, because reflections are easier to spot when the direct sound is not overpowering them. If the room still sounds bright at low volume, you likely have an untreated early reflection path.
If you have a friend or coworker you trust, ask them if your voice sounds less “roomy” on a call after each change. Outside ears are useful because you get used to your own room sound quickly.
For a quick ceiling check, temporarily hold a thick blanket or spare panel near the suspected reflection area and do the same voice memo. If the harshness drops immediately, you have confirmed the path before you drill anything.
- Clap test for flutter between the aim wall and the desk
- Phone voice memo before and after, same mic distance
- Mirror check for first reflection points at speaker height
- Pink noise pan check, center image stability
- Mute one speaker, listen for “room ring” on the remaining side
- Walk and talk test, note where the room gets sharp
When you do the clap test, listen for a fast “tzing” rather than a long echo. That quick zing is usually the vault and a hard wall trading reflections back and forth.
The one-speaker test is underrated because it isolates side wall issues. If one side sounds clean and the other side sounds like a small gym, you know exactly where to add treatment next.
Do not chase perfection in one afternoon, because your brain needs time to adjust to the new response. A room that is less reflective can sound strange for a day, and then it starts to feel normal and comfortable.
If you want a simple numeric check without special gear, watch the waveform in a voice memo app and compare how much the tail decays after you stop talking. A shorter, smoother decay usually means your panels are hitting the right surfaces.
Conclusion
A vaulted ceiling does not doom your office audio, but it does demand smarter placement than a flat ceiling room. When you treat the strongest paths and choose clean hanging panel hardware, acoustic panels for vaulted ceiling office setups can look tidy and sound controlled.
Start with wall-first placement, then add targeted ceiling treatment options only where the slope feeds reflections back to your seat. Once the slap and sloped ceiling reflections calm down, your calls sound clearer and your speakers stop fighting the room.
If you want one rule that holds up, treat early reflections before you chase coverage, and keep the left and right sides balanced even in an odd shaped space. That approach works whether your office is a spare bedroom with a small vault or a tall loft with a steep pitch.
Build your plan in stages, listen after each change, and stop when the room is no longer distracting. A home office should feel comfortable and natural, and good acoustics are mostly about removing the few problems that pull your attention away from work.
Once you have the reflections under control, you can make smaller upgrades like better mic technique, speaker stands, or a quieter fan without the room undoing your effort. The end result is not a studio, it is an office that sounds like you meant it to sound.


