Acoustic panels make a home office sound tighter, but they also sit there collecting dust like everything else in the room. If you ignore them for a year, you will hear it in the duller high end and you will see it in the fabric.
Good acoustic panels cleaning and maintenance is mostly about being gentle and consistent, not about using stronger products. The goal is simple, keep the absorption working while keeping the panel looking normal on camera calls.
I have seen perfectly good panels ruined by people treating them like a couch cushion and scrubbing hard with soapy water. A few minutes of the right dust removal routine beats an hour of panic cleaning after a spill.
Panels also tend to be placed right where your hands and chair bump them, which means they pick up oils and scuffs even in a clean room. The good news is that most of this is preventable with a simple schedule and a few habits.
If you are using panels for voice work, streaming, or client calls, you are probably sitting close enough to notice every little change in clarity. Maintenance is not just cosmetic, because clogged fabric and dusty fibers can subtly change how the room behaves.
What acoustic panels are made of (so you don’t damage them)
Most home office acoustic panels are a porous core wrapped in fabric, and that core is usually fiberglass, mineral wool, or polyester fiber. The whole point is that air can move through the material, so anything that clogs pores can reduce performance.
That porous core is also why panels behave more like a filter than a painted wall. Dust, skin flakes, and pet dander can settle into the surface over time, especially on panels placed near vents or fans.
Fiberglass and mineral wool are common because they absorb well, but they do not like being compressed or soaked. If the core gets crushed, it can lose thickness and change the way it absorbs lower frequencies.
Polyester and PET-based panels are more forgiving when handled, but they can still get fuzzy or shiny if you scrub them. Some felt panels also show pressure marks easily, which is why gentle vacuuming matters.
Fabric matters more than people think because it is the first thing your vacuum, hands, and cleaning products touch. Many panels use Guilford of Maine style acoustical fabric, but plenty of budget panels use cheaper polyester that can water spot.
Acoustical fabric is designed to be breathable, so it is usually thinner and more open than upholstery fabric. That breathability is great for sound, but it also means it can snag on rough brush bristles or Velcro on a sleeve.
Dark fabrics hide dust longer, but they can show salt marks and dried drips more clearly if you use too much water. Light fabrics show dust sooner, but they are often easier to blend when you do a careful spot-clean.
Some panels have a wood frame, some are frameless, and some are PET felt slabs with no wrap at all. Framed panels tolerate handling better, while frameless and felt panels show dents and edge wear faster.
Framed panels also tend to keep the fabric under more consistent tension, which helps them look neat over time. Frameless panels can look great, but the edges are more vulnerable when you move them or adjust mounting.
Backing materials vary too, and some panels have paper, thin fabric, or plastic on the back to keep fibers contained. If you see a dust cover on the back, do not rip it off thinking it is packaging, because it is part of the build.
Adhesives and spray glues show up in DIY builds, and they can soften if you saturate the fabric with liquid. If you do not know what is inside your panel, treat it like it is fiberglass with a fabric wrap and keep moisture to a minimum.
Even if you do know what is inside, the safest assumption is still that the panel was not designed to be washed like clothing. Think of it like a lampshade, where cleaning is mostly dry methods and careful spot work.
If you ever open a panel to rewrap it, wear gloves and a mask if there is fiberglass or mineral wool inside. A clean-looking panel can still shed tiny fibers when disturbed, and you do not want that in your office air.
Routine dusting and vacuuming that’s safe
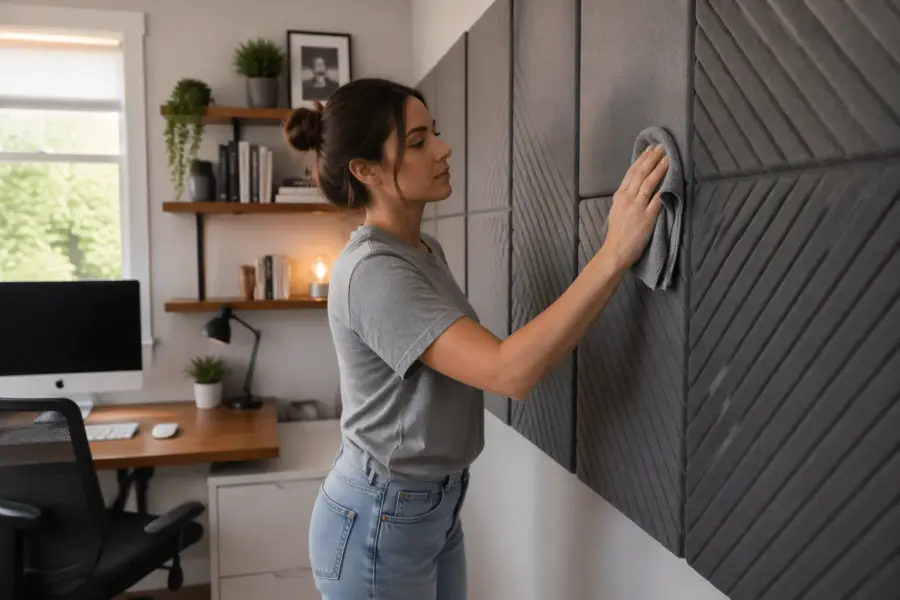
Routine dust removal is the easiest part of acoustic panels cleaning and maintenance, and it prevents the grimy look that makes panels seem old. I prefer a vacuum with a soft brush attachment because it pulls dust out instead of pushing it deeper.
A handheld vacuum works fine if it has decent filtration, but a full-size vacuum with a hose is usually easier to control. If your vacuum exhaust smells dusty, change the bag or clean the filters before you start, because you do not want to blow that back into the room.
Set the vacuum to low suction if you can, and keep the brush moving so you do not snag the weave. Start at the top edge and work down in overlapping passes, like you are mowing a lawn.
Do not press hard, because pressure can flatten the fabric texture and leave shiny tracks on some weaves. Let the brush tips do the work and treat the panel like it is a speaker grille, not carpet.
Pay extra attention to the top edge, because that is where dust likes to settle and stay. If your panels are mounted with an air gap, vacuum the edge and the small ledge behind it too, because that space can collect a surprising amount of lint.
If you do not have a brush attachment, use a clean microfiber cloth and a very light touch. Avoid feather dusters, because they tend to flick dust into the fabric and into the room air.
Microfiber works best when it is clean and dry, so do not use a cloth that has fabric softener residue on it. If the cloth drags or leaves fuzz behind, switch to a different one rather than forcing it.
For panels near a desk fan, air purifier, or HVAC vent, you will need to vacuum more often because they act like filters. Once every four to six weeks is realistic in a normal home office, and once every two weeks is common if you have pets.
If you have a cat that likes to nap near your panels, you will also see hair stuck to the fabric from static. A quick pass with the vacuum brush usually handles it, but you may need to reduce static by running a humidifier in dry winter months.
For felt panels, vacuuming is still the right move, but keep the brush even gentler to avoid pilling. If you see fuzz balls forming, stop and switch to a softer brush or a lower suction setting.
Ceiling clouds and high wall panels are easy to forget, so put them on the same schedule as changing your HVAC filter. If you cannot reach them safely, use a vacuum extension wand rather than balancing on a chair.
After vacuuming, step back and look at the panels under side lighting, because that shows dust streaks you might miss head-on. A second light pass is better than going aggressive in one spot.
If you are sensitive to dust, wear a mask and run an air purifier while you clean. Vacuuming panels can kick up fine particles, especially if it has been months since the last cleaning.
Spot-cleaning fabric without leaving marks
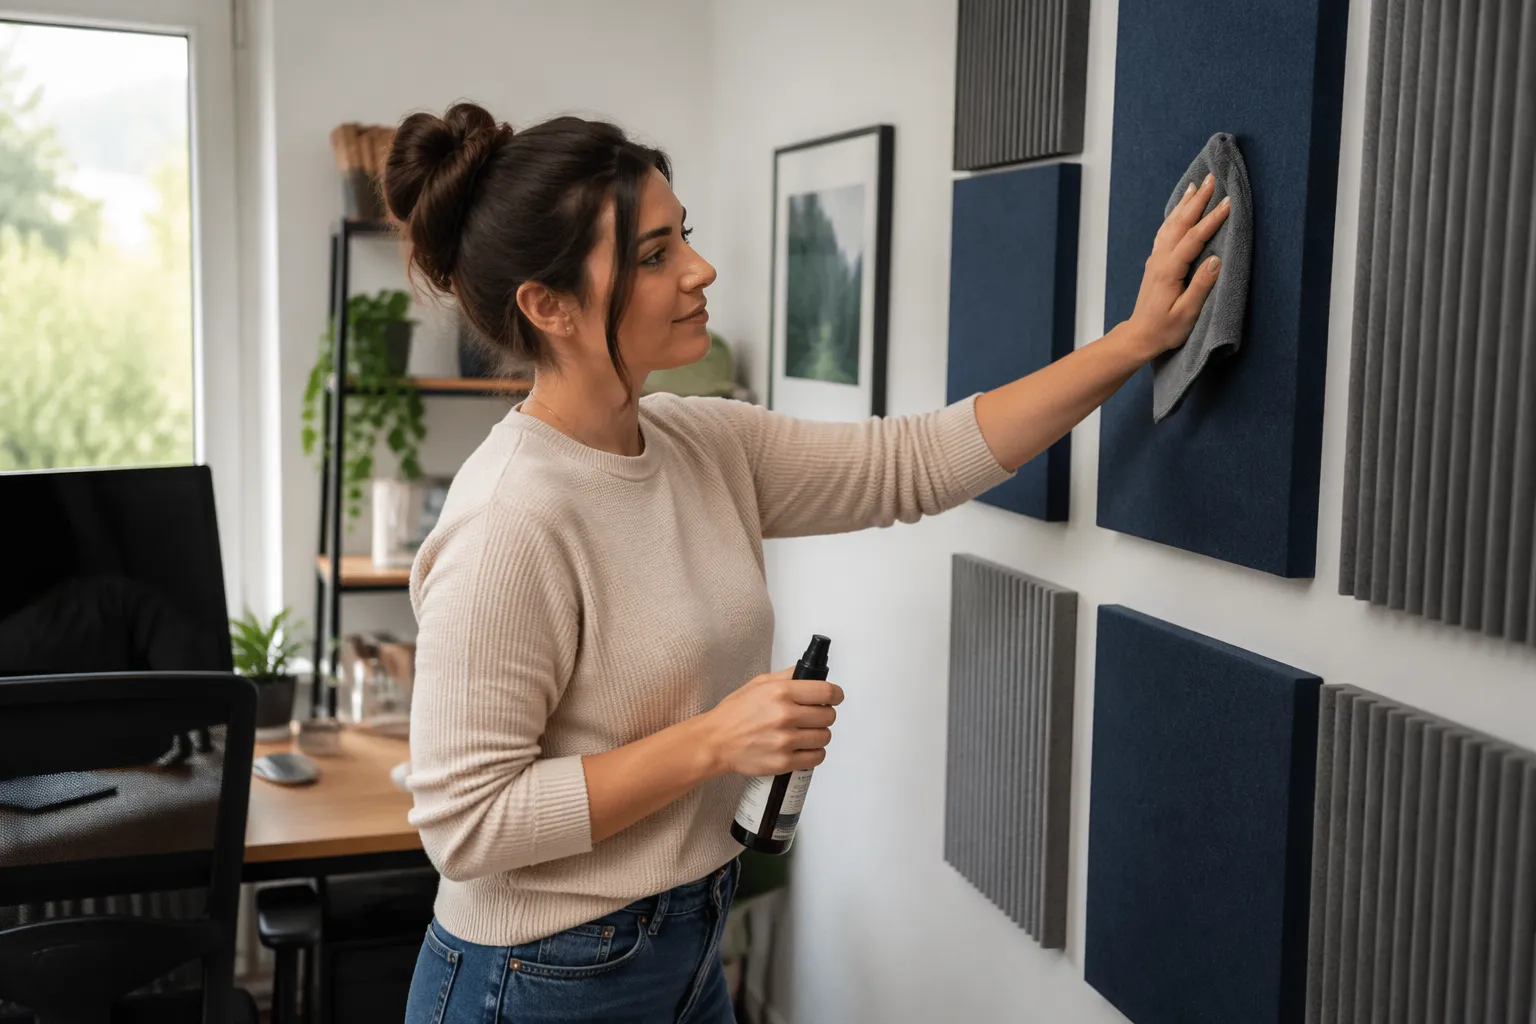
Fabric stain cleaning on acoustic panels is where people get into trouble, because the fabric can show rings even when the stain is gone. Your rule is to use as little liquid as possible and to clean the whole area evenly, not just the center of the spot.
The second rule is to blot, not scrub, because scrubbing can rough up the fibers and make a permanent light patch. If you have ever cleaned a car headliner, the technique is very similar.
Before you touch the stain, vacuum the panel lightly so you do not grind dust into the fabric. If the stain is fresh and wet, start by blotting with a clean towel to remove as much as possible without spreading it.
Test any cleaner on the back or bottom edge first, and wait for it to dry before you commit. If the fabric darkens, stiffens, or shrinks, stop and switch to a drier method.
Plain water is safer than most people think, but only when you use it sparingly and evenly. Distilled water is even better if your tap water leaves mineral spots on dark fabric.
If you use a mild soap solution, mix it weak, because too much soap leaves residue that attracts dust later. A drop or two of clear dish soap in a cup of water is usually enough for small stains.
Apply liquid to the cloth, not to the panel, so you stay in control of how wet the fabric gets. When you do need to blend an area, work from the outside toward the center to avoid pushing the stain outward.
Drying matters as much as cleaning, because slow drying increases the chance of rings. After blotting, press a dry towel against the area and let it pull moisture out, then let the panel air dry with good airflow.
A fan across the room helps, but do not aim a powerful fan directly at a wet spot because it can create uneven drying lines. If you have to speed things up, use gentle airflow and keep the room warm and dry.
If you are dealing with a mystery stain, assume it is oil-based until proven otherwise, because oil is common from hands and hair. Dry methods like baking soda or cornstarch are safer first steps than wet cleaners for unknown spots.
For ink, the cotton swab method is slow but controlled, and that is the point. You want to lift the ink in tiny amounts rather than dissolving it and spreading it into a larger halo.
If you have a panel in a kitchen-adjacent office and it has a greasy film, vacuuming alone might not fix the dull look. In that case, a barely damp cloth with a tiny amount of mild soap, used over a wider area, can restore the fabric without leaving a patch.
| Stain type | Safest first step | What to avoid |
|---|---|---|
| Dust smudge or hand oils | Dry microfiber, then barely damp cloth with plain water | Rubbing hard in one small circle |
| Coffee or tea | Blot with dry towel, then dab with diluted dish soap solution | Soaking the fabric or using hot water |
| Ink from a pen | Dab with isopropyl alcohol on a cotton swab | Spraying alcohol directly on the panel |
| Food grease | Sprinkle baking soda, wait, then vacuum with brush | Oily cleaners or furniture polish |
| Water ring | Lightly mist a wider area, then blot evenly to blend | Spot-wetting only the ring edge |
If you notice the fabric getting fuzzy after cleaning, stop and let it dry before you do anything else. Sometimes fuzz looks worse when damp and settles down once fully dry.
Steam cleaners are tempting because they feel gentle, but steam is still moisture and heat, which can loosen adhesives and warp frames. If you are not sure, skip steam and stick to controlled blotting.
Bleach, peroxide, and strong stain removers are risky because they can discolor fabric and leave stiff spots. Even when they work on the stain, they can make the panel look worse overall.
If a stain is large and you cannot blend it without soaking the panel, that is usually the moment to consider rewrapping. Trying to win a fight with a big stain often ends with a bigger stain.
Handling odors and keeping panels fresh
Acoustic panels can pick up odors because porous insulation and fabric hold onto smoke, cooking smells, and that stale office air. If your panels smell, the room usually has a ventilation problem first, and the panels are just the sponge.
Odors also build up when a room stays closed for long periods, like a spare bedroom office that only gets used a few days a week. The panels are not creating the smell, but they can hold onto it and release it when the room warms up.
Start with the boring fix, improve airflow and control humidity, because damp air makes odors stick. Keep the room around 40 to 55 percent relative humidity, and do not let panels sit against a cold exterior wall that sweats in winter.
If you see condensation on windows in winter, that is a sign your room is too humid, and your panels are likely absorbing some of that moisture. A dehumidifier in summer and better heating balance in winter can make a big difference.
For mild smells, vacuuming plus a few hours of fresh air does more than any scented spray. I do not recommend spraying deodorizers on panels, because fragrance oils can coat fibers and reduce absorption over time.
Even “fabric refresher” sprays can leave residue that attracts dust, which creates a new problem. If you want the room to smell better, focus on the air, not the panels, by filtering and exchanging it.
If you need a targeted approach, place an open box of baking soda in the room for a week and run a HEPA air purifier nearby. For smoke odor that will not quit, rewrapping is often cheaper than trying to chemically strip the smell out of the core.
Activated charcoal bags can also help, and they are less messy than loose powder if you have pets or kids. Just remember they treat the symptom, so you still want to find the source of the odor.
If the odor is coming from a spill that soaked into the core, surface cleaning will not fix it. In that case, the panel may need to be opened, dried thoroughly, and possibly rebuilt depending on what got inside.
Mold is the line you do not cross, because porous insulation is hard to fully sanitize once it is contaminated. If you see spotting, smell a persistent mustiness, or have allergy symptoms that flare up in the room, treat it seriously.
Pets can add their own smell to panels, especially if a cat rubs the corners or a dog brushes against them regularly. Keeping panels slightly out of reach, or adding a small barrier near floor-level panels, can prevent repeat issues.
If you burn candles or incense in the office, know that soot and oils can stick to fabric and build up over time. You might not notice it day to day, but it can slowly darken light-colored panels and add a stale scent.
Preventing sagging, warping, and loose mounts
Panel longevity depends as much on mounting as it does on cleaning, because sagging changes the air gap and can pull fabric out of shape. If a panel wobbles when you tap it, fix that now before it tears a keyhole slot or rips a corner.
A slight tilt might not look like a big deal, but it can put constant stress on one corner of the frame. Over time that stress becomes a loose staple line, a stretched fabric edge, or a mount that rips out at the worst moment.
Use mounts that match the panel weight, and do not trust tiny picture hooks for thick mineral wool panels. French cleats, Z clips, or solid impaling clips on anchors are boring, but they keep panels flat for years.
If you rent and cannot use heavy anchors, look for mounting systems that spread the load across multiple points. Two lighter-duty mounts used correctly are often safer than one mount that is barely holding on.
Check the wall surface too, because drywall can crumble if a panel has been bumped repeatedly. If an anchor spins or pulls out easily, repair the hole and remount rather than hoping it will hold.
Warping usually comes from moisture swings or from a thin wood frame that was never square. Keep panels away from direct sunlight and from baseboard heaters, because heat dries one side faster and twists the frame.
Sunlight can also fade fabric, which makes a panel look older even if it is clean. If a window hits one panel more than the others, you can rotate panels occasionally to keep the look consistent.
If you used spray adhesive in a DIY build, check edges twice a year because adhesives can creep when a room gets hot. A few staples and a tighter wrap will beat trying to glue a loose edge back down through the fabric.
For frameless panels, edge protection matters, because the corners take most of the hits during chair movement and cleaning. Even a small dent can make a panel look lumpy on camera, so handle them with two hands when you move them.
If your panels are hung with wire, watch for the wire cutting into the frame or pulling the panel away from the wall. Wire is fine for light frames, but rigid mounting usually keeps panels flatter and reduces rattles.
Rattles are not just annoying, they can show up in recordings as a faint buzz at certain frequencies. If you hear a new rattle, check mounts, frames, and anything touching the panel like cable clips or lamp cords.
Dusting can also loosen panels if you push sideways while cleaning, so support the panel with one hand while you vacuum. That small habit keeps your mounts from taking repeated lateral stress.
If you have panels on a door or movable partition, expect more wear because of vibration and constant motion. In those setups, inspect mounting hardware more often and use fasteners that resist loosening.
When to rewrap or replace a panel
At some point acoustic panels cleaning and maintenance stops being worth the effort, and a rewrap makes more sense. If the fabric is faded, pilled, or permanently stained, you can keep the core and make the panel look new in an afternoon.
Rewrapping is also a chance to upgrade fabric to something more durable or more camera-friendly. If your current fabric shows every fingerprint, a tighter weave or slightly textured fabric can be a practical improvement.
If you do rewrap, take photos as you remove the old fabric so you can copy the fold pattern and staple placement. A clean wrap is mostly about even tension and neat corners, not about pulling as hard as possible.
Replace the whole panel if the core has gotten wet, grown mold, or started shedding fibers into the room. A musty smell that returns after drying is a bad sign, and I would not gamble with indoor air quality in a small office.
Water damage can happen from a roof leak, a humidifier pointed the wrong way, or a spill that ran down the wall behind a desk. If the panel feels heavier than normal or stays cool and damp to the touch, assume the core absorbed moisture.
Some cores can be dried if they were only lightly damp, but you need time, airflow, and confidence that nothing is growing inside. If you cannot fully dry it quickly, replacement is usually the safer path.
Performance is another reason to replace, especially if you have changed your room setup and need different thickness or coverage. A panel that is fine for voice might not be enough once you add speakers and start mixing in the same space.
It is also okay to replace panels for aesthetic reasons if they make the office feel messy or dated. A clean-looking room is easier to work in, and that matters if you spend hours there every day.
- Persistent odor after a week of ventilation
- Visible sagging or a bowed frame
- Fabric torn through to the insulation
- Stains that reappear after drying
- Loose mounting points or stripped keyholes
- Core feels damp or heavier than normal
If you are on the fence, remove the panel and inspect the back and edges under good light. Small issues are easier to fix when they are caught early, before the fabric tears or the frame twists further.
When you replace, keep one old panel as a test piece for cleaning methods and fabric experiments. It is much less stressful to trial a cleaner on a sacrificial panel than on the one behind your webcam.
Storage tips if you move or reconfigure your office
Panels get damaged during moves because people stack them like cardboard, then wonder why the corners crush. Treat them like framed art, store them upright, and keep weight off the faces.
If you have to stack them for a short time, put the largest and most rigid panels on the bottom and use a clean blanket between each one. Never stack anything heavy on top, even for “just a minute,” because that is how dents happen.
Wrap each panel in a clean moving blanket or a cotton sheet, because plastic can trap moisture and make odors worse. If you must use plastic stretch wrap, leave the ends open so the panel can breathe.
Cardboard corner protectors help a lot if you are transporting panels in a vehicle with other furniture. The corners are the first thing to get scuffed when you turn a panel sideways through a doorway.
Do not store panels in a garage or attic that swings hot and cold, because humidity changes shorten panel longevity fast. A closet inside the conditioned part of the house is boring but safe.
If you are storing panels for more than a few weeks, vacuum them before they go into storage. Storing a dusty panel can set the dust into the fabric and make it harder to remove later.
Keep panels away from anything with a strong odor in storage, like paint, gasoline, or mothballs. Porous materials absorb smells, and you do not want your office to smell like a utility closet when you reinstall them.
If you are reconfiguring, label the back of each panel with painter’s tape so you can put them back in the same spots. That saves time later when you are trying to keep your reflection points covered and your desk area consistent.
It also helps to label which edge is “up,” especially for panels with directional fabric or a pattern. Putting a panel back upside down is not a sound problem, but it can look oddly mismatched once you notice it.
When reinstalling, take the opportunity to check mounts and replace any anchors that look tired. A move is often when you discover a mount was barely holding, so it is worth tightening everything before the panels go back up.
If you are changing layouts often, consider mounting methods that allow easy removal without tearing up the wall. Consistent mounting makes it more likely you will actually move panels to the best positions rather than leaving them where they are convenient.
Conclusion
Acoustic panels do not need fancy products, but they do need regular dust removal and a careful hand when spills happen. If you keep up with vacuuming and handle fabric stain cleaning gently, your panels will stay presentable and keep doing their job.
The best acoustic panels cleaning and maintenance routine is the one you will actually repeat, and that usually means quick monthly vacuuming plus fast spot care. When mounts loosen or fabric looks tired, fix it early, because small repairs are cheaper than replacing a whole wall of treatment.
If you want a simple baseline, vacuum on a schedule, spot-clean only when needed, and keep humidity under control. Those three habits prevent most of the problems people blame on “cheap panels” when the real issue was neglect.
Your panels are part of your workspace, so treat them like any other tool you rely on. A little maintenance keeps your room sounding consistent, which makes everything from meetings to recordings less stressful.


