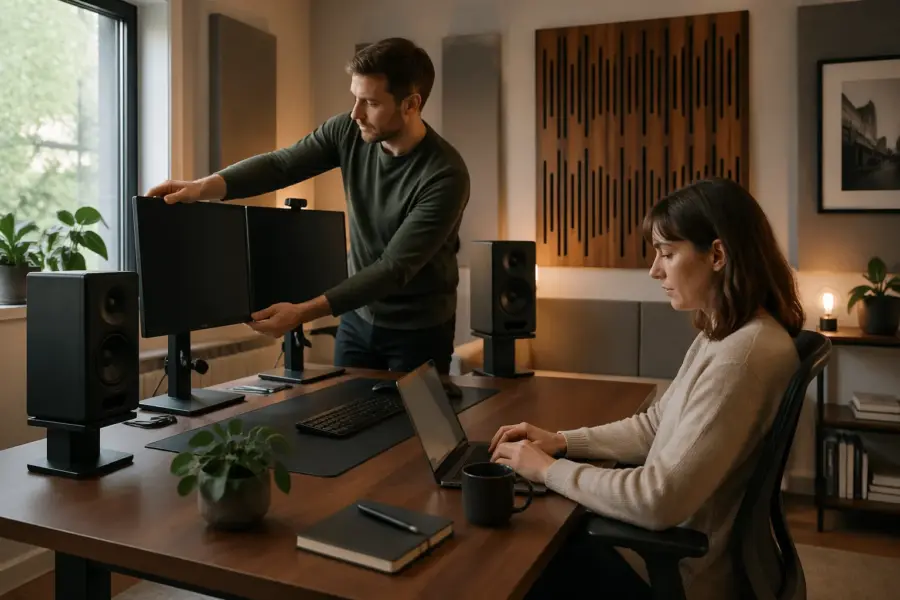
Dual monitors are great for work, but they can be a pain for audio if you park speakers wherever they fit. Room geometry for dual monitors and speakers starts at the desk, because the desk is where most of the early reflections and weird obstructions happen.
If you have ever heard your center image smear or your snare sound like it has a comb filter on it, your screens and desktop are likely part of the problem. You can fix a lot with simple geometry choices, before you buy more panels or foam.
This article focuses on monitor placement, speaker height, and desk reflections in a typical home office setup with two displays and nearfield speakers. The goal is a stable stereo image and predictable tone while keeping your workflow comfortable.
How screens and stands affect your sound path
Nearfield speakers aim a tight beam of high frequencies straight at your ears, and anything in that line matters. A dual monitor stack can sit right in the middle of that beam if you place the speakers too low or too close to the screens.
Even when the screens do not fully block the tweeters, their edges can diffract sound and create little timing shifts. Those shifts are small, but your brain uses tiny cues to localize a center image, so it adds up fast.
Flat panels reflect sound like small hard walls, especially in the 1 kHz to 10 kHz range where clarity lives. When both screens reflect slightly different paths to each ear, you get subtle phase differences that make vocals and dialog lose focus.
The bezel and the seam between monitors can behave like a narrow reflective ridge right on the centerline. If that ridge is close to the speakers, it can add a bright, papery layer that makes sibilance feel detached from the voice.
Glossy screens are usually worse than matte screens because they reflect more energy at higher frequencies. You might not hear it as an obvious echo, but you will hear it as a harder top end and less depth.
Monitor stands, clamp arms, and desktop risers also create little reflective surfaces near the speakers. A big metal VESA arm behind a speaker can bounce energy back into the cabinet area and change what you hear at the listening position.
Those arms and stands can also block airflow from rear ports if they sit too close, which changes the bass tuning in a way that feels inconsistent. If your low end changes when you move a screen, it is often because something is too close to the speaker’s back side.
Keyboard trays, laptop stands, and even a tall desk lamp can become a first reflection point if they sit between the speaker and your ears. The problem is not that these objects exist, but that they sit in the most sensitive zone near the tweeter line.
I prefer to treat screens as obstacles that you route sound around, not objects you ignore. If you plan the room geometry for dual monitors and speakers around clear lines from tweeter to ear, the rest of the setup gets easier.
Once you see the setup as a set of paths and bounces, you stop guessing and start making intentional choices. That mindset is more valuable than any single accessory, because it works in every room and every desk layout.
Placing speakers so screens don’t block or reflect too much
Start by pulling the speakers forward so their front baffles are slightly in front of the monitors, not behind them. This reduces the amount of sound that hits the screens first, which usually means cleaner imaging.
That forward move also tends to reduce the “tunnel” effect you get when speakers sit behind a wall of screens and accessories. You want the speakers to feel like they are in open air, not trapped in a little canyon.
If the desk is deep, aim for the tweeters to “see” your ears without the screen edges cutting through that line. You can check this by sitting in position and visually confirming the tweeter face is not hidden by the monitor corners.
Do the same check for both ears, because a screen edge can block one side more than the other if your chair is slightly off center. If one tweeter is partially hidden, the stereo image will pull even when levels match.
Try to keep the inner edges of the monitors a little behind the plane of the tweeters, even if it looks slightly unusual at first. That depth offset often does more than people expect, because it changes the earliest reflections that your brain prioritizes.
Toe in matters more with dual displays because the inner screen edges sit close to the speaker axes. A mild toe in that crosses just behind your head often keeps the strongest high frequency beam away from the screens.
If you toe in too aggressively, you can create a very narrow sweet spot that feels great for mixing but annoying for casual listening. With a work desk, a slightly wider sweet spot is usually better because you move around to type, read, and reach gear.
Keep the monitors centered and symmetrical, because asymmetry creates different reflection timing on the left and right. If you must offset one screen, offset both speakers and your chair as a group so the stereo geometry stays matched.
Symmetry also includes what sits next to the screens, like a dock, a notebook stack, or a mug that lives on one side. If you always keep a tall object near one speaker, you are building a permanent imbalance into the reflection field.
In tight spaces, you can sometimes win by narrowing the monitor gap and pushing the screens slightly farther back, even if the screens feel a bit smaller. The audio benefit is that the centerline becomes less reflective and the speakers get a cleaner shot to your ears.
If you cannot move the monitors back, consider moving the speakers out slightly and increasing toe in so the main beam misses the screens. This is not perfect, but it often beats leaving the speakers firing straight into the inner bezels.
Also pay attention to vertical placement relative to the screens, because a speaker that sits low will fire into the bottom half of the panels. A speaker that sits higher will often clear the screens and reduce the “screen slap” reflection.
Managing desk reflections with practical geometry choices
Desk reflections are the fastest way to make a good speaker sound cheap, because the bounce off the desktop arrives a few milliseconds after the direct sound. That short delay creates comb filtering that shows up as harshness, hollowness, or a “phasey” upper midrange.
The reason it is so audible is that the reflection is strong and consistent, since the desk is a large, flat surface close to both speakers. You can have a well-treated room and still get wrecked by the desk if the geometry is wrong.
You can’t delete the desk, so you control angles and distances to push the reflection later and weaker. Small changes in speaker height and monitor placement often move the reflection notch out of the most annoying vocal range.
Think of the desk bounce like a second tiny speaker that is delayed and filtered, because that is basically what it is. Your goal is to make that “second speaker” quieter and less aligned with the direct sound.
A simple trick is to slide the speakers toward the front edge of the desk so there is less surface in front of them. When the first bounce point moves off the desk or farther away, the comb filtering gets less intense.
Another trick is to keep the area between you and the speakers as uncluttered as possible, because clutter can create multiple smaller reflections. A clean desk is not just nice for workflow, it is also a simpler acoustic environment.
If you use a large mechanical keyboard, it can act like a little reflector right where the desk bounce happens. A soft desk mat under the keyboard can reduce some of that high frequency splash without changing your whole setup.
Laptop stands can be surprisingly destructive when they sit centered between the speakers, because they create a hard angled surface at the worst possible spot. If you need a laptop open, pushing it to the side is often better than centering it under the monitors.
Desk reflections also interact with screen reflections, because the desk can bounce sound up into the screens and back to you. When you reduce the desk bounce, the screens often become less of a problem too.
Do not assume that adding absorption is the first step, because geometry is usually the bigger lever. When the path lengths are wrong, you will need a lot of material to compensate, and it still might not feel “right.”
| Geometry choice | What it changes | What you usually hear |
|---|---|---|
| Speakers raised 3 to 6 inches | Longer path for the desk bounce | Less “cupped hands” midrange |
| Speakers moved forward to desk edge | Less desktop area in front of the speaker | Clearer transients, tighter center |
| Downward tilt reduced or removed | Less energy aimed at the desktop | Smoother presence region |
| Desk mat placed at first bounce area | Lower reflection level at high frequencies | Less glare, fewer sharp S sounds |
| Monitor riser lowered or removed | Fewer hard surfaces between speakers | More stable phantom center |
Use the table as a menu, not a checklist, because every desk and chair height combination is different. The best move is the one that changes the reflection path without forcing you into an awkward working posture.
If you want a quick sanity check, play a dry spoken word recording and listen for that hollow “in a box” tone. When the desk reflection is under control, speech tends to sound more direct and less nasal.
Also remember that your ears are not fixed in space, because you lean forward when you type and lean back when you listen. A geometry choice that only works in one posture is fragile, so aim for a setup that stays decent across normal movement.
When you get desk reflections right, you usually notice it as less fatigue over long sessions. The sound stops poking at you in the upper mids, and you can work longer without turning the volume down out of annoyance.
Setting heights: ears, tweeters, and screen tops
Speaker height is not a vibe thing, it is geometry, and most nearfields want the tweeter at ear level. If your speakers sit on the desk, they are often too low unless your chair is unusually low too.
When the tweeter is below ear level, you often compensate by turning the volume up or tilting the speakers, which can create new reflection problems. Getting the height right first keeps you from stacking fixes on top of fixes.
When you raise speakers, you also change how much of the desk reflection reaches your ears. A speaker that is 4 inches higher can move the reflection notch enough to make speech and vocals sound more natural.
Raising speakers also changes the vertical angle to the screens, which can reduce how much energy hits the panels. If your monitors are tall, a small height change can be the difference between “clear path” and “tweeter firing into glass.”
Screen height matters because tall monitors can creep into the sound path if you chase an ergonomic “top of screen at eye level” rule too literally. I like the top of the screens slightly below eye level when speakers sit behind them, because it keeps the tweeter line clearer.
That screen position also reduces neck extension, which matters if you spend all day at the desk. Comfort is part of repeatability, because a comfortable posture is a posture you can keep consistent.
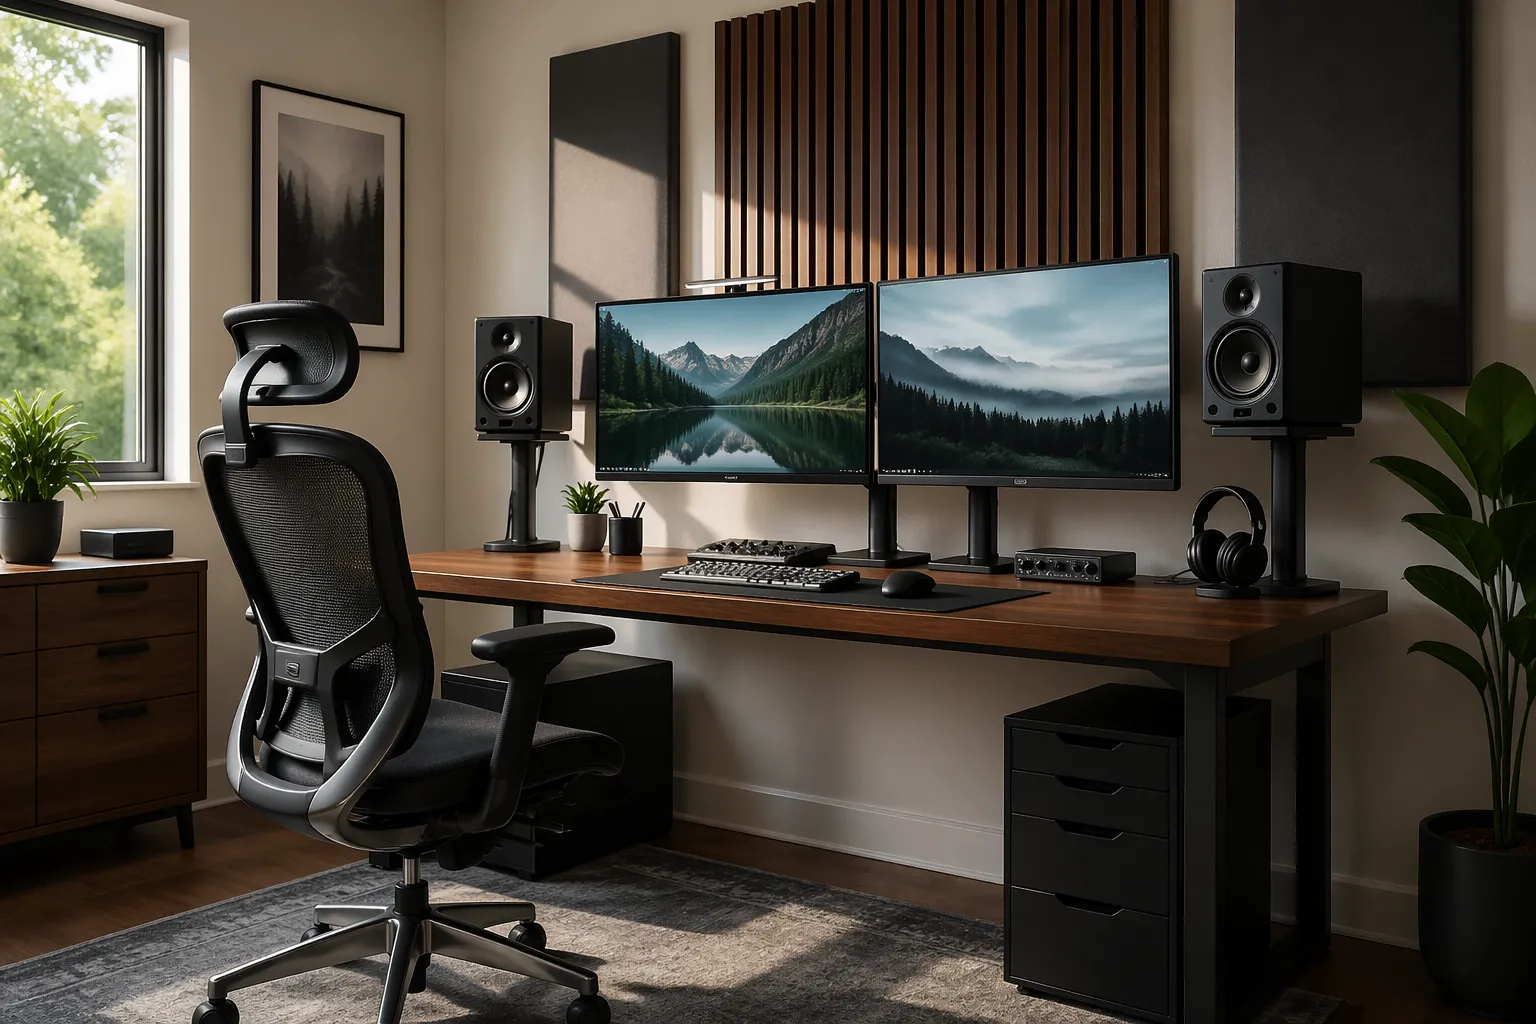
If you use monitor arms, you can lower the screens while keeping the same viewing distance, which helps both ergonomics and audio. That one change often improves monitor placement and reduces desk reflections at the same time.
Monitor arms also let you float the screens above the desk, which can free up space for speaker stands and reduce clutter between the speakers. The less stuff you have in the center, the easier it is to keep a stable phantom center.
Pay attention to the vertical relationship between the tweeter and your ears when you are actually working, not just when you sit up straight for a photo. If you naturally hunch a bit while typing, you may want the tweeter slightly lower than “perfect” ear height to match your real posture.
If your speakers have a waveguide or a narrow vertical dispersion, height becomes even more critical. In that case, being an inch or two off can change the presence region and make the top end feel inconsistent.
Try not to stack the speakers on random objects that ring or wobble, because that adds mechanical vibration into the desk. A stable stand with a predictable height is better than improvising with books that shift over time.
If you have to choose between perfect screen ergonomics and perfect speaker height, you can usually compromise by moving screens down and speakers up. Most people adapt to slightly lower screens faster than they adapt to smeared imaging and harsh desk bounce.
Keeping your triangle consistent with a wide desk
A wide desk tempts people to spread speakers to the far corners, and that usually breaks the nearfield triangle. You want an equilateral triangle, or close to it, with the speaker to speaker distance matching the distance from each speaker to your ears.
The triangle is not a strict law, but it is a reliable starting point that keeps imaging predictable. When the triangle is stretched, the center image weakens and you start hearing the left and right speakers as separate sources.
For most home office distances, that means speakers end up closer together than your monitors. The sound should anchor to your head position, not to the edges of your desk or the outer bezels of the displays.
It can feel strange when the speakers sit inside the monitor width, but it is usually the correct move for nearfield listening. Your eyes can handle wide visuals, but your ears want a controlled geometry with short, matched paths.
Keep the left and right speaker the same distance from the front wall and the side walls when you can. If one speaker sits closer to a side wall because of a bookshelf or PC tower, you will hear the image pull and the bass change.
That pull can be subtle on music and obvious on panned dialog, because speech makes localization errors easier to notice. If you edit video or podcasts, the triangle and symmetry issues show up quickly as a drifting voice.
Use the chair as the fixed point, then place speakers and monitors around it, not the other way around. Room geometry for dual monitors and speakers works best when your listening position is predictable every day.
If your chair rolls, consider marking a “listening spot” on the floor with discreet tape or a small rug edge. It sounds silly, but it prevents the slow creep that happens when you push back and never return to the same position.
Try to keep the speakers the same distance from you even if you change monitor angles or add a third screen later. The triangle is the anchor, and everything else is a layer you add around it.
If you need more desk space, resist the urge to push speakers wider and instead consider pushing them slightly forward on stands. Forward placement often preserves the triangle while freeing up usable space behind the speakers for screens and accessories.
Also watch the distance between the speakers and your ears, because too close can make the sound feel “inside your head” and too far can bring the room into the picture. Nearfield is a sweet spot where direct sound dominates, and the triangle helps you stay there.
Cable, stand, and spacing tips that keep the layout stable
A layout that shifts an inch every time you plug something in will never sound consistent, because your triangle keeps changing. Stability is a real acoustic tool, and it also keeps you from slowly drifting into a bad setup.
Stability matters because small position changes create measurable frequency response changes at the listening position. If you keep “fixing” EQ in software while the speakers keep moving, you are chasing a moving target.
Stands and isolation pads are useful, but only if they do not wobble or sag under the speaker weight. I would rather use a solid pair of desktop stands with a little Blu Tack than a fancy foam pad that slides around.
Isolation is also about preventing the desk from acting like a secondary radiator, especially in the low mids. When the desk vibrates, it adds a subtle haze that can make bass notes feel less defined.
Cable routing is part of geometry because cables can tug on speakers and slowly rotate them out of toe-in. If you have ever noticed one speaker pointing slightly differently than the other, cable tension is a common culprit.
Give cables enough slack to avoid pulling, but not so much that they pile up behind the speakers and touch the ports. A cable bundle right behind a rear port can change airflow and make the bass behave strangely.
Power bricks for monitors and laptops can also introduce noise into audio lines if everything is bundled together. Keeping a little separation between power and audio is basic, but it can save you from chasing hum and buzz later.
If you use clamp arms for speakers, make sure the clamps are torqued evenly and do not flex when you bump the desk. A tiny flex is enough to change the aim, and aim is half the battle in nearfield setups.
- Mark speaker stand positions with small tape tabs
- Route audio cables away from monitor power bricks
- Leave 2 to 4 inches behind speakers for ports and connectors
- Use identical stand height left and right
- Bundle slack cable under the desk, not behind the speakers
- Keep the PC tower off the desktop if possible
Those little tape marks are not about being precious, they are about returning to a known good baseline after you clean or rewire. If you can reset the layout in two minutes, you will actually do it.
Spacing behind the speakers also helps with heat and maintenance, because you can reach connectors without dragging the speakers around. The less you touch the speakers day to day, the more consistent your monitoring stays.
If you have to keep the PC on the desk, try to keep it centered or at least not directly next to one speaker. A big case next to one speaker creates an asymmetrical boundary that changes reflections and bass loading on that side.
When you lock down the physical layout, software calibration becomes more meaningful. Even basic room correction works better when the speakers are stable and the geometry is not changing week to week.
How to choose monitor placement that plays nice with stereo imaging
With dual monitors, the seam between screens often sits right on the centerline where your phantom center should lock in. If the monitors are too far forward, that seam becomes a hard reflector right where you want clean direct sound.
This is why some dual monitor setups sound “wide” but never really solid in the middle. The center information is fighting a reflection that is timed just right to blur localization cues.
Push the screens back a bit, then bring the speakers forward, so the speakers “own” the front edge of the desk. This simple depth offset reduces early reflections from the screens and helps the center image snap into place.
If you cannot push screens back because of a shallow desk, consider raising them slightly and lowering the speakers’ aim line so the tweeters clear the bottom edges. The goal is still the same: keep the direct path clean and the reflections delayed.
Angle the monitors slightly inward so you do not need to sit off center to see them comfortably. When you sit off center, you change arrival times at each ear, and the stereo field shifts even if the speakers are perfectly placed.
Even a small off-center posture can make you think a mix is panned wrong, when it is actually your head position. If you do critical listening, it helps to have a natural seated posture that lands you on the centerline without effort.
If you use one landscape and one portrait display, keep the portrait screen on the side and leave a small gap from the centerline. That gap keeps the center reflection zone cleaner and makes room geometry for dual monitors and speakers easier to maintain.
The same idea applies if you use a laptop as a third screen, because a centered laptop screen can become a third reflector right between the speakers. If you need it open, treat it like a temporary obstacle and move it out of the center when you listen seriously.
Try to keep the monitor faces roughly in the same vertical plane, because mismatched depths can create different reflection times on each side. If one screen is farther forward, it can make one side of the image feel slightly more “present” even when levels match.
Also avoid placing small hard objects on top of the monitors, like webcams on tall mounts or decorative items. Anything that sticks up near the tweeter line can become a little reflector that adds brightness and smear.
If you use a soundbar for casual listening, keep it separate from your nearfield monitoring decisions. Soundbars often sit exactly where you want a clean centerline, so they can be fine for video calls but not great for accurate stereo imaging.
Once the monitors are placed, resist the temptation to keep micro-adjusting them daily. A stable screen position helps you keep a stable head position, and that is part of keeping stereo imaging consistent.
Dealing with nearfield boundary effects at the back wall and side walls
Desk setups often end up close to a wall, and that wall can boost bass in a lumpy way. If your speakers are rear ported and jammed against drywall, the low end can turn into one note bass that masks detail.
Boundary effects are not just about “more bass,” they are about uneven bass that changes note to note. When the bass is uneven, you make bad EQ decisions because you are compensating for the room instead of the mix.
Try to keep at least 6 to 12 inches between the speaker back and the wall, then adjust by ear and measurement if you can. Even a small change can move a boundary peak enough to make kick drums and bass guitar separate again.
If you cannot get that distance, consider using the speaker’s boundary EQ switches if it has them, but treat that as a compromise. It is usually better to create physical space than to rely on a filter that may not match your exact room mode.
Side wall reflections show up as image blur and a wider but less accurate stereo field. If one side wall is close and the other is open, you will fight imbalance until you add absorption or you move the whole desk.
The imbalance can also show up as different tonal balance left versus right, because early reflections add energy in the upper mids. If one side is reflective and the other is not, the brighter side often feels louder even at the same SPL.
I like a practical approach: keep the desk centered if possible, then treat the first reflection points with real broadband panels. Foam tiles rarely do much below the top end, so they do not solve the underlying geometry problem.
Broadband panels do not have to be huge to help, but they need thickness and an air gap to work lower. If you only tame the very top end, you can end up with a dull but still smeared image, which is not the goal.
Also consider what is on the side walls, like windows, doors, or bookcases, because those surfaces behave very differently. A bookcase can act like a rough diffuser, while a bare window can act like a mirror for high frequencies.
If you have one open side and one wall, you can sometimes improve balance by adding a thick curtain or a panel on the wall side. The goal is not perfect symmetry in construction, but symmetry in acoustic behavior at the listening position.
Do not ignore the back wall behind your chair, because reflections from behind can reduce depth and make reverbs feel weird. In nearfield setups the back wall is less dominant than in farfield, but it still matters when the room is small.
When you deal with boundaries, you often notice the biggest improvement in low mid clarity, not just sub bass. That clarity is what makes mixes translate, because it is where guitars, vocals, and snare body all compete.
Using slight angles to control what reflects off the desk
People often tilt speakers down toward their ears when the speakers sit high, and that can backfire by aiming more energy at the desk surface. A flatter aim, with tweeters at ear height, usually reduces desk reflections without extra gear.
Vertical aim is easy to overlook because we focus on left-right toe in, but the desk is a vertical problem. If the speaker is aimed even a little too downward, you are basically spotlighting the desktop.
If you must tilt, keep it subtle and check the desk bounce by listening to pink noise or a vocal track you know well. When the angle is wrong, the upper mids get spitty and the center image loses its “locked” feeling.
It helps to make one change at a time and listen for a minute, because your ears adapt quickly. If you tilt and also move the speakers and also change monitor angle, you will not know what actually helped.
Monitor angle matters too because a screen that leans back can reflect sound upward toward your face. A more upright screen often reflects back toward the ceiling instead of straight into your ears.
A very upright screen can create its own ergonomic issues, so this is a balancing act. The point is to avoid a screen angle that acts like a ramp directing reflections right at your head.
These are small geometry moves, but they stack, and they cost nothing. Once you get the angles right, you can fine tune with a desk mat or a thin absorber strip in front of the monitors.
If you add a desk mat, place it where the reflection actually happens, not just where it looks good. The first bounce point is usually somewhere between the speakers and the keyboard area, and it shifts when you move speakers forward or backward.
Also consider the angle of any speaker stands you use, because some stands add a built-in upward or downward tilt. If the stand forces a tilt you do not want, you will end up compensating elsewhere and making the geometry more complicated.
Small angle changes can also reduce how much sound hits the inner edges of the monitors. When the inner edges stop lighting up with high frequency energy, the stereo image usually becomes less nervous and more stable.
When you get the angles right, you can often listen at lower volume and still hear detail. That is a good sign, because it means the direct sound is clean and you are not relying on loudness to overcome reflection blur.
Practical checks to confirm your geometry works
Use a mono vocal track and center it, then move your head a few inches left and right. If the vocal shifts hard to one side, your symmetry is off, or one screen edge is reflecting more than the other.
Also listen for a change in tone as you move, because strong desk comb filtering will sound different when your head height changes slightly. If the vocal suddenly gets nasal when you sit up, that is a clue that the desk bounce is still too strong.
Clap tests can point out flutter, but they do not tell you much about desk reflections. Instead, play a slow sine sweep at low volume and listen for sudden dips or honky peaks around the presence region.
If you hear a sharp “quack” around a specific frequency, try moving the speakers forward an inch and repeat the sweep. A small move that changes the quack is usually a desk or screen reflection issue, not a speaker quality issue.
If you can, run a quick measurement with REW and a cheap USB mic like the UMIK-1. You will see comb filtering from the desk as a series of tight ripples, and you can watch those ripples change when you adjust speaker height or distance.
Measurements also help you avoid placebo, because some changes look “more professional” but do not actually improve the response. If you measure before and after, you can keep the changes that matter and undo the ones that just look tidy.
Do not chase perfection, chase repeatability, because you work at this desk every day. When monitor placement and speaker height stay put, your ears adapt and your mix decisions stop swinging around.
Repeatability also means you should have a simple routine for returning to your listening posture, like centering your chair and sitting the same distance from the desk edge. If you always start in the same place, your brain learns the room faster and you work with more confidence.
Use reference tracks that you know well and that have stable centered vocals, because they reveal imaging issues quickly. If the vocal feels like it is coming from the screens instead of a point between the speakers, you still have a reflection or symmetry problem.
Finally, take breaks and come back, because fatigue can make you misread what you are hearing. A good geometry setup tends to sound “boring” in a good way, because it stops throwing weird artifacts at you.
Conclusion
Good room geometry for dual monitors and speakers comes from clear sound paths, controlled desk reflections, and a triangle that does not drift. You can get there with speaker position, monitor placement, and a few stubborn habits about symmetry.
Put the speakers slightly forward of the screens, keep tweeters at ear level, and avoid aiming energy straight at the desktop. Once those basics are right, treatment becomes a finishing move instead of a rescue mission.
Most home offices can sound surprisingly solid without turning into a studio build, but you have to respect the geometry on the desk. If your setup sounds inconsistent day to day, lock down the physical layout before you buy anything else.
When you do this well, you stop blaming your speakers for problems that are really caused by screens, stands, and reflections. The payoff is not just better sound, but faster decisions, because you trust what you hear.
Keep it simple, keep it symmetrical, and keep it stable, and your dual monitor workstation can behave like a serious listening position. The best part is that most of the improvements come from moving things you already own, not from buying new gear.


