Most home office studios fail before you buy a single panel, because the room layout is wrong. A smart room geometry checklist for a new home office studio keeps you from chasing problems that the furniture and angles created.
Room geometry is the stuff you cannot EQ away, like uneven side walls, a desk jammed into a corner, or speakers firing across a doorway. If you do the geometry work first, every later step in your setup workflow goes faster and costs less.
I like checklists because they force you to write down what you are doing instead of guessing by ear. This article is built around measurement notes and placement priorities you can apply in a spare bedroom, a den, or a converted garage.
You do not need fancy software to start, but you do need a tape measure, painter’s tape, and a notebook or notes app. The goal is to lock in a layout that makes mixing, calls, and focused work easier without constant second guessing.
Think of the room as a system that either supports your decisions or fights them all day. When the geometry is stable, you can change speakers, add a mic, or rearrange a shelf without resetting your entire reference.
The point is not to turn your home into a lab, but to stop making blind moves. A few clean measurements and repeatable marks will save you hours of “maybe it’s the plugin” troubleshooting later.
Step 1: Document the room shape and fixed obstacles
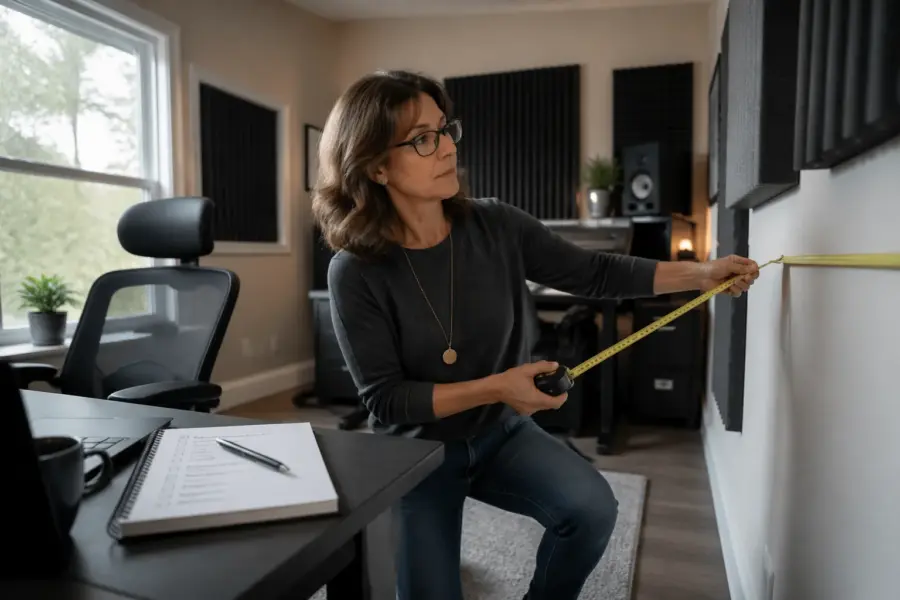
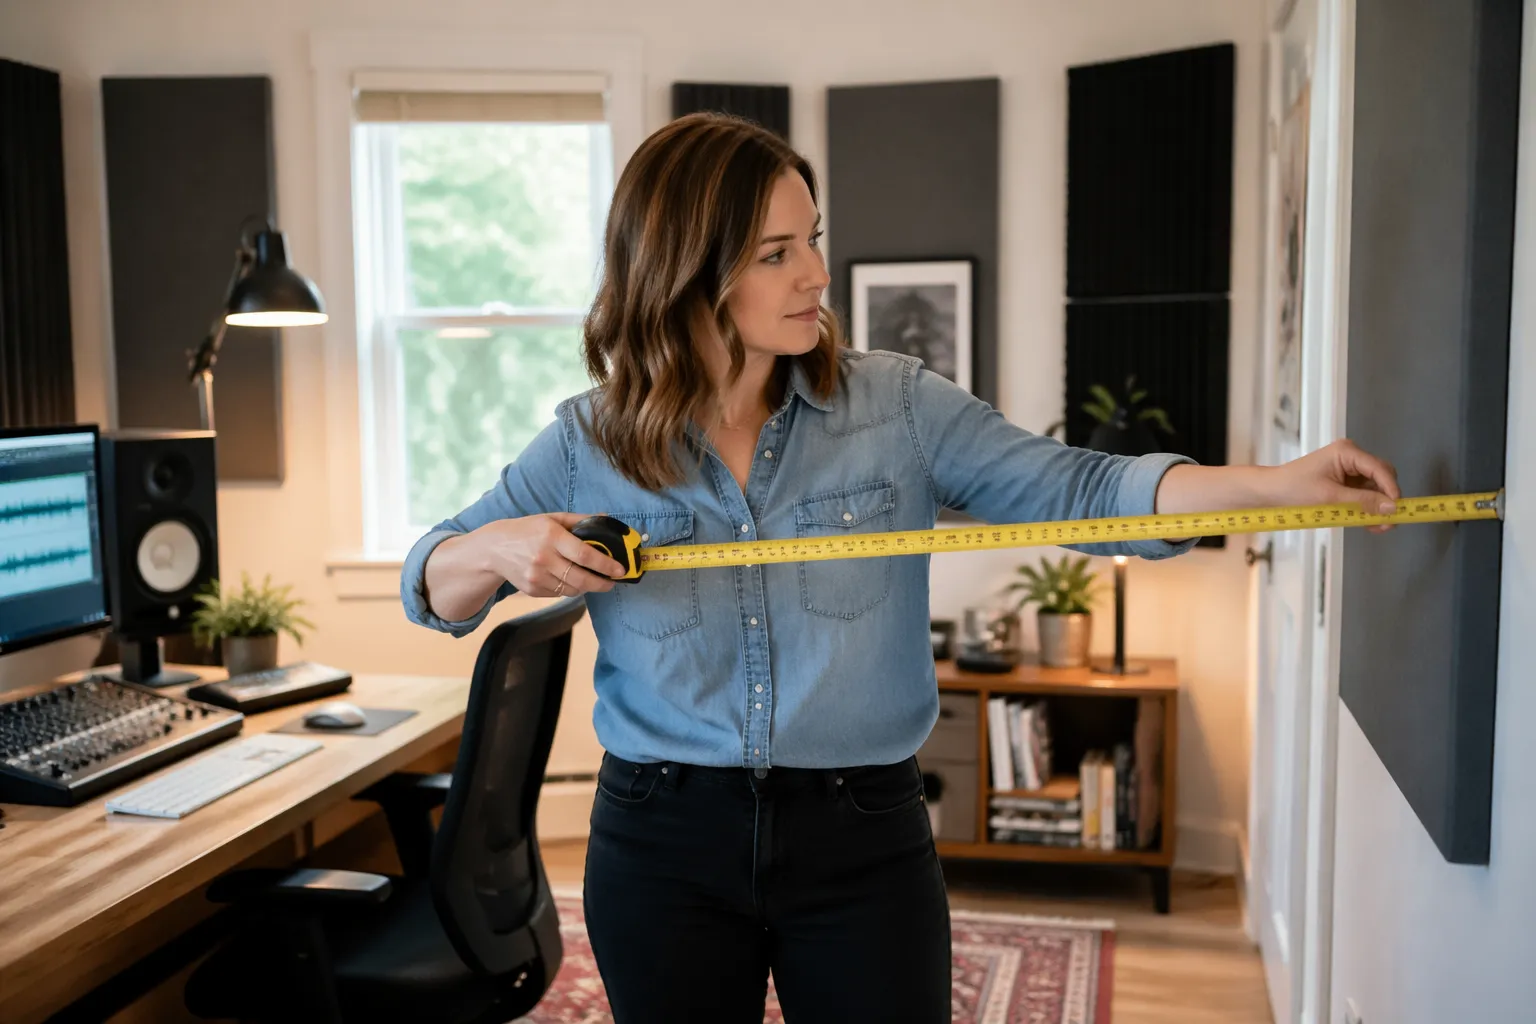
Start by drawing the room from above, even if your sketch looks rough. Put dimensions on every wall, and write them as real numbers, not “about 10 feet.”
Include the ceiling height at the front, middle, and back, because many home offices have soffits or sloped sections. Those changes affect where reflections land and where bass builds up.
Mark every fixed obstacle that forces placement decisions, like windows, radiators, built in shelves, and closet doors that must open. If you plan to keep a couch or a filing cabinet, treat it as fixed too, because it becomes part of the geometry.
Write down what each surface is made of, like drywall, exposed brick, glass, or hollow core doors. These measurement notes matter later when you decide whether a reflection is a slap off glass or a dull bounce off a bookcase.
Walk the room and listen for obvious rattles, like HVAC vents, window blinds, or a loose light fixture. A tiny buzz at 80 Hz can ruin your confidence when you start evaluating bass, so note it now.
Measure and note the size and position of the door openings, not just the doors themselves. A doorway is a big change in boundary behavior, and it can make one side of the room behave like it is “missing” a wall.
If the room is not a clean rectangle, document the weird parts with extra detail. A small alcove, a chimney bump-out, or a closet recess can act like a built-in cavity that changes what you hear at the desk.
Take photos from each corner and from the center of each wall, then label them in your notes. When you start moving furniture, those photos help you remember what was truly fixed and what was just “there for now.”
Note where power outlets, Ethernet jacks, and cable routes are located, because they quietly dictate where your desk wants to live. A layout that ignores power often turns into extension-cord spaghetti that forces last-minute compromises.
Write down what is on the floor, because carpet, hardwood, and rugs change the balance of high frequency reflections. Even if you plan to add a rug later, you want a baseline description of what the room is doing today.
Check whether any walls are shared with loud neighbors or a busy hallway, and note the direction of the noise. Sound isolation is a different topic, but your geometry choices can still help by keeping your listening position away from the noisiest boundary.
Do a quick clap test and write down what you hear in plain language, like “ringy,” “flutter,” or “dead.” You are not trying to diagnose everything by ear, but you are building a record you can compare after layout changes.
If the room has a closet, decide whether it will stay open, stay closed, or change depending on the day. That decision matters because an open closet can act like a crude absorber, while a closed hollow door can act like a reflector.
Finally, label the walls in your sketch as front, back, left, and right based on where you think the desk might go. This keeps your measurement notes consistent when you start testing orientations.
Step 2: Choose orientation and establish a center line
Pick which wall you will face, because orientation decides almost everything that follows. In many rooms, firing speakers down the longer dimension gives smoother low end and a wider working area behind you.
Symmetry is your friend, and fake symmetry is still better than none. If one side wall is a window and the other is a solid wall, you can still aim for equal distances to the nearest big boundaries.
Snap a center line with painter’s tape from the front wall to the back wall. This line is the anchor for your placement priorities, because it keeps your desk and monitors from drifting left over time.
Do a quick sanity check for daily life, like whether you can roll your chair back without hitting a bed frame or whether the door smacks into your speaker stand. A home office studio has to function as an office, or you will “temporarily” move things and never move them back.
If you have only one workable wall because of a window view or built in cabinetry, accept it and document the compromise. The checklist is not about perfection, it is about knowing why you chose what you chose.
Try to avoid aiming your speakers directly at a large glass surface if you have another option. A big window in front of you can create a hard, bright return that makes your top end decisions feel unstable.
Also avoid aiming your speakers across a hallway opening if the other direction is more closed in. An asymmetrical opening can pull the stereo image and make the low end feel different on the left and right.
When you choose an orientation, write down what you are optimizing for, like “best symmetry,” “best cable access,” or “best camera background.” Those priorities matter because you will be tempted to change the layout later when something else becomes annoying.
Stand at the center line and look for visual alignment cues, like ceiling lights, floorboards, or a window frame. These cues make it easier to keep the desk centered without measuring every time you bump it.
If the room has a sloped ceiling, test which direction keeps the slope left-right symmetrical around the center line. A slope that is higher on one side than the other can behave like a permanent imbalance you cannot fully fix with EQ.
Consider where the camera goes if you take video calls or record content, because you do not want to rotate the whole studio later for a better background. A layout that works for audio and daily work is more likely to stay intact.
Check that the center line does not run directly into a ceiling fan or a hanging light that forces you to place the desk off-center. If it does, note it and plan for a small offset that you can keep consistent.
Once you have a candidate orientation, sit in the room and imagine a full workday, not just a mix session. If the layout makes you feel cramped or boxed in, you will unconsciously shift things until the geometry falls apart.
Do a quick test by playing pink noise through a small speaker and walking left and right around the center line. You are listening for obvious “one side is louder” behavior that hints your orientation is fighting the room.
Step 3: Set listening position and speaker triangle
Set your listening position before you obsess over monitors, because the seat is where the room “adds” and “subtracts” bass. A common starting point is placing your ears about 38 percent of the room length from the front wall, then adjusting based on what the room does.
Build an equilateral triangle between your head and the two speakers, then keep it practical for desk work. If the triangle forces the speakers to sit on the desk and reflect off it, consider stands behind the desk or isolation risers to reduce that bounce.
Start with the speakers at ear height, with tweeters aimed at your ears unless the manufacturer suggests otherwise. If your speakers are below ear level because of screen height, tilt them up rather than accepting a downward firing angle.
Keep the left and right speakers the same distance from the front wall, even if the room is imperfect. Small mismatches here can create a lopsided low end that tricks you into panning and EQ moves you do not need.
Write down your chair’s normal position, including how far it slides when you lean back. If your head moves a foot during the day, your “reference” is not a point, it is a range you should account for.
Pay attention to the height of your ears when you are actually working, not when you sit up straight for a measurement. A relaxed posture is the one you will use for hours, so measure that and treat it as your real listening height.
Keep your monitors away from the exact midpoint between floor and ceiling if you can, because that position can line up with strong vertical modes. A small height change can sometimes clean up the low mid without any treatment.
If your desk forces the speakers to be wider than you want, bring the listening position forward rather than widening the triangle too much. A triangle that is too wide can make the center image feel hollow and make vocal placement harder.
Do a quick mono test with a familiar vocal track and listen for a solid phantom center. If the center image feels vague, re-check symmetry and toe-in before you assume the room needs panels.
Keep the speakers a reasonable distance from the front wall, but do not treat any single number as magic. Your goal is to find a spot where the low end is usable and the desk workflow still feels natural.
If you have rear-ported speakers, note the port direction and how close it is to the wall. A rear port too close to the wall can exaggerate certain bass notes and make your kick drum decisions feel random.
Make sure both speakers are level and stable, because a tiny tilt or wobble can change what you hear more than you expect. A speaker that slowly rotates over time is a stealth geometry problem, not a “my ears are weird today” problem.
When you find a good starting triangle, mark the speaker positions with tape and label them L and R. This prevents accidental swapping during cleaning or cable changes, which can mess with your reference if the speakers are not perfectly identical.
Do not forget the computer screen, because a large display between the speakers can cause reflections and a slight center smear. If the screen must be there, keep it as low as practical and avoid angling it like a reflector pointed at your face.
| Item to set | Starting target | Measurement notes to record |
|---|---|---|
| Ear position from front wall | About 38% of room length | Distance in inches, plus any seat travel range |
| Speaker to speaker distance | Same as speaker to ear distance | Center to center distance, and tweeter height |
| Speaker distance to side walls | Equal left and right | Nearest boundary distance for each speaker |
| Speaker distance to front wall | Start 8 to 24 inches out | Front baffle to wall distance, and port direction |
| Toe in angle | Aim at ears or slightly behind | Angle estimate, plus where the phantom center locks |
Use the table as a baseline, then add your own rows for things like desk depth and screen height. The more you can describe your setup in numbers, the easier it is to undo a bad change.
If you plan to add a sub later, leave some physical space and cable routing options now. Even if you do not place the sub yet, you do not want the desk layout to block every reasonable sub location.
Keep a short list of reference tracks and use them every time you move the triangle. Consistency matters more than perfection, because you are trying to compare changes, not audition your music library.
When you adjust toe-in, move both speakers the same amount and write down what you changed. Toe-in is easy to “eyeball,” but it is also easy to drift into a setup where left and right are not matched.
If you are using a laptop off to one side, note its position and whether it blocks a reflection path. A laptop can act like a small reflective panel that changes the upper mids more than you would expect.
Step 4: Check early reflection paths from walls and ceiling
Early reflections smear the stereo image, and they make you mix too bright or too dull depending on what your room throws back at you. You can find the main reflection points with the mirror trick, or by sliding a phone flashlight along the wall while you sit at the listening spot.
Check both side walls first, because those reflections hit fast and loud. If one side is closer than the other, your phantom center will lean, even if your speakers are perfectly level.
Do the same check on the ceiling, because a low ceiling can be a bigger problem than the side walls. If the ceiling reflection point lands right over your desk chair, plan for a cloud later, but for now just note the location.
Desk reflections matter in a home office setup workflow, since most people use a wide desk with a monitor, keyboard, and a laptop. If the speakers sit low and fire across the desk surface, you will hear a comb filtered midrange that makes vocals hard to judge.
Take measurement notes on distances from each speaker to the reflection point and back to your ears, because those path lengths explain the frequency range that gets chewed up. You do not need to calculate it perfectly, you just need enough detail to compare options when you nudge the desk forward or back.
Check the front wall reflection too, especially if the speakers are close to it. A strong front wall bounce can blur transients and make the low mid feel thicker than it really is.
Look for flutter echo between parallel surfaces like bare side walls or a wall and a closet door. If you hear a “zing” when you clap, note which direction it travels so you know which surfaces are talking to each other.
Do not ignore reflections from large furniture, like a tall cabinet beside the desk or a bookcase behind one speaker. Furniture can create a near-field reflection that is almost as strong as a wall reflection.
If one side wall is mostly glass, note whether you use curtains and whether they stay open or closed during work. A curtain is part of your geometry plan if it changes the reflection strength by a noticeable amount.
Check the reflection path off the computer screen by moving your head slightly up and down while playing speech or vocals. If the tone changes with tiny head movement, the desk and screen are likely contributing to the problem.
Mark the reflection points with small pieces of tape and label them, because you will forget which dot was which. When you later add treatment, those labels help you place panels with intent instead of guessing.
Pay attention to what is behind you, because rear wall reflections can be loud in small rooms. A hard back wall close to your chair can make reverbs feel louder than they are and can push you to mix too dry.
If you have a ceiling fan, note whether it sits near the ceiling reflection zone. A fan can add noise and also complicate mounting a cloud, so it is better to see that conflict early.
When you find a reflection point that lands on a door, note whether the door is hollow or solid and whether it rattles. Doors are sneaky because they can reflect mids and highs while also buzzing in the low end.
Try a quick test where you temporarily hang a thick blanket at one reflection point and listen again. You are not treating the room permanently yet, but you are verifying that the reflection is actually audible and worth addressing.
Keep your notes focused on what you can control, like moving the desk, raising the speakers, or rotating the setup a few degrees. If a reflection is unavoidable, you still want it documented so you stop blaming your ears for it.
Step 5: Identify bass trouble zones and seating risks
Bass problems show up as “one note” low end, missing kick drum weight, or a sub that sounds huge in one spot and dead in another. The ugly part is that bass issues can sound like your monitors are bad when the room is the real culprit.
Walk the perimeter while playing a slow sine sweep or a bass heavy track you know well. Corners and wall junctions will usually sound louder, and that is your first clue about where pressure builds.
Avoid seating with your head right against the back wall, because that spot often sits on a big bass peak and a nasty upper bass dip. If your room forces you close to the back wall, plan to leave at least a little breathing room and write down the exact distance.
Check for big nulls by moving your chair forward and back in 6 inch steps while a steady bass tone plays. When the bass drops out, mark that position on the floor tape, because you never want your main listening spot to land there.
Keep placement priorities realistic if you have a standing desk or you swap between chair heights. Your ear height changes the relationship to the floor and ceiling, so document both sitting and standing ear heights in your measurement notes.
Do a left-right check as well by moving your head a few inches toward each speaker while bass plays. If one side collapses faster than the other, it can indicate asymmetry in boundary distances or an opening that is stealing low end.
Listen for bass notes that seem to hang on longer than others, because that is often a modal ring rather than a mix issue. Write down the approximate note or frequency range if you can, even if it is just “low E feels huge.”
Pay attention to how the bass changes when the door is open versus closed. A door position can act like a crude pressure release, and it can make your low end reference inconsistent if you do not standardize it.
Check the corners behind the speakers and the corners behind your chair, because those are common pressure zones. Even if you do not treat them yet, you want to know which corners are the loudest so you do not block them with something fragile later.
If your desk is pushed into a corner, note that as a high-risk geometry choice for bass and imaging. Corner desks are convenient, but they often create uneven boundary distances that show up as lopsided low end.
Try moving the speakers a few inches forward and backward and listen for changes in kick drum punch. Small moves can shift the speaker-boundary interaction enough to turn “boomy” into “tight” without changing anything else.
If you have a couch or large chair in the room, note where it sits relative to the back wall. Big soft furniture can help a little in the midrange while doing almost nothing for deep bass, so do not assume it solves low end problems.
Document where you store heavy items like boxes of books or a full file cabinet. Dense objects can change how the room vibrates, and they can also introduce rattles if they are not stable.
Be honest about noise sources like a fridge in a garage studio or a loud PC fan under the desk. Low frequency noise can mask bass detail and make you chase “missing low end” that is actually being covered up.
If you use headphones for part of your workflow, still do the bass walk test because it informs where the desk should not be. A stable room layout helps even if you only use speakers for checking and not for full mixes.
When you are done, summarize your bass notes in one sentence, like “big corner buildup, null at 4 feet from front wall.” That summary becomes your quick reference when you later decide where bass traps are worth the money.
Step 6: Lock the layout before adding treatment or gear
This is the step people skip, and it is why they end up with random panels and a desk that slowly creeps into a corner. Once the geometry works, you can buy treatment with confidence because you know what problem you are solving.
Use tape marks for desk corners, stand feet, and chair position, then live with it for a week. If you keep stepping around a stand or you hate where the webcam sits, change the layout now, not after you mount panels.
Locking the layout also means locking your habits, like where you place your keyboard, mouse, and notepad. If your workflow forces you to twist sideways all day, you will end up rotating your chair and breaking your listening position without realizing it.
Make sure your cable management supports the layout instead of pulling it out of alignment. A tight power cord can slowly drag a speaker stand a half inch, and that half inch can be audible in the stereo image.
Check that your screen height and mic boom do not force the speakers into awkward positions. A mic arm that blocks a tweeter is a geometry problem disguised as a “recording accessory.”
Decide where your printer, scanner, or other office gear lives so it does not creep into reflection zones. Home office studios fail when the room becomes a storage space and the listening area becomes an afterthought.
Do a final measurement pass and confirm that left and right distances still match after you tidy the room. It is easy to set a perfect triangle and then ruin it by centering the desk visually instead of geometrically.
Write down a “reset procedure” you can do in two minutes, like aligning stands to tape and centering the chair on a mark. When life happens and the room gets bumped, you want a fast way to get back to your reference.
If you share the room with another person or use it for guests, decide what can move and what cannot. A layout that depends on everyone being careful is not a layout, it is a temporary arrangement.
Once the layout is stable, you can start thinking about treatment in a targeted way, like first reflections and bass corners. Treatment works best when it supports a good geometry plan rather than trying to rescue a bad one.
- Tape the room center line and desk center
- Mark speaker stand footprints on the floor
- Record ear height, sitting and standing
- Confirm door swing and chair clearance
- Note reflection points on side walls and ceiling
- Mark bass null spots found during sweeps
- Photograph the final layout from each corner
Add a date to your photos and notes so you can track what changed over time. This sounds obsessive, but it is the easiest way to connect a “mixes started translating better” moment to a specific layout decision.
If you plan to upgrade monitors later, keep the same geometry and swap one variable at a time. A stable layout lets you evaluate new gear without confusing “new speaker sound” with “new placement mistake.”
Do a final comfort check, because pain and fatigue will change how you listen. A chair that forces you to lean forward all day will move your ears out of the triangle, and your measurement notes will no longer match reality.
When you are confident, stop moving things and start working. The goal of the checklist is to get you to a repeatable baseline, not to keep you in endless setup mode.
Conclusion
A room geometry checklist for a new home office studio is boring in the best way, because it prevents expensive mistakes. If you document the room, choose a sane orientation, and lock your listening triangle, you set yourself up for treatment that actually works.
Keep your setup workflow simple, and treat your measurement notes like a living document you can revisit after each change. When placement priorities stay consistent, you stop second guessing mixes and start trusting what you hear.
The win is not a perfect room, it is a predictable room that lets you make decisions faster. Predictability is what makes your mixes translate and your workdays feel less like troubleshooting.
When you do add panels, bass traps, or new furniture, you will know exactly why you are adding them and where they should go. That is how a small home office studio becomes a reliable tool instead of a constant project.