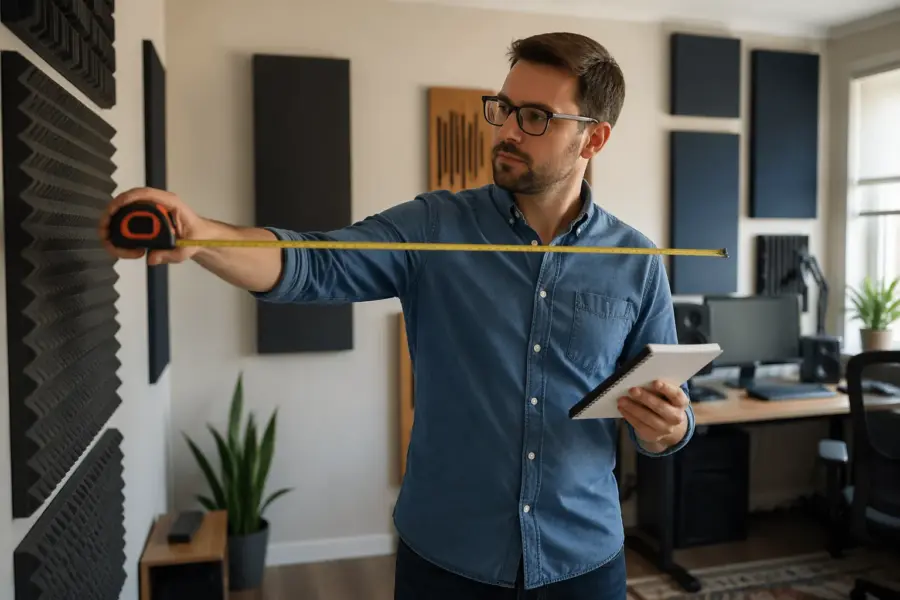
If you want your home office to sound decent on calls or for music work, you start with a tape measure, not foam. The whole point of how to measure a room for acoustic planning is to stop guessing and start making choices that fit your actual geometry.
Room dimensions decide where low frequency problems stack up, where reflections bounce, and where treatment will do the most work. If you measure sloppily, you end up buying panels that do not land where the sound problems are.
I have seen people spend real money on acoustic panels, then discover the desk could never be centered because of a door swing or a radiator. A clean set of measurements, including ceiling height, saves you from that kind of redo.
You do not need fancy tools, but you do need a repeatable method and a room sketch you can read later. This article focuses on the dimensions that matter for placement, symmetry, and basic treatment planning.
Even if you are not building a studio, the same physics shows up in a spare bedroom office and a living room corner setup. Measuring well is how you turn acoustic advice into something that fits your specific space instead of a generic checklist.
It also helps you avoid the common trap of treating symptoms while the layout causes the problem. A few minutes with a tape can save you weeks of moving panels around and wondering why nothing changes.
What measurements you actually need for geometry decisions
For acoustic planning, the big three are length, width, and ceiling height measured between hard boundaries. Those numbers drive speaker placement, listening position, and which room modes are likely to be annoying.
It is important that these are finished interior dimensions, not what the real estate listing says or what the floor plan claims. A room that is marketed as 12 by 10 can easily be 11 feet 7 inches by 9 feet 8 inches once you measure the actual drywall planes.

You also need the locations and sizes of openings like doors, windows, and pass throughs because they break symmetry and change reflection paths. If you ignore them, your plan will look great on paper and fail in the real room.
Openings also affect how enclosed the room behaves, especially in the low end where sound leaks through gaps and open arches. A room with a big open doorway to a hallway will not build bass the same way as a room with a sealed solid-core door.
Measure any built ins that change the wall shape, like a closet bump out, a chimney chase, or a soffit around ductwork. These details matter because they create early reflections and can steal space from bass traps.
Even small protrusions can matter if they sit right where you want to mount a panel or if they force your desk off center. A two inch pipe chase can be the difference between a flush-mounted absorber and a panel that has to float awkwardly on brackets.
Finally, note where your desk, shelves, and large furniture must stay, because they become part of the acoustic reality. A room that is technically 12 by 10 is not functionally 12 by 10 if a wardrobe eats two feet of one wall.
If you are sharing the room with a bed, a treadmill, or storage, treat those as fixed constraints until you know otherwise. Acoustic planning goes smoother when you accept the non-negotiables up front and plan treatment around them.
Do not forget outlets, vents, and thermostat locations, because they can dictate where a panel can safely sit. You may not need millimeter precision, but you do need enough detail to avoid covering something you still need to access daily.
It also helps to note the construction type if you know it, like plaster, drywall, or concrete, because it changes how reflective the boundaries are. You can still plan with just geometry, but surface type explains why two rooms with the same dimensions can feel very different.
Measuring length, width, and height in real rooms
Start by measuring the longest uninterrupted distance between two opposing walls at floor level, then repeat at about chest height. If those numbers differ, your walls are not parallel or something is bowing, and you should write both down.
Chest height is a useful reference because it is closer to where your ears and speakers live. A room that pinches in at the top can change reflection timing and can make symmetry harder than it looks from the floor plan.
Do the same for the other direction, and label them clearly as length and width based on how you expect to face your desk and speakers. Swapping labels later is an easy way to misplace everything in your setup plan.
If you are undecided about which wall you will face, still pick a temporary label so your notes stay coherent. You can always rename the walls later, but you cannot fix a notebook full of unlabeled numbers.
For ceiling height, measure from finished floor to finished ceiling in at least two spots, especially if the floor slopes or the ceiling has a drop section. Ceiling height changes how strong the floor to ceiling bounce is, and it affects whether a ceiling cloud will fit comfortably.
If you have a ceiling fan, pendant light, or sprinkler head, measure how low it hangs as well. That clearance is what decides whether a cloud can be centered or whether it has to shift to one side to avoid a collision.
Use measurement tips that prevent drift, like hooking the tape on a corner and pulling tight in a straight line instead of following baseboard curves. If you use a laser, verify one dimension with a physical tape because lasers can lie when you hit trim or textured surfaces.
When you measure alone, a cheap spring clamp or painter’s tape can hold the end of the tape measure in place. The goal is not speed, but repeatability, because repeatability is what makes the sketch trustworthy.
Measure in one unit system for the whole project, even if you think in both feet and inches. If you must convert, do it later in a clean table so you do not mix 10.5 feet with 10 feet 5 inches in the same drawing.
If the room has thick carpet or a rug over pad, note that too, because it changes the finished floor reference slightly. It will not make or break your plan, but it can matter when you are trying to fit a door sweep or a rolling chair mat.
Take at least one diagonal measurement corner to corner to check if the room is square. If the diagonals differ, your sketch should reflect that the room is slightly skewed, which can explain why a centered desk still feels off.
Capturing alcoves, soffits, and openings accurately
Once you have the basic rectangle, go back and measure anything that breaks it, including alcoves, closets, and wall jogs. Treat each odd shape like a mini rectangle and record its width, depth, and height if it changes.
It helps to walk the perimeter in one direction and measure features in the order you encounter them. That way your notes read like a map instead of a random list of numbers.
Openings need location as well as size, so measure from the nearest corner to the opening edge, then measure the opening itself. That extra step is what lets you recreate the room in a room sketch without eyeballing.
For doors, measure both the rough opening and the actual door slab if you can, because the swing arc is what steals usable space. A door that opens into the room can block a corner trap even if the opening itself is not near the corner.
For windows, measure the trim-to-trim opening, the glass area, and the sill height from the floor. Sill height matters because it affects where a side-wall panel can sit without covering the window or looking awkward.
If you have a radiator under a window, measure its height and how far it sticks out from the wall. That projection often forces panels to mount higher or to use a freestanding absorber instead of something fixed.
Soffits deserve extra attention because they can hide ductwork and create asymmetry you do not notice at first glance. Measure the soffit drop, the soffit width, and where it starts and stops along the wall.
Closets are tricky because they look like part of the wall until you open the doors and realize the corner is not usable. Measure closet door swing and track depth so you do not plan a trap that blocks access.
If the room opens into another space with no door, treat that like a large opening and measure it the same way. That opening can be your friend for bass, but it can also ruin symmetry if it sits on only one side of your listening position.
| Feature to measure | What to record | Why it matters |
|---|---|---|
| Door opening | Width, height, hinge side, distance from corner | Controls symmetry and panel placement near first reflections |
| Window | Width, height, sill height, distance from corner | Glass reflections, curtain options, and mic placement decisions |
| Alcove or closet recess | Width, depth, and height if it is partial height | Changes boundary conditions and can act like a bass pocket |
| Soffit or bulkhead | Drop depth, horizontal span, and distance from walls | Limits ceiling cloud size and changes ceiling reflection angles |
| Pass through or open arch | Opening size and distance from corners | Leaks low end and changes decay time compared to a closed wall |
After you fill a table like this, scan it for anything you did not measure the location of. The location is what makes the feature usable in a sketch, and without it you end up guessing where it sits.
If you have irregular shapes like angled walls or a bay window, break them into segments and measure each segment length. You can approximate angles later, but you cannot invent segment lengths you never recorded.
When a wall has multiple features, measure from the same reference corner for all of them. Switching reference points mid-wall is how you accidentally place a window on top of a door in your drawing.
Do a quick sanity check by adding up segments along a wall and comparing them to the full wall length you measured earlier. If the numbers do not match within a small margin, you missed a trim thickness or wrote something down wrong.
Making a simple room sketch you can use later
A room sketch does not need to look like an architect drew it, but it must be readable six months from now. Use graph paper or a notes app grid, pick a scale like 1 square equals 6 inches, and stick to it.
If you prefer digital, a simple rectangle tool in a drawing app is enough as long as you can label lengths. The key is that your sketch can be edited when you change furniture, not that it looks pretty.
Draw the outer perimeter first, then add every jog, alcove, and opening using the corner offsets you measured. If you cannot place a door on the drawing using your numbers, that is a sign you missed a dimension.
Keep door swings on the sketch, because they show you where you cannot place a stand or a thick trap. A door swing arc is also a quick reminder that you need clearance for daily life, not just for sound.
Label each wall with a name like North, South, East, and West, even if you never use a compass. That naming makes it easier to talk about treatment and to keep measurement tips consistent across revisions.
Once the walls are labeled, write the measured lengths directly on the corresponding wall lines. When you later calculate speaker spacing or panel widths, you will not have to hunt through notes to find the basic numbers.
Add fixed objects you cannot move, like radiators, built in shelves, or a ceiling fan, and note their rough size. Those items become constraints on where a mic stand goes and where a ceiling cloud can hang.
If you have HVAC vents, mark them too, because you do not want to block airflow with a thick absorber. A vent location can also influence mic placement if the airflow noise is audible during recordings or calls.
Include the location of power outlets and data ports if you are planning a desk setup with monitors and an interface. Cable routing is not acoustic treatment, but it affects where the desk can realistically sit.
Take a photo of the sketch once it is complete and store it with your room photos. A sketch that lives only on a scrap of paper tends to disappear right when you are ready to buy panels.
If you are planning more than one layout, make copies of the sketch and draw on the copies instead of erasing the original. Having a clean baseline drawing makes it easier to compare options without confusing yourself.
When you mark potential treatment, use simple symbols like rectangles for panels and triangles for corner traps. You want the sketch to communicate intent quickly, not to become a dense technical diagram.
Noting problem surfaces: glass, bare walls, and corners
Measurements alone do not tell you where the room will sound sharp or boxy, so you also need a quick surface inventory. Write down where you have glass, tile, exposed drywall, and any big empty wall that faces your desk.
This is where you stop thinking only in feet and start thinking in reflection strength. Two walls can be the same size, but one might be covered in bookshelves and the other might be a bare painted surface that acts like a mirror for mid and high frequencies.
Glass is usually the worst offender in a home office because it throws bright reflections right back at your ears and microphone. Measure the window area so you can estimate how much coverage you need from curtains, shades, or movable panels.
Also note whether the window is single pane, double pane, or has a deep recess, because that changes how it reflects and how easy it is to hang a curtain close to the glass. A deep window recess can act like a small cavity that adds its own coloration when you speak near it.
Corner notes matter because corners are where bass builds up, and bass traps need clear space. Mark every vertical corner, plus wall to ceiling corners if you have crown molding or a soffit that blocks mounting.
If a corner is blocked by furniture, note whether that furniture is permanent or flexible. A tall bookcase can sometimes act like partial treatment, but it can also prevent you from placing the one trap that would have helped the most.
Bare parallel walls create flutter echo, and you can often hear it with a quick clap test while standing where you work. When you hear that zing, mark those two opposing surfaces on your room sketch so you remember to break them up later.
Do the clap test in a few positions, not just in the center of the room, because flutter can be stronger in one zone than another. A hallway-like section near a closet can ring even if the main listening area feels fine.
Hard floors like wood or tile change the balance of reflections, especially if you sit close to the floor bounce path between speakers and ears. Note whether you have a rug and how large it is, because a small rug under the desk does not behave like wall-to-wall carpet.
Large empty wall areas behind you are worth flagging because they often create a strong slapback into the mic on calls. If you can measure how much uninterrupted wall you have, you can estimate whether one wide absorber or two narrower panels make more sense.
If you have a big whiteboard, TV, or framed glass art, treat it like a window for reflection purposes. Measure it and mark it, because those surfaces can be exactly at ear height and surprisingly destructive to clarity.
Finally, note any rattles or buzzing objects like loose vent grilles or picture frames, because they show up once you improve the room and start listening more critically. This is not a measurement in inches, but it is still part of planning a room that behaves.
Measurement tips that prevent common planning mistakes
The easiest mistake is measuring to trim instead of the real boundary, so decide what counts and be consistent. For acoustic geometry, I measure to the drywall plane, then separately note baseboard depth if it will interfere with panel mounting.
If you cannot easily find the drywall plane because of thick trim, measure to the trim and record the trim thickness next to it. That way you can back out the true boundary later without re-measuring the whole room.
Write measurements immediately, and include units every time, because you will forget what that lonely number meant. If you bounce between inches and feet, you will eventually place a door three feet wide on paper and wonder why nothing fits.
I also like to write measurements in a consistent format, like feet-inches, even if the inches are zero. Consistency makes errors stand out, because a random “96” looks suspicious next to “8-0” even if they are the same dimension.
Repeat important measurements at least once, especially the wall you plan to face and the distance between side walls. A second pass catches the classic mistake of measuring to the edge of a baseboard on one side and to the drywall on the other.
When you hit an obstacle like a couch you cannot move, measure around it using two shorter measurements and add them. It is better to have two accurate segments than one guessed long run that you could not pull straight.
If you are using a laser, keep it level and aim for a flat surface, not a shiny one. A laser dot on glass or glossy paint can scatter and make it look like you hit the wall when you actually hit the trim.
Take photos with the tape measure in frame for the weird areas, like a soffit drop or an alcove depth. That photo becomes a backup record when you later wonder whether you wrote 14 inches or 41 inches.
- Measure each main wall in two heights, floor and chest level
- Record corner to opening offsets before opening size
- Note ceiling height at two points, especially near windows
- Mark which way doors swing and where handles land
- Photograph each wall straight on for later reference
- Circle any spot where a tape could not pull straight
After you finish, do a quick “walkthrough” with your notes and confirm every wall has a length, every opening has a size, and every opening has a location. This checklist mindset is what turns measuring from a chore into a reliable input for planning.
Store your measurements in more than one place, like a notebook plus a photo of the notebook page. Losing measurements is not tragic, but re-measuring is the kind of friction that makes people abandon the planning step entirely.
If you share the room, write down what changes day to day, like a rolling chair, a movable lamp, or a folding table. Those moving items can change reflections enough that you want a plan that still works when the room is in its normal lived-in state.
When you are unsure about a number, mark it with a question mark and recheck it before you commit to buying anything. A single wrong dimension can cascade into a layout that forces asymmetry you could have avoided.
Turning measurements into a basic setup plan
Once you know the true length, width, and ceiling height, pick the wall you will face based on symmetry and practical constraints. In most small rooms, placing the desk on the short wall gives you more distance behind you, which usually helps with low frequency behavior.
That extra distance behind you gives reflections and bass pressure more room to spread out before they come back to the listening position. It also tends to make speaker placement easier because you can keep the speakers away from the side walls while staying centered.
Use your sketch to find a centered position on that front wall, then check whether doors, windows, or alcoves ruin left right balance. If they do, you can still work, but you should plan for extra absorption or diffusion on the more reflective side.
Sometimes the best compromise is not perfect symmetry, but predictable symmetry, where the big reflective surfaces are at least similar in distance. Your measurements help you see whether you are dealing with a small mismatch or a major imbalance.
Mark an initial listening position using a simple fraction of room length, like starting around 38 percent from the front wall, then adjust later with measurements and listening. This is not magic, but it is a reasonable starting point that keeps you away from the worst front to back nulls.
Use the measured room length, not a rounded number, when you place that starting point on the sketch. A few inches can matter when the room is small, especially if you are trying to avoid sitting with your head near the exact center of the room.
Now place speakers and a microphone zone on the sketch, leaving space for stands, cable runs, and a chair that can roll back. If the drawing looks cramped, that is your cue to scale down monitor size, change desk depth, or rethink the facing wall before you buy treatment.
Also mark where your camera is for video calls, because that can influence where you want treatment to be visible or hidden. A great sounding setup that looks messy on camera can be frustrating if you are on calls all day.
If you record voice, mark a standing position too, because standing changes ear height and the reflection pattern. You do not need a second room plan, but you do want to know whether your standing spot is right next to a bare wall or window.
Consider traffic flow in the room by drawing a simple path from the door to the desk and to any storage you use. If treatment blocks the path, it will get moved, and a plan that gets moved is a plan that stops working.
Finally, write down the constraints you discovered, like “desk cannot move left because door hits chair” or “right wall has window, left wall is solid.” Those notes become your decision log when you later wonder why you chose an imperfect layout.
Using dimensions to estimate first reflection points
You can get a rough first reflection plan with nothing more than your measurements and a little geometry. The reflection points on side walls depend on the speaker to ear path, so your speaker spacing and sitting distance should appear on the sketch.
This is why it helps to measure desk depth and the distance from the front wall to the front edge of the desk. If the desk forces the speakers forward or backward, your reflection points move with them.
In practice, I like to mark a likely speaker position, then draw straight lines to the listening spot and mirror them across each side wall. Where those mirrored lines hit is where a panel often pays off, and it is why accurate room dimensions matter.
If you do not want to draw mirrored lines, you can still use the sketch to estimate whether the reflection points land on a window, a door, or a clear wall section. That simple check prevents you from buying a panel that has nowhere sensible to go.
Ceiling reflections depend heavily on ceiling height and the height of your ears when seated. If your ceiling is low, a ceiling cloud becomes less optional, and you should measure how far down you can hang it without feeling like it is in your face.
Measure your seated ear height once, because most people guess wrong by several inches. That number helps you estimate the reflection path and also helps you place panels so they cover the right vertical band on the wall.
Front wall reflections can matter too, especially if your speakers are close to the wall behind them. Measure how far the speakers will sit from the front wall so you can decide whether you need absorption there or whether spacing alone is enough.
Rear wall reflections are often the most obvious on voice and on claps, because they come back as a distinct slap if the wall is close. Your room length measurement tells you whether you are dealing with a tight rear wall problem or a more manageable distance.
Do not overthink the math at this stage, because furniture and real world constraints will move things around. The goal is to use how to measure a room for acoustic planning to narrow down where treatment will likely land, not to produce a perfect simulation.
Once you have a rough plan, you can validate it later with the mirror trick on the actual walls or with a quick measurement microphone test. The measurements get you close enough that those validation steps are fast instead of a full restart.
If you plan to use thicker panels, remember to account for their thickness in the sketch so you know how far they protrude into the room. In a small office, a four inch panel plus an air gap can affect door clearance and chair movement.
Also consider the height of wall-mounted panels relative to the desk and monitors, because the desk itself creates reflections. Measuring desk height and monitor height helps you avoid placing a panel so low that it mostly treats your knees.
Planning for bass trapping with real corner and soffit data
Bass traps want corners, but real rooms have baseboard heaters, closet doors, and weird soffits that steal those corners. Your measurements tell you which corners can take a full height trap and which need a thinner panel or a freestanding option.
It helps to rank corners by usability, like “clear,” “partially blocked,” and “blocked,” based on what you measured. That ranking keeps you from planning four identical traps when only two corners can actually accept them.
Measure the clear width across each corner, including how far trim or window casings stick out. A trap that technically fits corner to corner can still sit crooked if the molding pushes it forward on one side.
Also measure ceiling height right at the corner if there is crown molding or a ceiling transition. A trap that fits in the middle of the wall may not fit in the corner if the ceiling detail reduces clearance.
Soffits and bulkheads matter because they create extra corner volume at the wall to ceiling line, and that can be useful if you can access it. If the soffit drops 10 inches, note that depth because it may limit a thick cloud but allow a long, shallow trap along the edge.
If the soffit runs only on one side of the room, it can also create an asymmetrical bass response. Measuring its exact span helps you decide whether you should compensate with additional trapping on the opposite side.
If you plan to use freestanding traps behind the chair, measure how far the chair slides back and how much walkway you need. A plan that blocks the only path to the door will not last, even if it measures well on paper.
Rear-wall traps also need depth, so measure the distance from the back of your chair to the rear wall at your normal sitting position. If you only have a foot of clearance, you may need thinner panels or to move the listening position forward.
Do not forget wall-to-ceiling corners if you are considering long traps or “superchunk” style builds. Those runs can be very effective, but only if you measured the span and confirmed you will not hit lights, sprinklers, or vents.
If you are renting, measure where you can place traps without drilling, like corners that can accept a pressure-fit pole or a freestanding frame. Planning around your mounting limitations is part of making the setup stable and repeatable.
Finally, note any corners that are actually open because of an archway or missing wall section. An open corner behaves differently, and your measurements help you avoid wasting a trap in a spot that cannot build pressure the same way a closed corner can.
When you look at bass trapping as a space-allocation problem, the tape measure becomes the deciding tool. You are not just buying traps, you are deciding where the room can afford to give up volume for better low end control.
Conclusion
Good acoustic work starts with boring work, and measuring is the boring part that pays you back every day. When you know your length, width, ceiling height, and all the odd bumps and openings, your choices get simpler and your purchases get smarter.
Accurate measurements also make it easier to ask for help, because you can share a sketch and real numbers instead of vague descriptions. Whether you are talking to a contractor, a panel company, or a friend who knows audio, clear dimensions turn opinions into actionable advice.
Keep your room sketch, photos, and notes in one place so you can revisit them when you change desks, move speakers, or add treatment. If you follow these measurement tips and record the dimensions that matter, how to measure a room for acoustic planning becomes a quick repeatable habit instead of a one time scramble.
Once you have the habit, you can re-measure quickly after any change and keep your setup from drifting into chaos. That is the real win, because most home offices evolve over time, and good sound depends on keeping the plan aligned with the room you actually have.


