If your home office is a square, you already know the weird part, you can move the desk a foot and the bass changes like you swapped speakers. Studio geometry for a square room forces you to deal with symmetry, because the room wants to ring in the same places on both axes.
A square room can still work for mixing, but you have to stop hoping for a magic spot and start making tradeoffs on purpose. The payoff is real, because once you tame the worst low frequency behavior, your decisions translate better to cars, earbuds, and actual studios.
This article stays practical and biased toward setups you can build in a normal home office with real furniture. We will talk about modal overlap, desk placement, and bass traps without pretending you can “fix” a square with one foam kit.
Why square rooms are tricky for low frequencies
Square rooms stack the same axial modes on top of each other, so certain bass notes get louder and longer than they should. That pileup is modal overlap, and it is why kick drums can sound huge at your chair and thin two steps behind you.
In a rectangle, length and width modes land on different frequencies, so the peaks and nulls spread out a bit. In a square, the length and width are identical, so the room “votes” twice for the same resonances.
That symmetry also makes the nulls more stubborn, because the cancellations happen in clean, repeatable stripes across the room. You can add subwoofer level all day and still not hear 70 Hz at the listening position if you are parked in a deep null.
The ceiling height still creates its own vertical modes, but the square footprint is the bigger problem for most home offices. When you read advice about “avoid squares,” this is the reason, the low end gets lumpy fast and stays lumpy without serious absorption.
Another problem is that the room tends to exaggerate the same notes across multiple instruments, so bass guitar, floor tom, and the low end of a synth can all feel like they are fighting for the exact same space. You end up EQing the mix to satisfy the room instead of the song, which is a fast way to get thin mixes everywhere else.
Square rooms also make it harder to tell the difference between “loud bass” and “long bass,” because ringing can feel like extra level. If a note hangs around for half a second longer than it should, your brain reads it as power even when the actual level is not that high.
Modal overlap is not just a single bump, it is a pattern of peaks and holes that repeats as you move. That is why you can find a spot where the kick feels perfect, then you stand up and suddenly the whole low end turns into a fog machine.
Boundary buildup is stronger in small rooms, and a square room gives you more “same distance” boundaries than you want. When the front wall, sidewalls, and corners all reinforce similar frequencies, it can feel like the room has a favorite note and it will not shut up about it.
Even if you do not make bass-heavy music, these issues show up in the low mids where warmth and punch live. If the room is lying around 120 to 200 Hz, you will struggle to place vocals, guitars, and snare body without second guessing everything.
The good news is that square-room problems are predictable, which means you can plan around them instead of treating them like random bad luck. Once you accept that the room is a system with patterns, it becomes easier to make calm, repeatable improvements.
Orientation options: facing a wall vs facing a corner
The first geometry decision is whether you face a flat wall or rotate the whole setup to face a corner. In a square, facing a wall keeps left and right boundaries identical, which is good for stereo, but it can make modal overlap more obvious because everything lines up.
Facing a corner breaks the distance symmetry to the four walls, and sometimes the bass response smooths out because the speaker to boundary path lengths are no longer equal. The downside is practical, your desk ends up diagonal, cable runs get annoying, and sidewall treatment becomes harder to place evenly.
If you work with video calls and need a clean background, facing a wall is often the only sane choice. You can still reduce the square-room penalty with bass traps and careful desk placement, but you will lean more on treatment than geometry tricks.
If you can tolerate the diagonal layout, corner-facing can be a lifesaver in very small squares where every inch matters. I have heard corner setups that measured and sounded better than the “proper” wall-facing layout, mostly because the worst peaks moved off the exact same frequencies.
When you face a wall, you also get a clearer plan for early reflection control, because the left and right mirror points are easy to find and match. That matters if you do any panning work, because uneven reflections can tilt your stereo image and make you mistrust the center.
When you face a corner, the stereo image can still be solid, but you have to work harder to keep the left and right sides feeling similar. A diagonal setup can accidentally put one speaker closer to a sidewall or a closet door, and that tiny difference can become a consistent mix bias.
A corner-facing setup also tends to put more stuff behind you, which can be good if that stuff is soft and irregular. A couch, a bookshelf, and a few thick panels behind the chair can make the rear of the room behave less like a trampoline.
One practical way to decide is to do a quick measurement sweep in both orientations before you commit to cable management and furniture. You do not need perfect data, you just want to see whether one orientation avoids a brutal null that the other one cannot escape.
If you cannot rotate the whole desk, you can still steal the idea by slightly angling the speakers or the desk a few degrees. Even a small de-correlation of boundary distances can take the edge off a single-note boom that is driving you crazy.
Also consider the door swing and daily workflow, because a setup you hate using will never stay consistent. Consistency is part of acoustics in a square room, because every time you move the desk, you reset the low end behavior you were learning.
Finding the least-bad listening position
Studio geometry for a square room is basically the art of finding a listening position that avoids the deepest nulls while keeping reflections manageable. You are not chasing perfection, you are chasing a response you can learn and trust.
Start with the classic 38 percent rule as a rough guess, but do not treat it like a law. In a square, 38 percent from the front wall can still land you in a nasty width-related null because the width and length behavior match.
Think of the listening position as a compromise between low frequency smoothness and practical ergonomics. If the best bass spot puts your chair in the middle of the doorway, it is not actually the best spot for a working room.
Move in small increments and listen for the specific notes that change, not just “more bass” or “less bass.” A square room often gives you one or two problem frequencies that dominate everything, and your goal is to make those less dramatic.
It helps to loop a simple kick and bass pattern that hits a few different notes, because a single sine wave can trick you into optimizing for one frequency. You want a position that behaves reasonably across the whole low end, not a position that flatters one note.
Do not ignore the vertical axis, because your ear height changes the relationship to the desk and the ceiling. If you switch between a tall chair and a low chair, you can accidentally change the low-mid balance and think your mix is moving around.
Keep the chair centered between the speakers, but do not assume the chair must be centered between the sidewalls. A tiny lateral offset can move you out of a null stripe without turning your stereo field into a mess, especially if your reflection control is decent.
Try to keep some space behind your head, because sitting with your ears glued to the back wall is usually a low frequency disaster. The back wall is where pressure tends to build up, and in a square room that buildup can be extra stubborn.
If the room is very small, you may have to choose between being too close to the front wall or too close to the back wall. In that case, being closer to the front wall with good front-wall treatment often feels more controllable than being pinned to the rear boundary.
Once you find a position that is not obviously broken, mark it with tape and stop “eyeballing” it. A half inch does not matter for your ego, but it can matter for repeatability when you are trying to learn what a 2 dB EQ move actually does.
| Test move | What to listen or measure for | What it usually means |
|---|---|---|
| Move chair forward 6 to 12 inches | Kick gets tighter or disappears | You crossed a length-mode peak or null |
| Move chair left or right 6 inches | Bass shifts even though speakers stay put | Width-mode null stripes are strong |
| Raise or lower ears 3 to 6 inches | Low mids change more than expected | Vertical mode or desk bounce is involved |
| Rotate setup 10 to 15 degrees | Same bass notes stop “booming” | Boundary distances de-correlated, less modal overlap |
If you have measurement tools, look for a position that reduces the depth of the worst nulls rather than the height of the biggest peaks. Peaks can be tamed with trapping and sometimes gentle EQ, but deep nulls are basically geometry problems.
Also pay attention to decay time, because a position with slightly uneven bass but faster decay can be easier to mix on than a position that looks smoother but rings forever. Long decay is what makes you under-mix bass, because the room keeps telling you the low end is already full.
When you test positions, keep the speakers fixed relative to each other and move the whole triangle if you can. If you move only the chair while leaving the speakers, you are changing multiple relationships at once and it is harder to understand what helped.
Give your ears a break between tests, because low frequency perception gets weird after a lot of looping. A square room can make you feel like you are making progress when you are really just adapting to the current problem.
Speaker spacing and wall distance in a square layout
Once the chair position is reasonable, lock the speakers to the chair, not to the walls. In a square room, small changes in speaker to front-wall distance can swing the low end because SBIR dips line up with the same modal overlap frequencies.
A common mistake is pushing the speakers far into the room to “let them breathe,” which often creates a deep cancellation in the 80 to 150 Hz range. If you cannot flush-mount, you usually do better either quite close to the front wall or clearly far away, and the “middle” distances tend to be the worst.
Keep the speaker spacing sensible, because too wide in a small square forces you close to sidewalls and raises early reflection energy. Aim for an equilateral triangle at first, then narrow slightly if your sidewalls are close and untreated.
Toe-in is your friend when the room is fighting you, because it reduces the amount of mid and high energy splashing onto the sidewalls. Strong toe-in can also stabilize the phantom center, which matters when the room symmetry tries to smear imaging.
Try to keep both speakers the same distance from the front wall, even if you are experimenting with other asymmetries. If one speaker is closer than the other, your low end can tilt left or right and make you pan bass elements to compensate without realizing it.
In a square room, it is tempting to put the speakers exactly halfway between the sidewalls because the room looks neat that way. Neat is not the goal, and a tiny change in sidewall distance can shift a reflection or SBIR interaction that is messing with your low mids.
Do not assume the speaker manufacturer’s rear-port advice solves your room, because port behavior is not the same thing as boundary interference. A rear-ported speaker can work close to a wall if the placement reduces cancellations and you control the boundary with treatment.
Stands matter more than people want to admit, because wobbly stands and resonant desks add their own fake bass. If your speakers are on the desk, decouple them and try to get the tweeters to ear height without building a little reflective tower under them.
Keep the speakers away from the exact corners unless you are doing it as a deliberate boundary-loading choice. Corners can make small monitors sound bigger, but they also make the room modes louder, and in a square you do not need extra encouragement.
If you use a subwoofer, placement becomes its own mini-project, because the sub interacts with the same modal overlap issues. A sub can help if it lets you place low frequencies where the room behaves better, but it can also make the worst note even worse if you drop it in the wrong spot.
When you adjust speaker distance, do it in repeatable increments and re-check your listening position each time. In a square room, you can “fix” one dip and accidentally create another dip at a nearby frequency, so you want to know what changed and why.
Desk placement: don’t let the furniture ruin the geometry
Desk placement sounds like a comfort issue, but it is an acoustic issue because the desk is a big reflective surface at exactly the wrong distance. If the desk is too deep or too high, you get comb filtering in the upper bass and low mids, and it can make vocals and snares sound hollow.
Keep the desk as low and as shallow as your workflow allows, and avoid tall racks right between you and the speakers. A big display can be fine, but stacking a laptop on a stand in front of the screen often creates a little reflector right in the tweeter path.
In a square room, people often center the desk perfectly because it looks right, and then they wonder why the bass is weird. Centering can put your ears on the exact symmetry line where left and right cancellations match, so a small offset of a couple inches can sometimes help without breaking stereo.
If you have to put the desk against a wall, do it intentionally and measure the result, because “against the wall” can be better than “halfway out” with SBIR. The big win is consistency, once you pick a layout, stop nudging things weekly and learn the room you built.
Watch what happens when the desk forces the speakers too wide, because that can push them closer to sidewalls and turn reflections into a bigger problem than they need to be. Sometimes a smaller desk or a keyboard tray is an acoustic upgrade, not just a space saver.
Try to keep the front edge of the desk from lining up exactly with the speaker baffles, because that can create a strong reflection path back to your ears. Pulling the speakers slightly forward so the baffles are closer to the desk edge can reduce that bounce.
Monitor placement relative to the desk also affects how much low-mid energy gets trapped between the desk surface and the front wall. If you can get a little air gap and avoid creating a tight cavity, you often get a cleaner 150 to 300 Hz region.
Keep clutter under control, because random objects on the desk can act like tiny reflectors and diffusers in the most annoying frequency range. A clean desk is not about aesthetics, it is about removing variables when you are trying to hear small changes.
If you have a big audio interface, a controller, or a mixer, try to keep it low and angled rather than tall and vertical. A vertical surface between you and the speakers is basically a reflection generator with a convenient knob layout.
Do not forget the chair, because a high-backed chair can reflect mids right back at your ears. If your chair has a tall hard back, throwing a blanket over it while mixing can be a surprisingly audible improvement.
If you are using dual monitors or a TV as a screen, consider pulling them slightly back so they are not directly between the speakers and your head. Screens are reflective, and in a square room you are already fighting enough symmetry without adding a glass mirror in the center.
Once the desk is in place, resist the urge to push it forward for leg room and then pull it back for “sound” every few days. Pick a position that works for your body and your ears, then solve the remaining issues with treatment and habits.
Using furniture and treatment to break symmetry problems
A square room punishes perfect symmetry, so you want controlled symmetry at the listening zone and broken symmetry elsewhere. That means you keep left and right reflection points similar, but you do not keep every surface and corner equally bare.
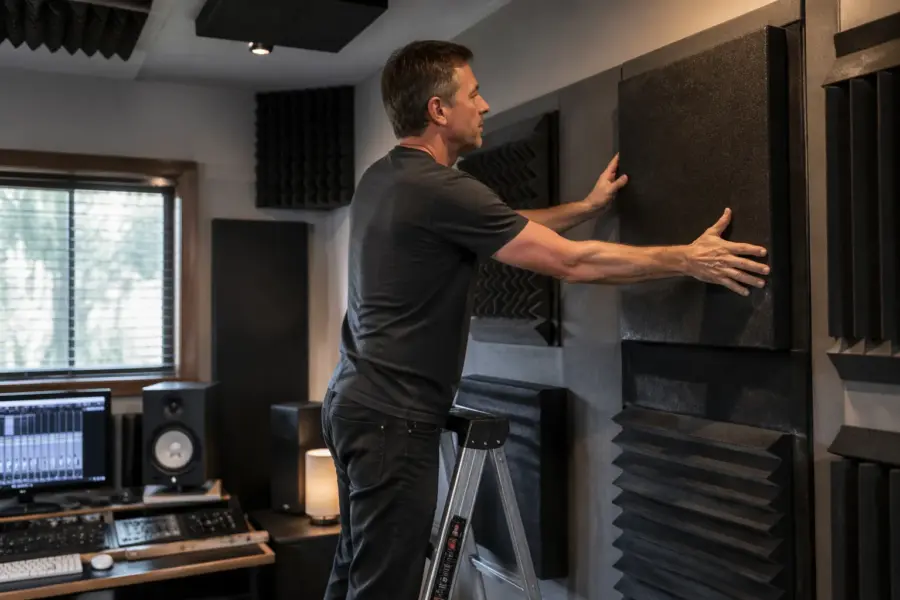
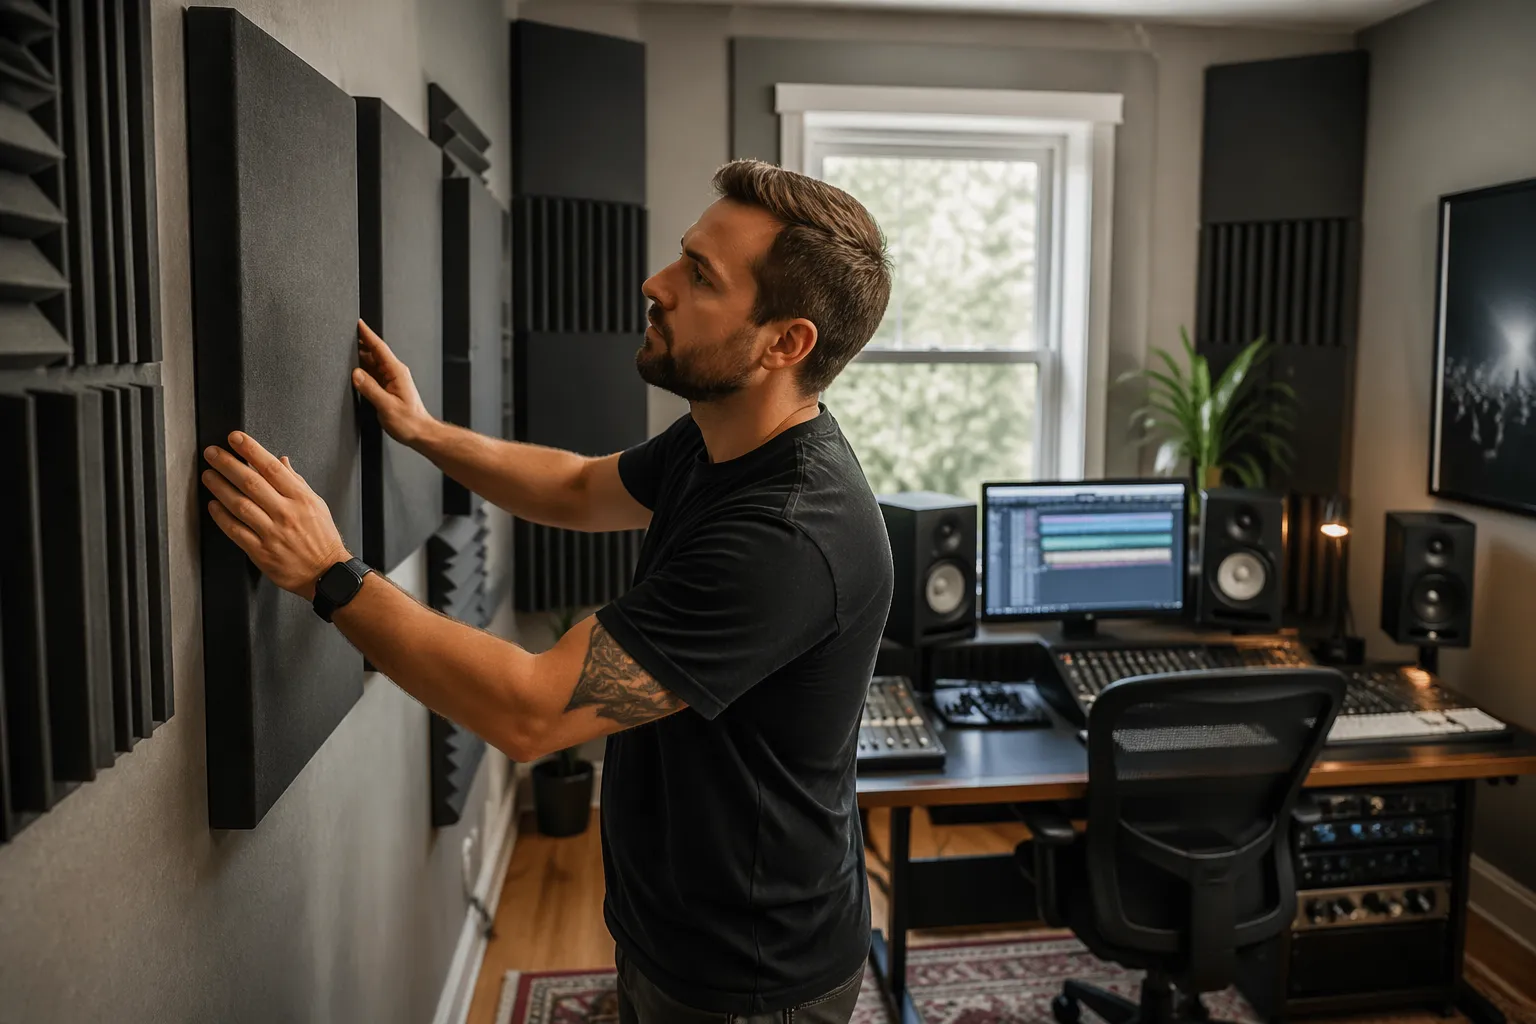
Bass traps do the heavy lifting, and in a square they are not optional if you care about low end decisions. Put thick traps in as many vertical corners as possible, then add wall-ceiling corners if you can, because modal overlap stores a lot of energy in boundaries.
First reflection panels on the sidewalls and ceiling are still worth doing, even if the low end is the main headache. They stop the room from adding a bright, phasey layer on top of your monitors, which makes you chase EQ moves that were never in the track.
Furniture can help if you use it like an adult, not like a superstition. A full bookshelf on one rear wall, a couch or thick chair on the back half, and a slightly irregular layout can reduce flutter and make the decay less “square,” even before you hang a panel.
Think in terms of surfaces and volumes, because big soft volumes absorb and big hard surfaces reflect. A packed closet with clothes can act like a decent absorber if you leave the door open, while an empty closet can act like a weird resonant cavity.
Breaking symmetry does not mean making the left and right sides random at the front of the room. It means keeping the monitoring triangle stable while letting the back half of the room be less mirror-perfect, so the room does not reinforce the same patterns as strongly.
A rear wall is usually a good place for thick absorption in a small square, because reflections from behind you are strong and arrive late enough to mess with clarity. If you cannot do thick absorption, even a dense bookshelf can help by scattering and partially absorbing midrange energy.
Do not rely on thin diffusers as a first move, because square rooms need decay control more than fancy scattering. Diffusion can be useful once the room is not ringing like a drum, but it rarely fixes the core low frequency problem by itself.
If you have a window on one side, you can match it with a panel on the other side so the early reflections stay balanced. The window does not behave like drywall, so pretending the room is symmetrical when it is not can make imaging worse.
Doors are also acoustic wildcards, because a door can leak bass when open and reflect bass when closed. Try to mix with the door in the same state every time, or you will keep chasing a low end that changes with your mood.
Plants, curtains, and rugs have a place, but mostly in the mid and high frequencies. They can make the room feel less harsh, but they will not replace thick panels when you are trying to stop a 90 Hz note from ringing for days.
When you add treatment, keep it secure and predictable, because a panel that shifts position is another moving variable. The whole point is to build a room you can learn, not a room that changes every time you vacuum.
Practical treatment priorities for a square home office
If you only buy or build a few pieces, spend the money on thickness, not quantity. Two-inch foam will not touch the modal overlap problem, while 4 to 6 inch mineral wool panels and real bass traps will.
Start with corner traps, then the ceiling cloud, then sidewall reflections, then the front wall behind the speakers if SBIR is ugly. If you have a door or window that blocks a corner, trap the other corners harder and use a thick panel on a stand when you mix.
In a square room, the temptation is to cover every flat surface with something thin, because it feels like progress. What you actually want is fewer pieces that do more work, because low frequency control is about depth and air volume, not just coverage.
If you build panels, leave an air gap behind them when possible, because an air gap can make a panel act thicker than it is. A 4 inch panel with a 4 inch gap often outperforms the same panel glued flat to the wall, especially in the low mids.
Corner traps can be straddling panels or superchunks, and both can work if they are truly thick. The main thing is to get real material into the corners where pressure builds, because that is where the room is storing the problem energy.
A ceiling cloud is not just about reverb, it is about controlling the early bounce that makes the top end feel smeared and the low mids feel boxy. In a square room, the ceiling bounce can combine with desk bounce in a way that makes the whole midrange feel confused.
Sidewall panels should go at the mirror points, but do not panic if the room layout makes perfect placement impossible. A slightly imperfect panel placement that stays consistent is better than a perfect plan you never install.
The front wall behind the speakers can help with SBIR and with reducing front-wall reflections, especially if the speakers are close to that wall. Thick absorption there can also reduce the sense that the sound is “stuck” to the wall instead of floating in front of you.
The rear wall behind the chair is often the most audible single panel in a small room, because it deals with the energy that comes back at you after the direct sound. If you only have space for one big thick panel, the rear wall is a strong candidate.
- 4 to 6 inch corner bass traps, floor to ceiling
- 6 inch ceiling cloud above the desk
- Sidewall reflection panels at mirror points
- Thick panel on the rear wall behind the chair
- Rug only for comfort, not “bass control”
- Door or window panel on a movable stand
If you rent and cannot drill, you can still do a lot with freestanding panels and corner stacks. A couple of thick gobos on stands can turn a square room from hopeless to workable without touching the walls.
Do not underestimate sealing gaps and rattles, because buzzing furniture can make you think the bass is distorted. Tighten loose shelves, isolate vibrating objects, and make sure your monitors are not exciting the desk like a drumhead.
If you plan to add a subwoofer later, treat the room first so the sub has a fighting chance. Adding a sub to an untreated square room often just makes the room louder at its favorite note, which is not the same thing as having more accurate bass.
Finally, accept that treatment is a system, not a single purchase, and budget time for iteration. You can install the basics in a weekend, but the real improvement comes from adjusting placement and filling in the obvious gaps over a few weeks.
Measuring and adjusting without getting lost
You can do a lot by ear, but a square room lies confidently, so basic measurements keep you honest. Room EQ Wizard with a cheap USB mic like the UMIK-1 will show you where the big peaks, nulls, and long decays live.
Focus on repeatable improvements, like shaving 6 dB off a peak at 60 Hz or shortening a long decay at 90 Hz. Chasing a perfectly flat line is a good way to waste weekends, because small rooms always have some mess below 200 Hz.
Measure one change at a time, and take notes like you are troubleshooting a computer. If you move the desk, move it back if it gets worse, because your memory will rewrite what you heard after an hour of tinkering.
Use smoothing carefully, because heavy smoothing can hide the narrow nulls that wreck bass translation. Waterfall or decay plots are often more useful than a single frequency response trace, since modal overlap is as much about ringing as it is about level.
Set up your measurement mic at ear height where your head normally is, and keep it there for comparisons. If you measure from a different spot each time, you are basically measuring a different room each time, especially in a square where the stripes are strong.
Do a baseline measurement before you add treatment, even if you think it will be depressing. That baseline becomes your reality check later, because it is easy to forget how bad the original nulls and decays were once you get used to the improved room.
When you add a panel, measure again and look for changes in both frequency response and decay. A panel might not change the peak level much, but it can shorten the ringing, and that is often the difference between guessing and knowing.
Try not to “EQ your way out” of deep nulls, because EQ cannot fill a cancellation at one spot in space. If you boost into a null, you mostly just make the peak louder somewhere else in the room and burn headroom in your monitors.
If you do use EQ, use it as a finishing tool after placement and treatment, not as the first move. A gentle cut on a stubborn peak can be helpful, but it should not be the only thing standing between you and a usable low end.
Keep your measurement workflow simple so you actually do it, because a complicated process encourages procrastination. The goal is not to become a lab, it is to make a few smart choices and confirm you are moving in the right direction.
Also measure at a couple of nearby positions, because a mix position that is razor-thin can be stressful to work in. If the response changes wildly when you lean back, you may want to trade a little perfection for a slightly wider “good zone.”
Once you have a workable setup, stop measuring every day and start mixing, because your ears need time to learn the new baseline. Measurements are a tool for decisions, not a hobby that replaces finishing music.
Small-room habits that help you mix more reliably
Even with good studio geometry for a square room, you still need habits that keep you from overreacting to the room. The simplest is level control, because bass perception changes a lot with volume, and small rooms get ugly when you crank them.
Keep a couple reference tracks you know cold and play them quietly before you start mixing. If the reference kick sounds like a basketball in your room, you will stop yourself from cutting too much low end in your own session.
Check mixes on headphones, but treat them like a second opinion, not a replacement for speakers. Headphones skip the room modes, so they can reveal whether your bass line is actually too loud, or whether the room just made it seem loud.
Use a mono check often, because square rooms can trick you into widening things to “escape” the center. If the vocal and snare stay solid in mono, you are less likely to build a mix that collapses outside your room.
Work at a consistent monitoring level most of the time, because your brain calibrates to whatever you repeat. If you mix loud one day and quiet the next, you will keep changing your low end decisions and blame the room for your own inconsistency.
Take short breaks, because low frequency adaptation is real and it makes you numb to the very problems you are trying to solve. Five minutes away from the room can reset your perspective more than another plugin will.
Do quick translation checks early, not just at the end, so you do not build a whole mix on a false low end. A two-minute car check or a phone speaker check can tell you whether you are compensating for a room null without realizing it.
Be careful with low-end soloing, because a square room can make soloed bass sound wrong even when it is right in the mix. Make bass decisions in context, then verify with references and headphones rather than chasing a perfect solo tone in a flawed space.
Use high-pass filters and arrangement choices like they matter, because they do, especially in small rooms. Cleaner low-end arrangement reduces how much the room gets excited, which makes your monitoring job easier before you even touch treatment.
If you use room correction software, treat it as a convenience, not a cure. Correction can help with tonal balance at the listening position, but it cannot stop the room from ringing, and it cannot fix what happens two feet away from your head.
Finally, trust patterns, not moments, because a square room can give you a random good minute that does not represent reality. If a mix decision holds up across references, headphones, and a few days of listening, it is probably solid even if the room still has quirks.
Conclusion
A square room is not a dealbreaker, but it demands discipline in layout and treatment. If you respect modal overlap, pick sane desk placement, and commit to real bass traps, you can get a monitoring setup that behaves well enough to trust.
Choose an orientation, measure a few options, and stop rearranging once you find the least-bad listening position. After that, your job is repetition, learn the room, keep references handy, and make decisions that hold up outside your home office.
The goal is not to make the square room disappear, because it will not, and pretending otherwise is how people waste money. The goal is to make the room predictable enough that you can stop fighting it and start finishing work with confidence.
If you do the basics well, you will notice that your mixes start needing fewer emergency fixes on other systems. That is the real sign you got the geometry and treatment under control, not whether a graph looks pretty on a screen.


