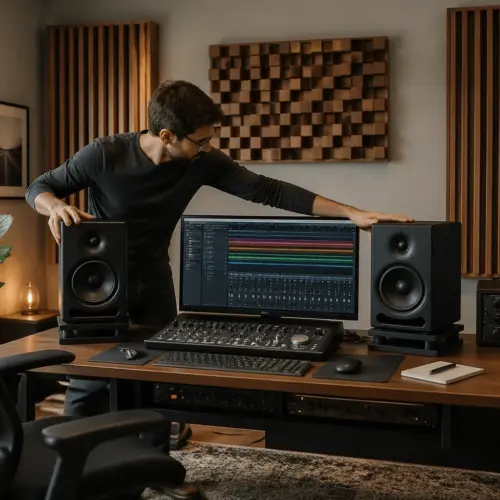
If your home office doubles as a recording spot or mix room, bass is the thing that makes you question your sanity. One day the kick drum sounds huge, the next day it disappears, and the only thing that changed was where you sat.
This bass absorption thickness guide is meant to stop the guessing by tying panel thickness to what actually happens in small rooms. The short version is that thickness, placement, and an air gap matter more than brand names once you get below about 200 Hz.
I like broadband treatment because it fixes problems you can hear right away, like boomy notes and smeared speech. You can spend a fortune chasing low end with fancy gear, but the room still wins.
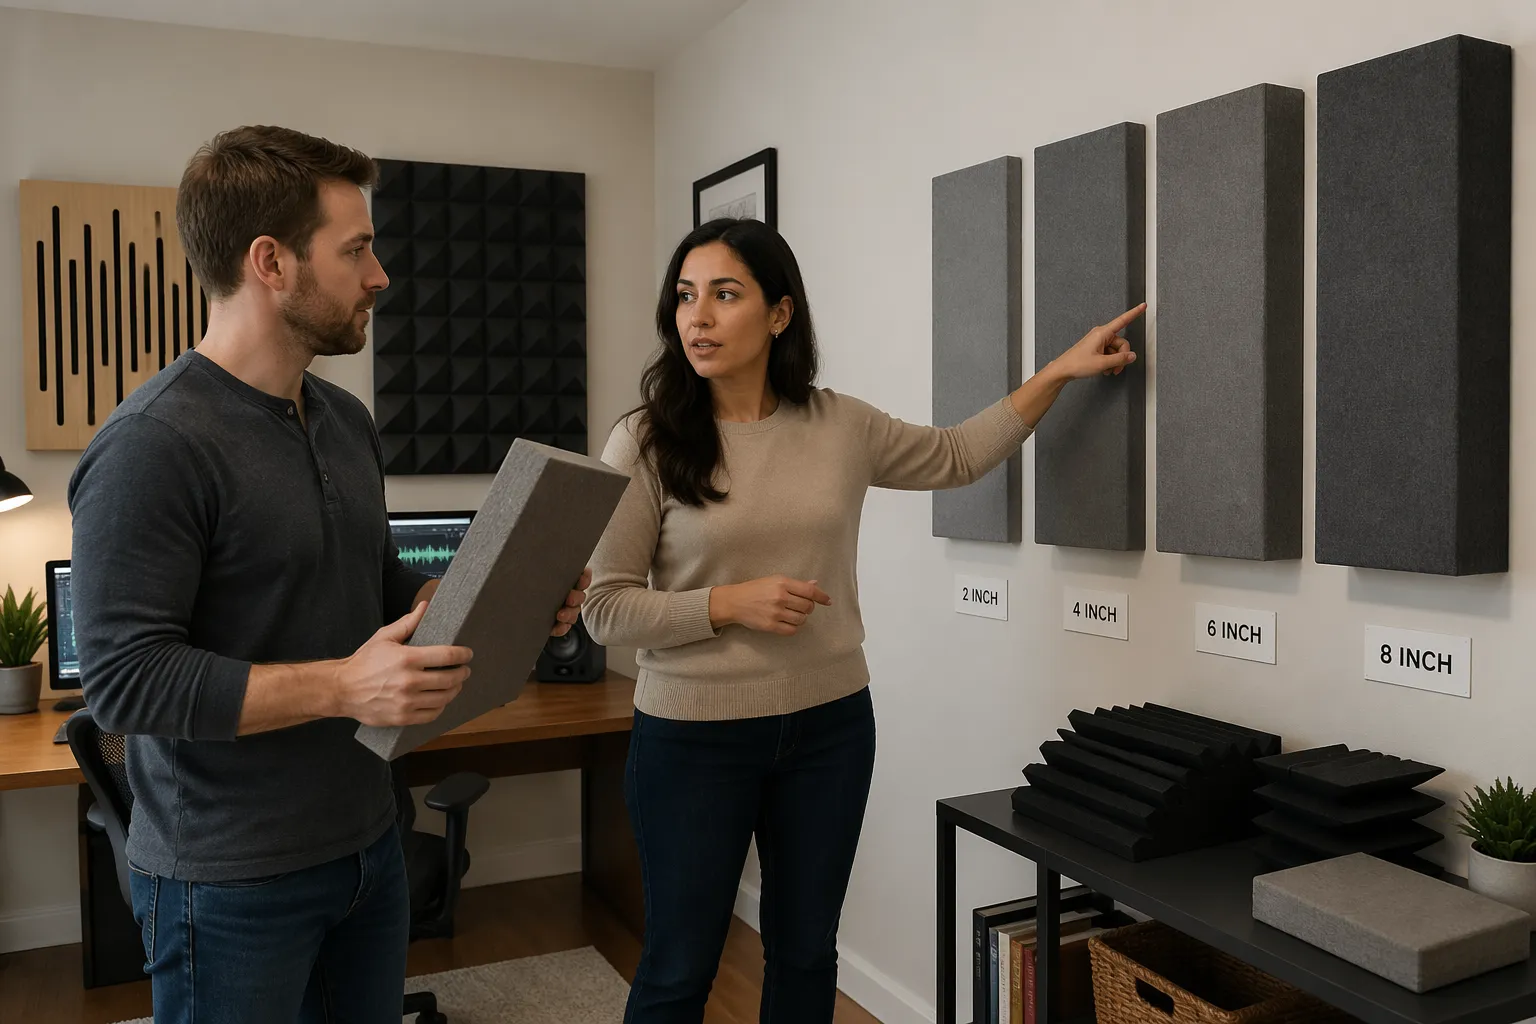
When people ask whether they should buy 2-inch, 4-inch, 6-inch, or 8-inch panels, they are usually asking how to get better low frequency performance without turning the room into a padded cell. You can do it, but you need to understand what thickness buys you and where it stops helping.
Why thickness matters more at low frequencies
Low frequencies have long wavelengths, so the pressure and velocity patterns in your room spread out over feet, not inches. A thin absorber simply cannot interact strongly with a 60 Hz wave if it only has two inches of material to work with.
Porous absorbers like fiberglass and mineral wool work best where particle velocity is high, which is usually away from the wall. Thickness pushes more material into that velocity zone, so you get more absorption down low.
In a home office, the worst bass issues often come from room modes between parallel surfaces, like front wall to back wall or floor to ceiling. Those modes create spots where bass piles up and other spots where it cancels, and your chair can land in either one.
Thicker panels do not magically erase modes, but they reduce decay time and smooth the peaks enough that mixes translate better. If you only treat mids and highs, the room can sound less echoey while the low end still rings for ages.
Another way to think about thickness is that you are buying bandwidth, not just “more absorption.” A thicker absorber keeps working as frequencies drop, while a thin absorber falls off right where the room starts to misbehave.
Small rooms exaggerate this because the modal spacing is wide, so a few notes can dominate everything. When you hear one bass note that seems louder than the rest, that is often the room, not your speakers or your mix.
Speaker placement and listening position determine which modes you excite and which ones you sit inside. Thickness matters because it gives you a tool that still helps even when you cannot move the desk three feet forward.
People also confuse “bass absorption” with “bass trapping,” but the physics are similar in porous materials. You are converting acoustic energy into heat through friction, and you need enough depth for that friction to happen where the wave has motion.
When the low end is uncontrolled, the problem is not only level, but time. A bass note that hangs around too long masks the next note, and that is why bass lines can feel blurry even when the frequency response looks okay.
Thickness is not the only variable, because density and flow resistivity matter too, but thickness is the lever most people can control. In practice, a well-built thicker panel in the right place beats a thinner panel made from exotic marketing claims.
It also helps to remember that absorption is not all-or-nothing. Even modest absorption at 80 to 150 Hz can make a room feel dramatically tighter because that range is where a lot of “boom” and “box” lives.
If you treat the room so the low end decays faster, you will notice that EQ decisions become easier. You stop compensating for the room and start hearing what is actually in the recording.
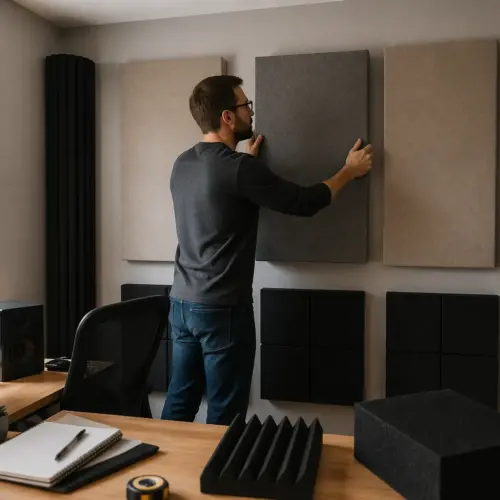
What 2-inch panels are good for (and what they miss)
Two-inch panels are great for early reflection control, especially at the side walls and ceiling above your desk. They tighten up stereo imaging, make speech clearer on calls, and reduce that harsh slap you get in bare drywall rooms.
If you mount 2-inch panels flat to the wall with no air gap, expect the useful absorption to start higher than most people want for bass. You will hear improvement, but it will be mostly in the midrange, with only modest help in the upper bass.
Two-inch panels also struggle when you place speakers close to a wall and the boundary boosts certain bass notes. That boundary effect can make 80 to 150 Hz feel thick and slow, and thin panels rarely pull enough energy out to change the character.
I still use 2-inch panels in small rooms, but I treat them like a precision tool, not a bass solution. If your main complaint is kick and bass guitar definition, you will probably outgrow 2-inch panels fast.
Where 2-inch panels shine is anywhere you need to stop the room from talking back immediately. If your mic hears a “papery” flutter or your claps sound like a ping, thin panels can calm that down quickly.
They are also useful when you need a lot of coverage without losing usable space. In a tight office, covering more square footage with thinner panels can make the room feel less aggressive without crowding your chair.
For voice work, the biggest win is often reducing reflections that hit the mic a few milliseconds after the direct sound. Two-inch panels placed behind and slightly to the sides of the mic position can make narration sound less like it was recorded in a box.
For mixing, 2-inch panels at first reflection points can stop comb filtering that messes with your sense of balance. That can make the center image more stable and reduce the urge to over-widen things.
The limitation is that bass problems are usually not “one reflection,” but a whole pattern of standing waves. You can make the room sound pleasantly dead in the highs while the low end still bounces around like it owns the place.
Another common trap is thinking that more 2-inch panels equals bass trapping. You can cover the entire wall surface and still have a stubborn 60 or 70 Hz mode that barely changes because the absorber depth is not engaging it.
If you already have 2-inch panels, you do not need to throw them away. You can repurpose them for reflections and then add thicker treatment in the places that actually influence bass behavior.
Two-inch panels also work well as “fill” around doors, windows, and awkward wall sections where a thick trap would be impractical. That kind of coverage can reduce midrange glare and make the room more comfortable for long sessions.
When 4-inch panels are the best all-around choice
Four-inch panels are where broadband treatment starts to feel like it is doing real work in the low end. They still handle early reflections well, but they also reach down far enough to reduce the tubby upper bass that dominates many home offices.
If you can only pick one thickness for a first round of treatment, 4 inches is my default because it has a good size-to-benefit ratio. You can mount them on walls, hang them as ceiling clouds, and even straddle corners without the room feeling cramped.
Four-inch panels also give you flexibility with air gaps, because they are thick enough to benefit from spacing without becoming flimsy. A 4-inch panel with a few inches of gap can outperform a thin panel by a wide margin in the range where bass starts to sound “one note.”
In a typical desk setup, 4-inch panels at the side wall first reflection points can improve imaging while also taking the edge off upper bass buildup. That matters because a lot of perceived muddiness lives in the 100 to 200 Hz area, especially in small rooms.
A 4-inch ceiling cloud is one of the most underrated moves in a home office studio. It reduces the desk-to-ceiling bounce that can smear transients, and it also helps with the vertical mode that makes bass feel uneven when you sit up or lean back.
On the front wall behind the speakers, 4-inch panels can reduce the strength of early reflections that mess with low-mid clarity. This is especially helpful if your speakers are closer to the wall than you would like because of desk depth.
On the back wall, 4-inch panels can keep the room from sounding like it is pushing sound back into your ears. That rear-wall energy is a big reason small rooms feel fatiguing, even when the volume is not high.
Four inches is also a practical thickness for DIY builds, because common insulation sizes and frame materials work well at that depth. If you want consistent results, build or buy panels that are rigid, evenly filled, and covered in breathable fabric.
The main tradeoff is that 4-inch panels start to look like real objects in the room. You may need to plan around doors, shelves, and monitors, and that is where a layout sketch saves you from buying panels you cannot place.
Coverage still matters more than perfection, so do not get stuck trying to make every panel symmetrical. A room with enough 4-inch coverage in the right zones will beat a room with a couple of “perfect” panels and a lot of bare boundaries.
If you are trying to hit a professional-sounding low end without rebuilding the room, 4-inch panels are usually the first thickness that feels like a real step forward. They will not turn a closet into a mastering suite, but they can make your decisions far more reliable.
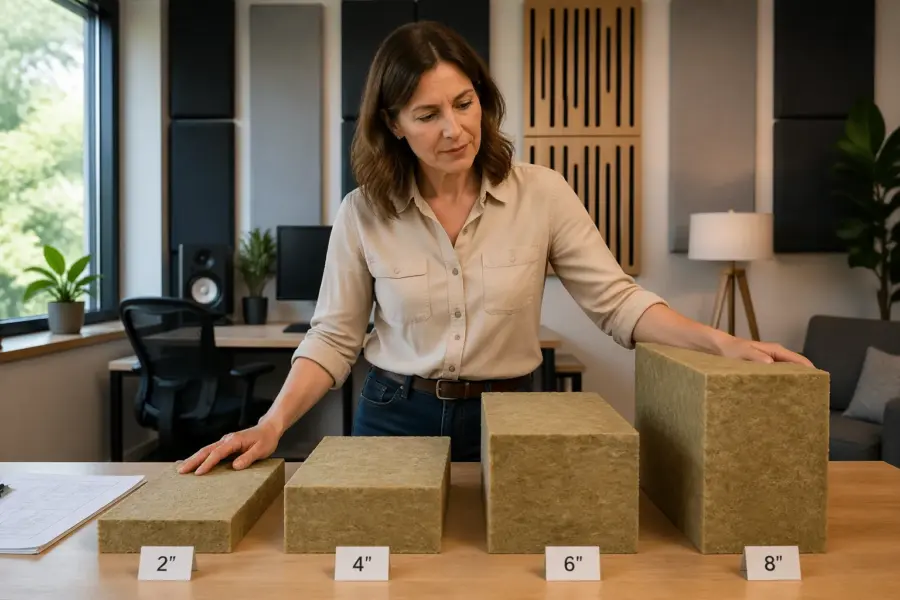
| Panel thickness | Best use in a home office | Typical tradeoff |
|---|---|---|
| 2 inches | Side wall and ceiling reflections, voice clarity | Limited low frequency performance |
| 4 inches | Broadband control, first serious step into bass absorption | Takes more wall space and depth |
| 6 inches | Corners, back wall, stronger modal damping | Bulkier, needs thoughtful panel mounting |
| 8 inches | Problem rooms, very short low end decay targets | Can crowd small rooms and cost more |
Going thicker: 6–8 inches and where it pays off
Six-inch panels start to earn their keep when your room is short in one dimension, like an 8-foot ceiling or a 10-foot length. Those dimensions push strong modes into the 50 to 90 Hz range, and you need more absorber depth to make a dent.
Eight-inch panels are not for everyone, but they can be the difference between a room that is merely workable and a room that feels controlled. If you do a lot of low end heavy work, like hip hop, EDM, or cinematic sound design, thick traps can save hours of second guessing.
The best spots for 6 to 8 inches are corners, the wall behind the speakers, and the back wall behind your chair. Those areas tend to have high pressure for multiple modes, so your absorption works on more than one problem at once.
Thick panels also help when you listen at moderate levels, because bass problems stay obvious even when you turn down. A room with better low frequency performance lets you trust quieter monitoring, which is a big deal in a home office with neighbors or family nearby.
Six inches is often the point where corner placement becomes the star of the show. When you straddle a corner with a thick panel, you are effectively creating a deeper absorber because the corner behind it is an air cavity.
In practice, thick corner traps can reduce the “two different basses” feeling where some notes hit you in the chest and others vanish. You may still have peaks and nulls, but they tend to be less extreme and less distracting.
Back wall treatment is where 6 to 8 inches can feel like cheating, especially if your chair is close to that wall. When the back wall is untreated, bass energy reflects right back into the listening position and exaggerates certain modes.
Thick absorption behind the listening position can also improve the sense of depth in mixes. You stop hearing the room as a separate layer, and reverbs and delays become easier to judge.
Eight-inch panels can be a smart move if you cannot use many panels due to aesthetics or space. A few very effective traps in the right places can outperform a room full of thin panels that only address the top end.
The tradeoff is that very thick panels require planning so they do not block airflow, doors, or storage. If the room becomes inconvenient, you will resent it, and that is how treatment ends up taken down and shoved into a closet.
Also remember that thick porous traps are not the only bass tools, but they are the least fussy. Tuned traps can target a narrow problem frequency, while thick broadband traps improve the overall low end behavior without needing exact tuning.
If you measure your room and see a huge, narrow peak at one frequency, thick panels may not fully flatten it. They can still reduce decay and make that peak less audible, which is often the real goal in a working home office.
Going thicker is most satisfying when you already handled reflections and general balance. Once the room is not screaming in the midrange, you can finally hear the bass issues clearly and fix them with traps that have enough depth to matter.
Using air gaps to boost bass absorption without bulk
An air gap behind a porous absorber can act like free thickness, as long as you do it intentionally. The gap moves the absorber farther into the velocity zone, so a 4-inch panel with a 4-inch air gap often behaves closer to a thicker unit at lower frequencies.
I prefer an air gap when wall depth matters, like behind a door swing or near a tight desk setup. You still need solid panel mounting, because a wobbly frame or sagging cloud ruins placement and can become a safety problem.
A common mistake is using a tiny air gap, like half an inch, and expecting a big bass change. Small gaps can help a little, but the audible improvement usually shows up when the gap is at least a couple inches and the panel is thick enough to begin with.
Air gaps also change the reflection behavior, which matters for early reflection control at your listening position. If you need both imaging and bass control, you can mix approaches, like 4-inch panels with a modest gap at first reflection points and thicker corner traps elsewhere.
The nice thing about air gaps is that they let you tune your treatment without buying different panels. If a room feels a little too live after you hang panels flat, spacing them off the wall can increase effectiveness without changing the look much.
A practical rule is that the air gap can be similar to the panel thickness, but you do not have to match it perfectly. Even a 2 to 4 inch gap behind a 4-inch panel can be a meaningful upgrade in the upper bass.
Air gaps are also helpful on the back wall, where you often have the most freedom to add depth. A thicker effective absorber behind you can reduce the “bass bloom” that happens when reflections stack up at the listening position.
On ceilings, an air gap is almost unavoidable because clouds are typically hung below the surface. That is good news, because it means a 4-inch cloud can behave like more than 4 inches if you suspend it a few inches down.
If you are using thin panels, air gaps can still help, but they do not turn a 2-inch panel into a real bass trap. Think of the gap as an amplifier for a panel’s strengths, not a replacement for thickness.
Another detail is that air gaps can reduce the amount of high frequency absorption relative to lows, which can keep the room from becoming dull. That balance matters in a home office where you want a controlled sound without killing all the brightness.
Just make sure the gap is consistent and the panel is not tilted unless you intend it. Random spacing and angles can create inconsistent results that are hard to troubleshoot when you are trying to make mixes translate.
If you are nervous about mounting, start with one or two panels spaced off the wall and compare before and after. Small experiments like that teach you more about your room than any chart ever will.
Panel mounting details that change real-world results
Panel mounting is where good materials go to die, because the wrong hardware puts panels in the wrong place or leaves air gaps you did not plan. If you want predictable bass absorption, you need panels that stay put and sit where the room needs them.
Flush mounting can be fine for midrange work, but bass benefits when you leave space behind the panel or move it to a corner. If you rent, picture rail hooks, French cleats, and heavy duty ceiling anchors make a bigger difference than people expect.
For wall panels, the goal is to avoid accidental coupling and rattles. A panel that buzzes against drywall or a frame that flexes can add noises that make you think your speakers are distorting.
For ceiling clouds, safety is not optional. Use hardware rated for the load, and assume that drywall anchors are only as good as the installation and the ceiling material.
Corner straddling works best when the panel spans the corner cleanly and leaves a decent air volume behind it. If the panel is jammed into the corner or blocked by trim, you lose some of the advantage you were trying to get.
Panel position matters more than being perfectly level, but you still want consistent placement across left and right reflection points. If one side wall panel is a foot forward compared to the other, your stereo image can lean even if your speakers are centered.
Mounting height matters too, especially for voice and instrument recording. Panels placed at ear height for seated mixing may not be ideal for a standing vocalist, so you may need a compromise or a movable panel.
Another overlooked detail is what happens behind the panel when you mount it. A panel hung over a bookshelf full of uneven objects will behave differently than the same panel over a flat wall, and that can be good or bad depending on your goal.
If you build panels, avoid packing the insulation too tightly just to make the frame feel solid. Compression can change airflow behavior and reduce low frequency effectiveness, which defeats the purpose of going thicker.
Also pay attention to fabric choice, because “pretty” fabric can be too airtight. If you cannot easily breathe through it, sound cannot either, and the panel becomes more reflective than you intended.
When mounting with an air gap, use spacers or standoffs that keep the distance consistent. A panel that leans at the top and touches at the bottom is not a planned air gap, it is an accident.
Finally, keep cables, power strips, and loose objects from touching panels. A vibrating cable against a frame can create a faint rattle that only shows up on bass-heavy material, which is exactly when you are trying to judge low end.
- Use corner straddling for the thickest panels
- Leave a 2 to 6 inch air gap behind wall panels when possible
- Hang ceiling clouds with rated eye bolts and proper anchors
- Keep panels centered at first reflection points, not just “nearby”
- Avoid compressing insulation inside frames
- Seal frames to prevent rattles against drywall
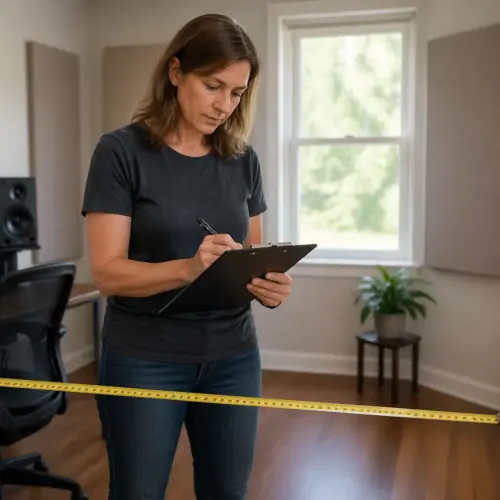
If you are not sure where first reflection points are, use the mirror trick and mark them. You sit in your listening position while someone moves a mirror along the wall, and wherever you can see a speaker in the mirror is a reflection point.
For corners, do not ignore the ceiling-to-wall corners just because they are harder to reach. If you cannot do full traps up there, even a couple of thick panels across the front wall-ceiling corners can help tame front-end bass buildup.
Mounting also affects how willing you are to iterate. If panels are easy to move, you will actually try different placements and find what works, instead of living with a layout that looked good on paper.
If you need to keep the room looking like an office, mounting can be your best friend. Clean frames, consistent spacing, and thoughtful placement can make thick treatment look intentional rather than improvised.
A simple selection checklist based on your room and goals
Start with what you do in the room, because podcast voice, Zoom calls, and mixing music have different pain points. If you mainly need clean speech, you can get far with thinner panels placed correctly.
If you mix or master, assume you need real bass control and plan for 4 inches as your baseline. Then decide where 6 to 8 inches makes sense, usually corners and the back wall if you have the depth.
Look at your room dimensions and note anything under about 12 feet, because small dimensions push modes up into the range you hear as one note bass. If your listening position is close to the back wall, thicker absorption behind you often beats adding more thin panels around the room.
Budget matters, but so does coverage, and one giant trap rarely beats several well placed panels. I would rather see four 4-inch panels with smart air gap spacing than two 8-inch panels shoved into random spots.
Also consider how loud you work and how consistent you need your results to be. If you only do occasional edits, you can tolerate more room behavior than someone delivering mixes to clients every week.
If your room is multi-use, prioritize the placements that help the listening position first. You can always add recording-focused panels later, but a reliable monitoring spot is what keeps you from chasing your tail.
Think about the desk and monitor layout, because big reflective surfaces near the speakers create their own problems. Sometimes the best “treatment” is simply pulling the speakers forward a few inches and keeping the desk surface clear.
Decide early whether you want panels to be permanent or movable. Freestanding gobos or panels on simple stands can be a lifesaver in rentals, and they let you change the room for voice tracking versus mixing.
If you are buying panels, check the actual thickness and the material type, not just the marketing name. A “bass trap” label does not mean much if the product is thin and meant for midrange absorption.
If you are building panels, be honest about your tools and time. A slightly imperfect DIY panel that is thick and well placed is still better than a perfect plan that never gets built.
Leave room in your plan for iteration, because your first layout is rarely the final one. Once you hear the room improve, you will notice the next bottleneck, and that is when targeted thickness choices make sense.
If you can measure, do it, but do not wait for measurement perfection before treating obvious issues. Even simple listening tests, like sine sweeps and familiar reference tracks, can reveal where the room is lying to you.
Finally, keep expectations realistic for the size of the room. Treatment can make a small office sound controlled and trustworthy, but it cannot change the laws of physics, so prioritize the improvements that make your work easier.
Conclusion
The cleanest way to use this bass absorption thickness guide is to treat 2-inch panels as reflection tools and 4-inch panels as your baseline for broadband control. Move to 6 or 8 inches when the room is small, the work is bass heavy, or you want tighter low frequency performance than typical home office setups.
Use an air gap when you can, because it is one of the few honest tricks that improves bass absorption without adding more material depth. Combine that with solid panel mounting and corner placement, and your room will stop arguing with your speakers.
If you want one practical plan, start with 4-inch panels at first reflection points and a ceiling cloud, then add thicker corner traps as budget and space allow. That order fixes what you hear immediately while building toward bass control that holds up across different listening positions.
If you already own thinner panels, keep them working where they shine and add thickness only where bass needs it. A layered approach usually looks better, costs less, and performs more predictably than replacing everything at once.
The goal is not a perfectly flat room on paper, but a room that lets you make decisions quickly. When bass stops shifting every time you move your head, you will spend more time creating and less time troubleshooting.