Bad panel placement makes a home office sound weird fast, like your voice is trapped in a cardboard box while the room still rings. Good placement makes calls clearer, recordings easier to edit, and music less fatiguing after a long day.
If you are searching for where to place acoustic panels in a home office, start by thinking about what you actually do in the room. A Zoom-heavy office needs different priorities than a space where you mix speakers at a desk every night.
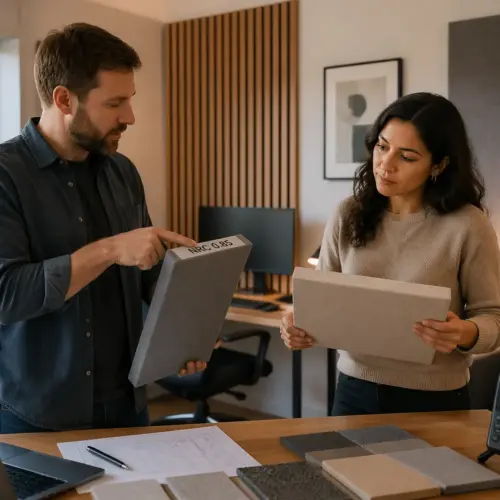
Most people buy panels and then stick them wherever they look nice, usually behind the chair or in a random checkerboard pattern. That usually treats the wrong surfaces, so the room still has harsh early reflections that smear speech and stereo imaging.
The goal is simple: reduce the strongest early reflections near your ears and microphone, then tame the leftover slap and flutter without deadening everything. You can do that with a small number of panels if you place them with intent and keep your desk setup acoustics in mind.
Start with your listening and speaking position
Before you hang anything, lock in the position where your ears and mouth will be most of the time. If your chair rolls around and your mic moves daily, your acoustic treatment will miss its target.
Pick the exact spot where you work, then commit to it for a week so you can notice changes after each panel goes up. If you constantly rotate the desk or move the chair to different corners, you are changing the room more than the panels are.
For speaker use, sit centered between the side walls, and keep the desk and monitors symmetrical left to right. Symmetry matters because uneven reflections pull your stereo image to one side and make EQ decisions unreliable.
Try to keep your head the same distance from each speaker, and avoid sitting with one shoulder near a wall and the other facing open space. Even if you never mix music, that imbalance makes voices and notification sounds feel lopsided and tiring.
If your desk has to be off-center because of doors or windows, you can still aim for symmetry around your head by angling the desk slightly. A small rotation can reduce the strength of one side reflection enough that panels do not have to work as hard.
For voice calls and voiceover, mark where your mic capsule sits, not where your mouth is. A boom arm that swings 10 inches changes which wall reflection hits the mic first, so treat the path the mic actually hears.
Also pay attention to the height of the mic, because a mic that sits high will “see” more ceiling and less desk. If you switch between a low podcast position and a higher video-call position, you may need to treat both paths or choose one as the priority.
Decide whether you speak straight into the mic or slightly across it, because that changes which surfaces are in the mic’s sensitive zone. A slight angle can reduce plosives, but it can also invite a side wall reflection if the room is bare.
Measure the distance from your head to the front wall, side walls, and ceiling, because those surfaces create the earliest, loudest bounces. When people ask where to place acoustic panels in a home office, this is the step they skip, then they wonder why the room still sounds splashy.
Write those distances down, because they help you predict what you will hear when you clap, talk, or play pink noise. A wall that is three feet away is a completely different problem than a wall that is eight feet away, even if the room looks similar in photos.
If you are using speakers, keep the listening position out of the exact center of the room when you can, because the center tends to exaggerate nulls and peaks. You do not need a perfect “studio” ratio, but you do want to avoid the worst spots before you start treating reflections.
For laptop-only calls, your “position” is still real, because the laptop mic is fixed and the screen usually aims you toward the same wall every day. Even a simple headset setup benefits from treating the wall you face and the side wall that is closest to your head.
Find first reflection points using the mirror method
First reflection points are the spots where sound leaves your mouth or speakers, hits a surface once, then reaches your ears or mic. Those early hits are the ones that blur consonants and make your voice sound phasey on recordings.
They matter because your brain combines the direct sound with the first reflections and treats them like one event. If the reflection is strong and fast, it changes tone and clarity even if the room does not sound obviously “echoey.”
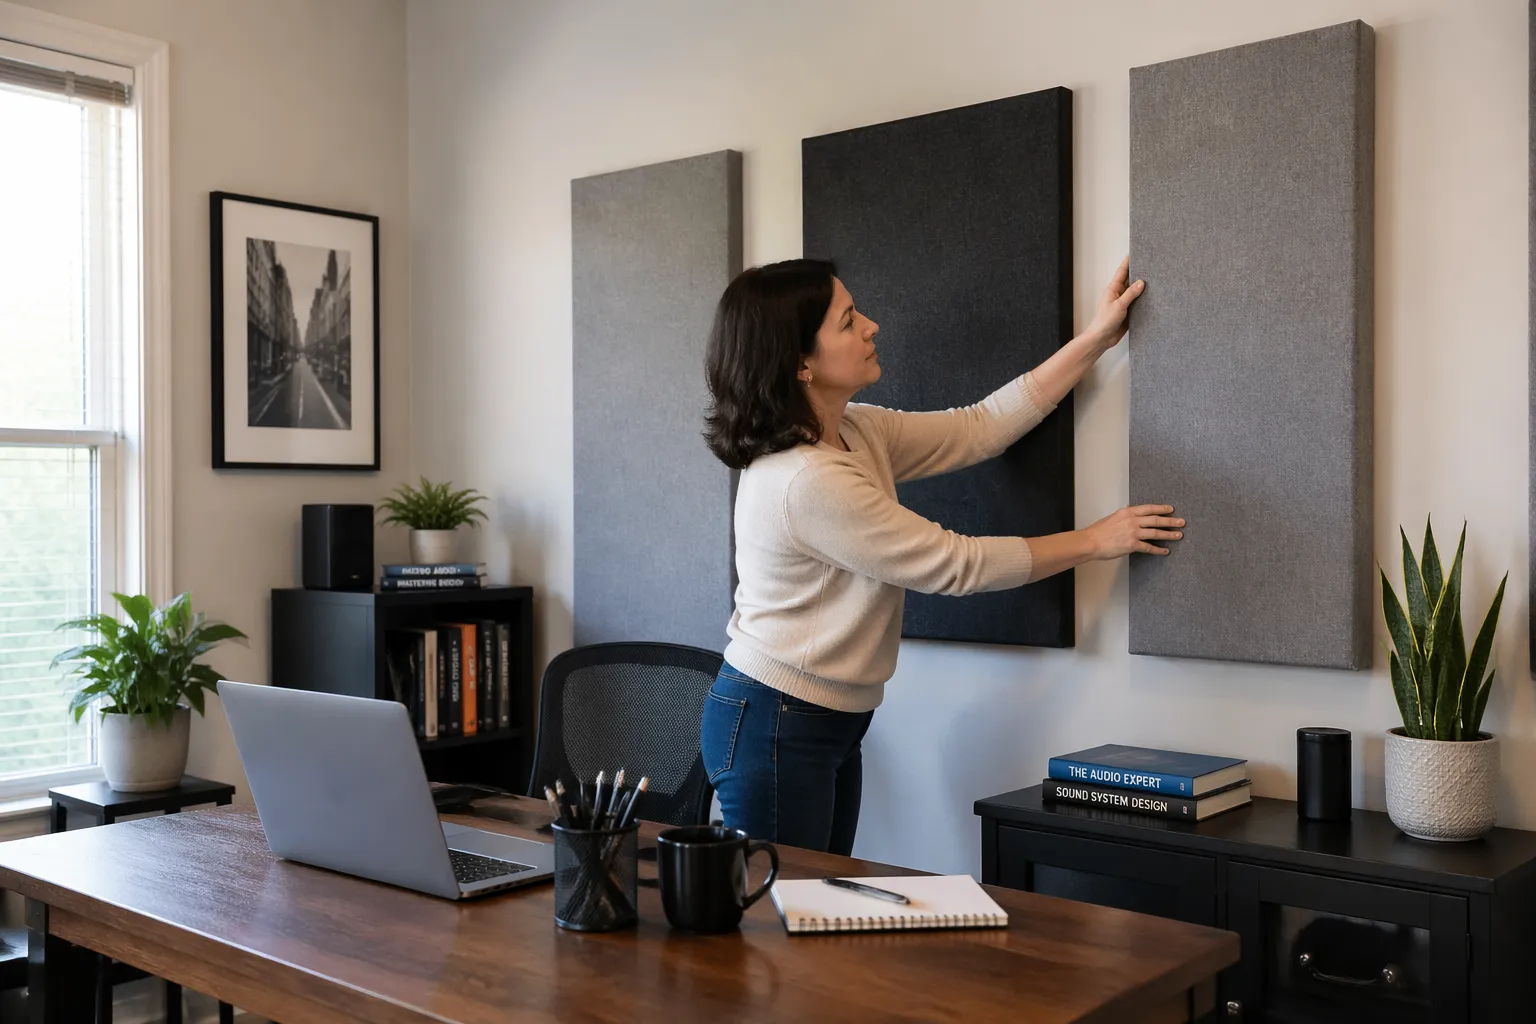
The mirror method acoustics trick is low tech and accurate enough for home offices. You sit in position, a helper slides a mirror along a wall, and you mark where you can see your speaker in the mirror from your seat.
Use painter’s tape for the marks so you can adjust later without damaging paint. A pencil mark is fine too, but tape makes it easier to visualize panel size and coverage before you commit to drilling holes.
If you do not have a helper, you can prop a mirror on a chair and move it in small steps while you stay seated. It is slower, but it still gets you close enough that your panels will land where they actually matter.
On each side wall, you will usually find one main point per speaker, plus a smaller hot spot closer to the desk edge if your desk is wide. Treat the points that line up with your tweeters first, because that is where the sharpest high frequency energy comes from.
If you only have two panels for the entire room, those side wall points are often the best use of them for speaker clarity. They reduce that “spitty” high end that makes you turn volume down, even when the speakers are good.
For voice, you can adapt the same idea by thinking of your mouth as the source and your mic as the listener. The first reflection point is then the spot where your voice bounces once and lands in the mic with the least delay.
In a typical desk setup, that voice reflection often comes from the wall you face, the side wall nearest the mic, and sometimes the desktop itself. You cannot hang a panel on your desk, but you can reduce desk reflections by keeping the mic closer to your mouth and slightly above the desktop plane.
Do the same on the ceiling by taping a small mirror to a broom handle, or by using a phone camera in selfie mode while you slide it overhead. When you see the left speaker from your seat, that ceiling location is a first reflection point and deserves a panel more than some random spot behind a bookshelf.
If you have recessed lights or a ceiling fan, you may need to shift the cloud a few inches to avoid hardware, but keep it covering the reflection zone. A slightly off-center cloud that hits the right spot beats a perfectly centered cloud that misses the path entirely.
Do not forget the wall behind you, because it can create a strong reflection that returns to your ears after a short delay. That reflection is not always the first, but it often contributes to the “roomy” sound on calls when your mic gain is high.
Once you mark the points, stand up and look at them from the doorway like a normal person, because you still have to live in the room. The goal is not to make the room look like a lab, but to make sure every panel has a job.
Treating the wall behind your monitor and desk
The wall behind your monitor is usually the closest large surface in front of you, so it sends fast reflections back toward your ears and mic. If you sit 2 to 4 feet from that wall, even a small untreated patch can add a hard edge to speech and cymbals.
This is also the wall that tends to be the most “naked,” because people keep it clean for screens, shelves, and cable runs. A clean wall is great for aesthetics, but acoustically it is basically a reflector aimed right at your face.
Panels here work best when they cover the area between and slightly outside your speakers, starting just above desk height. If you have a big ultrawide monitor, treat the wall around it, because the screen itself reflects highs like a little acoustic mirror.
If your speakers are close to the wall, you are fighting both reflection and boundary effects, which can create weird peaks in the upper bass and low mids. You may not fix bass with thin panels, but you can at least reduce the sharp comb filtering that makes vocals sound “hollow.”
When the desk is pushed into a corner, the front wall treatment becomes even more important because the corner loads up reflections and low-frequency energy. In that case, treat the front wall first, then deal with the side wall that is closest to your speakers.
If you do video calls with a webcam above the monitor, the front wall reflection can make your voice sound like it is coming from the screen instead of from you. A panel placed at mouth height on that wall helps your voice feel more direct and less “screeny.”
Do not overdo it by covering the entire front wall with absorption unless you know you want a very dry room. A few well-placed panels can keep clarity while still letting the room feel normal and not like a closet.
If you have a window on the front wall, treat around it rather than trying to stick panels on glass. Thick curtains can help a little, but they usually do less than a real panel, so prioritize the solid wall sections that reflect most strongly.
| Desk and front wall situation | What to do with panels | Why it works |
|---|---|---|
| Speakers on desk, 6 to 12 inches from front wall | Two panels centered behind each speaker | Reduces early bounce and comb filtering near tweeters |
| Speakers on stands, 12 to 24 inches from front wall | One wider panel between speakers, plus one behind each | Keeps center image stable and cuts strong front wall reflection |
| Ultrawide monitor or dual monitors | Panels on both sides of screens, not behind the screens | Targets the exposed wall that actually reflects into your ears |
| Mic for calls sits close to monitor | Panel directly behind monitor height, centered on mic line | Prevents the front wall from making voice sound hollow |
| Standing desk used for calls | Panel band at mouth height across the front wall | Matches treatment to the height you speak at most |
If you have to choose between treating behind the speakers or treating behind the monitor, treat behind the speakers first. The speaker reflection is constant and affects everything you listen to, while the monitor reflection is smaller and more dependent on angle.
On the other hand, if you mostly use a mic and never use speakers, the front wall panel at mouth height can be the single biggest improvement. It reduces that short “ping” you hear when you speak loudly and the room throws it right back.
Keep panels off the floor by a bit, because the desk already blocks some direct paths at very low height. Putting the panel slightly higher targets the reflection that actually reaches your ears and mic instead of treating air that no one listens from.
If you have shelves on the front wall, do not assume they solve the problem, because bookshelves can still reflect strongly at certain angles. They can help with diffusion a bit, but the early reflection can remain harsh if the shelf faces are flat and close to your speakers.
A practical trick is to sit in position, talk at normal volume, and listen for a “papery” slap coming back from the front wall. When you add a panel and that slap disappears, you know you treated the right surface instead of guessing.
Side wall placement for voice and speaker clarity
Side walls are where most small offices get harsh, because they are close and usually bare drywall. Treating them at the first reflection points tightens stereo imaging and makes your voice sound less like it is bouncing around your head.
They are also the surfaces that create flutter echo when you have two parallel walls with nothing soft in between. If you clap and hear a quick “zing” or “chirp,” side wall treatment is usually the fastest way to calm it down.
Use the mirror method acoustics marks, then mount panels with their center at ear height when seated. If your chair height changes a lot, split the difference and aim slightly higher, because reflections from above ear level still reach you strongly.
Do not be afraid to mount a panel a little forward of your ears if the mirror point lands there, because the reflection is about geometry, not about where a panel looks balanced. A panel that is six inches forward but in the right spot will outperform a perfectly centered panel that misses the reflection path.
If you record voice with a cardioid mic, remember the mic rejects sound from the back, not the sides. That means a side wall reflection can still enter the mic at an angle and show up as a bright, short echo on sibilants.
This is why people sometimes think their mic is “too bright” when the real issue is the room. Once the side reflections are controlled, you can often use less EQ and less de-essing because the harshness was never in your voice to begin with.
For desk setup acoustics, side wall panels often beat rear wall panels as a first purchase, because they address the earliest reflections. I would rather see two panels placed correctly on the sides than six panels scattered behind the chair for decoration.
If one side wall is a window and the other is drywall, you can still treat both sides, but you may do it differently. A thick curtain plus a panel on the solid wall can get you closer to symmetry than leaving the window side totally reflective.
When your desk is very close to one side wall, that wall becomes the dominant reflector and can make your voice sound like it is coming from that direction. In that situation, treat the close wall first, then add a panel on the far wall if you want the room to feel balanced.
In a narrow office, you may find the side reflection points are so close to the desk that standard 2 by 4 panels feel oversized. That is fine, because extra coverage usually helps, and you can mount the panel slightly higher to keep it out of elbow range.
If you have a door on one side wall, placing a panel on the door itself can work if you use removable hooks or a lightweight frame. Doors are big flat reflectors, and treating them can be a sneaky way to fix a reflection point without giving up wall space.
Try not to leave a hard, reflective object directly opposite a treated panel, because you can create new flutter paths between untreated sections. The goal is not perfection, but you do want to avoid obvious “hard-to-hard” lanes across the room.
If you use nearfield monitors, side wall treatment can make the speakers feel closer and more focused, even at low volume. That is useful in a home office because you can keep volume down and still hear detail.
Ceiling “cloud” placement for small rooms
A ceiling cloud is a panel hung horizontally above the desk, and it is one of the highest return moves in a tight home office. Low ceilings create fast ceiling reflections that smear speech and make claps sound sharp and metallic.
People skip the ceiling because it feels like a bigger project, but the ceiling is often the closest surface after the desk itself. If you have a typical 8-foot ceiling, the reflection arrives quickly enough to mess with clarity even when the room does not sound “echoey.”
Place the cloud above the desk area where your head and mic sit, not centered in the room like a chandelier. If you can, leave a small air gap of 2 to 6 inches above the panel, because that improves low mid absorption without buying thicker panels.
The air gap matters because it effectively increases the depth of the absorber at the frequencies that need it most in an office. That is one reason a cloud can sound more effective than the same panel mounted flat on a wall.
Use your ceiling mirror marks to decide the front to back position, then size the cloud to cover that zone with a little margin. A 2 by 4 foot cloud is a practical starting point for most desks, and two clouds work well for long L-shaped setups.
If your desk is deep, you may want the cloud to start slightly in front of your head position, because the reflection point can be forward of where you sit. This is especially true if your speakers are on the desk and angled toward you.
If you do video calls, keep the cloud slightly behind your key light so you do not cast weird shadows on your face. This is one of the few times aesthetics and acoustics can cooperate in a normal home office.
Also consider fan noise and HVAC vents, because a cloud placed too close to an air vent can flutter or pick up dust patterns over time. A few inches of clearance and solid mounting hardware keep it quiet and stable.
If you cannot mount to the ceiling, a cloud can sometimes be mounted to a simple frame that stands behind the desk, but it is not as effective as overhead placement. The closer the panel is to the reflection path, the more it behaves like a real cloud instead of just another wall panel.
In very small rooms, a cloud can reduce that “bathroom” brightness that makes you feel like you are speaking louder than you are. Once the ceiling reflection is controlled, you can often lower mic gain and still sound present.
If you are using an overhead mic for meetings, the cloud becomes even more important because the mic is literally pointed at the ceiling. Treating the ceiling in that case can be the difference between sounding professional and sounding like you are in a kitchen.
Keep the cloud centered over your actual work zone, not over the center of the room, because your ears and mic do not sit in the center. A cloud that follows the desk is a practical choice that matches how you use the space.
How many panels you need (practical starting layouts)
Panel count depends on room size, how reflective the room is, and whether you want it to sound neutral or just less annoying. For most people asking where to place acoustic panels in a home office, the right answer is fewer panels, placed at the right reflection points, then add more only if needed.
It also depends on how close you sit to walls, because close boundaries create stronger early reflections. A small office with the desk against a wall can need more targeted treatment than a larger room with the desk floating away from surfaces.
A good baseline for a small office is six to eight 2 by 4 foot panels, assuming they are real broadband absorbers and not thin foam. If you have hardwood floors and bare walls, you may want more, but start with a layout that hits the first reflection points first.
If you are on a tight budget, start with four panels and place them where they do the most work, then add a cloud later. Two side reflection panels plus two front wall panels can make a surprisingly big difference for both calls and casual listening.
If your room already has carpet, curtains, and a soft couch, you might need fewer panels than you think, because the room is already absorbing some highs. The mirror method still matters, because even a “soft” room can have a few nasty reflection points near the desk.
If your room is mostly glass, hardwood, and minimal furniture, you may need more coverage just to stop the room from sounding sharp. In that case, treat reflection points first, then add panels to break up large bare areas that keep the room lively.
- Two side wall panels at first reflection points
- One ceiling cloud above the desk
- Two front wall panels behind speakers and monitor zone
- One rear wall panel at head height behind the chair
- Optional corner bass traps if the room booms at 80 to 150 Hz
- Optional extra side wall panel if the desk is very wide
That list is a starting layout, not a rule, and you can swap pieces depending on your biggest problem. If your voice sounds roomy but your speaker setup is fine, move the priority to the front wall and rear wall around the mic line.
If you do not use speakers at all, you can treat the room like a voice booth without making it claustrophobic. In that case, panels near the mic and the wall you face usually matter more than perfect left-right symmetry.
If you do use speakers and you care about bass accuracy, panels alone may not be enough in the corners. Bass traps or thicker corner treatment can reduce the “one note” boom that makes some voices and kick drums feel too loud.
A practical way to scale is to add panels one pair at a time and listen for changes in clarity and fatigue. When additional panels stop making obvious improvements, you are probably past the point of “home office” needs and into fine-tuning.
Do not forget that rugs, heavy curtains, and filled bookshelves can count as part of the overall absorption and scattering in the room. They are not replacements for reflection-point panels, but they can reduce how many panels you need to reach a comfortable sound.
If you share the office with someone else, a smaller number of well-placed panels is easier to keep neat and acceptable. A room that looks normal but sounds controlled is usually the best long-term win.
When in doubt, prioritize the surfaces closest to your head and mic, because those create the strongest early reflections. Panels far across the room can help, but they are rarely the first thing that fixes clarity.
Common placement mistakes to avoid
The most common mistake is treating the room like a photo backdrop, with panels stacked behind you because it looks “studio.” That can help a little for the mic, but it ignores first reflection points that actually ruin clarity.
A backdrop wall can still be useful, but it should not be the only treated surface in the room. If the side walls and ceiling are untreated, your mic will still pick up those early reflections even if the background looks great on camera.
Another mistake is placing panels too low, especially when people mount them like wainscoting. Your ears and mic are higher than your knees, so low panels miss the strongest reflection paths.
Low panels can help with some flutter and general liveliness, but they are not a substitute for ear-height placement. If you only have a few panels, put them where the sound actually travels, not where they avoid furniture.
Thin foam tiles are also a trap, because they mainly absorb hissy highs and leave the boxy low mids untouched. The result is a room that sounds dull but still muddy, which is the opposite of what you want for calls and voice recording.
Foam can be fine as a small add-on for taming a very specific high-frequency reflection, but it should not be your main plan. If you want real improvement, use broadband panels with enough thickness to affect the range where speech lives.
Another common mistake is leaving a big reflective desk surface and then wondering why the mic still sounds “roomy.” The desk reflection is not always the biggest issue, but it can add a subtle comb filter that makes voices feel papery.
You can reduce desk reflections by raising the mic slightly, angling it down toward your mouth, and keeping the mic closer so you can lower gain. The less gain you need, the less the mic hears the room, even before you add more panels.
People also mount panels with no thought to air gaps, especially on the ceiling and front wall. A small gap can improve performance enough that you need fewer panels to get the same result.
Finally, avoid random spacing that leaves big reflective gaps right at the mirror method acoustics marks. If you must choose between perfect symmetry and hitting the true reflection point, hit the reflection point and live with the look.
A related mistake is assuming that any empty wall space is a “reflection point” just because it is empty. Reflection points are specific locations, and treating the wrong place can make you think panels do not work when the problem is simply placement.
Another trap is over-treating one area while leaving another critical surface bare, which can make the room sound uneven. A balanced approach usually sounds more natural than a room that is dead in front and bright behind.
If you are using speakers, do not forget that the floor can be a reflection path too, especially with hardwood. A rug between you and the speakers can reduce the floor bounce and complement the wall and ceiling panels.
If you are using a headset mic, do not assume you can ignore the room completely, because the headset still hears reflections and reverb. A treated room makes even cheap headset mics sound more expensive and easier to listen to.
Conclusion
Clearer sound comes from controlling the earliest reflections around your desk, not from covering every empty wall. When you focus on first reflection points, the rest of the room often becomes easy to manage with a few extra panels.
Use your real working position, mark reflection points with the mirror method, then treat the front wall, side walls, and ceiling in that order. If you keep desk setup acoustics front and center, you will stop guessing about where to place acoustic panels in a home office and start hearing predictable improvements.
After you place the first few panels, test with the same routine each time, like reading a paragraph out loud or taking a quick meeting recording. Small changes are easier to hear when you keep the source and mic position consistent.
If the room starts to feel too dead, add back a little life with furniture, plants, or a bookshelf rather than removing the panels that are doing the most important work. A home office should sound controlled and comfortable, not like you are speaking into a pillow.
Once your reflection points are treated, you can make small tweaks like shifting a panel a few inches or adding a second cloud section to cover a wider desk. Those small moves are where the room starts to feel “finished” instead of just improved.
The best part is that you do not need to guess or chase trends, because the geometry tells you what to do. When you place panels where the sound actually travels, the room stops fighting you and starts working with you.