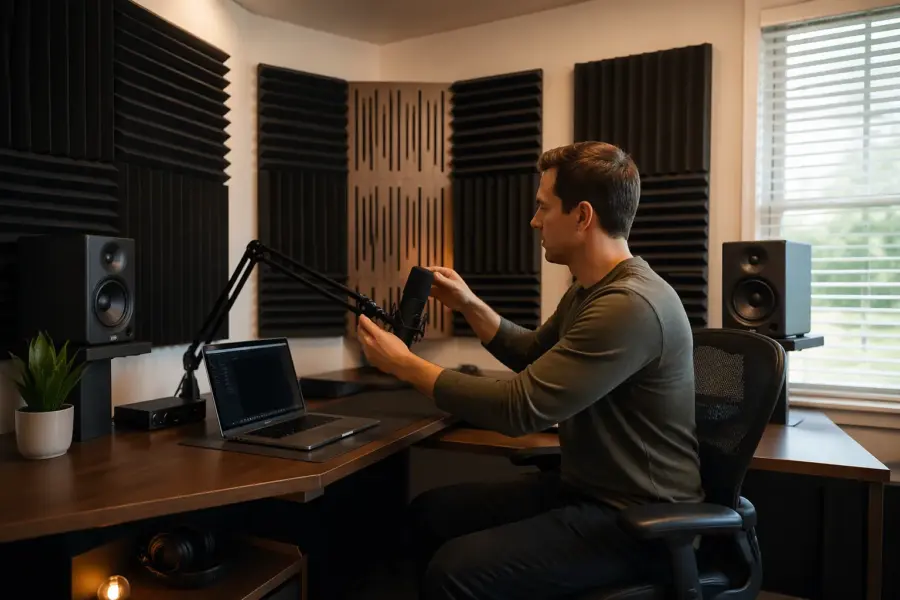
A corner desk home studio geometry setup is the most common home office compromise I see, because it fits the room before it fits the audio. It can work, but only if you treat the corner like a problem to manage instead of a neutral place to park speakers.
When your monitors and your head sit near two walls, you get corner loading in the lows and a mess of early reflections in the highs. Those two issues can make mixes sound thick, sharp, and confusing at the same time.
The goal is not perfection, because small rooms do not hand out perfection. The goal is repeatability, so what you hear at the desk matches what you hear on headphones, in the car, or on a Bluetooth speaker.
If you keep the corner, you need a plan for bass, speaker angles, and reflection control that respects the geometry of the room. If you can move out of the corner, you should at least know what you gain and what you lose before you start buying panels.
Why corner setups are common (and why they’re challenging)
Corner desks happen because bedrooms and spare rooms usually have one “good” wall for a bed, one wall for a closet door, and a corner that seems leftover. The corner also gives you a sense of privacy on video calls, since the camera points into the room instead of at a blank wall.
The challenge is that audio does not care about convenience, it cares about distances and symmetry. In a corner you are automatically close to two boundaries, and those boundaries change the low end and the timing of reflections.
People also like corners because they can push the desk back and reclaim floor space. That move usually puts the speakers closer to the walls than the speaker manufacturer ever intended.
Corner desk home studio geometry gets extra weird when one wall is a window and the other is drywall, because the two sides do not reflect the same way. Even if the room is square, the corner makes it easy to end up with one speaker closer to a wall than the other.
Corners also encourage odd desk shapes, like L-desks or wraparound surfaces that look productive but create more reflection area. The more hard surface around the speakers, the more the room adds its own EQ on top of your monitors.
Another reason corners feel natural is that you can face into the room and keep the door in your peripheral vision. That comfort matters for long sessions, but it can trick you into accepting a listening position that is acoustically hostile.
Most home studios are also shared spaces, so the corner becomes the only place you can leave gear set up without blocking normal life. The problem is that “out of the way” often means “right where the room piles up bass.”
People underestimate how much a few inches matter, because the corner feels like a fixed point. In reality, the corner is a pressure zone, and small shifts in where you sit relative to it can change what you think the kick drum is doing.
Finally, corners tend to be where power outlets and Ethernet jacks end up, which makes the setup feel practical. Practical is good, but you cannot cable-manage your way out of early reflections and boundary interference.
What happens to bass when you sit in a corner
A corner is the loudest place in the room for bass, and that is the core of corner loading. Two walls and often the floor meet there, so low frequencies build up and decay longer than they should.
That buildup is not a smooth “more bass” knob, it is a set of peaks and dips tied to room modes. You can get a huge hump around 80 to 120 Hz and a deep null around 50 to 70 Hz, then you chase it with EQ and make the problem worse.
When you sit in the corner, you also sit closer to pressure maxima for several axial modes. The result is bass that sounds impressive on kick drums but lies to you on bass guitar notes that land in the nulls.
If you want proof, play a slow sine sweep from 30 Hz to 200 Hz and listen at the chair. You will hear the level jump around, and you will also hear certain notes hang in the air after the sweep passes them.
Corner loading also changes how you set your low end balance, because the room makes you think there is more sub than there really is. That is why corner mixes often come out thin on other systems, even when they sounded “big” at the desk.
SBIR is the other bass villain here, because the speaker’s output reflects off the wall behind it and cancels at specific frequencies. In a corner, you can get SBIR from the front wall and the side wall at the same time, which creates multiple dips that feel random.
The floor matters too, especially if the speakers are on the desk and close to the surface. Floor bounce can carve out a notch in the low mids that makes you overdo warmth on vocals and guitars.
Low frequency decay is what makes corners feel “boomy,” and it is often more important than the frequency response line. If the room rings for a long time at one note, your compressor decisions will be based on the room’s tail instead of the track’s envelope.
Subwoofers get extra tricky in corners because the sub is basically designed to excite room modes efficiently. If you add a sub without a plan, you can turn a manageable hump into a low end fog that never clears.
Even if you do not use a sub, modern nearfields can reach low enough to trigger the same issues. The better your monitors are, the more clearly you will hear the corner’s problems, which is both frustrating and useful.
One of the most common corner mistakes is mixing at low volume to “avoid bothering people,” then turning up occasionally to check. The room’s bass balance changes with level perception, so the corner can feel different every time you touch the volume knob.
Getting workable speaker angles and symmetry
Speaker angles matter more in a corner because you have less room to “cheat” with placement, and the side walls are right there. You still want an equilateral triangle, with the tweeters aimed at your ears and the monitors the same distance from your head.
Symmetry is the part that people skip, then wonder why the stereo image leans left or right. Measure from each tweeter to the nearest side wall and to the front wall, and make those distances match as closely as the room allows.
If the desk is in a true 90-degree corner, the simplest target is to bisect the corner so your nose points directly into the angle. That at least gives you a fighting chance at equal left and right boundary conditions.
Toe-in is not just about imaging, it is also about how much high frequency energy you throw at the side walls. A little more toe-in can reduce side wall splash, but too much can make the sweet spot tiny and fatiguing.
Distance from the wall behind the speakers matters because it sets the SBIR frequency, and small changes can move the dip out of the most sensitive range. In corners, pulling the speakers forward even a hand’s width can change the low-mid clarity more than a plugin EQ.
Height symmetry matters as much as left-right symmetry, because one monitor on a stack of books and the other on a stand is a recipe for different reflections. If the tweeters are not level with each other, the phantom center will never feel locked.
Isolation is part of geometry too, because a speaker coupling into the desk changes what you hear at the chair. Pads and stands are not magic, but they reduce the desk’s tendency to act like a resonant instrument.
Do not assume the desk edge is your reference, because many desks are not square to the walls once they are shoved into a corner. Use the walls and a tape measure as the reference, then align the desk to the listening geometry instead of the other way around.
If you have to compromise, prioritize equal distance from your head to each speaker over almost everything else. A slightly imperfect triangle is easier to adapt to than a triangle where one side is longer and your brain keeps correcting for it.
| Setup choice | What you gain | What can go wrong |
|---|---|---|
| Monitors tight in the corner | More desk space, shorter cable runs | Heavy corner loading, strong SBIR dips |
| Monitors pulled 8 to 16 inches forward | Cleaner low mids, easier reflection control | Less desk depth, stands may be needed |
| Wider speaker angle (over 60 degrees) | Big stereo width at low volumes | Weak center image, harsh side wall reflections |
| Narrower speaker angle (under 60 degrees) | Stable phantom center for vocals | Smaller sweet spot, more toe-in sensitivity |
| Speakers on stands behind desk | Better height and isolation | Stand placement fights the corner footprint |
If your monitors are rear-ported, corners can exaggerate the port tuning and make the low end feel like it has one-note power. Front-ported speakers are not immune, but they often behave a little more predictably when space is tight.
Keep an eye on how far the speakers are from the desk edges, because edge diffraction can add a subtle brightness that is hard to identify. When one speaker is closer to an edge than the other, it can also skew your perception of left-right tone.
It helps to mark the speaker feet positions once you find something that works, because corners invite accidental nudges. Repeatability starts with being able to return to the same geometry after cleaning or moving gear.
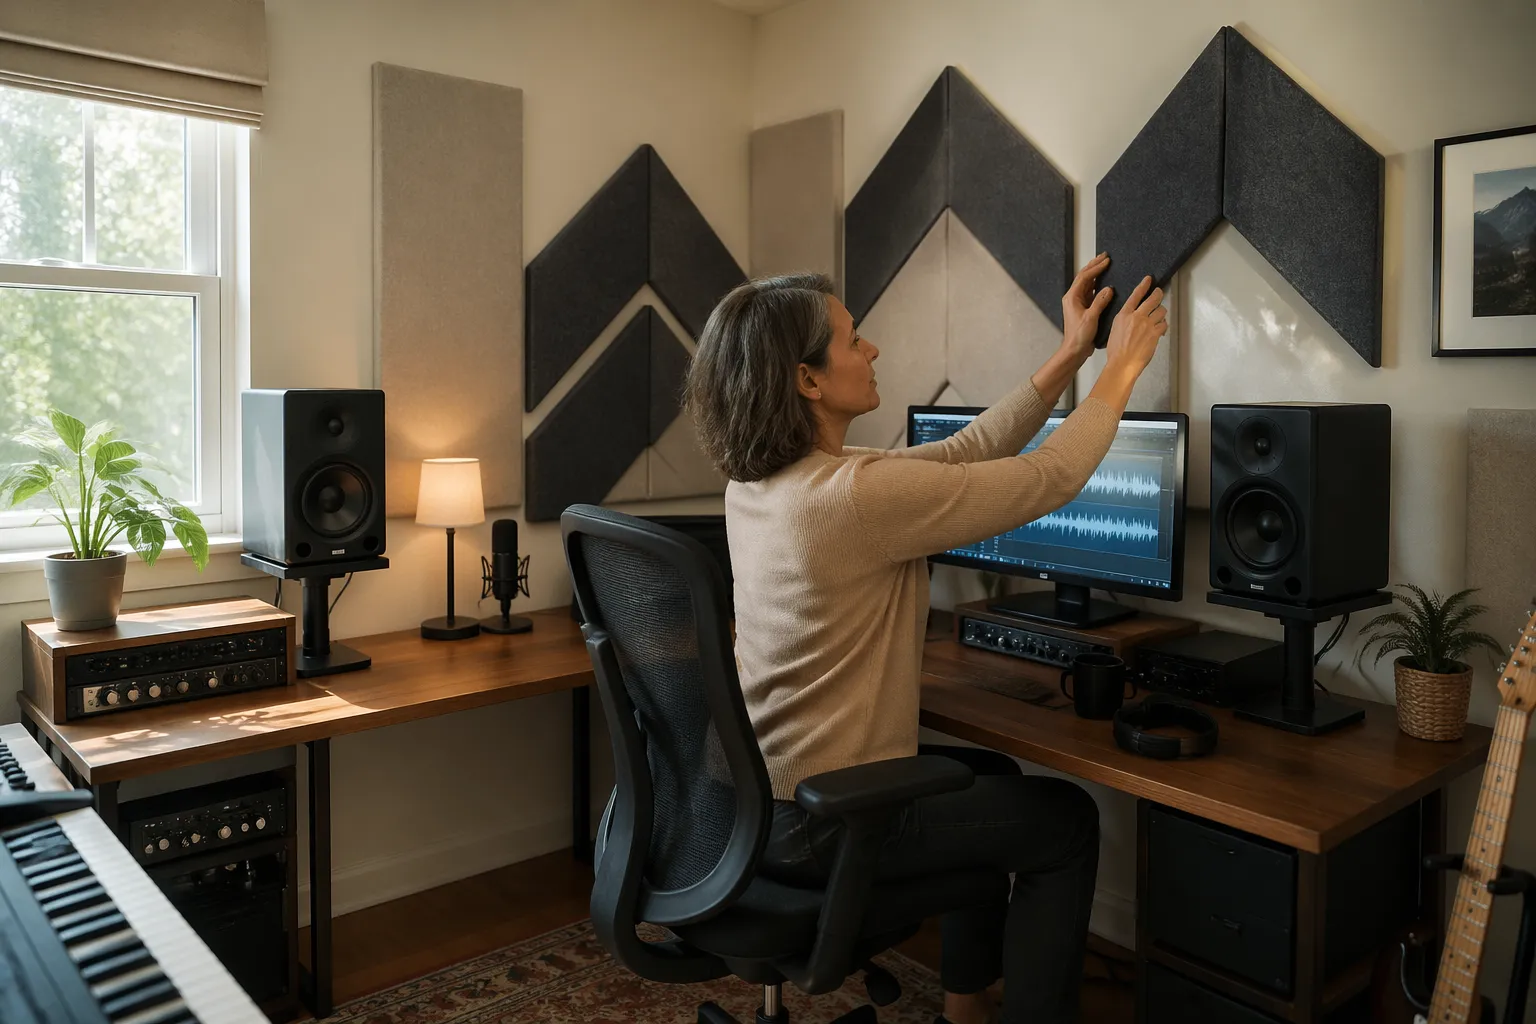
Managing reflections from two nearby walls
In a corner, the first reflections arrive fast, because the sound only travels a short distance to hit a wall and bounce back. That early energy smears transients and makes cymbals and consonants sound splashy or spitty.
Reflection control starts with the mirror trick, where you slide a mirror along each wall and mark where you can see the tweeter from the listening spot. Those marks are where broadband absorption does the most work for imaging.
Panels need thickness to matter, so a 4-inch panel with a small air gap usually beats a thin foam tile. If you can only do one thing, treat the two side wall points first, because they mess with speaker angles and phantom center the quickest.
The corner itself also throws reflections back toward you, especially if the desk is shoved tight and the speakers fire across the corner. A thick corner trap or a stack of mineral wool in the corner can reduce that slap and calm the top end.
Desk reflections are the sneaky third wall in a corner setup, because the desktop is usually closer than either side wall. If your desk is glossy or wide, it can add a bright comb filter that makes you under-EQ harshness in the mix.
The ceiling is often forgotten because it is not in your line of sight, but in small rooms it is usually a strong early reflection. A cloud above the listening position can make the stereo image snap into focus, especially in corners where everything is close.
Windows create a different kind of reflection, because glass is very reflective in the highs but can flex a bit in the lows. That mismatch can make one side feel brighter while also feeling oddly “hollow” compared to the other side.
Doors and closets can act like partial absorbers when they are open, which means your room changes every time you walk in. If you mix with a door open, try to keep it open consistently so your left-right balance does not shift day to day.
Diffusion is tempting because it looks cool, but in a tight corner it often does not have enough distance to work as intended. If the wall is within a couple feet of your head, thick absorption is usually the safer move.
Do not forget that reflections are also about timing, not just level, so the “same” panel can feel different depending on placement. Moving a panel a few inches can change whether it catches the first reflection or the second, and the first one is the one you care about most.
If you have bare parallel walls near the corner, flutter echo can show up even when the room is small. A couple of well-placed absorbers can stop the zing that makes you think your monitors are too bright.
Small layout changes that reduce corner problems
You do not need to rebuild the room to improve corner desk home studio geometry, but you do need to stop treating the desk as immovable. Pull the desk forward so the monitors are not jammed against the walls, even if that means you lose a few inches of walking space.
Try shifting the whole desk left or right by a few inches to dodge a stubborn bass null, because small moves can change the modal balance at your ears. Keep the chair centered on the desk, because you want the same speaker angles on both sides.
Get the monitors off the desk if you can, since the desk surface creates its own reflection that comb filters the midrange. A pair of short stands behind the desk or clamp-on monitor arms can clean up the 150 Hz to 1 kHz region more than people expect.
Do not ignore height, because a tweeter that fires at your chest will sound dull and lopsided once reflections kick in. Set tweeters at ear level and keep both monitors the same height, even if you have to raise one with a proper stand.
If your desk is an L-shape, try using only the main section for the speakers and keep the return as empty as possible near the monitors. That reduces the amount of hard surface right next to the speaker baffles.
Rotate the desk slightly so the speakers do not fire perfectly parallel to either side wall, because tiny rotations can change reflection paths. You still want symmetry, but symmetry can exist at a slight angle if both sides match.
Consider placing the keyboard and mouse a little lower or farther back so you can keep the speakers forward without sacrificing comfort. Comfort matters because you will not keep a setup that forces you into a bad posture.
If you have a big screen between the speakers, lower it or move it back so it is not acting like a reflective wall in the middle. A screen reflection can blur the center image and make vocals feel like they are coming from the glass instead of the speakers.
Try a small rug if you have a hard floor, because it can reduce some mid and high reflections that bounce between desk and floor. It will not fix bass, but it can make the room feel less “clicky” and less tiring.
Keep clutter under control, because piles of gear can create random reflective angles that change the sound in unpredictable ways. Random is not always bad, but it makes it harder to learn your room and trust what you hear.
If you can, keep the speakers the same distance from the corner seam itself, not just from the walls. That little seam becomes a reference point when you are trying to keep the geometry consistent.
Practical treatment priorities for a corner desk
If you can buy or build only a few pieces, start with bass trapping, because corner loading is the hardest thing to EQ away. Thick traps in vertical corners and along the ceiling line do more for translation than a dozen thin panels.
After bass, chase the early reflections that ruin imaging, because that is where your brain decides whether panning and reverb make sense. That means side wall absorption, then a ceiling cloud above the desk if the ceiling is low and reflective.
The back wall matters too, even in a corner setup, because reflections behind you can ring and make the low mids cloudy. If the chair is close to the back wall, use thick absorption there rather than a diffuser, because diffusion needs distance to work.
Do not treat only one side because one side “looks nicer,” since asymmetry is how you get a tilted stereo image. If one wall is a window, a heavy curtain plus a panel on a stand can get you closer to matching the other wall.
If you are building DIY panels, prioritize density and thickness over fancy fabric, because performance comes from the core. A plain-looking 4-inch panel in the right spot beats an expensive thin panel placed for aesthetics.
Air gaps are your friend, because a panel spaced off the wall can absorb lower frequencies than the same panel glued flat. In a corner room, that extra reach can help tame the low mids that make mixes feel congested.
Do not ignore the wall directly behind the speakers, because it is part of SBIR even if the speakers are angled. A couple of thick panels behind the monitors can sometimes smooth the low-mid response more than you expect.
Ceiling-to-wall corners are often easier to treat than floor corners in a lived-in room, because you are not tripping over traps. A continuous soffit-style trap around the corner area can be a big win if you can pull it off.
If you record vocals in the same corner, do not assume the mixing treatment automatically fixes recording reflections. You may need a movable absorber or gobo so the mic is not hearing the same corner slap you are trying to mix through.
Try to keep treatment decisions consistent with your workflow, because the best panel is the one you do not move out of the way every day. If you must use stands, choose positions that do not block drawers or doors so you keep them deployed.
Once you have basic treatment, small tweaks like adding absorption to the desk front edge area can reduce midrange glare. The goal is not to deaden the room, it is to reduce the most damaging early energy.
Quick checks you can do before buying anything
You can learn a lot with a tape measure, painter’s tape, and a few reference tracks you know cold. Mark your current speaker and chair positions, because you will forget the “before” once you start sliding furniture around.
Use a mono vocal track and listen for center stability as you move your head an inch or two, because reflections will pull the image off center fast. If the mono image jumps around, you have a reflection control problem before you have a “better monitors” problem.
Clap tests can be useful if you do them carefully, because they reveal flutter and short slap echoes that show up in corners. If you hear a metallic zing, you are hearing geometry, not “air” or “detail.”
Play pink noise and slowly pan it left to right, because it makes level imbalances obvious. If one side feels louder or brighter at the same fader position, your symmetry is off or one side is reflecting harder.
Listen to a kick-and-bass-heavy reference and focus on whether the bass notes feel evenly spaced in loudness. If some notes vanish while others jump out, you are sitting in a modal pattern that will mislead your low end decisions.
Try moving the chair forward and back in 3-inch increments while playing a steady bass tone, because it shows how sensitive the corner is to position. Once you find a spot with fewer extremes, you can build the rest of the setup around it.
Use your phone’s SPL meter app as a rough consistency tool, not as a lab instrument. The point is to keep your monitoring level repeatable so you can compare changes without being fooled by volume.
If you have headphones you trust, compare low end balance between headphones and speakers at the same perceived loudness. Big differences usually mean the room is pushing you around, not that your headphones are “wrong.”
- Measure tweeter to ear distance on both sides
- Match tweeter height to seated ear height
- Check 60 degree speaker angle at the chair
- Move desk 6 to 12 inches forward from the corner
- Mark side wall first reflection points with a mirror
- Play a 30 to 200 Hz sweep to spot peaks and nulls
Take photos of each change so you can correlate what you heard with what you did. That record helps you avoid looping back to a worse setup just because it “looked cleaner.”
Do one change at a time and recheck, because corners punish random experimentation. If you move speakers, chair, and desk all at once, you will not know what actually helped.
When to abandon the corner and try a wall setup
Some rooms fight you so hard in the corner that treatment starts to feel like patching a leaky boat. If you cannot get symmetry, or you cannot pull the monitors away from the walls at all, a straight wall setup often wins immediately.
A wall setup usually means the desk is centered on one wall and the speakers fire down the length of the room. That geometry tends to give you more even bass and more consistent reflection timing, even before you hang a single panel.
If one side of your corner is open to a hallway and the other is a solid wall, you have a built-in imbalance that speaker angles cannot fix. You can treat around it, but you will always be mixing into a left side that behaves differently than the right.
You should also bail on the corner if your chair ends up against the back wall, because that position exaggerates low frequency pressure and kills depth. Even a 12 to 18 inch gap behind your head can make the room easier to manage.
If you have the option to face the short wall and fire down the long dimension, you usually get smoother modal spacing at the listening position. It is not guaranteed, but it is often a better starting point than a corner that forces everything close.
Another sign to move is when your treatment plan becomes extreme just to reach “okay” results, like needing massive traps that eat the whole corner. At that point, a simple layout change can be more effective than doubling down on the same geometry.
If your desk must be in the corner for non-audio reasons, you can still consider a wall-facing listening setup by rotating the speakers and chair away from the desk. It is not elegant, but it can separate “computer station” from “mix position.”
Pay attention to how often you second-guess panning and reverb depth in the corner, because that is a symptom of reflection chaos. A wall setup often makes depth decisions feel easier even when the bass is still imperfect.
Moving out of the corner can also simplify cable routing and stand placement, because you are not fighting the tight footprint. Ironically, the corner that felt tidy can become the messiest spot once you add treatment and stands.
If you must stay in the corner, set realistic targets
Staying in the corner is fine if you accept that you are building a dependable workstation, not a mastering room. Your target is a stable phantom center, predictable bass balance, and fewer surprises when you check mixes elsewhere.
Pick one reference level and stick to it, because loud monitoring hides bass problems and makes reflection glare easier to ignore. I like checking around 70 to 75 dB SPL at the chair, then doing quick quiet checks where the midrange tells the truth.
Use a measurement mic if you can, because REW sweeps show you what corner loading is doing instead of what you want it to do. The graphs do not mix music for you, but they keep you from wasting money on treatment in the wrong spot.
Do not over-EQ the monitors to “fix” the room, because deep nulls are usually geometry problems and they do not fill in with EQ. Fix placement first, then treat, then use gentle EQ as a finishing move.
Build a small reference routine that you repeat every session, like checking one bass-heavy track and one vocal-forward track. The routine trains your ears to your corner, which is the real secret to getting consistent results.
Accept that you may need to do more headphone cross-checking than someone in a better room. Headphones are not a replacement for speakers, but they are a useful second opinion when the corner is lying to you.
Keep your low end decisions conservative, because corners often make you under-mix bass and low mids. If you are unsure, leave a little more weight than feels perfect in the corner and verify it elsewhere.
Be careful with wide stereo effects, because corner reflections can make width feel exciting even when the mix will collapse on other systems. If the center image is stable, then you can trust your width choices more.
Try to keep the room configuration consistent, including curtains, door position, and even chair height. Consistency is how you turn a compromised geometry into a reliable tool.
If you add new gear, recheck your geometry, because a bigger screen, a new rack, or a different desk can change reflections. The corner is sensitive, so even “small” furniture upgrades can shift the sound.
When you do use EQ correction, keep it broad and gentle, because narrow filters can make you chase measurement noise. The goal is to smooth the overall trend, not to flatten every ripple in a room that will never be flat.
Conclusion
Corner desk home studio geometry can work, but the corner pushes bass forward and drags reflections into the first few milliseconds where your ears judge clarity. If you manage corner loading, lock in speaker angles with real symmetry, and commit to reflection control, the corner stops being a deal breaker.
Start with placement and small layout changes, because those moves are free and they often beat buying more gear. If the room still refuses to cooperate, moving to a centered wall setup is the cleanest upgrade you can make in a home office.
The most important takeaway is that corners are not “bad,” they are just demanding, and they punish guesswork. A few measured decisions can turn a frustrating corner into a space where you can finish mixes with confidence.
Once you get something repeatable, stop changing things every week and learn the setup through real projects. The room will never be perfect, but your results can be consistent if your geometry and habits stay consistent.


