If you make music or run video calls from a home office, your chair position matters more than your monitors cost. A few inches forward or back can flip your bass response from tight to muddy.
The listening position 38 percent rule home studio advice gets passed around because it often lands you in a less awful spot for low end. It is not magic, but it is a fast way to avoid the worst pressure zones in a typical rectangular room.
Home offices add their own problems like desks jammed against walls, closets that act like random bass traps, and doors that stay open all day. The goal here is simple, find a starting point that respects room length, then verify it with your ears and a couple small moves.
What the 38% rule is (and what it isn’t)
The 38% rule says you start your listening position at 38 percent of the room length, measured from the front wall behind your speakers. That location often avoids the strongest front to back standing wave null that shows up closer to the middle of the room.
It is a setup shortcut for rectangular rooms, not a physics law that guarantees flat bass response. If your room has big asymmetries, open doorways, or a sloped ceiling, you can still use it as a baseline but you should expect to adjust.
People misuse the rule when they treat it like a fixed seat placement for every studio and every desk. The real value is that it gives you a repeatable front wall distance to try before you start chasing problems with gear.
It also does not tell you where the speakers go, how far apart they should be, or how high they should sit. Think of it as one coordinate in a bigger layout, with room length and symmetry doing most of the heavy lifting.
The reason this number exists is that the worst seat in many rooms is right around the 50% mark, where a big null can make bass disappear. Starting at 38% is basically a way to not begin your setup in the most common trap.
It is also not the same thing as “sit where it sounds best” because you still need symmetry and workable speaker placement. A spot that seems bassy in one corner can be misleading if the stereo image is skewed and reflections are uneven.
Some rooms end up happier at 35% or 41%, and that does not mean you did it wrong. The rule is more like a first guess that is usually closer than random placement.
If you only remember one thing, remember that the rule is about the distance from the front wall, not the distance from your desk edge. Your ears are the reference point, not your keyboard.
It also does not replace basic listening habits like checking mixes on headphones and in the car. A better listening position just means your decisions translate more often and you waste less time second guessing the low end.
How to measure your room length the right way
Room length for this rule means the distance sound travels from the front wall to the back wall along the centerline of the room. Measure the longest continuous front to back dimension that your speakers and chair actually “see,” not the distance to a bookshelf or a dresser.
Pick the front wall first, which is usually the wall you face while working, with speakers firing down the length of the room. This orientation tends to give smoother bass response than firing across the short dimension, especially in narrow home offices.
Use a tape measure and run it at ear height if you can, because alcoves and baseboard heaters can trick you at floor level. If you have a closet with a door that stays shut, treat it like a wall for measurement, because acoustically it mostly behaves that way below a few hundred hertz.
If one side opens to a hallway and the other side is a solid wall, write that down because it affects what “back wall” even means. The 38 percent point still gives a starting chair distance, but open boundaries can reduce or shift the biggest nulls compared to a sealed rectangle.
Do not guess the length based on a floor plan unless you have verified it with a real measurement. A few inches of error is not fatal, but it can push your starting point into a spot that feels confusing when you begin fine tuning.
If your room has a bump out, like a chimney chase or a built in cabinet, measure the distance between the main front and back planes. Those protrusions matter for reflections, but the length mode behavior still mostly follows the largest surfaces.
In a bedroom office, the “back wall” might be a wall with a big window and curtains, and that is still a wall for low frequencies. Curtains help highs, but bass goes right through them and still reflects off the boundary behind.
If you have a door on the back wall that stays open, measure to the wall plane anyway and note the opening as a variable. That open door can act like a pressure release and change the severity of certain bass peaks.
Also measure the room width and ceiling height even though the rule is about length. Those numbers help you understand why a room might still sound uneven even when the chair is “correct” on the length axis.
When you write down the length, write it in inches or centimeters, not just feet or meters. Precision makes the 38% calculation easier and helps when you are moving things in small steps later.
Setting your chair and desk around the 38% point
Once you have the room length, multiply it by 0.38 and measure that distance from the front wall into the room. That mark is your starting listening position, meaning where your ears land when you sit upright.
In a home office, the desk often forces compromises, so prioritize ear position first and then fit the desk around it. A deep desk can push you too far back, so it can help to pull the desk off the wall or use a shallower top.
Think about the chair position as a point in space, not the chair legs on the floor. If you recline, slouch, or perch forward, your ear position can shift several inches and you will hear the room change.
Set your chair height so your ears are roughly level with the tweeters, then keep that height consistent. If you constantly raise and lower your chair for typing comfort, you are also changing how the desk reflection hits your ears.
Try to keep the desk centered on the front wall so left and right boundaries match as closely as possible. Symmetry is not about perfection, it is about not giving your brain a lopsided soundstage to compensate for all day.
If your desk has to be off center because of a door or a closet, offset the entire speaker and chair setup together rather than just sliding one speaker. Unequal side wall distances are a reliable way to get a vocal that never quite sits in the middle.
Leave some breathing room behind the chair if you can, even if it is only a couple of feet. A little distance makes rear wall reflections easier to control with treatment and makes the low end less sensitive to tiny posture changes.
When you place the chair at the 38% mark, do not forget the desk thickness and monitor placement on the desk. If your speakers end up far forward on the desk, your ears might drift back without you noticing.
It helps to mark the ear position on the floor with tape and then align the chair so your head lands there naturally. If you have a rolling chair, consider using a small rug or a chair mat that keeps it from creeping backward.
If you use a sit stand desk, decide whether your critical listening happens seated or standing and optimize for one. Standing mixes can work, but the ear height change can shift the vertical reflection pattern and make the top end feel different.
| Room length | 38% distance from front wall | Practical desk and chair note |
|---|---|---|
| 10 ft (120 in) | 3.8 ft (46 in) | Often requires a compact desk or pulled forward desk |
| 12 ft (144 in) | 4.56 ft (66 in) | Works with many 24 in deep desks if monitors sit close |
| 14 ft (168 in) | 5.32 ft (77 in) | Gives breathing room for speaker stands behind the desk |
| 16 ft (192 in) | 6.08 ft (92 in) | Usually allows both desk space and a clear back wall gap |
Use the table as a sanity check, not as a strict target, because furniture depth varies a lot. A 30 inch deep desk plus a big monitor arm can eat the entire front half of a 10 foot room before you even place speakers.
If the calculated point lands in the middle of a walkway, you can still aim for it and then slide forward or back to keep the room usable. The point is to start near a known reference so your tweaks are intentional.
Once the chair is set, build your speaker triangle around that ear position. If you change the chair distance later, you may need to re-check toe-in and speaker spacing so the image stays stable.
When the rule fails: short rooms, alcoves, and open layouts
Short rooms are the most common failure case because the 38% point can land your chair uncomfortably close to the desk or too close to the back wall. When your ears end up within a foot or two of the rear boundary, rear wall reflections and boundary bass buildup can get ugly fast.
Alcoves and bay windows can also break the assumptions behind the rule, because the room length changes depending on where you stand. If your speakers fire into an alcove, the front wall distance is not a clean flat surface, and the low end can get lopsided.
Open layouts behave differently because the back wall might be “missing” into a hallway or kitchen, so some modes weaken while others stay. That can sound like less bass in general, but it can also create weird one note resonances if one boundary stays rigid and the other leaks.
If you cannot make the 38% placement work, do not force it by cramming furniture. Use it as a reference point, then choose a position that keeps your speakers and chair centered and gives you workable distances from both the front wall and the back wall.
Another failure case is the “multi-purpose wall,” where the front wall is mostly a window or a thin partition. The room can still have modes, but the boundary behavior is different enough that the usual null locations may shift.
Rooms with a big desk built into a nook can also trick you into measuring the wrong length. If your speakers are effectively firing into a small recess before the main room opens up, you will get early reflections and uneven bass that the 38% point cannot solve on its own.
Very small rooms sometimes sound better with the chair slightly forward of 38% simply because you need rear wall distance more than you need theoretical mode placement. If you have to choose, avoid being glued to the back wall whenever possible.
In open layouts, you may find that the best listening position is closer to the center than you expected because the missing boundary reduces the severity of the big null. That is fine, as long as you confirm it with repeatable listening and not just one bass-heavy song.
If your room has a sloped ceiling, the length mode might not be the dominant problem, and you may hear more unevenness in the low mids than the sub bass. In that case, the 38% rule still gives you a starting line, but treatment and speaker height become more important.
Do not ignore ergonomics when the rule “fails,” because pain and fatigue will ruin your decisions faster than a 6 dB dip at 110 Hz. A position that is slightly less ideal acoustically but comfortable and repeatable can beat a perfect spot you cannot sit in for an hour.
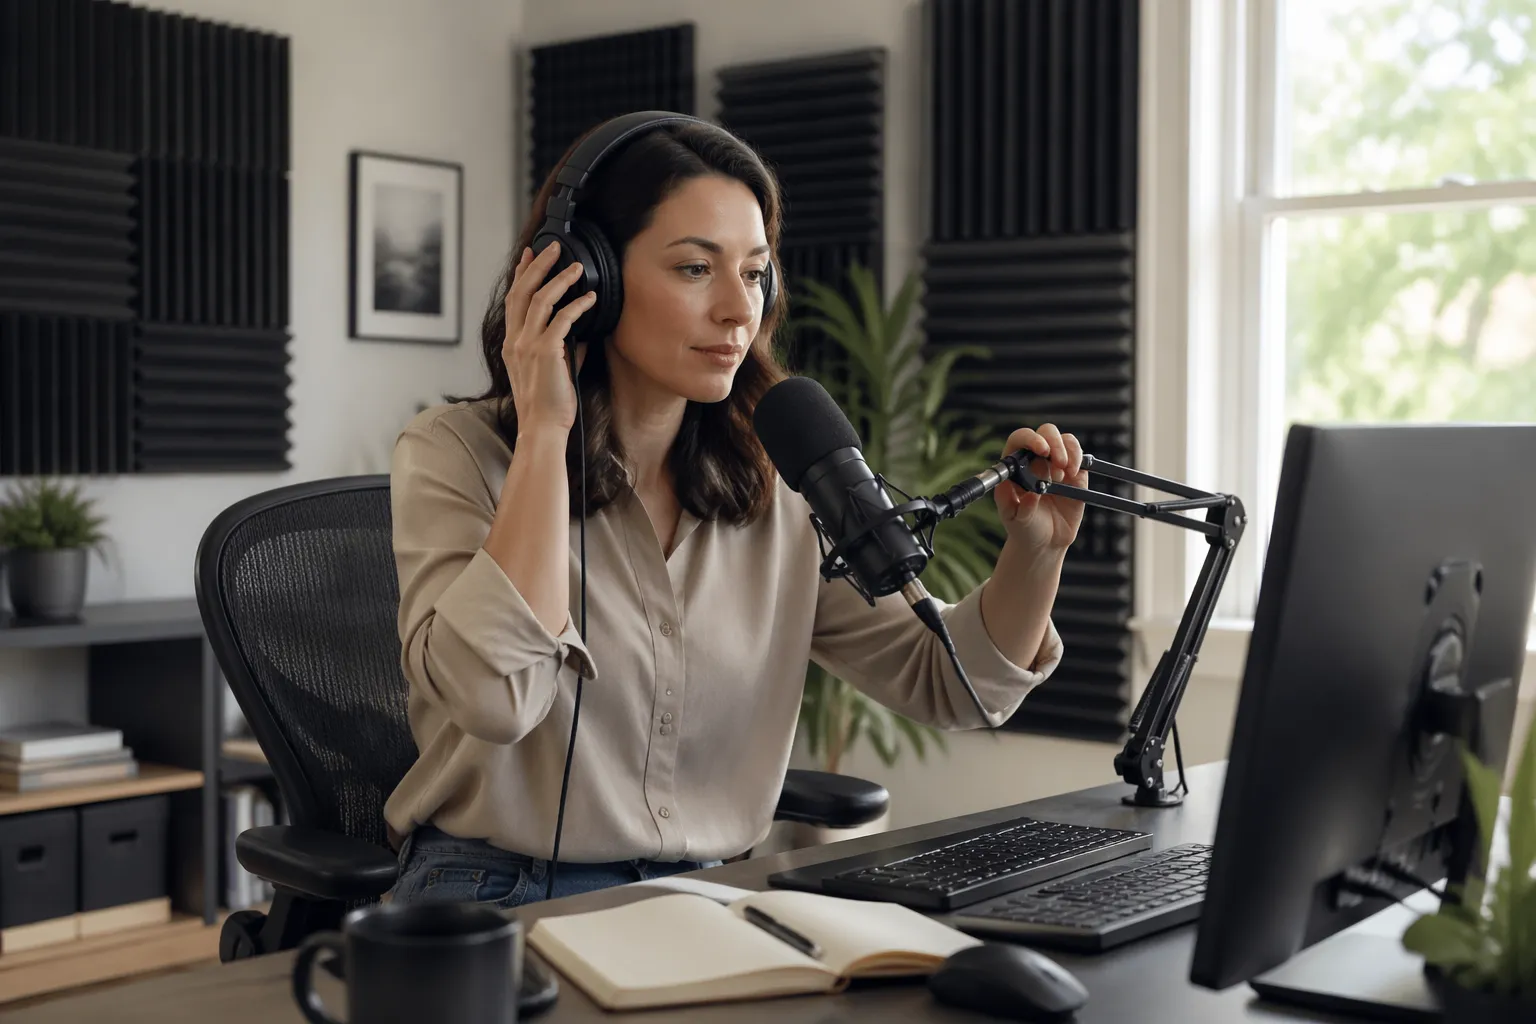
Fine-tuning with small moves you can actually hear
Once you are near the 38% spot, the best tweaks are small, like moving the chair 2 to 4 inches at a time. Big shifts make it hard to learn what changed, and you will blame the wrong thing.
Use a loop that exposes low end problems, like a kick and bass groove you know well, or a sine sweep if you can tolerate it. You are listening for sudden drops in bass response, boomy notes that hang around, and a center image that drifts when you lean.
Mark positions with painter’s tape on the floor so you can return to them after a meeting or a chair swap. In a home office, chairs roll, rugs slide, and you will lose your reference in a day if you do not mark it.
If you can, run a quick measurement with Room EQ Wizard and a cheap USB mic, then compare it to what you hear. The point is not to chase a perfect graph, it is to confirm that your listening position changes line up with real peaks and nulls tied to room length.
Start by moving only the chair, not the speakers, because you want to isolate one variable at a time. If you move both at once, you can land on a better sound by accident and have no idea how to repeat it later.
Listen for bass consistency rather than bass quantity, because louder bass is not always better bass. A position that feels slightly lean but even across notes is easier to mix on than a position that hypes one or two notes.
Pay attention to the low midrange too, because that is where “boxy” and “honky” live in small rooms. When you move a few inches and vocals suddenly sound like they are inside a cardboard tube, you probably crossed a reflection or mode boundary.
Try a simple forward-back test where you move 6 inches forward, listen for 10 seconds, then move 6 inches back past your starting point. If one direction clearly tightens the kick and makes bass notes more even, you have a useful trend.
Do the same test at the same volume each time, because louder playback can mask nulls and make peaks feel exciting. Consistent level keeps your brain from confusing “better” with “louder.”
If you have a chair with a tall back, be aware that it can reflect mids and highs into your ears. Sometimes lowering the chair back or using a different chair makes the image clearer without changing the 38% distance at all.
When you measure, take more than one sweep and average them, because HVAC noise and random room sounds can mess with a single reading. Also keep the mic at ear height where your head normally sits, not where it is convenient.
After you find a good spot, live with it for a few days before making more changes. Your ears adapt quickly, and the goal is a position that stays trustworthy across different sessions and different material.
Quick checks to confirm you are in the right neighborhood
You can do a lot without software by using repeatable checks that expose placement problems. These checks are blunt tools, but they keep you from tuning by mood or volume.
Start with mono speech, like a podcast voice, because it should lock to the center without sounding hollow. Then play a bass heavy track quietly, because low volume makes room problems easier to spot than blasting the monitors.
Use a track with a steady bass line that walks through different notes, because it reveals unevenness faster than a single sustained sub note. If every G note explodes and every A note disappears, you are hearing the room more than the mix.
Clap once and listen for a sharp flutter echo between side walls, because that usually means you need some absorption at reflection points. Flutter does not directly invalidate the 38% rule, but it tells you the room is adding its own texture to everything.
Check your setup at the volume you actually work at, not just at a quick “test” level. Some room resonances feel manageable at low volume but become distracting when you turn up for a client call or a mix decision.
Also do a quick left-only and right-only check, because asymmetry can hide in plain sight when both speakers play together. Each speaker should sound roughly similar in bass and midrange when listened to alone from the chair.
- Mono vocal stays centered at normal sitting height
- Kick drum level stays similar when you lean 6 inches forward
- Bass notes do not vanish around 60 to 120 Hz
- Snare and vocal do not get sharper when you scoot back
- Left and right speaker sound equally loud at the chair
- Desk reflections do not make cymbals sound phasey
If two or three of those checks fail, do not panic and buy new monitors. Move the chair a few inches, re-check symmetry, and confirm your speaker distances before you assume the room is hopeless.
If all of the checks pass but mixes still do not translate, the issue might be monitoring level, calibration, or expectations rather than placement. A stable listening position is necessary, but it is not the only ingredient in consistent results.
One more simple check is to play pink noise in mono and slowly turn your head left and right. The tonal balance should not change dramatically with tiny head movements if the setup is reasonably stable.
Finally, do a “walk the room” test where you play a bass-heavy loop and walk from front to back. If the bass changes wildly across the room, that is normal, but your chair should not be sitting in the most extreme dead spot.
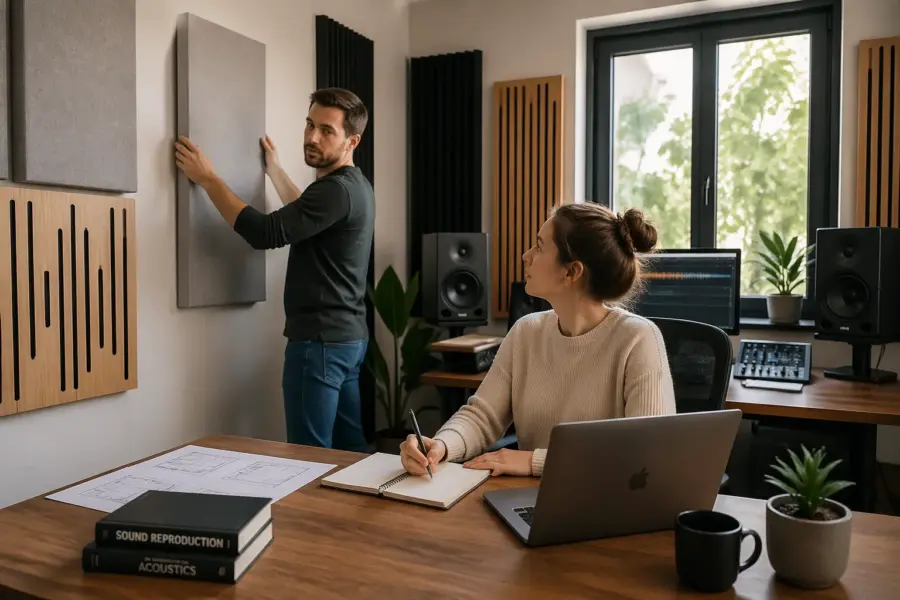
Pairing the position with basic acoustic treatment
The 38% rule gets you a better starting geometry, but treatment is what makes that geometry usable day to day. If you skip treatment, you can still mix, but you will fight the room every time the bass line changes key.
Start with bass traps in the front corners, because the front wall distance and corner pressure zones interact hard in small rooms. Thick traps, like 4 to 6 inches of mineral wool with an air gap, beat thin foam every time for bass response.
Next, treat the first reflection points on the side walls, which helps the stereo image and reduces comb filtering. If your desk is large and reflective, a small desk pad and slightly higher speaker stands can also cut the worst early reflections.
Rear wall treatment matters when your listening position ends up closer to the back wall than you would like. A thick absorber behind your chair can tame slap and smooth upper bass, and it is often the difference between “tight” and “boxy” in a home office.
If you can only treat a little, treat consistently rather than randomly. Two matching panels on the side walls will usually help more than one panel in a strange place that just happens to be convenient.
Ceiling treatment is also underrated in home offices because the desk and floor already create strong vertical reflections. A cloud above the listening position can clean up the midrange and make reverb tails easier to judge.
Do not assume that a couch, a bookcase, or a pile of clothes is “good enough” treatment, even though those things can help a little. Soft clutter tends to absorb highs while leaving bass untouched, which can make the room feel dull but still inaccurate.
If you rent and cannot mount panels, use free-standing gobos, thick art panels, or even heavy-duty mic stands with absorber panels clamped on. The goal is controlling reflections and bass buildup, not winning an interior design contest.
Once you add treatment, re-check your chair position because the best spot can shift slightly. Treatment changes decay time and reflection strength, which can make a previously “okay” position become clearly better or worse.
Resist the temptation to fix everything with EQ before you have done basic treatment. EQ cannot fill a deep null at the listening position, and boosting into a null just wastes headroom and makes other spots in the room boomier.
If you do use correction software, treat it as the final polish, not the foundation. A good position plus basic treatment makes correction gentler and less likely to create weird artifacts.
Speaker distance from the front wall and why it changes everything
You can place the chair perfectly and still get wrecked by speaker boundary interference if the monitors sit at a bad front wall distance. That effect shows up as deep dips in low frequencies, often somewhere between 80 and 200 Hz depending on distance.
As a practical rule, either keep monitors very close to the front wall or pull them far enough away that the first cancellation moves lower than your speaker can reproduce strongly. In many home offices, “very close” wins because it preserves space and keeps the desk from creeping into the listening position 38 percent rule home studio zone.
If you use speaker stands behind the desk, measure from the front wall to the front baffle of the speaker, not the back of the cabinet. Small changes, like 2 inches, can move a cancellation enough to hear it on bass guitar and lower piano notes.
Subwoofers complicate this, but the same idea applies, distance to boundaries changes where cancellations land. If you add a sub later, keep your chair position stable and move the sub around, because moving the chair breaks the whole reference you built.
Front wall distance also interacts with ported speakers, because rear ports can exaggerate boundary effects when they are too close to a wall. If your monitors have rear ports, you may need to experiment with the manufacturer’s recommended clearance as a starting point.
Toe-in matters here too, because it changes how much high frequency energy hits the side walls versus your ears. A small toe-in change can make the image snap into focus even if the bass response stays the same.
Try to keep both speakers the exact same distance from the front wall, even if the desk makes it annoying. A one inch mismatch can shift the cancellation frequency between left and right, which can smear the center image in the low mids.
Do not forget the desk itself as a boundary, because the speaker-to-desk distance can create its own comb filtering. Raising speakers a little and angling them down slightly can reduce the strongest desk bounce without changing the 38% chair placement.
If you must place speakers on the desk, use isolation pads or small stands to control angle and reduce vibration. Desk vibration does not just add noise, it can blur transients and make it harder to judge compression and punch.
When you change speaker distance from the wall, re-check your listening position with the same loop you used before. Sometimes a speaker move fixes a dip but creates a new one, and you want the best overall compromise.
If you are using a sub, a common home office win is placing it near the front wall and slightly off center, then crossing over conservatively. That approach can smooth response at the chair without forcing you to move the desk or break the 38% reference.
Common home office setups and how to adapt the rule
If your desk must stay against the front wall, you can still use the rule by moving the chair back and placing speakers on stands that straddle the desk. This keeps the listening position tied to room length even when the desk location is fixed by outlets and work habits.
If your desk sits in a corner, you will fight asymmetry, and the 38% point will not fix that. The best move is usually rotating the setup so you face a wall, center the desk, and keep equal side wall distances for both speakers.
If you work in a shared room, like a guest bedroom with a bed along one wall, treat the bed like a big absorber and use it. A thick duvet and mattress can reduce reflections on one side, so you may need extra absorption on the opposite wall to balance the stereo image.
If your chair must roll between a work screen and a music screen, lock down one “mix” spot with tape and return to it for serious listening. You can answer emails anywhere, but you should judge bass response from the same position every time.
If you are stuck with a desk against a side wall because of room shape, aim for symmetry by placing absorption on the near wall and adding a thick curtain or panel on the far side. You are trying to make both sides behave similarly even if they are not physically identical.
For laptop-only setups, the temptation is to sit anywhere and call it a studio. Even then, it helps to pick a consistent chair position near the 38% point and keep your speakers or headphones as the stable reference.
If you use nearfields on small stands behind the desk, make sure the stands do not create a new reflective surface at ear height. A metal stand post can reflect midrange energy, so placement and angle matter more than people expect.
In a room with a big closet on one side, you can sometimes use the closet as a pseudo bass trap by keeping it open and filled with clothes. If you do that, keep it consistent, because opening and closing it changes the room response.
If your office includes a big bookcase, it can act as light diffusion in the mids and highs, but it does not solve bass problems. It can still be useful behind you if it breaks up strong reflections, especially when you cannot mount rear wall panels.
If you have to place the desk under a window, pay attention to rattles and resonances when bass hits. A window that buzzes at one note will trick you into cutting that note in your mix even if the speakers are fine.
For people who do a lot of video calls, keep the camera framing separate from the listening position decision. You can always adjust lighting and camera angle, but you cannot fake low end accuracy with a ring light.
If you share the room with someone else, consider a “folding studio” approach where speaker stands and treatment panels can move into place quickly. The 38% mark still helps because it tells you exactly where the chair should return to every time.
Conclusion
The listening position 38 percent rule home studio approach works because it gives you a sensible starting point tied to room length and front wall distance. It saves you from placing your chair in the dead center where nulls often ruin bass response.
Measure your room carefully, set your ears near 38%, then refine with small moves you can hear and repeat. Pair that placement with basic corner trapping and reflection control, and your home office studio stops sounding like a compromise.
Keep the process simple, change one thing at a time, and write down what you did so you can undo it. The best setup is the one you can return to after life happens and the desk gets moved for the hundredth time.
If you treat the 38% point as a starting pin on the map instead of the destination, you will get the real benefit. You end up with a listening position that is predictable enough to make decisions, even in a room that still has flaws.


