A small home office studio can sound weird in ways that make you doubt your ears, even when your monitors are solid. The fix is rarely a magic panel, it is a bass trapping plan for small studio rooms that targets the real problem first.
Bass issues show up as lumpy low end at the desk, missing notes that vanish on certain pitches, and kick drums that hang around too long. If you treat the wrong surfaces first, you can spend money and still fight the same mixes.
I like simple plans that match how small rooms behave, because you cannot outsmart physics with foam. The good news is that a few smart treatment priorities, plus disciplined corner placement, can change the room more than most people expect.
Step 1: Define the problem you’re solving (level, nulls, or decay)
Before you buy anything, decide whether your main problem is level balance, deep nulls, or long decay in the low end. Each one points to a different fix, and mixing them up is how people end up with a room that measures better but still feels wrong.
Level problems are broad peaks where bass is simply too loud around certain notes, so every mix comes out thin elsewhere. Nulls are the nastier version, where a bass note disappears at the chair and reappears a foot forward.
Decay problems are about time, not loudness, so the bass hangs on after the sound stops and blurs the groove. You can hear it on short kick patterns, where the second hit sounds softer because the room is still ringing from the first.
The fastest way to sort this out is a measurement mic and free software like Room EQ Wizard, but you can learn a lot by moving your head while playing a slow sine sweep. If the bass changes wildly with small movements, your bass trapping plan for small studio spaces should prioritize geometry and corner traps over fancy diffusers.
It helps to put words to what you hate, because “boomy” can mean three different things depending on the room. One person means a 70 Hz hump that makes every bass guitar sound huge, and another person means a 120 Hz thud that makes vocals feel boxed in.
When you identify the problem type, you also identify the success metric you should chase. A flatter response curve is great, but if the bass still rings for half a second, you will keep over-EQing and under-compressing to compensate.
Nulls deserve extra respect because they can be so deep that no reasonable amount of EQ can fill them. If you boost into a null, you mostly feed the room more energy and still get a hole at the listening position.
Decay is the sneaky one because it can sound like “slow” bass even when the frequency response looks acceptable. A room with long decay makes you turn down bass notes that are actually fine, because the room is adding a tail that does not exist in the track.
If you measure, look at both the frequency response and the waterfall or spectrogram view, because they tell different stories. A modest peak that lasts forever is often more damaging than a bigger peak that dies quickly.
If you cannot measure yet, use a few simple listening tests that repeat well. Play a bassline that walks chromatically and note where the room suddenly gets louder or quieter, because those spots usually line up with modes you can treat.
Also listen at low volume, because room problems do not disappear when you turn down, they just become easier to notice. If the bass balance changes dramatically as you change volume, you are likely reacting to room gain and decay rather than the mix.
Write down the top two symptoms you want to fix, because it keeps your shopping cart honest. A bass trapping plan for small studio rooms works best when you treat the biggest pain first, not when you chase every minor annoyance at once.
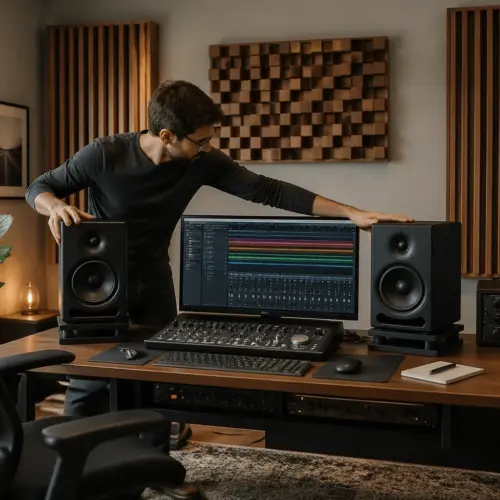
Step 2: Lock in a workable desk and speaker layout
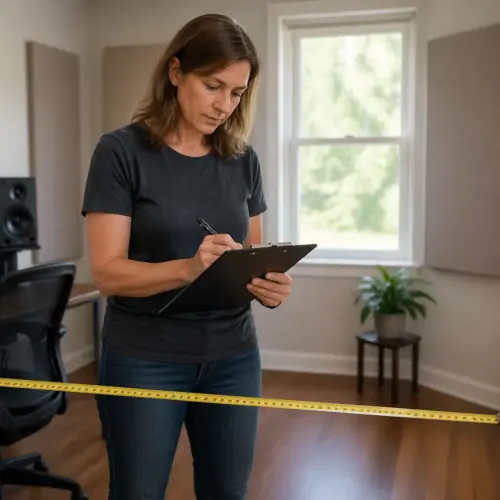
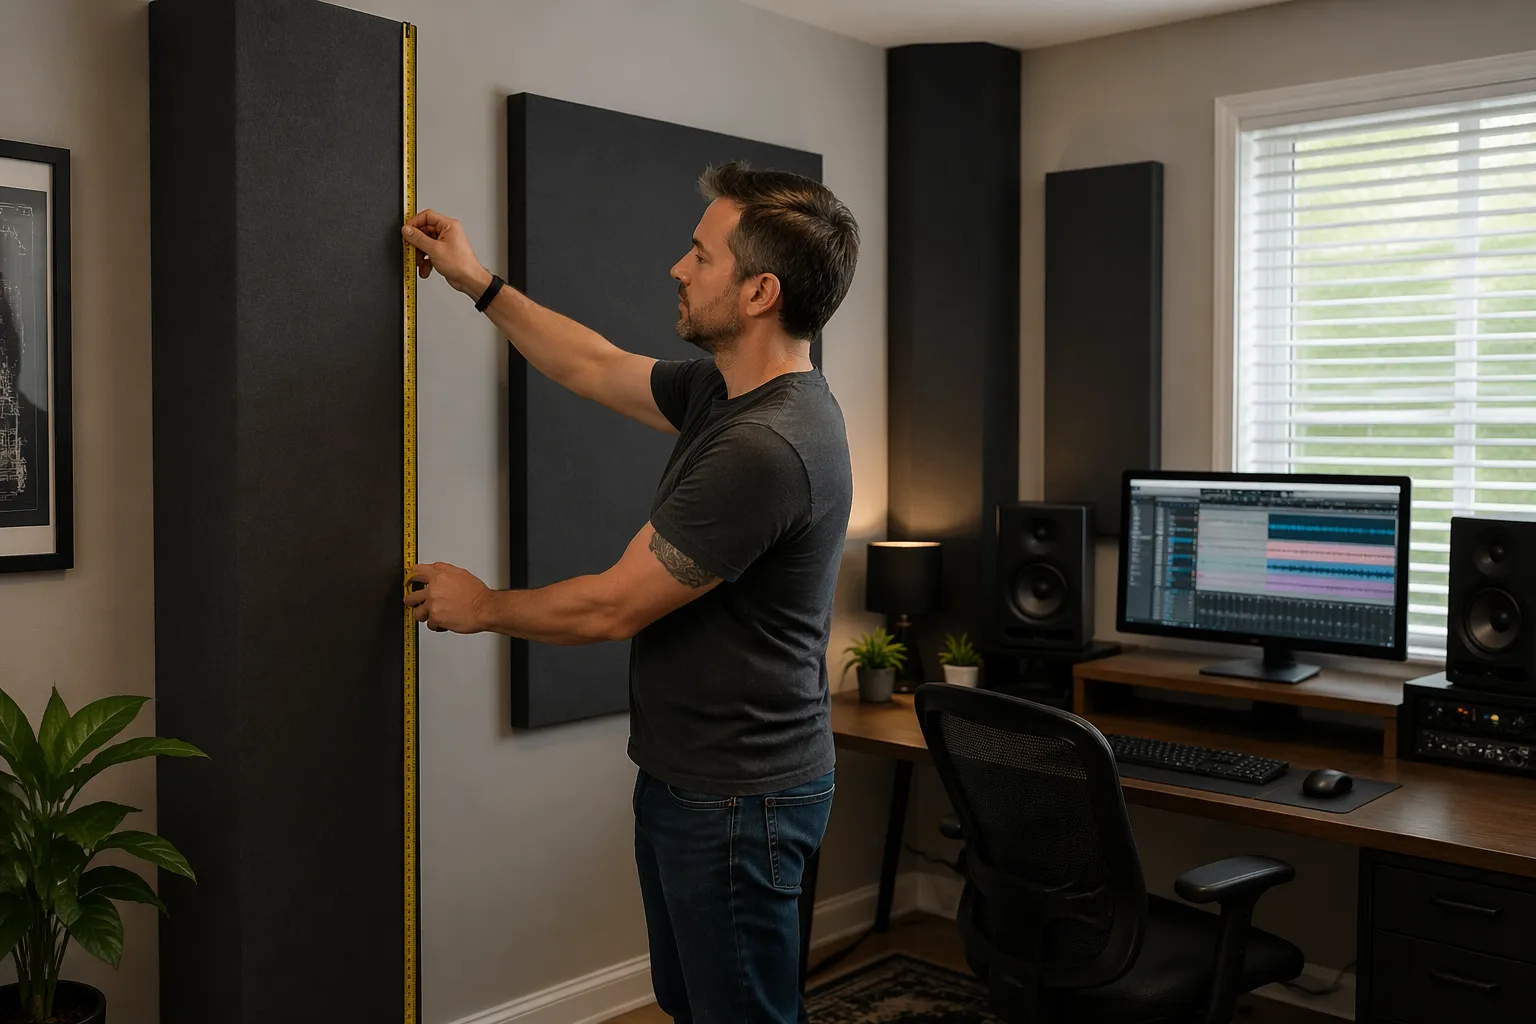
Do layout before treatment, because moving the desk later can undo half your work. In most small rectangles, the best starting point is the desk centered on the short wall so the speakers fire down the long dimension.
Start with your ears about 38 percent of the room length from the front wall, then adjust by measurement or by listening for the smoothest low end. That number is not sacred, but it often lands you between the worst axial nulls in typical home office sizes.
Set the monitors so the tweeters hit ear height, the speakers form an equilateral triangle with your head, and both speakers are the same distance to the front wall. Symmetry matters, because uneven boundaries make one side of the bass behave differently than the other.
Keep the desk surface as low and uncluttered as you can, since a big reflective desk can mess with imaging and midrange clarity. If you use a big screen, pull it back a bit so it does not sit right between the speakers like a hard reflector.
Try to keep the speakers a sensible distance from the front wall, because boundary effects can exaggerate certain lows. Some monitors like being closer to the wall and some hate it, so use your ears and measurements instead of guessing.
If your speakers have rear ports, be extra cautious about shoving them into the wall just to save desk depth. The port output can couple to the boundary and make one-note bass worse, which makes you think you need more trapping than you actually do.
Avoid placing the listening position exactly in the center of the room length or width, because that is where strong nulls love to live. Small moves matter, so treat layout like a dial you can turn, not a one-time decision.
Keep left and right side boundaries similar, even if the room is a multipurpose office. If one side is a bare wall and the other side is an open doorway, your stereo image and low-mid balance will lean in ways that are hard to correct later.
Decouple speakers from the desk if possible, because desk vibration can smear low mids and make bass feel less defined. Stands are ideal, but even solid isolation pads can reduce the “thump” that tricks you into thinking the room is worse than it is.
Do not ignore vertical placement, because floor and ceiling reflections also shape the low end. A small change in stand height can shift a cancellation up or down in frequency, which can make the crossover region feel smoother.
If you use a subwoofer, lock its position in early and treat it as part of the layout, not an accessory. Sub placement can make or break the room, and moving it later can undo the improvements you got from corner traps.
Once you find a layout that feels promising, mark it with tape on the floor so you can return to it. This is boring, but it keeps your comparisons fair when you start adding treatment and second-guessing everything.
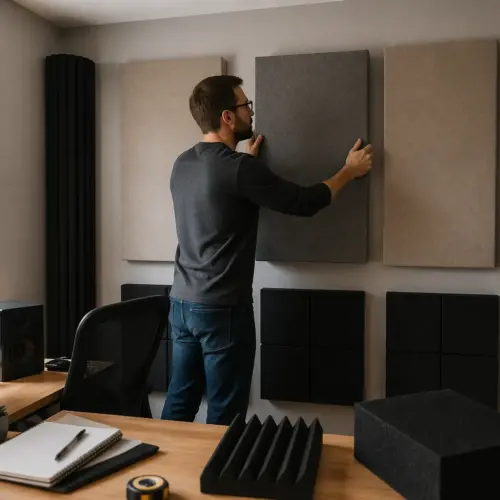
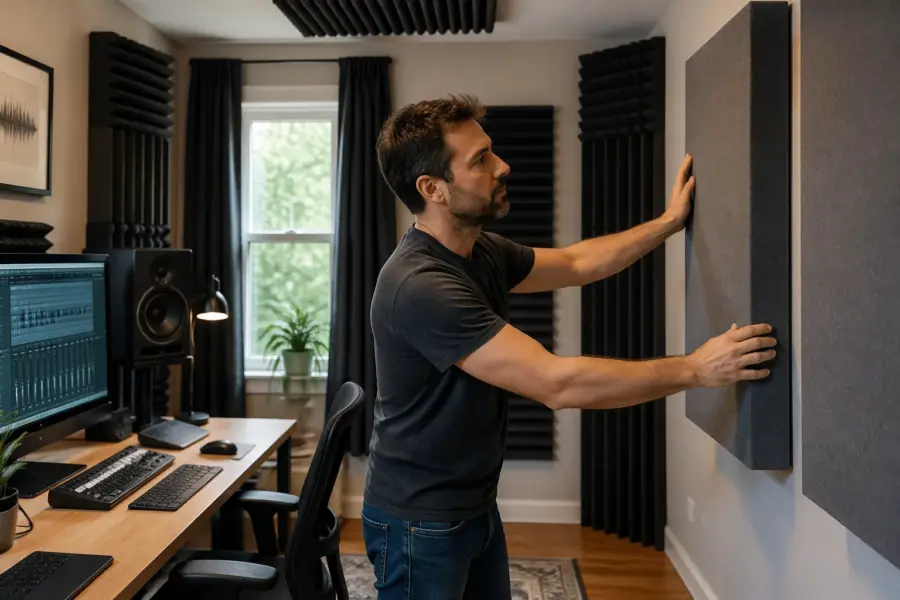
Step 3: Treat the front corners for the biggest early gain
If you only treat one area first, treat the front vertical corners where the speakers face, because they collect a lot of bass energy fast. Good corner placement here often reduces both peaks and decay, which is why it is the first move in a bass trapping plan for small studio rooms.
I prefer thick broadband traps, at least 4 inches thick with an air gap, or full superchunk style if you can spare the space. Thin panels can help mids and highs, but they barely touch the bass problems that make small rooms hard to trust.
Think of corners as pressure zones, where multiple boundaries meet and the room has nowhere to “let go” of low-frequency energy. When you add thick absorption there, you are giving the bass a place to die instead of bouncing back into the listening position.
Straddling a panel across a corner works better than flat-on-wall mounting because it creates an air cavity behind the absorber. That air gap effectively increases low-frequency performance without adding material cost, which is a big deal in small rooms.
Go as tall as you can, because bass does not stop at four feet off the ground. Floor-to-ceiling coverage also makes the trap behave more consistently across a wider range of modes.
If you are building DIY traps, use rigid fiberglass or mineral wool with a breathable fabric face, because you want air to move through the absorber. Plastic wrapping and vinyl covers look neat but can reflect highs and reduce effectiveness if you overdo them.
Do not obsess over perfect lab specs, because placement and thickness usually beat small differences in material choice. A slightly less “ideal” material placed correctly in the corner will outperform a premium panel placed like wall art.
If you have baseboards, do not let them force the trap away from the corner unless you have to. You can notch the frame or add small spacers so the trap sits properly and maintains a consistent air gap.
Pay attention to the front wall corners and the wall behind the speakers as a system, because they interact. A front corner trap plus a thick panel on the front wall can reduce speaker boundary interference and make the low end feel less “phasey.”
If you have a window in a front corner, you can still trap it by building a freestanding unit that sits in front of the glass. This often improves the room while keeping the window intact, which matters in rented spaces.
When you install the first pair of front corner traps, listen before you add more, because the room can change fast. The goal is not maximum absorption everywhere, it is predictable bass at the chair.
| Front-corner option | Space used | Best use case |
|---|---|---|
| 4 inch panel straddling corner with 4 inch air gap | Moderate | General peaks and mild decay in small offices |
| 6 inch panel straddling corner with 2 to 6 inch air gap | More | Deeper bass control when you cannot build superchunks |
| Superchunk triangle fill (floor to ceiling) | Most | Strong decay control and smoother low end across seats |
| Hybrid trap with limp mass membrane face | Moderate | Stubborn low frequency ringing below about 80 Hz |
Membrane or hybrid traps can be useful, but they are easier to get wrong than broadband absorbers. If you do not have measurements, start broadband and use hybrids only when you can clearly see a stubborn low-frequency ridge that will not die.
Do not be surprised if the room sounds slightly less exciting at first, because uncontrolled bass often feels “big” even when it is inaccurate. After a few sessions, you usually notice that you can place the kick and bass faster and stop fighting the same notes.
If you share the room with non-studio life, treat the traps like furniture and make them look intentional. A clean frame and matching fabric can keep the room usable while still doing the heavy acoustic work.
Step 4: Add rear wall and rear corners to control decay
After the front corners, the next big win is usually rear wall absorption, because the back of the room is where low end piles up and bounces back at you. This is also where long decay often lives, so rear wall absorption is a direct attack on that time smear.
If your chair is close to the back wall, go thicker than you think, because thin panels right behind your head can make the room dull without fixing bass. A thick absorber, like 6 to 8 inches with an air gap, keeps the upper mids from getting overdone while still helping the lows.
Do not ignore the rear corners, because they often measure almost as hot as the front ones once you tame the first set. Floor to ceiling traps in the back corners can shorten low frequency decay in a way that feels like the room finally stops arguing with your kick drum.
If you can only afford one rear element, choose the back wall first when decay is your main complaint, then add rear corners later. If nulls are the main complaint, rear corners can sometimes help more than a single back wall panel, so your treatment priorities should follow your measurements.
The rear wall is also where you often get strong slap and flutter in the mids, which can make the room feel nervous and harsh. A thick rear absorber calms that down while still staying focused on the bass and low mids.
If you have a door on the rear wall, you can still treat it by using a panel that mounts to the door itself or a freestanding gobos-style absorber. The key is to keep the rear boundary from acting like a hard reflector that throws low end back at the mix position.
In very small rooms, a full-width rear wall absorber can be more effective than several small panels scattered around. Continuous coverage reduces the chance that reflections sneak around the treatment and keep the decay alive.
If you plan to add a couch in the back, treat it as a bonus, not a solution. Soft furniture can help upper bass a little, but it rarely replaces a thick, purpose-built absorber with an air gap.
Rear corner traps are especially helpful when you notice the bass changes a lot between the desk and the back of the room. When the back corners are controlled, the room tends to feel more even and less “two different rooms” depending on where you stand.
Try not to leave a big untreated strip at the top of the rear wall, because ceiling interaction can keep decay going. Even a modest extension upward, or a rear wall panel that reaches close to the ceiling, can make the result feel more complete.
If you use a closet at the back, an open closet full of clothes can act like a rough absorber, but it is unpredictable. It can still be useful as part of your bass trapping plan for small studio rooms, just do not assume it replaces proper rear treatment.
Once rear treatment is in, listen for the moment when the kick drum stops sounding like it is in two places at once. That “double kick” feeling is often a rear wall timing issue, and thick absorption can clean it up dramatically.
Step 5: Expand to wall-ceiling corners if needed
Once the vertical corners and rear wall are handled, the next step is the wall ceiling perimeter, because it is a long continuous corner that can hold a lot of bass energy. People skip it because it feels like construction, but it can be the difference between “better” and “done.”
Soffit style traps, even modest ones, add a lot of surface area without stealing floor space, which matters in a home office. If you rent, you can mount lightweight corner wedges or build simple frames that sit at the ceiling line and screw into studs with minimal holes.
Focus on the front wall ceiling corners first if your low end still feels thick at the desk after the main corner placement work. If the room still rings, treat the rear wall ceiling corners next, because that is where the back wall reflection returns with extra low frequency weight.
Do not expect wall ceiling traps to fix a deep null by themselves, because nulls are often geometry problems tied to listening position. They are best as an expansion step once your bass trapping plan for small studio rooms has already tamed the big peaks and shortened decay.
Wall-ceiling corners are also great for smoothing the low-mid range where many home offices feel congested. When that area clears up, you often notice that vocals sit more naturally and guitars stop feeling like they are fighting the bass.
You do not need a massive soffit to get value, because even a 12-inch deep perimeter trap adds meaningful absorption area. The win comes from coverage and continuity, not from making one corner trap absurdly thick.
If you are doing DIY, build modules that are easy to lift and mount, because ceiling work gets annoying fast. Smaller sections also let you experiment with placement, which is helpful when you are fine-tuning a tricky room.
Keep safety in mind, because overhead panels need secure anchors and a frame that will not sag. A trap that falls is not worth any acoustic benefit, so overbuild the mounting rather than trusting light hardware.
In rooms with very low ceilings, wall-ceiling treatment can reduce that “headphone clamp” feeling where the room seems to press down on the sound. That sensation is often early reflections and low-mid buildup working together, and soffit traps can ease both.
If you have crown molding or awkward ceiling edges, you can still trap by building a face frame that clears the trim. The goal is to create a porous volume in the corner area, even if the geometry is not perfectly clean.
Stop adding perimeter trapping when the room starts to feel controlled but not dead, because you can overshoot comfort. If you notice you are turning the volume up just to feel energy, you may be absorbing too much mid and high content along with the bass.
Step 6: Verify results and fine-tune placement
Verification is where most DIY rooms fall apart, because people stop when the room looks treated instead of when it sounds controlled. Measure again from the same mic position, then compare frequency response and decay plots so you can see what changed.
If you do not want to measure, pick three reference tracks you know well, then listen at the same level every time you change something. Pay attention to whether bass notes stay consistent as they walk up the scale, because that is the practical test that matters.
When you measure, take multiple sweeps and average them, because one sweep can be noisy or slightly off. Also measure a few inches around the listening position, because you want a workable zone, not a single perfect point.
Look for improvements that show up as smoother bass in the 40 to 200 Hz region and shorter decay tails, not just a prettier line. A room can measure flatter but still feel slow if the decay is not coming down.
If your response got smoother but you still have a deep hole at one frequency, try moving the listening position before you buy more traps. A 3 to 6 inch chair move can outperform hundreds of dollars in additional absorption when the issue is a strong axial null.
Also check that both speakers measure similarly, because asymmetry can hide as “random” bass weirdness. If one speaker is closer to a side wall or corner, you can end up mixing with a lopsided low end without realizing it.
Do not forget to verify at realistic listening levels, because some room noises and rattles only appear when you work at normal volume. A buzzing light fixture or desk drawer can mimic low-end distortion and send you chasing treatment you do not need.
Fine-tuning is often about small placement tweaks, like increasing an air gap or extending a trap higher. These little changes can shift performance enough to matter, especially in compact rooms where every boundary is close.
- Recheck speaker distance to front wall
- Slide the chair forward or back in 2 inch steps
- Rotate corner traps to maximize the air gap
- Seal trap edges so they do not leak around the corner
- Try thicker rear wall absorption before adding more panels
- Measure decay time from 40 to 200 Hz
When you seal trap edges, you are not trying to make them airtight, you are trying to prevent obvious gaps that let sound bypass the absorber. A trap that floats awkwardly off the corner can lose effectiveness, especially in the low mids where leakage is more noticeable.
If you see a big improvement from one change, stop and live with it for a few days before you add the next thing. Your ears adapt quickly, and you want to make decisions based on repeatable results, not first-impression excitement.
Keep notes of what you changed and what you heard, because it prevents you from looping back to the same experiments. A bass trapping plan for small studio rooms is easier when you treat it like a process, not a weekend makeover.
If you are using EQ correction software, verify the room first without correction, then apply correction as the last layer. EQ is a great finishing tool, but it is not a replacement for controlling peaks and decay with physical treatment.
Step 7: Handle first reflection points without killing the room
Bass trapping fixes the low end, but you still need clean early reflections so the stereo image snaps into place. Treat the side wall first reflection points with 2 to 4 inch panels, and use the mirror trick to find the exact spots.
Ceiling clouds help more than people admit, especially in low ceilings where the bounce is fast and loud. A 4 inch cloud with an air gap often gives you clearer vocals and tighter snare placement without making the room sound like a closet.
Do not cover every inch of drywall, because you still want some life in the room for long sessions. If the room starts to sound dull, pull back on mid and high absorption and keep your energy focused on bass and low mids.
This step is where many people break their treatment priorities, because they buy lots of thin panels and call it done. Keep reminding yourself that the bass trapping plan for small studio rooms is the foundation, and reflections are the polish.
First reflection treatment is about clarity, not about making the room silent. When early reflections are controlled, panning decisions become easier and reverbs sit where you put them instead of smearing across the speakers.
Use an air gap behind side panels when you can, because it improves low-mid absorption and keeps the room from getting too bright in a weird way. A 2-inch panel with a 2-inch gap often behaves more like a thicker unit than you would expect.
If you have one side wall close and the other far away, treat both sides for balance, even if the far side reflection seems quieter. The brain notices asymmetry fast, and it can make you mistrust the center image.
Do not forget the front wall area between and behind the speakers, because it can contribute to comb filtering in the mids. A modest absorber there can make the phantom center tighter, especially if your monitors are close to the wall.
Ceiling clouds should be wide enough to cover the reflection zone for both speakers, not just a small panel above your head. If the cloud is too small, you can reduce one reflection while leaving another, which can feel like a strange tonal tilt.
If you record vocals or acoustic instruments in the same room, reflection panels can double as portable gobos. That flexibility lets you keep the mix position consistent while still controlling reflections when you track.
When the room starts sounding too dry, add life with positioning and selective surfaces rather than ripping everything down. A little exposed wall, a rug choice, or a reflective desk angle can restore comfort without undoing the bass work.
Step 8: Know when diffusion helps, and when it wastes space
Diffusion is tempting because it looks “pro,” but it rarely fixes the problems that make small rooms hard to mix in. If your room is under about 12 feet long, you usually do better with rear wall absorption than a diffuser behind your head.
Diffusion starts to make sense when your decay is under control and you have enough distance for scattered sound to develop. In practice, that often means a larger room, or a home office where the listening position is far from the back wall.
If you want a safer compromise, use a bookshelf with uneven depths on the rear wall, but do not pretend it replaces bass trapping. It can break up flutter and add some texture, yet it will not solve a 60 Hz hump that wrecks your kick balance.
I like diffusion most on the back half of the room when the front is already controlled and the goal is comfort, not rescue. If you are still fighting nulls or long decay, spend that money on thicker rear wall absorption and better corner placement.
Diffusers need distance to work properly, because the scattered energy has to blend before it reaches your ears. If the diffuser is too close, you can get a weird “phasey” brightness that feels like a problem you cannot EQ out.
In small rooms, diffusion can also steal depth that you really need for thick absorption. Giving up 6 to 10 inches for a diffuser hurts more when you could have used that depth to tame the rear wall bounce and shorten decay.
If you do add diffusion, make sure it is not placed where it creates strong specular reflections back to the listening position. Even good diffusers can behave like reflectors at certain angles or frequencies, especially if they are shallow or poorly positioned.
A hybrid approach can work, like absorption on the lower rear wall and diffusion higher up, but only after the bass is behaving. This keeps the room from feeling claustrophobic while still keeping the low end tight enough to mix confidently.
Do not confuse diffusion with randomness, because a messy wall does not automatically diffuse in a useful way. A bookshelf can help, but it is still mostly a mid and high frequency tool, and it does nothing for the core bass trapping plan for small studio rooms.
If you want the room to feel inspiring, use lighting, ergonomics, and a comfortable chair before you use diffusion as decoration. A room that feels good to work in helps your mixes more than a diffuser that is installed too early.
Step 9: Common mistakes that sabotage small-room bass control
The most common mistake is treating only at ear height, as if bass politely stays in the middle of the wall. Bass loads boundaries, corners, and big surfaces, so your plan has to reach floor to ceiling where possible.
Another mistake is using foam wedges in corners and expecting real low frequency control. Foam can tame highs and upper mids, but it usually does not have the depth or density to act like serious bass trapping.
People also forget that furniture changes the room, especially big couches, bookcases, and cabinets. If you reconfigure the office after treatment, recheck your measurements because the low end can shift in annoying ways.
The last mistake is ignoring the rear wall because it is “behind you,” even though it is often the loudest bass zone in the room. Rear wall absorption is boring to shop for, but it is one of the most reliable upgrades you can make after front corner placement.
A big sabotage move is placing traps where they look symmetrical instead of where they work. Symmetry is helpful for imaging, but bass trapping is about pressure zones, and sometimes the best location is the awkward one you wanted to ignore.
Another common mistake is buying too many small panels because they are easy to ship and hang. A few large, thick traps in the right places usually outperform a wall full of thin rectangles.
People also underestimate air gaps, then mount everything flat to the wall because it feels neat. A panel with a gap often gives you more low-frequency benefit than adding another thin panel somewhere else.
Leaving corners untreated because you want to keep floor space is understandable, but it is often the wrong trade in a tiny room. If you cannot trap a corner, consider a freestanding trap that you can move when you need the space.
Another trap is chasing perfect graphs instead of workable mixes, especially when you are new to measuring. The goal is not a ruler-flat line, it is a room where decisions translate to headphones, cars, and other speakers without surprises.
It is also easy to forget that doors and windows are part of the boundary system. A thin hollow door can rattle and leak, and a big glass window can reflect highs while still letting bass behave unpredictably around it.
Some people add a subwoofer to “fix” missing bass, but it often just excites the same modes harder. If you add a sub, treat it as a placement and integration project, not a volume knob that replaces acoustic work.
Finally, many rooms fail because the plan stops too early, right after the first audible improvement. Small rooms can be deceptive, because the first traps make a big difference, but the last 20 percent is what makes the room reliable day after day.
Conclusion
A good bass trapping plan for small studio rooms starts with the problem, then locks in layout, then attacks corners and the rear wall in that order. When you keep treatment priorities straight, you spend less and you stop chasing your tail on every mix.
If you do the front corners, then rear wall absorption and rear corners, you usually get the biggest audible change per dollar in a home office. After that, wall ceiling corners and reflection control are the finishing steps that make the room comfortable and predictable.
Measure if you can, because it keeps you honest and shows whether a change fixed level, nulls, or decay. When the low end finally behaves, you will mix faster, second guess less, and trust what comes out of the speakers.
The point is not to build a showroom, it is to build a room that tells you the truth. Once your bass is consistent, you stop doing emergency EQ moves and start making musical choices that translate.
Small rooms can absolutely work when you respect how they store and release low-frequency energy. If you treat corners and the rear wall like the main event, the rest of the studio decisions get easier.
Give yourself permission to do this in phases, because a good plan survives budget and time constraints. Each step should make the room more predictable, and predictability is what turns a home office into a real mixing space.