Bass ringing in a small room is the kind of problem that makes you doubt your speakers, your mixes, and sometimes your sanity. One note hangs on forever, while the next note feels normal, and the whole low end turns into a slow, blurry smear.
If you are searching for how to reduce bass ringing in a small room, you are already past the beginner stage where people just say “turn it down.” Ringing is about time, not just level, and the fix is usually geometry, placement, and serious absorption that targets modal decay.
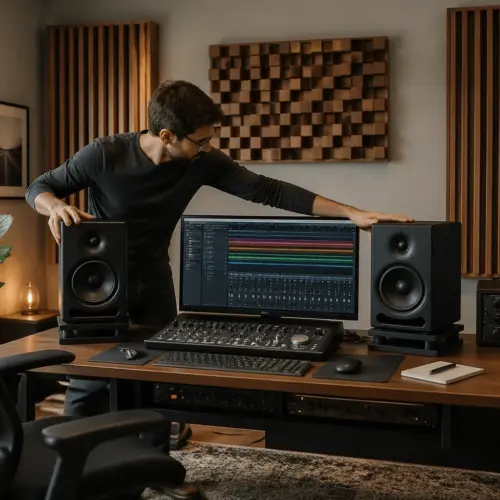
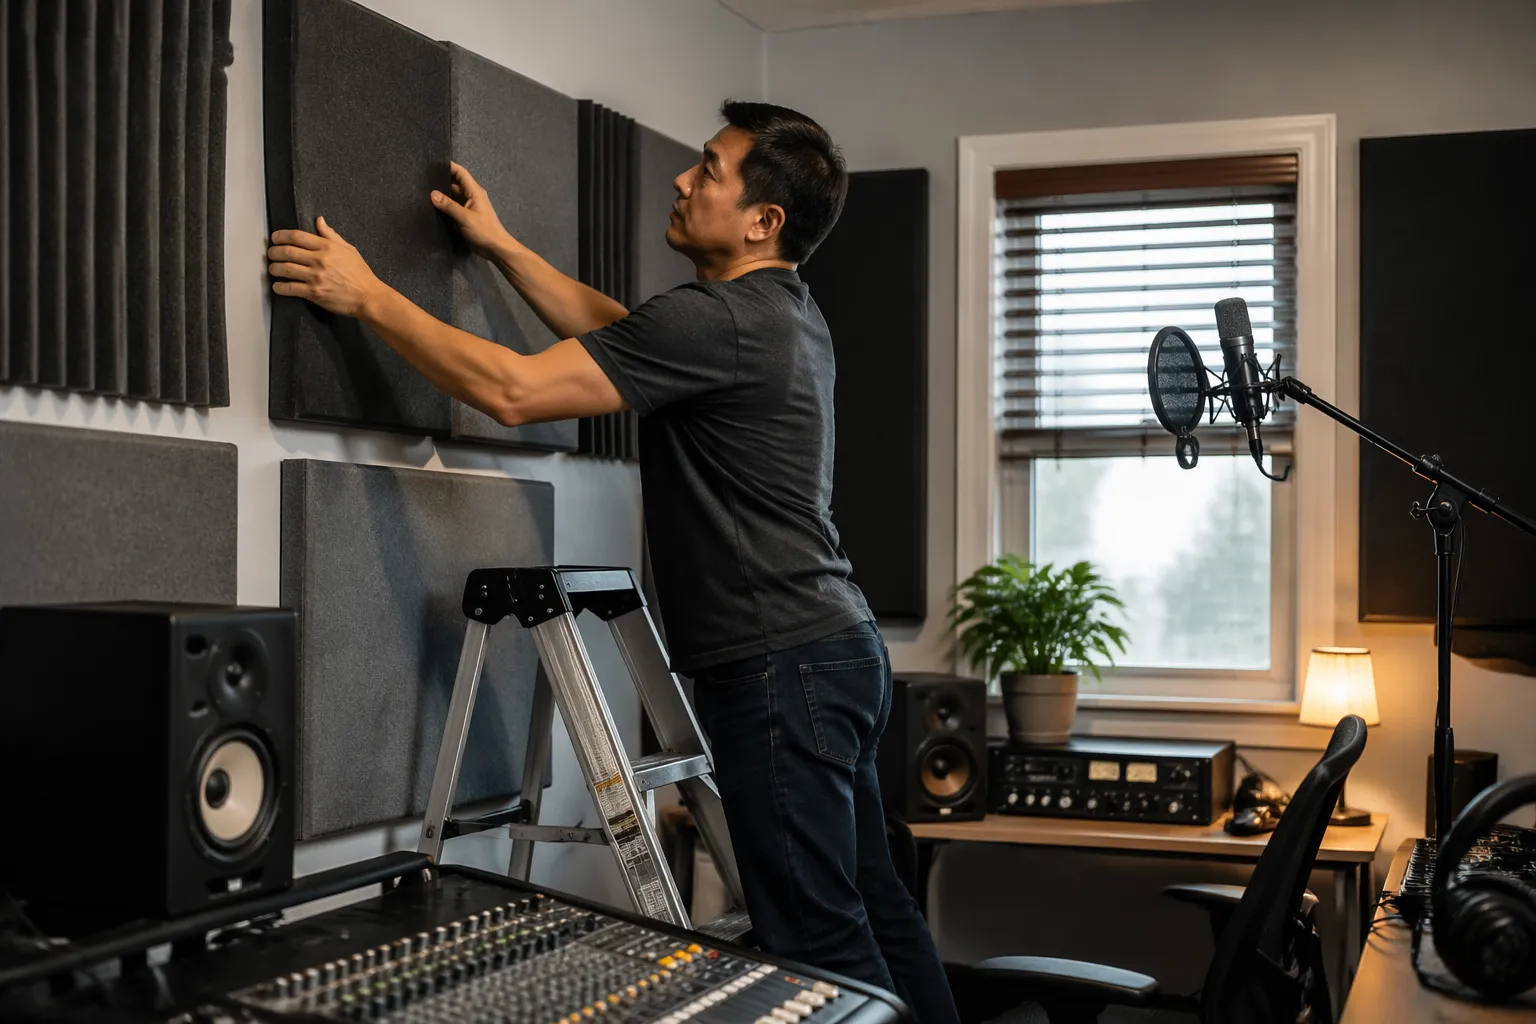
I see this constantly in home offices that double as editing rooms, podcast booths, or small music studios. The room is small, the desk is against a wall, and the bass energy has nowhere to go except back into your ears as room resonance.
The good news is you can make a small room behave a lot better without rebuilding it. The bad news is you have to be honest about what is causing the boom, and you have to treat the room where it actually stores bass energy.
Most people describe it as “boomy,” but what they really mean is the room is ringing and smearing transients. When the room is ringing, you can turn the bass down and it still feels slow and oversized.
Ringing also messes with your decisions because you start mixing around the room instead of the track. You cut low end that is not actually in the recording, and then your mix collapses everywhere else.
Small rooms are unforgiving because the modal frequencies sit right in the musical range of kick drums, bass guitars, and male voice fundamentals. That is why even a “nice” pair of monitors can sound weird in a spare bedroom.
The goal is not perfection, because a tiny room will never behave like a large control room. The goal is to shorten decay enough that bass notes stop overlapping and you can trust what you are hearing.
Recognizing ringing vs simple bass loudness
Bass loudness is when the low end is simply too strong compared to the mids and highs. Bass ringing is when the low end keeps going after the sound stops, like a note that refuses to die.
A quick tell is to play a kick drum sample and listen to the tail in the room, not in the recording. If the kick turns into a low “whoooom” that lasts longer than it should, you are hearing decay, not just volume.
Another tell is unevenness across notes, where one bass guitar note blooms and hangs while the next one disappears. That pattern is classic room resonance from modes, and it is why EQ on the speakers rarely fixes it.
If you clap and hear flutter echo, that is a different issue in the mid and high range. Bass ringing lives lower, and it shows up as modal decay you feel in your chest or in the way speech sounds thick and tubby.
A cheap but useful test is a sine sweep from 20 Hz to 200 Hz at a moderate level. When the sweep hits a problem frequency, you will hear it get louder and then linger after the sweep moves on.
Ringing is also directional in a weird way, because you can move your head a few inches and the problem changes. That is a clue you are dealing with room interaction, not the speaker itself.
Simple loudness usually tracks with the volume knob, meaning if you turn down a few dB the bass feels proportionally better. Ringing does not behave that politely, because the room keeps storing energy and releasing it after the transient.
Listen for the moment after the kick, where the room seems to “breathe” or swell even though the sample is over. That swelling is the room’s decay signature, and it is what makes tight bass feel slow.
On sustained material like a sine bass or an 808, ringing shows up as a note that seems to wobble or change character as it holds. The pitch is stable in the recording, but the room adds its own resonant emphasis that makes it feel unstable.
Speech is a sneaky test because spoken word should not have a huge low end, yet a ringing room makes voices sound chesty and over-weighted. If you hear that “AM radio in a closet” thickness, the room is boosting and holding low frequencies.
Another simple check is to mute the speakers right after a loud bass hit and pay attention to what you still hear in the room. If there is a lingering tone or pressure sensation, that is decay that treatment and placement can improve.
It also helps to compare headphones to speakers at the same perceived loudness. If the bass is tight on headphones but slow on speakers, the room is almost certainly the main culprit.
Do not confuse port noise or cabinet resonance with room ringing, because those are mechanical and usually follow the speaker. Room ringing changes dramatically with position, while a speaker issue stays consistent.
If you have a subwoofer, ringing can be easier to spot because the sub excites the lowest modes more strongly. A sub that sounds great in one corner and terrible in another is basically a mode detector.
When you can identify ringing as a time problem, you stop chasing it with tone controls. That mental shift is important, because the solutions are mostly about where energy goes and how long it stays there.
The main causes: modes, boundaries, and weak absorption
Small rooms have widely spaced axial modes, and those modes create big peaks and deep nulls in the bass. When a mode is strongly excited, it stores energy and releases it slowly, which is exactly what long modal decay sounds like.
Boundaries make it worse because bass piles up near walls, corners, and especially wall to wall to ceiling intersections. If your speakers and your listening position both sit in high pressure zones, the room resonance gets fed hard.
Weak absorption is the third leg of the problem, because foam and thin panels barely touch the frequencies that ring. If your “treatment” is a few 1 inch tiles, the room still behaves like painted drywall at 60 Hz.
Furniture helps less than people hope, since couches and bookcases mostly work higher up unless they are huge and stuffed. A packed closet can absorb some low mids, but true bass trapping needs thickness, air space, or both.
One more cause people miss is symmetry, where a centered desk and centered speakers excite left and right modes in the same way. Symmetry is nice for imaging, but in tiny rooms it can lock you into the worst peaks unless you treat aggressively.
Room dimensions are the root of it, because certain lengths and widths cluster modes in the same frequency region. When two or three modes stack up near the same note, that note becomes the one that rings and dominates everything.
Ceiling height is a big deal in bedrooms and basements, because an 8 foot ceiling puts a strong axial mode right in the low end you care about. That height mode can make the room feel like it has a permanent low thump even at moderate volumes.
Boundary interference is slightly different from modes, but it creates its own dips and bumps that make bass uneven. The classic example is a speaker a certain distance from the front wall creating a cancellation at a specific frequency at the listening position.
That cancellation is why one note can vanish while another note explodes, even before you talk about decay. When you move the speakers or the seat, you change the geometry and the cancellation moves with it.
Hard surfaces also matter because they reflect low frequencies more than people expect. Drywall, plaster, and wood panels are not “transparent” to bass in a small room, so the energy keeps bouncing and building.
Doors and windows can act like weak pressure relief, but they are inconsistent and often rattle instead of absorbing. A closet door that buzzes at 70 Hz is not bass trapping, it is just noise added to the problem.
Desks and large screens can create their own reflections and cavities that exaggerate certain low mid frequencies. That does not usually cause true sub-bass ringing, but it can add a boxy layer that makes the low end feel even more congested.
Speaker placement relative to corners matters because corners act like bass megaphones. Put a speaker near a corner and you increase boundary reinforcement, which can be useful for output but brutal for ringing.
Listening position tends to be the bigger mistake, because people sit where the room looks convenient rather than where the modes behave. Sitting with your head near the back wall is basically asking the length mode to dominate your perception.
Weak absorption is not just about thickness, it is also about coverage and location. A thin panel in the middle of a wall might reduce some midrange reflections, but the bass pressure is highest at boundaries and corners where that panel is not.
Even when people buy “bass traps,” they sometimes buy decorative, shallow units that do not have enough depth to matter below 100 Hz. If the trap is lighter than a pillow and thinner than your forearm, it is probably not doing much for ringing.
Finally, the source content matters because some tracks have sustained low notes that expose decay instantly. If you only test with short bass hits, you might miss how bad the room is on long notes and drones.
Fast fixes with placement changes you can try first
Before you buy anything, move the listening position, because you might be sitting in a modal hotspot that makes every mix sound boomy. Start by pulling your chair and desk so your ears land around 38 percent of the room length from the front wall, then fine tune by ear.
Next, move the speakers, because distance to the front wall changes boundary interference and can either deepen or soften a bass null. If you can, test two extremes, very close to the front wall and then 2 to 3 feet out, because the best option depends on the room.
Keep your speakers and your head away from exact halfway points in the room, because those positions often line up with nulls and peaks. A few inches can be audible, so treat this like dialing in a microphone position rather than moving furniture once and calling it done.
Try facing the short wall if you are currently firing down the long dimension, because it changes the way the length mode is excited. In many small rooms, short-wall setup gives you more distance behind the listening position for rear-wall treatment to work.
If you have a subwoofer, do the sub crawl, because it is the fastest way to find a position with fewer severe peaks. Put the sub at the listening position, play a bass-heavy loop, and crawl around the perimeter until the bass sounds smoothest, then put the sub there.
Do not ignore height, because moving speakers up or down changes the interaction with the floor and ceiling mode. A small change in stand height can reduce a stubborn low-mid dip that makes you overcompensate with EQ.
Toe-in can slightly change how much low mid energy hits the side walls early, which can affect perceived thickness. It will not fix true ringing, but it can clean up the transition region where the room starts to dominate.
Decouple speakers from the desk and flimsy stands if they are vibrating, because mechanical vibration can make the bass feel longer than it is. Isolation pads or solid stands will not solve modes, but they can remove a layer of smear that confuses your diagnosis.
Try moving the desk away from the wall a bit, because having a giant reflective surface right against a boundary can make the front of the room feel pressurized. Sometimes a small gap changes the way the speaker interacts with the front wall and the desktop reflection at the same time.
If you are in a square room, accept that placement options are limited and you will need more treatment. In a near-square room, you are basically choosing which problem you prefer until you add absorption.
When you test placement, keep one speaker as a reference and move both symmetrically, because asymmetry can create confusing stereo differences. Once the bass is smoother, you can experiment with slight asymmetry if it helps break up a stubborn resonance.
Use repeatable steps like 6 inch moves and write them down, because your ears adjust quickly. If you do not track changes, you will end up back where you started with no clear idea of what improved.
| Change to try | What it targets | What to listen for |
|---|---|---|
| Move seat forward or back 6 to 12 inches | Axial length mode balance | One-note boom shifts pitch or reduces |
| Move speakers closer to front wall | Speaker boundary interference response | Tighter kick, less 80 to 120 Hz hollowness |
| Widen speaker spacing slightly | Different excitation of width modes | Less bass pileup in the center |
| Change subwoofer position to a side wall | Mode excitation pattern | Smoother sweep, fewer lingering notes |
| Rotate desk and speakers to face the short wall | Shorter front-to-back path | Less long decay, better punch |
After each move, listen for the time behavior, not just the amount of bass. If the kick feels like it stops faster, you are winning even if the bass level is still a bit high.
If you find a position where the bass is smoother but slightly quieter, that is usually a good trade. You can always add a little level later, but you cannot EQ a room into stopping its own ringing.
Placement changes also help you decide where to treat, because they reveal which boundaries are causing the worst buildup. When one corner position makes everything explode, you have just found a corner that needs trapping.
Do not expect a miracle from placement alone in a very small room, because the physics are stacked against you. The point of placement is to avoid the worst spots so your treatment has a fighting chance.
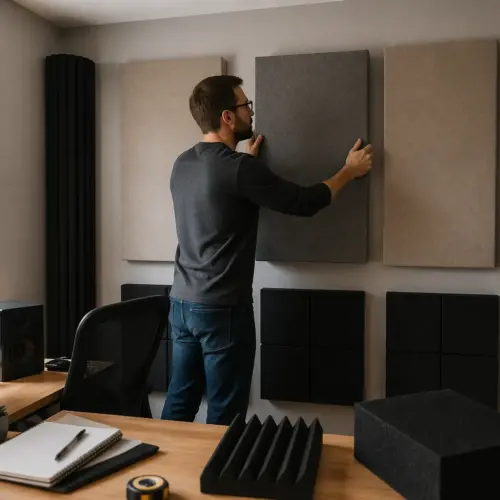
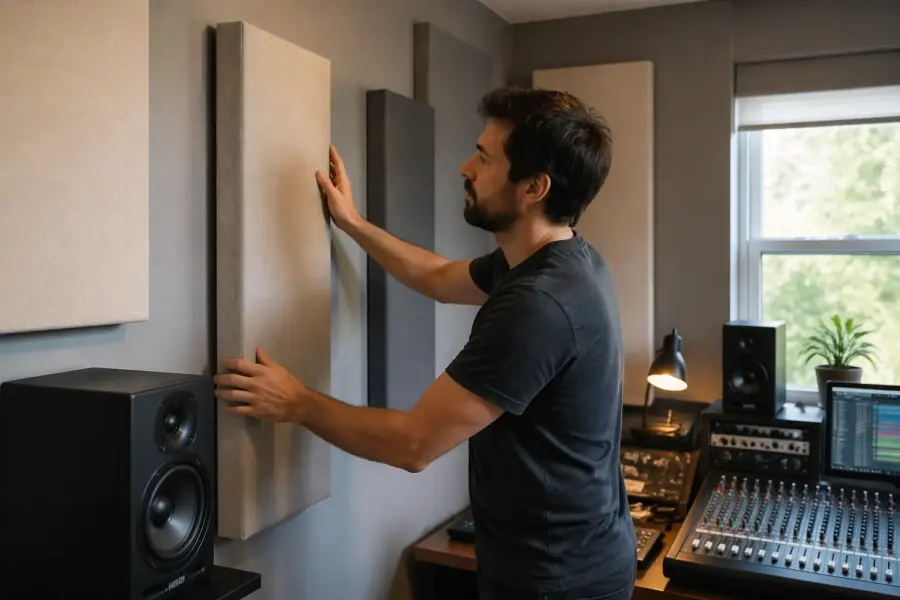
Treatment moves that shorten decay: corners and rear wall
If you want to reduce ringing, you have to absorb bass where the room stores it, and that is usually corners and the rear wall behind you. This is why bass trapping is the first real purchase, not fancy monitor stands or new converters.
Corner traps work because corners are high pressure zones for many modes, so they see more bass energy than a flat wall panel at the same thickness. In a small room, four vertical corners plus the wall to ceiling corners often do more for modal decay than any other single change.
The rear wall matters because reflections and pressure buildup behind the listening position tend to reinforce the length modes. A thick absorber on the rear wall can shorten decay and also reduce that weird “bass behind your head” sensation.
For materials, I trust rigid fiberglass or mineral wool in the 3 to 6 pound per cubic foot range, built thick and covered with breathable fabric. If you build 6 inch traps with a 2 to 4 inch air gap, you are finally in the territory where 60 to 120 Hz starts to calm down.
If you can only treat a couple of spots, start with the two front corners behind the speakers and then the rear wall. That order tends to reduce room resonance without wrecking the rest of the room balance.
Think of bass traps as time-control devices, not tone shapers, because their job is to stop energy from bouncing around for seconds. When decay shortens, the bass feels punchier even if the frequency response graph still looks imperfect.
Superchunk corner traps, where you fill the corner with thick triangular mineral wool, are effective because they put a lot of material where pressure is high. They also tend to be more forgiving than thin corner wedges that only touch the surface.
If you cannot build superchunks, straddling the corner with a thick panel and leaving an air gap behind it is a solid compromise. The air gap effectively increases low-frequency performance because the velocity component is higher away from the boundary.
Rear-wall treatment should be thicker than you think, because a thin panel back there mostly absorbs mids and makes the room feel smaller. A 6 to 8 inch absorber, or multiple layers with an air gap, is where you start to hear the decay tighten.
If your listening position is very close to the rear wall, the rear-wall absorber becomes even more important. In that situation, you are sitting in a pressure zone, so you need as much help as you can get right behind your head.
Wall-to-ceiling corners are underrated because they run the full perimeter and catch multiple modes at once. Even a series of smaller traps along that top edge can noticeably reduce the sense of bass hanging in the room.
Do not forget the front wall behind the speakers, because that is where a lot of low-frequency energy immediately hits and reflects. Treating the front wall can reduce early buildup and make the low end feel less pressurized at the mix position.
If you have a closet or alcove, you can sometimes turn it into a low-frequency absorber by leaving the door open and adding thick material inside. It is not a replacement for proper trapping, but it can act like a pressure sink in some rooms.
Sealing gaps and stopping rattles is part of treatment too, because buzzes mask decay and make you think the room is worse than it is. A vibrating light fixture or loose vent can sound like ringing even when the mode is improving.
When you mount traps, make sure the fabric is breathable, because plastic-backed or tightly woven fabric reflects highs and reduces effectiveness. If you can breathe through it, sound can get through it, and that is the simple rule.
It is normal to hear the room get less “exciting” after trapping, because the low end stops blooming. That is not lost bass, it is lost resonance, and it is what makes your mixes translate.
If you want to go further, tuned traps and membrane absorbers can target a specific ringing frequency, but they are harder to design correctly. In most small rooms, thick broadband trapping gets you most of the benefit with fewer surprises.
Keep the room usable while you treat it, because a studio that is uncomfortable will not get used. You can stack traps, test, and then commit to mounting once you know which locations actually shorten decay.
How much absorption is enough for audible control
People underestimate the amount of absorption needed because bass wavelengths are long and drywall rooms are efficient at storing low frequency energy. A couple of small panels can make the room sound less bright, while the bass ringing stays almost the same.
For audible control in a typical 10 by 12 foot home office, I like to see at least two big corner traps per front corner, plus something substantial on the rear wall. If you can cover 15 to 25 percent of the total wall area with thick broadband absorption, the room usually stops fighting you.
Thickness matters more than surface area once you are targeting modal decay under about 150 Hz. A 2 inch panel at first reflection points is good for imaging, but it does not do much for the long decay that makes bass notes ring.
There is also a point where you can overdo the upper frequencies and end up with a dull room that still has a lumpy low end. If you keep adding thin panels, you get a dead top and a boomy bottom, which is the worst of both worlds.
A practical approach is to build or buy thicker traps first, then add thinner panels only where you need clarity and reflection control. When the low end tightens, your EQ decisions get easier and you stop chasing bass that is really just room resonance.
In practice, “enough” means you can play a kick and it stops like a kick, not like a low drone. It also means bass lines have note-to-note consistency instead of random notes jumping out.
If you are doing voice work, enough absorption means spoken word sounds clear without that constant chesty buildup. You should be able to hear proximity effect from the mic as a creative choice, not as a room default.
Coverage needs to be distributed, because trapping only one corner can shift the problem rather than solve it. When multiple corners are trapped, the room has fewer places to store energy and the decay drops more evenly.
It is common to treat the front half of the room and forget the back half, which leaves the length mode under control at the speakers but still ringing behind you. A balanced approach usually sounds more natural and measures better in the waterfall plot.
If you add a lot of thick traps and the room starts feeling too dry, you can keep some life with diffusion or reflective faces, but do that later. The first job is to stop the low end from ringing, because that is what ruins translation.
Do not judge absorption by how it looks, because effective bass trapping often looks excessive in a small room. If it feels like you are building a fort out of mineral wool, you are probably getting closer to the right amount.
Budget matters, so prioritize depth and placement over fancy finishes. A simple, thick DIY trap in the right corner beats an expensive thin panel in the wrong spot every time.
If you rent and cannot mount anything, you can still stack traps in corners and use freestanding gobos on the rear wall. Freestanding treatment is not as tidy, but it can be surprisingly effective if it is thick and placed well.
Remember that the goal is not a perfectly flat response at one point, because that can be a trap in itself. The goal is a room that is consistent enough that you can move slightly and still hear the same bass balance.
When absorption is sufficient, you stop feeling like you need to check every bass decision on three other systems immediately. That confidence is usually the first real sign the room is under control.
One more reality check is that small rooms often need more trapping than people are willing to install. If you are still hearing ringing after “a normal amount” of treatment, the answer is often simply more thickness in more corners.
Also consider that your room might have multiple ringing frequencies, so fixing one note does not mean you are done. As decay improves, you may notice the next problem frequency that was previously masked by the worst one.
Finally, do not treat only for mixing, because the room affects recording too. A tighter room makes bass instruments easier to mic and makes vocal recordings sound less like they were captured in a box.
Checking progress with repeatable listening and measurements
You can waste a lot of money if you change five things at once and then guess what helped. Treat this like troubleshooting, change one variable, and keep your tests repeatable.
Use a short playlist of problem material, like a kick heavy track, a sustained bass synth, and a dry spoken word recording. Keep the volume the same each time, because loudness changes your perception of bass decay fast.
When you listen, focus on the space between notes, because that is where ringing lives. If the silence between hits is not really silent, your room is still storing energy.
Try to test at a realistic working level, because very low levels can hide decay and very high levels can exaggerate it. Consistency matters more than the exact SPL, so pick a level and stick with it.
Measurements help because your brain adapts quickly and starts normalizing the problem. A waterfall or decay plot will show you whether the tail is actually shorter or if you are just getting used to it.
If you use Room EQ Wizard, do not obsess over a single frequency response curve. Pay attention to the decay times and the ridges that stick out, because those ridges are the ringing you are trying to kill.
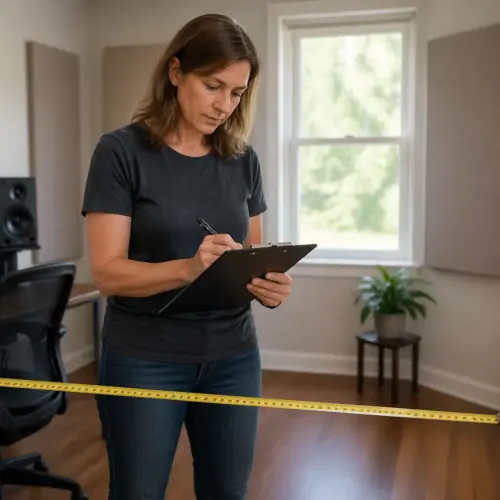
Mark your mic position and listening position with tape so you do not accidentally measure a different spot each time. A two inch change can alter the bass response enough to make you misread your progress.
Take notes on what you changed and what you heard, even if it feels obvious in the moment. After three rounds of moving speakers and adding traps, it is easy to forget which step actually improved the decay.
- 20 to 200 Hz sine sweep at fixed level
- Single kick sample with a short tail
- Bass guitar scale across E1 to G2
- Pink noise for quick balance checks
- Room EQ Wizard waterfall plot at the listening position
- Same mic placement marked with tape
When you run sweeps, listen for both peaks and the after-ring that follows them. A peak that no longer rings is often less of a practical problem than a smaller peak that hangs around forever.
Use a few different sweep speeds if you can, because a slow sweep makes ringing easier to hear while a faster sweep can reveal how quickly the room lets go. The combination gives you a better picture than one test alone.
For music tests, use tracks you know well and that have bass you trust. If you pick unfamiliar references, you can end up blaming the room for choices that are actually in the production.
It also helps to test from multiple spots, like the chair, the back of the room, and near each corner. If the corners are still overwhelmingly loud, you have confirmed where additional trapping will pay off.
Do not ignore subjective comfort, because a room that measures better but feels weird might have an imbalance between low-frequency control and high-frequency absorption. The best result is usually a room that sounds natural and also behaves better on decay plots.
If you add a subwoofer, re-measure everything, because the modal excitation pattern changes. A sub can be a huge improvement when placed well, but it can also light up the exact frequency that used to ring quietly.
EQ and room correction can help after you have improved decay, but they are not the first tool for ringing. Use correction to smooth response once the room stops ringing like a drum.
Give your changes time, because your ears recalibrate and you need a day or two of normal listening to judge real improvement. The immediate “wow” is not always the same as long-term translation.
The best progress check is translation, where your mixes stop coming out bass-light or bass-heavy on other systems. When the room is not lying to you, your low end decisions start holding up everywhere.
Conclusion
If you want a real answer for how to reduce bass ringing in a small room, focus on decay, not hype, and fix the room before you blame the speakers. Modal decay comes from modes plus boundaries plus weak absorption, and you can attack all three with smart placement and proper bass trapping.
Start with placement because it is free, then treat corners and the rear wall because that is where room resonance builds up. When you measure and listen the same way each time, you will hear the ringing fade, and the low end finally starts behaving like music instead of a foghorn.
Once the ringing is under control, everything else gets easier, from EQ moves to compression settings to how loud you can work without fatigue. You stop mixing around a problem note and start mixing the actual song.
A small room will always have quirks, but it does not have to punish you with long, uneven bass decay. With honest testing, smart placement, and enough thick absorption in the right places, you can make the low end tight enough to trust.